Makita WT001G Instruction Manual
Cordless shear wrench
Hide thumbs
Also See for WT001G:
- Instruction manual (65 pages) ,
- Instruction manual (33 pages) ,
- Instruction manual (52 pages)
Table of Contents
Advertisement
Quick Links
Advertisement
Table of Contents

Related Manuals for Makita WT001G


Summary of Contents for Makita WT001G
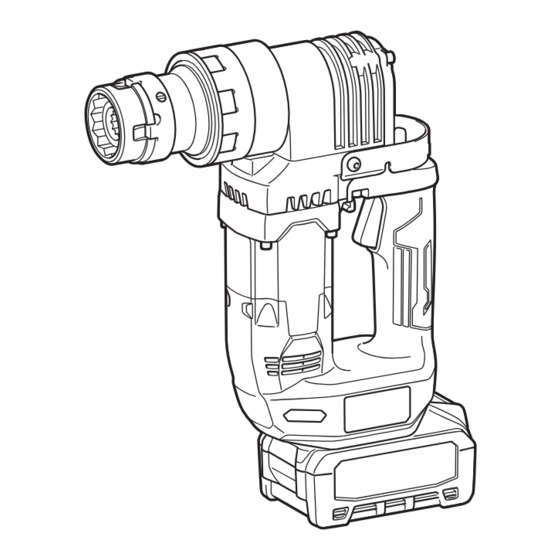
- Page 1 INSTRUCTION MANUAL Cordless Shear Wrench WT001G Read before use.
-
Page 2: Specifications
SPECIFICATIONS Model: WT001G Bolt size M16, M20, M22 Maximum torque 804 N•m No load speed (RPM) 17 min Overall length (with BL4050F) 289 mm Rated voltage D.C. 36 V - 40 V max Net weight 5.2 - 5.9 kg •... -
Page 3: Declarations Of Conformity
Avoid body contact with earthed or grounded Vibration surfaces, such as pipes, radiators, ranges and refrigerators. There is an increased risk of elec- The vibration total value (tri-axial vector sum) deter- tric shock if your body is earthed or grounded. mined according to EN62841-2-2: Do not expose power tools to rain or wet con- Work mode: screwdriving without impact ditions. - Page 4 Keep handles and grasping surfaces dry, When sheared bolt tip falls without pulling the clean and free from oil and grease. Slippery eject lever, never use the tool and ask Makita handles and grasping surfaces do not allow for Authorized Service Center for check and safe handling and control of the tool in unexpected repair.
- Page 5 Do not short the battery cartridge: CAUTION: Do not touch the terminals with any con- Only use genuine Makita batteries. Use of non-genuine Makita batteries, or batteries that ductive material. have been altered, may result in the battery bursting Avoid storing battery cartridge in a con- causing fires, personal injury and damage. It will...
-
Page 6: Functional Description
Indicating the remaining battery capacity FUNCTIONAL DESCRIPTION Press the check button on the battery cartridge to indi- cate the remaining battery capacity. The indicator lamps light up for a few seconds. CAUTION: Always be sure that the tool is switched off and the battery cartridge is removed before adjusting or checking function on the tool. Installing or removing battery cartridge CAUTION: Always switch off the tool before... -
Page 7: Overheat Protection
Charge the battery(ies) or replace it/them with Fig.4 recharged battery(ies). ► 1 . Battery power lamp Let the tool and battery(ies) cool down. If no improvement can be found by restoring protection Hook system, then contact your local Makita Service Center. Switch action CAUTION: Be sure to attach the shoulder belt included in the tool as the standard accessory. WARNING: Before installing the battery car- Use the shoulder belt for carrying the tool, and... -
Page 8: Electric Brake
This tool is equipped with an electric brake. If the tool Press the pin down to remove the inner sleeve consistently fails to quickly stop after the switch trigger from the outer sleeve. is released, have the tool serviced at a Makita service center. Accidental re-start preventive function Even if you install the battery cartridge while pulling the switch trigger, the tool does not start. -
Page 9: Operation
Installing the outer and inner OPERATION sleeves CAUTION: Keep the bolt tips off of the Place the inner sleeve with the pin facing upward. ground, floor, walkways, etc. to prevent injury Attach the outer sleeve to the inner sleeve securely from tripping or falling. while pressing the pin of the inner sleeve. Tighten bolts preliminarily by using a hand wrench. - Page 10 When the specified torque is attained, the bolt NOTICE: Washer and nut have head and tail. tip will be sheared at its notched portion. The bolt tip Head has identification mark for nut and chamfer remains inside the inner sleeve. for washer. When placing them, be careful not to place in reverse.
-
Page 11: Maintenance
To maintain product SAFETY and RELIABILITY, repairs, any other maintenance or adjustment should be performed by Makita Authorized or Factory Service Centers, always using Makita replacement parts. OPTIONAL ACCESSORIES CAUTION: These accessories or attachments are recommended for use with your Makita tool specified in this manual. The use of any other accessories or attachments might present a risk of injury to persons. Only use accessory or attachment for its stated purpose. If you need any assistance for more details regard- ing these accessories, ask your local Makita Service Center. - Page 12 Makita Europe N.V. Jan-Baptist Vinkstraat 2, 3070 Kortenberg, Belgium Makita Corporation 3-11-8, Sumiyoshi-cho, Anjo, Aichi 446-8502 Japan 885A48-223 20230712...
Need help?
Do you have a question about the WT001G and is the answer not in the manual?
Questions and answers