Table of Contents
Advertisement
Quick Links
Advertisement
Table of Contents

Related Manuals for MP Filtri CML4


Summary of Contents for MP Filtri CML4
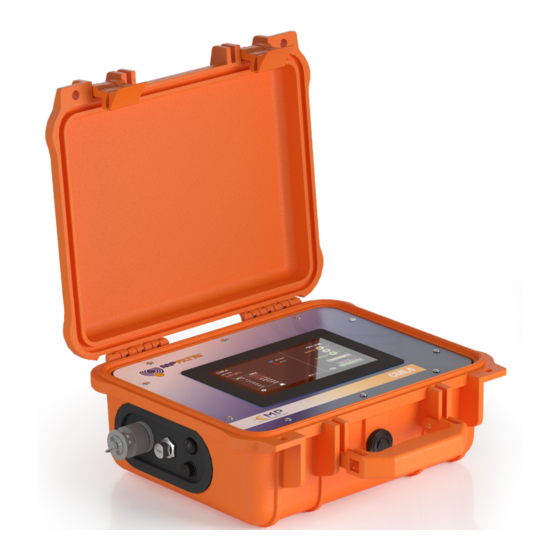
- Page 1 CML4 Operators Guide Compact Portable Contamination Monitor PASSION TO PERFORM...
- Page 2 The data and information contained in this publication are provided only for the purpose of information. MP Filtri reserves the right to make changes to the models and versions of the products described at any time, both for technical and commercial reasons.
-
Page 3: Product Overview
Easy to master, the new CML4 features cutting-edge contamination control technology for anyone wishing to protect their critical systems. The CML4 features a metering pump which enables analysis of both pressurised and unpressurised systems, delivering comprehensive contamination checks on any machine in any condition. -
Page 4: Product Presentation
ISO 4406, NAS 1638, AS 4059E&F Tables 1 and 2, ISO 11218, GBT 14039, GJB 420B, GOST 17216 The CML4 incorporates a connector for power as well as separate USB connections for connection to a personal computer for remote monitoring; settings access; and direct download to a USB memory stick. - Page 5 The USB data stick icon appears on the right-hand side of the screen when the data stick is plugged in. The arrow icon pointing to the icon is visible when the CML4 tries to write the log file to the data stick. A successful download is denoted by a green tick emblem.
-
Page 6: Ec Declarations Of Conformity
BS EN 62262:2002 Degrees of Protection Provided for Electrical Equipment against External Mechanical Impacts (IK Code) • BS EN 60721-3-4: 1995 Part 3: Classification of Groups of Environmental Parameters and their severities, Section 3.4 Date: July 2023 Signed: Kris Perks (General Engineering Manager) on behalf of MP Filtri UK Ltd Contamination Monitors... - Page 7 DECLARATION OF CONFORMITY Contamination Monitors...
-
Page 8: Table Of Contents
Product overview Product Presentation EC Declarations of Conformity Table of Contents 1 General warnings and information for the Operator General safety warnings Dangers and Hazards that cannot be eliminated Personal Protective Equipment Precautions related to product handling of the Liquid Crystal Touchscreen display 2 Transportation and Storage Transportation and Handling Conditions Storage... - Page 9 TABLE OF CONTENTS 5.2.16 RH result Settings menu 5.3.1 Water Content 5.3.2 Time Settings 5.3.3 Diagnostics 5.3.4 Contamination tolerance limits 5.3.5 Historical results and trend monitoring 5.3.7 Wifi 5.3.8 Home Icon 5.3.9 Erase Logs 5.3.10 Printer 5.3.11 Simulation 5.3.12 Language 5.3.13 Contrast slider Sampling procedure 5.4.1...
-
Page 10: General Warnings And Information For The Operator
1 General warnings and information for the operator 1.1 General safety warnings Do not operate, maintain or carry out any procedure before reading this manual. Any individual operating the unit shall wear the following Personal Protective Equipment: - Protective eyewear - Safety shoes - Gloves - Overalls (or other suitable protective clothing) - Page 11 GENERAL WARNINGS To allow rapid identification of the employees who must read this manual, the definition has been used with the following meaning: This is any individual whose task is to use the machine for production purposes. The operator is aware of all the measures taken by the machine manufacturer in order to eliminate any source OPERATOR of injury risk in the workplace and takes into account the operational constraints.
-
Page 12: Dangers And Hazards That Cannot Be Eliminated
The unit shall be taken out of service and/or dismantled in accordance with the current regulations in force in the country where the machinery is installed CAUTION 1.2 Dangers and hazards that cannot be eliminated - Risk of hydraulic injection injury - Burn risk because of high temperatures - Accidental oil leaks with consequent risk of slipping - Hose breakage and resulting lubricant loss... -
Page 13: Transportation And Storage
The unit is shipped in a cardboard box with appropriate protective packaging and these should be recycled accordingly where possible. The packed weight of the CML4 and accessories is 12 kg 2.2 Storage The unit should be stored in a suitable location away from the production area when not in use. The unit should be stored with the caps provided on the ports. -
Page 14: Warranty, Limitations And Disclaimers
How to obtain service? To obtain service under the terms of this warranty, the customer is required to notify MP Filtri before the expiration of the warranty period and to return the item in accordance with MP Filtri product return policy. Any product returned for warranty repair must be accompanied by a full fault report specifying the symptoms and the conditions under which the fault occurs. - Page 15 MP Filtri Ltd maintains a policy of product improvement and reserves the right to modify the specifications without prior notice. 3.1 Warranty on Recalibration The CML4 is guaranteed for 12 months upon receipt of the product, subject to it being used for the purpose intended and operated in accordance with this User Guide.
-
Page 16: Technical Specification
4.Technical Specification 4.1 Performance Technology LED Based Light Extinction Automatic Optical Contamination Monitor Particle Sizing >4, 6, 14, 21, 25, 38, 50, 70 μm Reporting Standards ISO 4406; NAS 1638; AS4059 Rev E, Table 1; AS4059 Rev E, Table 2 AS4059 Rev F, Table 1;... -
Page 17: Physical Attributes
TECHNICAL SPECIFICATION 4.3 Physical attributes Dimensions Width: 350mm / 13.8”. Height: 149mm / 5.8” (not including handle). Depth:155mm / 6.1” Weight 8.5 kg / 19 lbs Hydraulic Connections Online mode: (High pressure) M16 x 2 (test point) Offline mode: (Low pressure) Quick-release coupling Outlet quick-release coupling (standard) Seal Material NBR, Viton... -
Page 18: Dimensions
4.6 Dimensions 297.1 356.5 351.7 4.7 Designation & Ordering code AUTOMATIC CONTAMINATION MONITOR CML4 CML4 Configuration example: Series CML4 Light extinction Contamination monitor Moisture Sensor With moisture and temperature sensor Design Reference Standard option Fluid compatibility Mineral oil and synthetic fluids... -
Page 19: Product Installation And General Operation
TECHNICAL SPECIFICATION 5. Product Installation and General Operation 5.1 Installation Each CML4 supplied consists of the following: • 1 x CML4 • 1 x M16x2 Microbore pressure hose, 1500mm long + pouch • 1 x 2000mm Quick release waste hose + pouch •... -
Page 20: Physical Procedure
Do NOT connect the system at this point. See section 5.4 for a detailed walkthrough. CAUTION Do NOT connect the waste hose to a pressurized system. This will cause the CML4 to malfunction and could cause internal damage. There must be no extra restriction placed on the waste hose, this must be vented to atmosphere. -
Page 21: Electrical Interface
The power on/off button is located at the side of the unit, see Section 5.1 (Page 17). Pressing this will cause the CML4 to switch ON and startup screen will show on the display, see Figure 5.2 (page 21). The button also contains a Tri-colour LED that will show the status of the unit relating to the amount of charge left in the battery. -
Page 22: General Operation
The due date for recalibration of the product is stated in the center of the screen. This can also be found in the settings page of the unit. To progress to the main user screen, select the arrow in the bottom right corner of the screen. Figure 5.1 - CML4 Flash Screen Contamination Monitors... -
Page 23: Home Screen
Note: upon initial start-up, the home screen will be blank until tests have been completed. Once test results are present in the product memory, the home screen will be laid out in the following manner. 16 15 Figure 5.2 - CML4 Home Screen Items: 1. Test reference 11. -
Page 24: Test Reference
5.2.4 Test reference Home screen - Item 1. Programming of the test reference can be done by pressing the test reference icon. Here you can change the test reference as required, up to 31 characters. (Fig 5.3) To confirm any changes, you must select “OK” with the green tick icon. -
Page 25: Settings
PRODUCT OPERATION 5.2.8 Settings Home screen - Item 5. Selecting the Settings Icon (Fig 5.6) will open the options screen. The sub-menu of the options screen can be viewed at section 5.3 Figure 5.6 5.2.9 Printer Home screen - Item 6. Tapping the printer icon (Fig 5.7) will print the last test result in the result format currently displayed on the screen. -
Page 26: Test Type Toggle Mode
5.2.12 Test type toggle mode Home screen - Items 9-14. The CML4 toggles between online and offline mode by simply tapping this area. Select the Offline icon to activate a sample for an unpressurised system. (Fig 5.10) Figure 5.10 Select the Online icon to choose the online test. Press on the continuous / single test Mode Icon to choose your preferred test type. -
Page 27: Test Start/Stop Operation
PRODUCT OPERATION 5.2.13 Test start/stop operation Home screen - Item 9. Selecting this icon will start and a sample/test. (Fig 5.13) Figure 5.13 During a test the icon will ‘fill’ to show how much of the sample volume has been performed. -
Page 28: Normal Test
5.2.14.1 Normal test Pressing the start button will operate the test procedure. Figure 5.15 Figure 5.16 5.2.14.2 Continuous test Continuous test is allowed in online mode only by pressing the related icon (Fig 5.17/5.18) Figure 5.17 Figure 5.18 5.2.15 Temperature result Home screen - Item 15. -
Page 29: Settings Menu
PRODUCT OPERATION 5.3 Settings menu Home Screen - Item 5. Selecting this icon will bring up the settings screen. This will allow you to modify settings in further detail. Figure 5.21 Settings screen - Figure 5.22 Items: RH test enabled Erase log Time settings Printer settings... -
Page 30: Water Content
Figure 5.24 5.3.3 Diagnostics Settings Menus - Item 19. This icon is to view the diagnostics screen Figure 5.25 (Fig 5.25). This is not accessible by end user and is only for MP Filtri personnel during calibration / repair. Contamination Monitors... -
Page 31: Contamination Tolerance Limits
PRODUCT OPERATION 5.3.4 Contamination tolerance limits Settings Menus - Item 20. This icon allows access to setting of the alarm levels associated with the selected reporting format. Alarms can be set on combinations of cleanliness codes, water content and Figure 5.27 temperature. - Page 32 NAS1638 alarm levels NAS1638 can be used by selecting this as the test format. The headings and boxes for the available settings change appropri- ately. NAS1638 represents the overall cleanliness level as a single code, this being the highest of the individual codes generated for each defined particle size.
-
Page 33: Historical Results And Trend Monitoring
Download MP Filtri’s CMP View software from mpfiltri.com/ download. Once the CML4 is connected to the software you can view historical data and trend monitoring. To connect to the software and master its functionality, see our training video at: https://youtu.be/Exvv343EAfI... -
Page 34: Wifi
5.3.9 Erase logs Settings Menus - Item 23. Pressing the Erase Logs / Delete History icon will erase all records held within the CML4 memory. Figure 5.37 Before proceeding with the deletion, the unit will ask for confirmation, (fig. 5.38) It is important to ensure/verify that your log results have been downloaded and saved prior to deleting from the unit. -
Page 35: Simulation
5.3.12 Language Settings Menus - Item 26. The CML4 is equipped with multiple languages, the default language is set to English (Fig 5.42). To alter to a preferred language, press Figure 5.42... -
Page 36: Sampling Procedure
5.4 Sampling Procedure 5.4.1 Offline mode (unpressurised) Step One: Connect the waste hose (Fig 5.45) to a waste receptacle (Fig 5.46) and then connect to the CML4 waste outlet quick-release attachment. Figure 5.46 Figure 5.45 Step Two: Connect the suction hose onto the CML4 low pressure inlet quick-release attachment (Fig 5.47) Figure 5.47... - Page 37 PRODUCT OPERATION Step three: The CML4 is now ready to take samples from low-pressure offline systems. To begin sampling switch to offline mode on your device (See 14b on CML 4 Home screen overleaf) and press start. Figure 5.48 Step Four: The results will appear on the main screen.
-
Page 38: Online Mode (Pressurised)
Figure 5.50 Figure 5.49 Step two: Connect the suction hose to the CML4 high pressure inlet first. THEN connect to the high pressure test point on the system. Please refer to the safety instructions in Section 1.1 (Page 8) Figure 5.51... - Page 39 PRODUCT OPERATION Step three: The CML4 is now ready to take samples from pressurised systems. To begin sampling switch to online mode on your device and press start (Fig 5.52). Press on the Continuous/Single test Mode Icon (fig 5.53) to choose your preferred test type.
-
Page 40: Cml4 Removal And Product Maintenance
All CML4 products are sent in a cardboard box with appropriate protective packaging and these should be recycled accordingly where possible. Fluids used with the CML4 should be fully drained and disposed of according to EU waste framework directive and ISO 14001 Environmental Management. -
Page 41: Spares
PRODUCT OPERATION/SPARES 6 Spares 6.1 Accessories Bluetooth Printer: MP Filtri item number: 482.016000 Wireless, Bluetooth 4.0, Direct heat printer with no expensive ink replacement require. Compact, quiet, high-speed printing. Support for Android, for IOS and Windows 6.2 Spares Calibration Verification Fluid... - Page 42 Waste bottles: 1Litre - Round SK0012 1Litre - Square (for use with CB0001) SK0013 USB A-C cable 443.074000 USB stick with all user guides and LPA-View Software 13.055001 Contamination Monitors...
-
Page 43: Troubleshooting / Faq
• Disconnect power supply to CML4 and then reconnect it. If the CML4 has been subjected to excessive contamination and a blockage is suspected, a flush with a suitable fluid (such as hydraulic mineral oil) may clear the blockage. DO NOT USE ACETONE... - Page 44 Contamination Monitors...
-
Page 45: Product Documentation
PRODUCT DOCUMENTATION 8 Product documentation 8.1 Download Area Please scan the QR codes below to get updated electronic version of the related document /software Contamination Monitors... - Page 46 WORLDWIDE NETWORK CANADA RUSSIAN FEDERATION CHINA SINGAPORE FRANCE UNITED ARAB EMIRATES GERMANY UNITED KINGDOM INDIA PASSION TO PERFORM mp ltri.com...
Need help?
Do you have a question about the CML4 and is the answer not in the manual?
Questions and answers