Table of Contents
Advertisement
Advertisement
Table of Contents

Subscribe to Our Youtube Channel
Related Manuals for ECOWITT WS3900


Summary of Contents for ECOWITT WS3900
- Page 1 Weather Station Receiver Manual Model: WS3900/WS3910 https://s.ecowitt.com/E8FN9Q...
-
Page 2: Table Of Contents
2.2.1 Power-up ................... 2 2.2.2 Download the Ecowitt App ............3 2.2.3 Connect the Station to Wi-Fi via Ecowitt App ......4 2.2.4 Connect the Station to Wi-Fi via Web Page 192.168.4.1 ..7 2.2.5 Device Location, Timezone, DST, and Data Public ....12 2.2.6 Replacing Wi-Fi Router ............13... - Page 3 3.7 Firmware Upgrade ................. 41 4. Optional Sensors .................. 42 4.1 Sensors ................... 42 4.1.1 Sensor Data Can be Displayed on the WS3900/WS3910 ..43 4.1.2 Sensor Data Can Only be Uploaded to the Cloud ....44 4.2 IoT Device ..................45 4.3 Calibrate the WH46/WH45 Sensor ..........46...
-
Page 4: Introduction
WS3910 CO2 sensor × √ Temperature- √ √ Humidity sensor Pressure sensors √ √ Meanwhile, it supports connecting IoT devices, such as WFC01 and AC1100, to achieve smart control through the Ecowitt App, which is a powerful weather station receiver. -
Page 5: Installation
Just so you know, the WS3900/WS3910 needs to be used with sensors to obtain outdoor weather data and is not a standalone product. The following user guide provides step by step instructions for installation and operation. -
Page 6: Download The Ecowitt App
Visit the App Store or Google Play Store or scan the QR code below to download the free Ecowitt App onto your mobile device. Open the Ecowitt App, follow the on-screen setup instructions to create an account, add a new my device, and follow Section 2.2.3 or 2.2.4 below to connect your station to your Wi-Fi network. -
Page 7: Connect The Station To Wi-Fi Via Ecowitt App
2.2.3 Connect the Station to Wi-Fi via Ecowitt App (1) Open Ecowitt App, click "Add New Devices", click WS3900/WS3910 icon, and choose WiFi Provisioning: Figure 4... - Page 8 (2) Hold WS3900/WS3910’s button TEMP + - for more than 2s in normal mode will trigger to turn on AP (WS3900/WS3910’s hotspot), Wi-Fi icon will flash fast on the screen. Use your mobile phone to connect to the hotspot "WS39xx-WIFIxxxx".
- Page 9 Figure 6 (4) After the gateway setup is successful. Switch to your usual Wi-Fi. WS3900/WS3910 has been successfully added to the App, and you can view the weather data on the App.
-
Page 10: Connect The Station To Wi-Fi Via Web Page 192.168.4.1
Figure 7 Note: If you are unable to connect the WS3900/WS3910 to Wi-Fi using the Ecowitt App, we recommend using the setup via Embedded Web Page 192.168.4.1. 2.2.4 Web Page 192.168.4.1 (1) Turn on WS3900/WS3910’s AP. The WS39xx’s hotspot will be turned on automatically when the product is powered on, if the product is not paired with a network, the AP will be turned on all the time, and the Wi-Fi signal icon flashes fast to indicate. - Page 11 Connecting this WS39xx’s hotspot on a mobile phone or PC. e.g.: WS3900x/WS3910x-WIFIxxxx, the first x represents the frequency, A=868MHz, B=915MHz, C=433MHz, xxxx represents the last 4 digits of the product MAC address. (3) Open the browser and visit 192.168.4.1. Enter the login page, the default password is empty, click Login directly. (4) Select Local Network.
- Page 12 Figure 8: Select the router (6) After entering the Wi-Fi password, click Apply Figure 9 (7) After connecting to the router, it prompts Connection successful.
- Page 13 Figure 10 (8) Wi-Fi configuration is complete. Copy the MAC Address for the following steps. Figure 11: Copy the MAC address...
- Page 14 (9) Open Ecowitt App, click "Add New Devices", click WS3900/WS3910 icon, and choose Manually Adding: Figure 12 (10) Edit the Device Name and paste the MAC address copied in step (8) into the box, and click "Save", then you can view the data on the App.
-
Page 15: Device Location, Timezone, Dst, And Data Public
2. Click on the '...' icon in the upper right corner of the gateway module. 3. Set the Device's precise location and Timezone on this interface. 4. Tick 'Auto DST' and 'Is Public' when necessary. 5. Click 'Save', then reboot the WS3900/WS3910 device, the device will automatically synchronize time and DST. -
Page 16: Replacing Wi-Fi Router
Figure 14: Related settings via Ecowitt App Note: After completing the above Wi-Fi configuration and related settings, the WS3900/WS3910 screen will display a stable Wi-Fi signal tower, auto time zone, and DST (when necessary). Figure 15: WS3900/WS3910 sync App related settings 2.2.6 Replacing Wi-Fi Router... -
Page 17: Adding Sensors
5. If data is not received, try the following: after making sure the phone and WS3900/WS3910 are connected to the same Wi-Fi network, open the Ecowitt App, find Sensors ID, and enter the Edit Gateway page. 6. In the Edit Gateway page, find the sensor you want to pair - select the ID number box and register it. -
Page 18: Upload Data To Server
E. Customized servers Upload servers management: (1) Ensure that the mobile phone and WS3900/WS3910 receiver are using the same Wi-Fi. (2) Ecowitt App - "..." at the top right corner - "Others" - "DIY Upload Servers" Figure 17: Upload data to server... -
Page 19: Instructions For Use
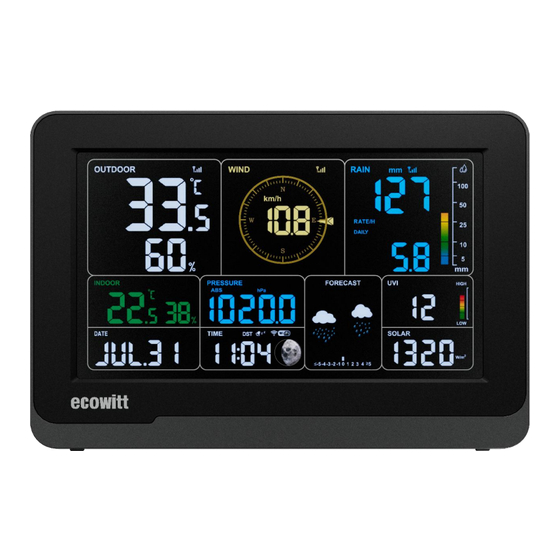
3. Instructions for Use 3.1 Multiple Views and Size Figure 18: Main view Figure 19: Right view... -
Page 20: Features
Figure 20: Top view Figure 21: Rear view (Refer to 3.4 for Button functions) 3.2 Features 7.5" LCD color display 8 physical buttons Support DC powered and 3 x AA battery powered (Battery not included. Tested to run for about 24 hours on battery power alone. Battery only used as a short-term backup power) ... - Page 21 ID Data storage on Ecowitt server: https://ecowitt.net Support uploading data to the weather station server after connecting to Wi-Fi network: ■ ecowitt.net (Default upload to this server) ■ wunderground.com ■ weathercloud.net ■ wow.metoffice.gov.uk ■ Customized servers Supports additional sensors, please refer to Section 4.
-
Page 22: Icon Explanation
3.3 Icon Explanation See Figure 22 to help you identify icons of the console’s display screen. Figure 22 No Description No Description Circulating multi-channel Auto-Scroll model temperature and humidity Outdoor humidity Outdoor temperature Feels like/Apparent Dew point temperature RF signal bar and low battery Power indicator for WS69 or Gust WN30/31/36 sensors... -
Page 23: Date & Time
The date and time will be automatically updated when connected to Wi- Fi. (refer to 2.2 for Wi-Fi configuration) Figure 23: Date & Time 3.3.2 CO2/PM1.0/PM2.5/PM10/AQI WS3900/WS3910 supports connecting WH45/WH46 air quality sensor and displaying CO2/PM1.0/PM2.5/PM10/AQI data. Air quality data... - Page 24 Note: 1. The WH46 sensor would show the data of the Temperature-Humidity and PM4.0 on the Ecowitt App or the website, but the WS3900/WS3910 console would not show the related data. 2. The WH45 sensor would show the data of Temperature-Humidity on the Ecowitt App or the website, but the WS3900/WS3910 console would not show the related data.
-
Page 25: Weather Forecast
The WS3910 shows the data of the CO2 PM1.0 PM2.5 PM10 AQI: Figure 25: CO2/PM1.0/PM2.5/PM10/AQI 3.3.3 Weather Forecast Weather forecast is based on learning the local air pressure over a period (at least one month) and then making a prediction of the weather for the day ahead based on the change in air pressure. -
Page 26: Pressure Trend Function
Sunny Partly Cloudy Cloudy Pressure increases for a Pressure increases slightly Pressure decreases sustained period of time or initial power up slightly Rainy Stormy Snowy Pressure decreases Pressure decreases for a for a sustained Pressure rapidly decreases sustained period of time period of time, and temperature ≤0℃... -
Page 27: Wi-Fi Icon
Table 3:Wi-Fi icon 3.3.6 Indoor Temperature, Humidity, and Pressure WS3900/WS3910 has a built-in temperature & humidity sensor, and barometric pressure sensor, but the WN32P sensor also could receive the data, and be used to replace the indoor temperature, humidity, and air pressure. -
Page 28: Outdoor Temperature And Humidity
When the wind speed unit is selected via buttons (refer to Section 3.5.2 to adjust the unit) or web page 192.168.4.1 (Unit Settings), the WS3900/WS3910 will display the corresponding unit and value on the screen. Units set by the Ecowitt App or Ecowitt.net website will not be synchronized to the WS3900/WS3910. 3.3.9 Rainfall 1. -
Page 29: Uvi
Units set by the Ecowitt App or Ecowitt.net website will not be synchronized to the WS3900/WS3910. 3.3.10 UVI The UV index varies between 0 ~ 15. The bar graph is divided into 6 levels of display. -
Page 30: Feels Like
Northern Hemisphere: Waxing First Waxing Full Waning Third Waning Moon Crescent Quarter Gibbous Moon Gibbous Quarter Crescent Moon Waxing First Waxing Full Waning Third Waning Moon Crescent Quarter Gibbous Moon Gibbous Quarter Crescent Moon Southern Hemisphere: Note: When the new moon comes, our display will show a circle arc. Figure 28: The New Moon 3.3.12 Feels Like Feels Like measurement range: -40°F ~ 140°F (-40°C ~ 60°C). -
Page 31: Lcd Display Brightness
When the outdoor temperature is greater than 80°F (26.7°C), the value of Feels Like is the heat index. Users can choose whether to display Feels Like Temperature or Apparent Temperature on the App: Open Ecowitt App – Menu – Setting – Temp Index. 3.3.13 LCD Display Brightness The WS3900/WS3910 has 5 levels of brightness, which are Max ->... - Page 32 Figure 30 2. If the device does not include the indoor co2 and also does not receive the sign of other CO2 sensor, then press + will not toggle and only the DATE will be shown. How to distinguish the built-in CO2 sensor and the WH46/WH45 CO2 sensor: The built-in CO2 sensor does not show the RF signal bar.
-
Page 33: Feel Like
Users have the option to choose between "Feels Like Temperature" and " Apparent Temperature" on the App or ecowitt.net. Take the App as an example: Open Ecowitt App → "Menu" → "Settings" → "Temp Index"→"Feels Like Temperature" or "Apparent Temperature ". - Page 34 Buttons Functions Setting button Press to switch display mode. Press to switch hour/minute in alarm setting mode. Press to switch setting option in setting mode. Hold to enter setting mode. Hold SET + LIGHT for a factory reset. Temperature display button Press to switch temp channel.
-
Page 35: Product Modes
3.5 Product Modes There are 5 modes in total: Normal mode, Setting mode, Max/Min value mode, Alarm setting mode, MAC address display. 3.5.1 Normal Mode 1. The product will enter the main page of Normal mode by default when it is normally powered on. In other modes, no button operation for 30 seconds or press LIGHT can also return to the main page of normal mode. - Page 36 8. Press + to switch Date/CO2/PM1.0/PM2.5/PM10/AQI display. 9. Hold - to switch to UVI/Solar radiation/Sunrise/Sunset display. The exponential intensity graph on the right side synchronizes the display of UVI values. Press - to switch PERSSURE REL/ABS. 10. When DC power is supplied, press LIGHT on the main page to adjust the backlight in 5 levels: MAX ->...
-
Page 37: Setting Mode
3.5.2 Setting Mode In Normal mode, hold SET for more than 2s to enter Setting mode. Then press SET to switch the setting item, press the + or - button to adjust the setting value: Beep sound (ON/OFF) Hour format (12 hours/24 hours) Hour setting Minute setting Year setting... -
Page 38: Max/Min Value Mode
3.5.3 Max/Min Value Mode In Normal mode, press SET to enter Max/min value mode. Sequence: Normal mode -> Maximum value -> Minimum value. Max value: outdoor/indoor temperature & humidity, feels like, dew point, pressure, rainfall, wind speed, gust speed, UVI and solar radiation. Min value: outdoor/indoor temperature &... -
Page 39: Snooze Function
After the alarm is triggered, the alarm will continue to sound for 2 minutes when no button is pressed, and the alarm will become more and more rapid within these 2 minutes. Figure 36: Alarm setting 3.5.4.2 Snooze Function When the alarm clock is set and the alarm is triggered, press LIGHT to enter snooze mode, the snooze icon will be displayed near the alarm clock icon , and the alarm will sound again after 10 minutes. -
Page 40: Mac Address Display
3.5.5 MAC Address Display In Normal mode, press SET to change the mode. Sequence: Normal mode -> Maximum value -> Minimum value -> Alarm setting -> MAC address display. Figure 38: MAC address 3.5.6 Bulit-in CO2 sensor Calibration(Only WS3910) The CO2 calibration has two ways. 1. - Page 41 Figure 39: Only WS3910 CO2 Calilbration Keep the device for 3 to 5 minutes in a stable environment, when the left of the screen will be shown OK at the bottom, the calibration is complete. Figure 40 If NG is shown, the calibration has failed, and needs to be re-calibrated.
-
Page 42: Historical Data Export And Clear
WS3900/WS3910 doesn't support a memory card to store data, when the Wi-Fi configuration (refer to 2.2 for Wi-Fi Configuration) is completed, you can log in to Ecowitt.net to export the data in CSV file format. Figure 42: Export Historical Data from Ecowitt.net... -
Page 43: Clear History Data
Note: Data with a query period of days/24 hours is retained for 3 months. Data with a weekly query period is retained for 1 year. Data with a monthly query period is retained for 2 years. Data with a yearly query period is retained for 4 years. 3.6.2 Clear History Data: Under "menu"... -
Page 44: Firmware Upgrade
3.7 Firmware Upgrade Method 1: Via Ecowitt App Open Ecowitt App – My Devices – "…" (Open the edit gateway page) – tap the firmware version number to upgrade if there is a new version available. When the upgrade is complete, the WS3900/WS3910 will reboot into the latest version. -
Page 45: Optional Sensors
Figure 46: Automatically upgrade firmware setting on the web page 4. Optional Sensors The RF reception function will always be turned on to receive data from multiple sensors at any time. 4.1 Sensors: When powered by DC or battery, the device supports these sensors as below, power consumption can be high if only battery power is available. -
Page 46: Sensor Data Can Be Displayed On The Ws3900/Ws3910
(the frequency is different for various countries because of regulations). Note: Max QTY of the following table means the maximum number of different sensors that can be connected to the WS3900 or WS3910. 4.1.1 Sensor Data Can be Displayed on the WS3900/WS3910: Sensor Model... -
Page 47: Sensor Data Can Only Be Uploaded To The Cloud
1. Some data of WS90/80/69/68/WH40/WN32 exist display priority, please refer to Section 3.3.7~3.3.9. 2. Some data of WH45/WH46 would not show on the WS3900/3910 (uploading the data). Please refer to Section 3.3.2. 4.1.2 Sensor Data Can Only be Uploaded to the Cloud:... -
Page 48: Iot Device
Sensor Model Max QTY Picture Functions WFC01 Smart water timer AC1100 Smart plug Table 8: IoT device After the Wi-Fi configuration of WS3900/WS3910 is finished (refer to 2.2), IoT products can be connected to the App. Take WFC01 for an example:... -
Page 49: Calibrate The Wh46/Wh45 Sensor
2. Click "…" on the top right corner and choose "Calibration". 3. Calculate the offset of data for the WH45/WH46 CO2 sensor. 4. Fill in the offset from step3, click Save. 5.The Ecowitt sensors also can be calibrated when compared with other accurate data of the same type. sensors. -
Page 50: Others
5.1 Lightning Distance Unit WS3900/WS3910 can connect WH57 lightning sensor, and the lightning data can only be viewed through Ecowitt App, website, and web page, if you need to modify the lightning distance unit, you can modify it by modifying the wind speed unit on App, website or web page. - Page 51 Figure 49: Setting lightning units by setting wind speed units on App Note: The wind speed units set on the App will not be synchronized to the WS3900/WS3910.
-
Page 52: Specifications
6. Specifications Model WS3900 Name Weather Station (receiver) Dimensions 209×28.5×142.5(mm) Screen Size 169×94.5(mm) Weight 366(g) Material of Plastic Casing Material of Screen VA-LCD Temperature Metering Range -9.9°C to 60°C(14°F to 140°F) Temperature Metering Accuracy ±0.2°C(±0.4℉) Temperature Metering Resolution 0.1°C(0.2℉) Humidity Metering Range... - Page 53 Model WS3910 Name Weather Station (receiver) Dimensions 209×28.5×142.5(mm) Screen Size 169×94.5(mm) Weight 366(g) Material of Plastic Casing Material of Screen VA-LCD Temperature Metering Range -9.9°C to 60°C(14°F to 140°F) Temperature Metering Accuracy ±0.2°C(±0.4℉) Temperature Metering Resolution 0.1°C(0.2℉) Humidity Metering Range 1% to 99% Humidity Metering Accuracy ±2%...
-
Page 54: Warranty And Statement
Note: When working with other transmitters, the screen displays the following range of data: Indoor temperature -9.9 to 60℃ Outdoor temperature -40 to 60°C Humidity 1% to 99% Wind speed 0-180km/h Wind direction 0 to 359 degrees Rainfall 0 to 9999mm 0 to 40,000 ppm PM1.0, PM2.5, PM10 0 to 999 ug/m3... -
Page 55: Care And Maintenance
Manufacture: Shenzhen Fine Offset Electronics Co., Ltd. Address: 4/F, Block C, JiuJiu Industrial City, Shajing Town, Baoan Distri ct, Shenzhen City, China 8. Care and Maintenance When batteries of different brands or types are used together, or new and old batteries are used together, some batteries may be over-discharged due to a difference in voltage or capacity. -
Page 56: Contact Us
9. Contact Us 9.1 After-sales Service Order Issues: If you encounter any missing or incorrect shipments of Ecowitt products purchased, please reach out to the respective platform's customer service from the store where you bought the product for assistance. Usage Inquiries: Our product is continuously changing and improving, particularly online services and associated applications.
Need help?
Do you have a question about the WS3900 and is the answer not in the manual?
Questions and answers
hello, is it possible to connect my ws3900 to weather underground, and if so PLEASE help an older gentleman thru the dance steps before my wife kills me, thanks sherm ;-)
è possibile cambiare la lingua da inglese a ITALIANO? ECOWITT Stazione meteo WS3900, 7 in 1 Stazione meteo da giardino Unità sensore esterno WS69, 7.5 pollici 3 in 1 sensore casa Wifi Indoor LCD Colore Console, IOT Controllo intelligente del collegamento