
Related Manuals for Dixie Chopper Vortex 2008


Summary of Contents for Dixie Chopper Vortex 2008
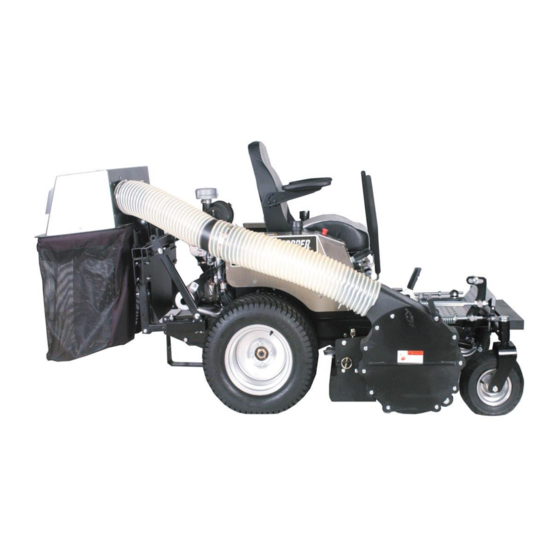
- Page 1 Model # ____________________ Serial # ____________________ Date Purchased ____________________ 2008 Vortex Installation/Owner’s Manual April 2008 700134...
- Page 2 Dixie Chopper Mower Accessories. A space has been provided on the cover and below to record information about your new Dixie Chopper Mower Accessory. Please take time to record such information for future reference, especially when you contact an authorized Dixie Chopper Mower dealer with questions.
-
Page 3: Table Of Contents
F2/F4/F5 Pre-Installation F2/F4/F5 Hopper Installation F2/F4/F5 Hopper Installation F4/F5 Door Linkage Adjustment F4/F5 Door Linkage Adjustment Counter Weight Installation Counter Weight Installation Diesel Hopper Installation Dixie Chopper • 6302 E. County Road 100 N. • Coatesville, IN • 46121 • www.dixiechopper.com... -
Page 4: Warranty Policies
Through the terms and conditions contained herein, Magic Circle Corporation, a.k.a. Dixie Chopper, warrants that it will adjust, repair, or replace any factory original part used in the manufacturing of a Dixie Chopper Bagger unit, found to be defective in material or workmanship. -
Page 5: Safety Information
• Check all belts for proper wear and correct tension. • Check engine oil and air fi lters as recommended in the engine manufacturers’ operators manual. Dixie Chopper • 6302 E. County Road 100 N. • Coatesville, IN • 46121 • www.dixiechopper.com... - Page 6 Do not operate the mower near any body of water, (lakes, ponds, riverbanks, etc.). When backing up, make sure the area behind you is clear. Dixie Chopper’s zero turning radius nearly eliminates the need for backing up. Simply turn the mower around within its own dimension and proceed forward.
- Page 7 Always run engine at idle for at least one minute (fi ve minutes maximum) for each hour of previous running, before shutting down engine. Never attempt to service or adjust the blower attachment while engine is running. Dixie Chopper • 6302 E. County Road 100 N. • Coatesville, IN • 46121 • www.dixiechopper.com...
-
Page 8: Safety Decals
Should these decals become diffi cult to read or are missing from the mower, contact your Dixe Chopper dealer for a replacement. Dixie Chopper • 6302 E. County Road 100 N. • Coatesville, IN • 46121 • www.dixiechopper.com... - Page 9 DAPDF44Kit 44” Deck Kit FCPDF029 Hardware Kit PG50 DAPDF60Kit 60” Deck Kit DAPDF50Kit 50” Deck Kit 60”/72” Pulley Guard FCPDF029-1 Clamps DCT077 F3 Bag PG6072 Dixie Chopper • 6302 E. County Road 100 N. • Coatesville, IN • 46121 • www.dixiechopper.com...
- Page 10 FCPDF028-R Latch RH FCPDF028-L Latch LH FCPDF027-L Push Bar Left Bent FCPDF027-R Push Bar Right Bent FCPDF023 Heat Shield FCPDF024 L-Bracket FCPDF025 Stabilizer Clevis Dixie Chopper • 6302 E. County Road 100 N. • Coatesville, IN • 46121 • www.dixiechopper.com...
- Page 11 Push Bar Straight FCPDF027-L Push Bar Left Bent FCPDF027-R Push Bar Right Bent FCPDF028-L Latch LH FCPDF028-R Latch RH FCPDF023 Heat Shield FCPDF024 L-Bracket Dixie Chopper • 6302 E. County Road 100 N. • Coatesville, IN • 46121 • www.dixiechopper.com...
- Page 12 Hood F2PDF005 Bag Hoop F2PDF008 Square Tube F2PDF009 Stabilizer Angle F2PDF011 Hood Stop F2PDF010 Stabilizer F2PDF012 Heat Shield DCD022 Hood Latch F2PDF014 Hood Spring Dixie Chopper • 6302 E. County Road 100 N. • Coatesville, IN • 46121 • www.dixiechopper.com...
- Page 13 Belt Take-up BLPDF012 Hitch Adjustment Plate BLPDF013 Handle BLPDF014 Hook Latch BLPDF019 Blower Housing BLPDF016 Alignment Plate Alignment Plate BLPDF020 Discharge Liner B-319 Liner Bolt Dixie Chopper • 6302 E. County Road 100 N. • Coatesville, IN • 46121 • www.dixiechopper.com...
-
Page 14: Blower Installation
50-inch machine, you must install the spacer. 6. Using bolts removed from the OCDC earlier, mount the blower bracket to the deck and fi nger-tighten them. Fig. 1-3 Dixie Chopper • 6302 E. County Road 100 N. • Coatesville, IN • 46121 • www.dixiechopper.com... - Page 15 11. Tighten the four receiver tower bolts, making sure the blower is at a right angle (90 degrees) to the deck, (Fig. 1-4). You may have to adjust the blower in order to achieve proper alignment. Dixie Chopper • 6302 E. County Road 100 N. • Coatesville, IN • 46121 • www.dixiechopper.com...
- Page 16 I. Before operating, be sure blower hub is full of grease. J. Install new pulley guard (Fig. 2-4). Verify that all fasteners are fully tightened before proceeding. Dixie Chopper • 6302 E. County Road 100 N. • Coatesville, IN • 46121 • www.dixiechopper.com...
-
Page 17: F2/F4/F5 Hopper Installation
In replacing the front bolts, leave 1/2” gap to enable the mounting bracket to slide into place (Fig. 3-4). Install the back bolts through the bracket (Fig. 3-5). 6. Securely tighten all four bolts. Dixie Chopper • 6302 E. County Road 100 N. • Coatesville, IN • 46121 • www.dixiechopper.com... - Page 18 (due to the presence of vaporizer). (Fig. 3-8). 3. Securely fasten the four bolts on right side and 4 coupler nuts on left side. Fig. 3-8 Dixie Chopper • 6302 E. County Road 100 N. • Coatesville, IN • 46121 • www.dixiechopper.com...
- Page 19 Fig. 4-4 Dixie Chopper • 6302 E. County Road 100 N. • Coatesville, IN • 46121 • www.dixiechopper.com Dixie Chopper • 6302 E. County Road 100 N. • Coatesville, IN • 46121 • www.dixiechopper.com...
-
Page 20: F4/F5 Door Linkage Adjustment
Upon completion of hopper and blower installation, check deck for proper level and pitch. Center the hopper to the seat so that its weight is distributed evenly. Dixie Chopper • 6302 E. County Road 100 N. • Coatesville, IN • 46121 • www.dixiechopper.com... -
Page 21: Diesel Hopper Installation
Fig. 6-3 7. Install left mounting bracket on the top of the outer frame rail with hopper brace (“ear”) facing forward (Fig. 6-4). Fig. 6-4 Dixie Chopper • 6302 E. County Road 100 N. • Coatesville, IN • 46121 • www.dixiechopper.com... - Page 22 (Fig. 6-10). 13. Loosen the bolts that hold the legs of the hopper to accommodate the proper width before sliding legs into the mounting brackets. Dixie Chopper • 6302 E. County Road 100 N. • Coatesville, IN • 46121 • www.dixiechopper.com...
- Page 23 15. Install the new tailpipe provided in the kit. You will attach the new tailpipe to the 90-degree tailpipe for clearance purposes. Failure to perform this step will damage overfl ow tank. Final notes: Re-tighten all fasteners before operating. Dixie Chopper • 6302 E. County Road 100 N. • Coatesville, IN • 46121 • www.dixiechopper.com...
- Page 24 Coatesville, IN 46121 Phone 1-765-CHOPPER www.dixiechopper.com Dixie Chopper, Magic Circle, and the Magic Circle Atom Logo are all trademarks of Magic Circle Corporation and may not be reproduced without permission. Printed In USA Specifi cations and instructions subject to change without notice.
Need help?
Do you have a question about the Vortex 2008 and is the answer not in the manual?
Questions and answers