Table of Contents
Advertisement
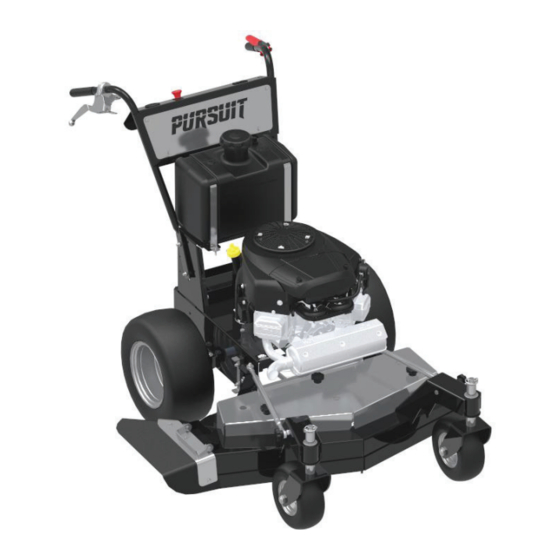
2016 PURSUIT WALK-BEHIND
Warning: If incorrectly used, this machine can cause severe injury. Those who use and
maintain this machine should be trained in its proper use, warned of its dangers, and must
read the entire manual before attempting to set up, operate, adjust,or service the machine.
700493
Safety, Operation, & Maintenance Manual
Pursuit 1832S, Single-Drive, 32" Cutting Unit
Pursuit 1836S, Single-Drive, 36" Cutting Unit
Pursuit 1836D, Dual-Drive, 36" Cutting Unit
Pursuit 1844D, Dual-Drive, 44" Cutting Unit
WARNING
Advertisement
Table of Contents

Related Manuals for Dixie Chopper Pursuit 1832S


Summary of Contents for Dixie Chopper Pursuit 1832S
- Page 1 2016 PURSUIT WALK-BEHIND Safety, Operation, & Maintenance Manual Pursuit 1832S, Single-Drive, 32” Cutting Unit Pursuit 1836S, Single-Drive, 36” Cutting Unit Pursuit 1836D, Dual-Drive, 36” Cutting Unit Pursuit 1844D, Dual-Drive, 44” Cutting Unit WARNING Warning: If incorrectly used, this machine can cause severe injury. Those who use and maintain this machine should be trained in its proper use, warned of its dangers, and must read the entire manual before attempting to set up, operate, adjust,or service the machine.
-
Page 2: Table Of Contents
CONTENTS Introduction Maintenance 2.1 Important ................1 9.1 General Precautions ............. 28 2.2 Product Identification ............1 9.2 Engine ................. 28 2.3 Serial Numbers ..............1 9.3 Engine Oil ................29 2.4 Guidelines for the Disposal of Scrap Products .....2 9.4 Engine Air Filter ..............30 9.5 Fuel .................. -
Page 3: Introduction
INTRODUCTION 2.1 IMPORTANT The Dixie Chopper Pursuit 1832S, Pursuit 1836S, Pursuit 1836D, and Pursuit 1844D with a Gasoline engine is a self propelled rotary mower. If you follow all instructions in this manual, you increase the life of your mower and keep its maximum performance. -
Page 4: Guidelines For The Disposal Of Scrap Products
Add items that can not be easily separated into different materials to the “General discarded materials” area. • Do not burn the discarded materials Change the mower records to show that the mower is not in service and is discarded. Supply this serial number to Dixie Chopper Warranty Department to close their records. 700493... -
Page 5: Safety
Know the location and correct operation of controls. Operators without experience must receive instruction from another person that knows the correct operation of the equipment before you operate the mower. Only use parts, accessories and attachments approved by Dixie Chopper. - Page 6 SAFETY • Inspect the cutting system before you start the mower. Make sure the blades are free to rotate. When you rotate one blade, other blades can rotate. 3.1.3 OPERATION • Never operate the engine without enough ventilation or in an enclosed area. The carbon monoxide in the exhaust fumes can increase to dangerous levels.
- Page 7 • Replace worn or damaged parts for safety. Replace damaged or worn decals. Only use parts, accessories and attachments approved by Dixie Chopper. • To decrease the fire hazard, remove materials that burn from the engine, muffler, battery tray and fuel tank area.
- Page 8 4. Never carry passengers. 5. Never operate the equipment without a correctly fastened grass deflector in position. If additional information or service is needed, contact your Authorized Dixie Chopper Dealer. Your Dealer knows the current methods to service this equipment. 700493...
-
Page 9: Specifications
SPECIFICATIONS 4.1 ENGINE SPECIFICATIONS Pursuit 1832S / 1836S / 1836D / 1844D Make Briggs & Stratton ® Model V-Twin Professional Series Type Four cycle, air cooled, Gasoline Number of Cylinders Bore and Stroke 2.97 in. (8.38 cm) x 2.89 in. (7.34 cm) Total Displacement 40.03 in3 (0.656 l) -
Page 10: Dimensions And Weights
SPECIFICATIONS 4.2 DIMENSIONS AND WEIGHTS 1832S 1836S 1836D 1844D A - Width of Cut 32 inch 36 inch 44 inch B - Maximum Width 41.25 inch 44.75 inch 53.5 inch C - Height 40 inch 44 inch D - Total length 68.5 inch 63.5 inch 65 inch... - Page 11 SPECIFICATIONS 1832S SPECIFICATIONS 4 SPECIFICATIONS 4 SPECIFICATIONS 4 WZT 1836S WZT 1836S WZT 1836S 1836S WZT 1836D WZT 1836D WZT 1836D 1836D WZT 1844D WZT 1844D WZT 1844D 1844D 700493 en-12 en-12 en-12...
-
Page 12: Mower Specification
310 feet/second @ 3600 rpm engine speed 4.5 BELT SPECIFICATION Pursuit 1832S / 1836S Traction Belt: 4L-Section, Wrapped, Belt Pursuit 1836D / Pursuit 1844D Traction Belt: 4L-Section, Wrapped Belt Pursuit 1832S Engine to Deck Belt: 5L-Section, Wrapped Belt Pursuit 1836S Engine to Deck Belt: 5L-Section, Wrapped Belt... -
Page 13: Recommended Lubricants
Kit Number TBD 4.8.3 ACCELERATOR BAGGER Kit Number TBD 4.9 SUPPORT LITERATURE Contact your Dixie Chopper Dealer for a complete listing of literature available for your mower. Operator’s Manual: 700465 Mower Parts Manual: 700484 Service & Repair Manual: TBD 700493... -
Page 14: Decals
DECALS 5.1 SAFETY & INSTRUCTION DECALS Understand the purpose of these decals. The decals are important to the safe operation of the mower. REPLACE THE DAMAGED DECALS IMMEDIATELY. General Safety Decal - Pursuit/Havoc PN: 800XXX NOTES: 1.25” x 9” *Dual-drive *Single-drive models only models only Neutral Release - Pursuit S Models... -
Page 15: Controls
CONTROLS 6 CONTROLS MOWER CONTROLS _______________________________________________________ 6Controls 6.1 MOWER CONTROLS 1832S / 1836S WZT 1836S STOP 6.8.3 6.8.1 6.8.2 1836D / 1844D WZT 1836D and WZT 1844D 6.9.1 STOP 6.9.4 6.9.2 6.9.2 6.9.3 6.9.5 700493 en-17... -
Page 16: Ignition Switch
6.2.10 START CONTROLS 6 6.2.8 STOP 6.2.2 PTO SWITCH _____________________________________________________________ CONTROLS 6.2.8 The PTO switch is a 2-position knob type switch to engage and to disengage the cutting unit. The PTO switch must be in the OFF (down) position to start the engine. 6.2.7 Pull on the red knob to move the switch to the ON position. -
Page 17: Pursuit 1836S Controls
CONTROLS CONTROLS 6 WZT 1836S CONTROLS_____________________________________________________ 6.8 1832S / 1836S CONTROLS STOP 6.8.3 6.8.1 6.8.2 6.8.1 FORWARD CONTROL LEVER 6.8.1 FORWARD CONTROL LEVER _______________________________________________ Slowly move the forward control lever toward the handle to drive the mower in the forward direction. The closer the Slowly move the forward control lever toward the handle to drive the mower in the forward direction. -
Page 18: Pursuit 1836D/1844D Controls
CONTROLS 6 CONTROLS WZT 1836D/1844D CONTROLS ______________________________________________ 6.9 1836D / 1844D CONTROLS 6.9.1 STOP 6.9.4 6.9.2 6.9.2 6.9.3 6.9.5 6.9.1 LIGHT SWITCH 6.9.1 LIGHT SWITCH ___________________________________________________________ The light switch controls the operation of the mower work lights. Never operate the work lights with the engine stopped. The light switch controls the operation of the mower work lights.Never operate the work lights with the engine stopped. -
Page 19: Operation
OPERATION 7.1 DAILY INSPECTION CAUTION The inspection must be done each day when the engine is turned off and all fluids are cold. Engage the parking brake, stop the engine and remove the ignition key • Do a visual inspection of the mower. Look for indications of wear or loose hardware. Look for any components that are not included on the mower or damaged components. -
Page 20: Pursuit 1836S Opc System
OPERATION 7.2 Pursuit 1832S / 1836S OPC SYSTEM The 1832S / 1836S OPC System prevents the engine to start unless the forward and reverse levers are in the Neutral position and the PTO switch is in the OFF (Down) position. The system stops the engine if the OPC lever is released with WARNING Do not operate the equipment with the OPC System disconnected or the system does not operate correctly. -
Page 21: Pursuit 1836D/1844D Opc System
OPERATION 7.3 Pursuit 1836D / 1844D OPC SYSTEM The 1836D/1844D OPC System prevents the engine to start unless the steering control levers are in the Neutral position and the PTO switch is in the OFF (Down) position. The cutting unit does not operate with the drive levers in the Neutral position. -
Page 22: Operating Procedure
OPERATION 7.4 OPERATING PROCEDURE CAUTION To prevent injury, always wear safety glasses, leather work shoes or boots, and ear protection. 1. Always start the engine with the operator behind the mower, never while next to the mower. Never start the engine with persons near the mower. -
Page 23: Starting The Engine
OPERATION 7 OPERATION STARTING THE ENGINE____________________________________________________ 7.5 STARTING THE ENGINE Start the engine with the operator behind the mower, the PTO Ignition switch in the OFF position and the parking brake engaged. WZT 1836S Switch Switch Start the engine with the operator behind the mower, the PTO Remove your hands from the drive control levers. -
Page 24: Pursuit 1832/1836S Driving
OPERATION OPERATION 7 7.7 Pursuit 1832 /1836S DRIVING WZT 1836S DRIVING _______________________________________________________ Read and follow all safety instructions contained in this manual when you operate the mower. When you operate in the reverse direction, look behind you to make sure you have a clear path. Do not mow in reverse. Read and follow all safety instructions contained in this manual when you operate the mower. -
Page 25: Pursuit 1836D/1844D Driving
OPERATION 7.8 Pursuit 1836D/1844D DRIVING 7 OPERATION Read and follow all safety instructions contained in this manual when you operate the mower. When you operate in the WZT 1836D/1844D DRIVING _________________________________________________ reverse direction, look behind you to make sure you have a clear path. Do not mow in reverse. Read and follow all safety instructions contained in this manual when you operate the mower. -
Page 26: Mowing
OPERATION WARNING To prevent injuries, when the blades rotate, keep your hands, feet and clothing away from the cutting unit. NEVER use your hands to clean the cutting unit. Use a brush to remove grass from the blades. The blades can be sharp and can cause injury. -
Page 27: Towing The Mower
OPERATION 7.11 TOWING THE MOWER If the mower has a problem and the engine will not run, move the Neutral release lever to the Neutral position and load the mower on a trailer. If a trailer is not available, tow the mower at a slow speed for short distances. Be careful when you load or unload the mower on the trailer. -
Page 28: Maintenance And Lubrication Charts
MAINTENANCE AND LUBRICATION CHARTS 8.1 MAINTENANCE CHART Mower Service Interval Chart Interval Item Section • Replace engine oil See 9.3 • Replace engine oil filter See 9.3 First 5 Hours • Check electrical wiring See 9.14 • Lubricate spindles and casters See 8.2 •... -
Page 29: Lubrication Chart
MAINTENANCE AND LUBRICATION CHARTS 8 MAINTENANCE AND LUBRICATION CHARTS 8.2 LUBRICATION CHART LUBRICATION CHART _____________________________________________________ FLUID REQUIREMENTS ____________________________________________________ 8.3 FLUID REQUIREMENTS Fluid Requirements Fluid Requirements Quantity Type Quantity Type Engine Oil with Filter 2 quarts (1.89 l) SAE 10W-30 API Classification SJ Engine Oil with Filter 2 quarts (1.89 l) SAE 10W-30 API Classification SJ... -
Page 30: Maintenance
MAINTENANCE 9.1 GENERAL PRECAUTIONS WARNING Before you clean, adjust or repair this equipment, push PTO switch to the OFF position, lower the cutting unit, engage the parking brake, stop the engine and remove the key. Make sure the mower is parked on a solid and level surface. Never work on a mower that is lifted only by the jack. Always use the jack stands. -
Page 31: Engine Oil
9 MAINTENANCE MAINTENANCE 9 MAINTENANCE ENGINE OIL ______________________________________________________________ ENGINE OIL ______________________________________________________________ Check engine oil level Check engine oil level 9.3 ENGINE OIL Check the engine oil level before you start the engine or at least five minutes after you stop the engine. Check the engine oil level before you start the engine or at Check Engine Oil Level least five minutes after you stop the engine. -
Page 32: Engine Air Filter
MAINTENANCE 9 MAINTENANCE ENGINE AIR FILTER _______________________________________________________ Do not remove the element to inspect or clean. Removal of the filter that is not 9.4 ENGINE AIR FILTER necessary increases the risk of dust and other particles to enter the engine. Cover Do not remove the element to inspect or clean. -
Page 33: Battery
MAINTENANCE 9.6 BATTERY Before you service the battery, make sure the ignition switch is in the OFF position and the key is removed. CAUTION When you service the battery, always use the tools with insulation, wear protective glasses and protective clothing. Discard used batteries as shown in your local regulations. -
Page 34: Charge The Battery
MAINTENANCE 9.7 CHARGE THE BATTERY WARNING Charge the battery in an area with good airflow. The battery can release hydrogen gas that is explosive. To prevent an explosion, keep any device that can cause sparks or flames away from the battery. When the battery charger is turned on, to prevent injury, stay away from the battery. -
Page 35: Tires
MAINTENANCE 9.9 TIRES Keep the tires correctly inflated to increase tire life. Inspect the tread wear. Check the tire pressure each day, while the tires are cool. Use an accurate low-pressure tire gauge. Keep the rear tires inflated to 8-10 psi. Keep the front tires inflated to 12-15 psi. CAUTION DO NOT try to put a tire on a rim unless you have the correct training, tools and experience. -
Page 36: Air Cooling System
MAINTENANCE MAINTENANCE 9 9.11 AIR COOLING SYSTEM The engine on the mower is an air-cooled engine. Dirt and other objects can decrease the air flow and cause the engine 9.11 AIR COOLING SYSTEM _____________________________________________________ to overheat, cause bad performance and decreased engine life. The engine on the mower is an air-cooled engine. -
Page 37: Sharpening Blades
MAINTENANCE 9 MAINTENANCE 9.13 SHARPENING BLADES ____________________________________________________ Put a wooden block between the blade and cutting unit housing 9.13 SHARPENING BLADES to prevent the blade to rotate. Put a wooden block between the blade and cutting unit housing to prevent the blade to rotate. WARNING WARNING The cutting unit blades can have sharp edges. -
Page 38: Care And Cleaning
MAINTENANCE 9.15 CARE AND CLEANING Clean the mower and cutting units after each use. To prevent damage to the engine, do not wash the mower with the engine in operation. When possible, clean the mower with compressed air. NOTICE Do not wash any part of the mower that is hot. Do not use the high-pressure spray or steam. Use cold water and automotive cleaners. -
Page 39: Mower Storage
MAINTENANCE 9.16 MOWER STORAGE General • Clean the mower and lubricate. Repair and paint damaged or open metal. • Inspect the mower, tighten all hardware, replace worn or damaged components. • Clean the tires and keep the mower so that the load is not on the tires. If the mower is not on the jack stands, check tires at normal intervals and add air when needed. -
Page 40: Adjustments
ADJUSTMENTS 10.1 GENERAL PRECAUTIONS WARNING Before you clean, adjust or repair this equipment, push PTO switch to the OFF position, lower the cutting unit to the ground, turn on the parking brake switch, stop the engine and remove the key. Make sure the mower is parked on a solid and level surface. -
Page 41: Belt Adjustment
ADJUSTMENTS 10 ADJUSTMENTS 10.2 NEUTRAL ADJUSTMENT 10.2 NEUTRAL ADJUSTMENT ___________________________________________________ The mower must not move with the drive control levers in the Neutral position and the parking brake disengaged. The mower must not move with the drive control levers in the Neutral position and the parking brake disengaged. WZT 1836S: The neutral adjustment is done on the left side of the drive axle.... -
Page 42: Height Of Cut
ADJUSTMENTS 10.3 HEIGHT OF CUT The height of cut for the cutting unit is adjusted from 1-1/2 to 4-1/2 inch (3.8-11.4 cm) in 1/2 inch (1.3 cm) steps. The height of cut result can be different from the heights given because of the condition of the turf and other conditions. NOTICE When cutting rough areas, a lower height of cut can cause scalping. - Page 43 ADJUSTMENTS 10 ADJUSTMENTS To change the deck bracket height of cut To change the deck bracket height of cut Support the mower and remove the deck bracket hardware from both sides of the mower. Loosen the slot hardware. A. Support the mower and remove the deck bracket hardware from both sides of the mower. Loosen the slot Check the deck bracket mounting position.
-
Page 44: Torque Specification
For tightening plated bolts, use the value given for lubricated. Dixie Chopper uses Grade 5 (Inch) and Grade 8.8 (Metric) Plated bolts, unless a note is given. Always check the marks on the head of the bolts for the bolt grade. -
Page 45: Problem Solving
PROBLEM SOLVING 11.1 GENERAL The problem solution chart lists basic problems that can occur during start and operation of the mower. For complete information about the hydraulic and electrical systems, contact your Dixie Chopper Dealer. Symptoms Possible Causes Action 1. Parking brake disengaged or power take- 1. -
Page 46: Quality Of Cut
QUALITY OF CUT 12.1 QUALITY OF CUT PROBLEM SOLVING________ 12Quality of Cut Make a “test cut” to check the performance of the mower before you s 12.1 QUALITY OF CUT PROBLEM SOLVING This area must have turf conditions that are known and do not chan accurate inspection of the performance of the mower to be made. -
Page 47: Step Cutting
QUALITY OF CUT 12 QUALITY OF CUT 12.3 STEP CUTTING ____________________________________ 12.3 STEP CUTTING Step cutting occurs wh of a cutting unit than occur when one cutting Step cutting occurs when grass is cut higher on one side of a cutting unit. -
Page 48: Stragglers
QUALITY OF CUT 12 QUALITY OF CUT 12.5 STRAGGLERS _______________________________ Stragglers ar 12.5 STRAGGLERS or are cut inc Stragglers are separated blades of grass the are not cut, or are cut incorrectly. TN0223 NOTE: Arrow indicates direction of travel. Probable Cause Remedy Probable Cause Sharpen the blade(s). -
Page 49: Windrowing
QUALITY OF CUT 12 QUALITY OF CUT 12.7 WINDROWING ______________________________ 12.7 WINDROWING Windrowing end of cu Windrowing Windrowing is the deposit of clippings increased at one end of cutting unit(s) or between cutting units. Windrowing can make a line in the direction of travel. TN0225 NOTE: Arrow indicates direction of travel. - Page 50 NOTES 700493...
- Page 51 NOTES 700493...
- Page 52 Specifications and instructions subject to change without notice. Dixie Chopper and Jacobsen Professional Lawn Care Inc, are registered trademarks. Dixie Chopper Any and all use and/or reproductions are strictly prohibited. 6302 E CR 100 N • Coatesville, IN 46121 www.dixiechopper.com 765.246.7737...
Need help?
Do you have a question about the Pursuit 1832S and is the answer not in the manual?
Questions and answers