
Summary of Contents for Intec 980951
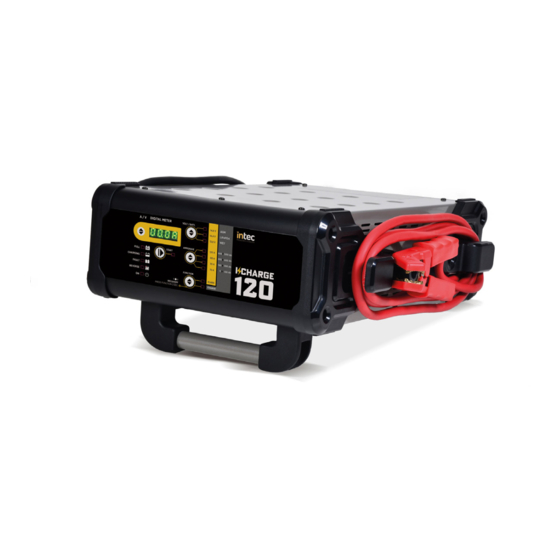
- Page 1 Caricabatterie · Charger · Chargeur 12 V - 120 A · Italian Italiano · English English · French Français 980951...
-
Page 2: Attenzione - Istruzioni Di Sicurezza
IT - Italiano - Istruzioni per l’uso Utilizzare il caricabatterie esclusivamente per ricaricare batterie ricaricabili al piombo-acido e LiFePO4 agli ioni di litio da 12 V. Non utilizzare per alcun altro scopo. Questo caricabatterie è progettato per l’uso solo con la rete di alimentazione da 110-240 V~, 50/60 Hz. 1. -
Page 3: Informazioni Generali
1.11 Non aprire né smontare l’apparecchio; rivolgersi a un tecnico qualificato quando sono necessari interventi di assistenza e riparazione. 1.12 Non utilizzare l’apparecchio se questo ha subito un forte urto, è caduto o si è altrimenti danneggiato in qualsiasi modo. 1.13 Non introdurre le dita o le mani all’interno dell’apparecchio. - Page 4 « Function » pulsante: Selezionala modalità operativa. 2 LED sulla modalità operativa (giallo): « Flash » o « Charge ». « » pulsante (display): Seleziona cosa visualizzare sul display. 2.2 Display digitale Il tasto di selezione « » permette di visualizzare a display la tensione o la corrente. 3.
- Page 5 FASE 1 Analisi 1 Se la batteria presenta una tensione superiore ai 3 V, procede con la successiva fase. Tensioni sotto i 3 V causano il ritorno in 'Stand-by' del dispositivo. FASE 2 Pre-carica Inizia una carica a corrente costante fino a che la tensione della batteria non raggiunge 13 V.
-
Page 6: Indicazioni Errori
3.4 Memorizzazione delle impostazioni Il dispositivo realizza la memorizzazione delle impostazioni sul pannello frontale di controllo. Nel caso si verifichi una interruzione accidentale o volontaria dell'alimentazione, al momento della riaccensione il caricabatterie si avvia con le ultime impostazioni memorizzate. Con caricabatterie impostato in modalità « Flash »... -
Page 7: Carica Della Batteria
Le pinze dei conduttori di uscita Er07 e LED « Posizionare correttamente le pinze e sono collegati impropriamente alla Reverse » riprendere la carica della batteria. batteria. Corrente di uscita troppo alta. Diminuire l’assorbimento sulla Er08 Corrente sopra il limite massimo. batteria. -
Page 8: Manutenzione E Conservazione
• Tasto A seconda della tensione di alimentazione necessaria per sostenere « Volt / Batt. » la tensione di batteria durante le operazioni di riprogrammazione (SOLO modalità « Flash »), è possibile selezionare tre diverse tensioni di alimentazione. O A seconda della tecnologia costruttiva della batteria (SOLO modalità «... -
Page 9: Caution: Safety Instructions
EN - English - Instructions for use Only use the charger to recharge 12 V rechargeable Wet, AGM and Lithium LiFePO4 batteries. Do not use it for any other purpose. This charger is designed for use only with the supply mains of 110 - 240 V~, 50/60 Hz. -
Page 10: General Information
1.14 Never put the appliance on top of the battery while using it. 1.15 Do not attempt to charge a damaged battery. 1.16 Never charge a frozen battery. 1.17 Keep away from jewelry. Remove personal metal objects such as rings, bracelets, necklaces and watches when working with a lead-acid battery. - Page 11 3.1 Operating modes « Function » « Charge » Battery charging mode. There are 7 charging steps, as described below: STEP 1 Test 1 If the battery has a voltage above 6.5 V, the unit proceeds with the next step. Voltage below 6.5 V will cause the device to revert to stand-by.
- Page 12 STEP 4 Constant Keeps the battery at charge end voltage. voltage STEP 5 Buffer Voltage drops to the maintenance level and the charging cycle is completed. The green « Full » LED turns on. STEP 6 Pulsed current Pulsed battery maintenance cycle (over long periods). cycle ATTENTION: Because of the high voltage reached during this charging cycle, the battery recovery process must be performed with the battery disconnected from the vehicle.
-
Page 13: Error Codes
• Damaged battery: The « Fault » LED turns on and the « Start/Stop » LED switches off, and the charger enters stand-by mode. The display shows the message “Errx”, where ‘x’ is the number corresponding to the cause of the error (see table below). Single two second audible warning. - Page 14 3. Charge a battery with negative earth, grounded to the motor vehicle’s chassis, as follows: • Connect the output lead with the red clamp to the positive terminal (+) of the battery. • Connect the output lead with the black clamp to the motor vehicle’s earthing point, keeping it away from the battery and fuel pipe.
-
Page 15: Maintenance And Storage
instructions (5.1 ). 11. Once the battery is charged, press the « Start/Stop » button of the battery charger. The LED will turn off to show that the battery charger has completed the work cycle. 12. Disconnect the power supply lead of the appliance from the mains socket. 13. -
Page 16: Attention - Instructions De Sécurité
FR - Français - Mode d’emploi N’utilisez le chargeur que pour recharger des batteries au plomb rechargeables 12 V. Ne l’utilisez en aucun cas pour recharger d’autres produits. Ce chargeur est uniquement conçu pour une alimentation secteur de 110 - 240 V~, 50/60 Hz. 1. -
Page 17: Informations Générales
1.12 N’utilisez pas l’appareil s’il a reçu un coup violent, est tombé ou a été endommagé d’une autre manière. 1.13 Ne placez pas les doigts ou les mains dans l’appareil. 1.14 Ne placez jamais l’appareil sur le dessus de la batterie en cours d’utilisation. 1.15 N’essayez jamais de charger une batterie endommagée. - Page 18 Bouton « » (display): Sélection de l'affichage sur l'écran. 2.2 Afficheur numérique Le bouton de sélection « » permet d'afficher à l'écran la tension ou le courant. 3. FONCTIONS DU CHARGEUR DE BATTERIE ET MODES DE FONCTIONNEMENT 3.1 Mode de fonctionnement « Function »...
- Page 19 PHASE 1 Analyse 1 Si la batterie présente une tension supérieure à 6,5 V, on passe à la phase suivante. Des tensions inférieures à 6,5 V provoquent le retour en 'Stand-by' du dispositif. PHASE 2 Pré-charge Début de la charge à courant constant jusqu’à ce que la tension de la batterie atteigne les 13 V.
-
Page 20: Indications D'erreurs
3.4 Mémorisation des réglages Le dispositif effectue la mémorisation des réglages sur le panneau avant de contrôle. En cas d’interruption accidentelle ou volontaire de l’alimentation, au moment de la remise en marche, le chargeur de batterie repart avec les derniers réglages mémorisés. Avec le chargeur de batterie réglé... -
Page 21: Charge De La Batterie
Les pinces des conducteurs de Positionnez correctement Er07 et LED « sortie sont branchées de manière pinces et recommencez à charger la Reverse » incorrecte à la batterie. batterie. Courant en sortie trop élevé. Courant Er08 Diminuer l’absorption sur la batterie. au-dessus de la limite maximum. -
Page 22: Entretien Et Stockage
•Bouton En fonction de la tension d’alimentation nécessaire pour soutenir « Volt / Batt. » la tension de batterie pendant les opérations de reprogrammation (UNIQUEMENT en mode « Flash »), il est possible de sélectionner trois différentes tensions d’alimentation . OU En fonction de la technologie de construction de la batterie (UNIQUEMENT en mode «... - Page 23 - 23 -...