Vulcan-Hart GCO2C Installation And Operation Manual
Gas convection ovens
Hide thumbs
Also See for GCO2C:
- Installation and operation manual (20 pages) ,
- Replacement parts catalog (13 pages) ,
- Service manual (40 pages)
Table of Contents
Advertisement
Quick Links
Download this manual
See also:
Service Manual
Advertisement
Table of Contents

Related Manuals for Vulcan-Hart GCO2C


Summary of Contents for Vulcan-Hart GCO2C
- Page 1 GCO2D & GCO2C GAS CONVECTION OVENS MODEL GCO2D ML-114569 GCO2C ML-114571 VULCAN-HART DIVISION OF ITW FOOD EQUIPMENT GROUP, LLC WWW.VULCANHART.COM INSTALLATION & OPERATION MANUAL MODEL GCO2D LOUISVILLE, KY 40201-0696 P.O. BOX 696 FORM 30975 Rev. D (12-07)
-
Page 2: Important For Your Safety
IN THE EVENT OF A POWER FAILURE, DO NOT ATTEMPT TO OPERATE THIS DEVICE. © VULCAN-HART COMPANY, 1996 IMPORTANT FOR YOUR SAFETY I m p r o p e r i n s t a l l a t i o n , a d j u s t m e n t ,... -
Page 3: Installation
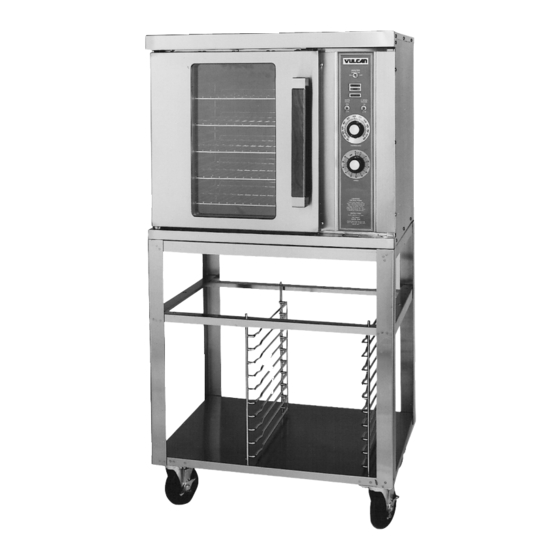
GENERAL Model GCO2D Gas Convection Oven is a single cavity oven, featuring a solid state temperature control and 1-hour dial timer. Model GCO2C features a programmable controller. Each oven is equipped with a 25,000 BTU/hr burner and HP (0.37 kw) electric motor. Porcelain interior is standard. Each oven is furnished with five racks;... -
Page 4: Installation Codes And Standards
Mississauga, Ontario, Canada L4W 5N6. INSTALLING BASIC OVEN The basic oven must be installed on 4" (10 cm) or 6" (15 cm) adjustable legs for counter installation or be mounted on a modular stand. Installations on concrete bases or other supports restricting air circulation underneath the oven are not advisable and may void the warranty. - Page 5 Assembling the Legs to the Single Oven The 4" (10 cm) or 6" (15 cm) legs are packed inside the oven during shipment and must be installed on the bottom of the oven. Place the oven on its left side, being careful to avoid scratching the finish. The gas pipe connection protrudes beyond the back;...
-
Page 6: Electrical Connections
LEVELING Once the oven is in its permanent position, place a carpenter's level on the oven rack. If the oven is installed on legs, turn the adjustable feet in or out to level oven front-to-back and side-to-side. If the oven is installed on casters, loosen set screws and turn casters in or out to level oven front-to-back and side-to-side. - Page 7 The oven is provided with a regulator integral to the gas solenoid valve, and requires no regulator external to the device. A gas shutoff valve is supplied with each oven and is located at the bottom of the control panel. No tools are required to access this valve.
-
Page 8: Flue Connection
• The oven should be located under a hood which has an adequate connection to an exhaust duct and extends 6" (15 cm) beyond the oven sides. • Clearance above the oven flue should be adequate for the flue products to escape so that there is no interference with heat circulation in the ovens. -
Page 9: Lighting The Gco2D Oven
If burners do not light after five trials, turn off the manual valve and call a qualified servicer. BEFORE FIRST USE Before the oven is used for the first time, it must be "burned in" to release any odors that might result from heating the new surfaces in the chamber. - Page 10 CONTROLS — MODEL GCO2C Built before October 1999 (Fig. 6) HEAT LIGHT TEMPERATURE KNOB ROAST BUTTON THERMOMETER BUTTON TIME BUTTON START/STOP BUTTON GENTLE BAKE BUTTON THERMOSTAT CONTROL Temperature Display (When not timing product). Displays set cook temperature while the light in the Roast Button is lit. Will be overridden to display actual cavity temperature for 8 seconds when Thermometer Button is pushed.
-
Page 11: Timer Control
1. Selects the Roast mode, indicated by the Roast Button Light described above. 2. Has no effect if timing in the Hold mode. Thermometer Button — When pressed, displays the actual oven temperature for about 8 seconds, then returns to the set temperature. -
Page 12: Lighting The Gco2C Oven
The HEAT light should come on. If HEAT light is not on, make sure the door is closed. 3. If the oven fails to light, push the ON / OFF / OVEN COOL switch OFF. Wait 5 minutes before trying to re-light the oven. -
Page 13: Using The Gco2C Oven
End of Day 1. Push ON / OFF / OVEN COOL switch to OVEN COOL. Leave door ajar while the fan is on to cool the oven. 2. When the oven has cooled sufficiently, turn the ON / OFF / OVEN COOL switch OFF and clean the oven. -
Page 14: Menu Select
CONTROLS — MODEL GCO2C Built after October 1999 R & H OVEN OVEN MODE READY HEATING MENU SELECT PRIMARY SECONDARY SECONDARY ROAST & HOLD START STOP MENU RACK POWER NO IGNITION OVEN COOL PL-53543 1 2 3 4 5 Always displays [HR:Min] when setting the time. -
Page 15: Manually Setting The Temperature And Cook Time
MANUALLY SETTING THE TEMPERATURE AND COOK TIME To Set the Temperature • Press the SET button. Press the TEMPERATURE button; StPt displays to indicate Setpoint. • Use the Up and Down Arrow keys to increase or decrease the displayed Temperature value. •... -
Page 16: Setting The Oven For Roast & Hold
At startup, the display will initially show a the set temperature displays. The READY light is lit, the HEAT light goes out, and the oven is ready for you to select the Cook Time, Menu Item Cook Time, or Menu / Rack # Cook Time. -
Page 17: Proper Utensils
Stage Cooking. When the Hold temperature is reached, cooking is done. The Time Display counts up the Hold time and flashes "Hold." Temperature in the oven will be maintained at the Hold temperature until the oven is turned off. 400ºF 300ºF... -
Page 18: Suggested Cooking Guidelines - Models Gco2D And Gco2C
Clean outside of the oven daily by wiping with a clean damp cloth. Clean porcelain oven interior daily with soap or detergent and water. Rinse thoroughly and wipe dry with a soft clean cloth. Optional Stainless Steel Oven Interior Soap or detergent and water usually handle routine cleaning. -
Page 19: For Best Results
Lasagna FOR BEST RESULTS Product to be cooked should be centered on the oven rack, and the racks should be spaced evenly inside the oven. It is best not to rotate the product or open the door during the cooking cycle. -
Page 20: Maintenance
• Call your local Vulcan authorized service representative. SERVICE AND PARTS INFORMATION To obtain service and parts information concerning this model, contact the Vulcan-Hart Service Agency in your area (refer to our website, www.vulcanhart.com for a complete listing of Authorized Service and Parts depots).
Need help?
Do you have a question about the GCO2C and is the answer not in the manual?
Questions and answers