Table of Contents
Advertisement
VC SERIES
GAS CONVECTION OVENS
MODELS
VC4GD
VC4GC
VC6GD
VC6GC
STACKED MODELS
VC44GD
VC44GC
VC66GD
VC66GC
For additional information on Vulcan-Hart or to locate an authorized parts
and service provider in your area, visit our website at www.vulcanhart.com
VULCAN-HART
DIVISION OF ITW FOOD EQUIPMENT GROUP, LLC
WWW.VULCANHART.COM
ML-126611
ML-136494
ML-126613
ML-136495
ML-126611
ML-136494
ML-126613
ML-136495
INSTALLATION &
OPERATION MANUAL
MODEL VC4GD
P.O. BOX 696
LOUISVILLE, KY 40201-0696
FORM 31123 Rev. K (Mar. 2009)
Advertisement
Table of Contents

Related Manuals for Vulcan-Hart VC4GD ML-126611


Summary of Contents for Vulcan-Hart VC4GD ML-126611
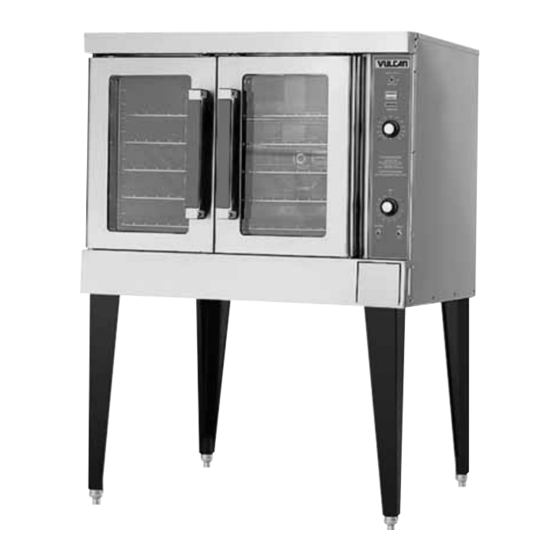
- Page 1 VC66GD ML-126613 VC66GC ML-136495 MODEL VC4GD For additional information on Vulcan-Hart or to locate an authorized parts and service provider in your area, visit our website at www.vulcanhart.com VULCAN-HART P.O. BOX 696 DIVISION OF ITW FOOD EQUIPMENT GROUP, LLC LOUISVILLE, KY 40201-0696 WWW.VULCANHART.COM...
-
Page 2: Important For Your Safety
Read the installation, operating and maintenance instructions thoroughly before installing or servicing this equipment. IN THE EVENT OF A POWER FAILURE, DO NOT ATTEMPT TO OPERATE THIS DEVICE. © VULCAN-HART, 2009 – 2 –... -
Page 3: Features And Options
Other options include: an open stand with lower storage rack, roast and hold, and a stacking kit for mounting one oven on top of another. Vulcan VC Series Gas Convection Ovens are produced with quality workmanship and material. Proper installation, usage and maintenance of your oven will result in many years of satisfactory performance. -
Page 4: Installation Codes And Standards
If the supply and equipment requirements do not agree, do not proceed with the installation. Contact your dealer or Vulcan-Hart Company immediately. UNPACKING This oven was inspected before leaving the factory. -
Page 5: Installing Basic Oven
Ovens Mounted on Casters Ovens mounted on casters must use a flexible connector (not supplied by Vulcan) that complies with the Standard for CONNECT Connectors for Movable Gas Appliances, ANSI Z21.69 • CSA GAS LINE STRAIN RELIEF 6.16 and a quick-disconnect device that complies with the... -
Page 6: Assembling The Stand To The Oven
Assembling the Legs to the Oven BACK The legs must be installed on the bottom of the oven. Gently position the oven on its side, taking care not to scratch or damage it. Attach each of the four leg assemblies to the bottom of the oven with the 24 bolts and lockwashers (six per leg). -
Page 7: Gas Connection
GAS CONNECTION GAS DATA INPUT RATING MANIFOLD PRESSURE MODEL L.P. GASES L.P. GASES Natural Natural (Propane) (Propane) VC4GD VC6GD 44,000 BTU/hr 44,000 BTU/hr 3.5" W.C. (0.9 kPa) 10" W.C. (2.5 kPa) VC4GC VC6GC VC4GD-SEF 44,000 BTU/hr 44,000 BTU/hr 3.7" W.C. (0.93 kPa) 10"... -
Page 8: Vent System
Insufficient air will cause flames to burn with a yellow tip and result in carbon accumulation in the flame chamber and heat exchanger tubes. Contact your local Vulcan-Hart servicer if required. VENT SYSTEM DO NOT obstruct the flow of flue gases from the flue located on the rear of the oven. It is recommended that the flue gases be ventilated to the outside of the building through a ventilation system installed by qualified personnel. -
Page 9: Operation
OPERATION The oven and its parts are hot. Use care when operating, cleaning or servicing the oven. CONTROLS (Models VC4GD and VC6GD Without Roast & Hold) MASTER SWITCH MASTER SWITCH OVEN COOL OVEN COOL HEAT HEAT IGNITION IGNITION THERMOSTAT THERMOSTAT 100 C 100 C LIGHTING INSTRUCTIONS... - Page 10 CONTROLS (Models VC4GD and VC6GD With Roast & Hold) MASTER SWITCH MASTER SWITCH OVEN COOL OVEN COOL HEAT HEAT IGNITION IGNITION THERMOSTAT THERMOSTAT 100 C 100 C R & H TIMER R & H TIMER TIMER TIMER LIGHTS LIGHTS NORMAL NORMAL FUNCTION FUNCTION...
- Page 11 CONTROLS (Model VC4GD-SEF) (With Standing Pilot) Master Switch ON — Turns oven control circuits on. OFF — Turns oven control circuits off. SHABBOS — Puts oven in Sabbath mode allowing oven to operate when doors are open. On Light (Amber) —...
- Page 12 BEFORE FIRST USE Before using the oven for the first time, it must be "burned in" to release any odors that might result from heating the new surfaces in the chamber. 1. Using a clean, damp cloth, wipe the inside of the oven including the racks. 2.
- Page 13 LIGHTING OVEN (Model VC4GD-SEF) (With standing pilot) The oven fan continues to run when the oven door is opened. The oven contains hot air and steam. Stay clear while opening the door. 1. Turn on main gas supply. 2. With Master Switch in OFF position, lift access door in lower trim, light pilot while holding red button on control panel.
-
Page 14: Conserving Energy- All Models
Cooking 1. Open doors and load the product into the oven. Place pans in the center of the racks. Close doors. 2. Set the Timer. After the preset time lapses, turn Timer to OFF position to stop alarm. 3. When product is done, open doors and carefully remove cooked product from the oven. Care should be taken when wiping up spills, as oven is still hot. -
Page 15: Proper Utensils
ROAST & HOLD OPERATION — (When Equipped) Roast & Hold cooks the product in two stages. During first-stage cooking, the oven temperature is regulated by the temperature setpoint and the R & H Timer setting. After the time counts down to 00:00, second-stage cooking begins. - Page 16 PROGRAMMABLE CONTROLS (Models VC4GC AND VC6GC) Always displays [HR:Min] when setting the time. Displays [HR:Min] if the countdown time is more than 1 hour. Displays [Min:Sec] if the countdown time is less than 1 hour. Displays temperature in °F. Indicates the oven is in the Roast & Hold Mode. R &...
-
Page 17: Manually Setting The Temperature And Cook Time
MANUALLY SETTING THE TEMPERATURE AND COOK TIME To Set the Temperature 1. Press the SET button. Press the TEMPERATURE button; StPt displays to indicate Setpoint. 2. Use the Up and Down arrow keys to increase or decrease the displayed temperature value. 3. - Page 18 Always Set the Temperature Before Setting the Time 1. Open the door; door will display. 2. Place the desired product on any of the five racks. 3. Close the door. The display should return to the set temperature or the GROWING BAR. 4.
-
Page 19: Setting The Oven For Roast & Hold
SETTING THE OVEN FOR ROAST & HOLD 1. Press the ROAST & HOLD button to select roast & hold. 2. Set the first stage temperature and the cook time as described in MANUALLY SETTING THE TEMPERATURE AND COOK TIME. Press START/STOP to begin cooking. 3. -
Page 20: Special Procedures For Baking
The high limit switch operates independently and will automatically shut the oven down should the primary control fail. If this situation occurs, DO NOT attempt to bypass the high limit. Shut the oven down and contact your local Vulcan authorized service agency. – 20 –... -
Page 21: Recommended Temperatures And Times For Roasting
RECOMMENDED TEMPERATURES AND TIMES FOR ROASTING Meat roasting is most satisfactory at temperatures of 225 to 325°F (107 to 163°C) for beef, lamb, poultry and ham; 325°F (163°C) for fresh pork as recommended by USDA and American Meat Institute. A pan, approximately 12 x 20 x 1" (305 x 508 x 25 mm) full of water, may be placed in the oven bottom. This water supplies humidity to reduce shrinkage. - Page 22 RECOMMENDED TEMPERATURES, TIMES AND NUMBER OF RACKS FOR BAKING TEMPERATURE TIME IN NO. OF PRODUCT °F (°C) MINUTES RACKS Cakes Sheet Cakes 18 x 26 x 1" (457 x 660 x 25 mm) pan Scaled 4 to 6 lb (2 to 2.7 kg)/pan 325-360 (163-182) 20 to 23...
- Page 23 REHEATING PREPARED FOODS TEMPERATURE TIME IN NO. OF PRODUCT °F (°C) MINUTES RACKS Frozen French Fries 400-450 (204-232) 6 to 8 2 to 3 Frozen TV Dinners 350-400 (177-204) 10 to 12 2 – 5 Frozen Entrees 300-350 (149-177) 10 to 20 2 –...
-
Page 24: Guidelines For Maintaining Stainless Steel Surfaces
CLEANING Disconnect the electrical power to the machine and follow lockout / tagout procedures. Allow the oven to cool before cleaning. Snorkel The snorkel (heat circulation tube), located in the back of oven cavity, should never be blocked. The snorkel should be kept clean at all times for proper operation of the oven. Clean with standard oven cleaner at least once a week. -
Page 25: Maintenance
MAINTENANCE The oven and its parts are hot. Use care when operating, cleaning or servicing the oven. Disconnect the electrical power to the machine and follow lockout / tagout procedures. LUBRICATION The fan motor comes with sealed bearings and requires no lubrication. VENT Periodically check the flue, when the oven is cool, to be sure it is free of obstructions. -
Page 26: Troubleshooting
• . s l SERVICE AND PARTS INFORMATION To obtain service and parts information concerning this model, contact the Vulcan-Hart Service Agency in your area (refer to our website, www.vulcanhart.com for a complete listing of Authorized Service and Parts depots). -
Page 27: Entretien
Lors www.vulcanhart.com. l’adresse à site notre visiter autorisées, pièces l’entretien service succursales complète liste Pour près. plus Vulcan-Hart l’entretien service avec communiquer four, pièces l’entretien renseignement tout Pour RECHANGE PIÈCES L’ENTRETIEN SERVICE secondes. plus pendant allumée ouverts. - Page 28 – – éclatant. plus lustre additionnelle protection pour Sheen) Super Benefit (tel inoxydable l’acier pour recommandé poli appliquer nécessaire, inoxydable. l’acier corrosion éviter pour fois désinfectants, chlorure plusieurs rincer contenant nettoyants utiliser devez vous essuyer. soigneusement Rincer chlorure. contenant nettoyants doux détergent Utiliser...
- Page 29 – – à à 425) à (400 à fondant fromage Sandwiches à à 475) à (425 à précuite pâte Surgelés – Pizzas à à 425) à (400 à 22,7 à à 450) à (400 à 22,7 à à 450) à (400 à...
- Page 30 – – à à 385) à (335 à maïs Pain plaque à à à 400) à (335 à plaque à à Poids à 400) à (335 à Plaque à à 375) à (325 à Muffins à à 400) à (350 à...
- Page 31 – – réduits. cuisson temps avec commerciale recette bonne toute pour résultats d’excellent obtenir pouvez Vous spéciales. recettes requiert four personnels. goûts l’installation à ingrédients, recettes, adapter seulement. d’exemple titre à suggérés sont grilles nombre cuisson, temps températures, SUGGÉRÉ CUISSON GUIDE recette.
- Page 32 – – Vulcan. l’entretien service avec communiquer four Éteindre thermostat. court-circuiter tenter produisait, cela défaut. faire à venaient primaires commandes four automatique l’arrêt assure indépendamment fonctionne surchauffe. qu’il empêcher pour four température capte sécurité thermostat d’un pourvus sont fours Tous SÉCURITÉ...
- Page 33 – – besoins. propres leurs à satisfaire pour grilles disposer façons d’autres développent utilisateurs quelques courantes, choses sont partiels chargements mixtes chargements Lorsque manuel). cuisson Guide référer l’eau contenant récipient pour d’espace suffisamment position grille positionnant hauteur. jusqu’à allant rôtis autres dindes rôtissage...
- Page 34 – – minute. encore indique minuterie refermée, puis secondes pendant ouverte porte minute d’une réduit produit temps exemple, minuterie. redémarrage porte fermeture jusqu’à minutage fonctions toutes interrompt produit autre ajouter pour porte L’ouverture minuterie Porte (marche-arrêt). STOP START touche appuyant tout annuler, à...
- Page 35 – – (marche-arrêt). STOP START touche fois deux appuyer Programmation, mode quitter Pour grille. numéro pour CUISSON TEMPS menu sauvegarder pour fois seconde (marche-arrêt) STOP START touche Appuyer LOC. indique l’afficheur (marche-arrêt); STOP START touche Appuyer verrouiller. pour (marche/arrêt) STOP START bouton d’appuyer...
- Page 36 – – programmé. qu’il fois grille numéro pour cuisson temps individuel menu sélectionnent grille touches NOUVEAU. À RALLUMER AVANT MINUTES ATTENDRE (ARRÊT). À PRINCIPAL secondaire menu L’INTERRUPTEUR METTRE S’ALLUMER, articles pour fois seconde Appuyer REFUSE BRÛLEUR (MARCHE). À PRINCIPAL L’INTERRUPTEUR METTRE 5 / 6 primaire...
- Page 37 – – résultats. meilleurs donnent températures temps déterminer pour aliments avec Expérimenter SEULEMENT. SUGGESTIONS titre à donnés sont manuel présent dans compris cuisson temps températures goûts, selon l’autre à personne d’une varient recettes Puisque inférieurs. sont cuisson temps températures plus, traditionnels;...
- Page 38 – – four. l’efficacité inévitablement entravera complètement fermer portes empêche corps Tout • nourriture. particule toute exemptes propres environnantes surfaces portes Garder • nécessaire. absolument s’avère cela sauf four portes ouvrir • élevée. plus température à seulement requise cuisson température à...
- Page 39 – – (arrêt). à électrique l’alimentation Mettre (arrêt). à principal l’interrupteur Mettre PROLONGÉ ARRÊT (arrêt). à principal l’interrupteur Mettre FOUR D’ARRÊT INSTRUCTIONS Sabbath. mode fonctionnement pour SHABBOS à hebdomadaire fonctionnement pour (marche) à principal l’interrupteur Mettre ventilateur. vitesse ainsi désirée température à...
- Page 40 – – désirée. préchauffage température atteint four lorsque s’éteint (chauffage) HEAT blanc voyant appropriés. bacs dans déposer aliments Préparer allumé. demeure s’allume (allumage) IGNITION voyant s’allumer, refuse brûleur plats. aliments divers cuisson températures temps pour SUGGÉRÉ CUISSON GUIDE reporter °F). à...
- Page 41 – – (arrêt). (marche) à four l’éclairage Commande — d’éclairage Interrupteur ventilateur (basse). (élevée) vitesse choisir Permet — vitesse Interrupteur pas. sert four lorsque l’avertisseur éteindre pour (arrêt) à minuterie Régler pas. s’éteint four mais écoulé, temps lorsque continuellement retentit sonore avertisseur cuisson.
- Page 42 – – (arrêt). (marche) à four l’éclairage Commande d’éclairage Interrupteur allumés. sont brûleurs lorsque ventilateur vitesse basse Utilise rôtissage. étape deuxième pendant °F) (160 °C maintien température choisit thermostat réglage lors rôtissage étape première pour & minuterie Utilise & ventilateur. élevée vitesse régulière...
- Page 43 – – (arrêt). (marche) à four l’éclairage Commande d’éclairage Interrupteur ventilateur (basse). (élevée) vitesse choisir Permet Vitesse Interrupteur pas. sert four lorsque l’avertisseur éteindre pour (arrêt) à minuterie Régler pas. s’éteint four mais écoulé, temps lorsque retentit sonore avertisseur cuisson. temps réglage Permet...
- Page 44 – – édition. dernière NFPA-70), (norme Code Electrical National conformes Données fils)/50/3 240/415 fils)/50/3 220/380 VC6GC fils)/50/3 220/380 VC4GC 240/50/1 VC6GD 240/60/1 VC4GD 208/60/1 120/60/1 sûreté dispositif maximale Intensité V/Hz/ph Modèles circuit minimale Intensité ÉLECTRIQUES CARACTÉRISTIQUES...
- Page 45 à l’immeuble l’extérieur à brûlés l’évacuation faire recommandé l’appareil. l’arrière à d’évacuation conduit dans brûlés débit obstruer D’ÉVACUATION CONDUIT nécessaire. Vulcan-Hart l’entretien service avec Communiquer chaleur. d’échangeur tubes flamme chambre dans carbone accumulation résulte jaune, pointe avec brûlent flammes insuffisant, d’air...
- Page 46 – – individuel. manuel robinet fermant canalisation l’appareil isoler psig), (1/2 3,45 à inférieure égale d’essai pression Lorsque gaz. conduite d’arrêt robinet four débrancher pression, d’essais lors psig) (1/2 3,45 à supérieure canalisation pression CANALISATION ESSAIS contient. qu’elle l’air tout évacuer pour conduite...
- Page 47 – – propane. naturel l’action à résister doivent tuyaux joints à pâte Fig. conduite d’alimentation raccords four. dessus entre tuyauterie Raccorder PL-53564 fournies. quatre moyen (Fig. superposition d’évacuation conduit Installer positionnement. goujons avec l’aligner soin prenant supérieur four déposer prévu l’emplacement à...
- Page 48 DISPOSITIF FIXER dispositifs • ANSI-Z21.41 normes conforme rapide débrayage à raccord d’un mobiles, appareils connecteurs 6.16 • ANSI-Z21.69 normes conforme Vulcan) fourni (non flexible connecteur d’un munir roulettes, installée être doit frire à plaque roulettes four Installation annulée. sera garantie...
- Page 49 Immédiatement l’appareil. livraison responsable entièrement transporteur soigneusement. inspecté été appareil l’usine, quitter Avant DÉBALLAGE immédiatement. Vulcan Compagnie représentant votre avec Communiquer l’appareil. installer pas, correspondent elles l’appareil. avant supérieur garnissage panneau derrière située l’appareil signalétique plaque spécifications...
- Page 50 Leur matériaux. meilleurs partir à soin grand plus avec fabriqués sont Vulcan série pulsé à fours l’autre. four d’installer permettant superposition nécessaire Garde-au-chaud Rôtissage fonction bas, rangement tablette d’une pourvu Support...
- Page 51 – – 2009 VULCAN-HART, COMPAGNIE © APPAREIL. FONCTIONNER FAIRE COURANT, PANNE ENTRETIEN. TOUT INSTALLATION TOUTE À PROCÉDER AVANT D’ENTRETIEN FONCTIONNEMENT D’INSTALLATION, INSTRUCTIONS LIRE MORT. MÊME BLESSURES MATÉRIELS, DOMMAGES CAUSER PEUVENT APPAREIL INCORRECTS L’ENTRETIEN MODIFICATION RÉGLAGE, L’INSTALLATION, AVERTISSEMENT APPAREIL. AUTRE TOUT APPAREIL PROXIMITÉ...
- Page 52 WWW.VULCANHART.COM (3-09) Rév. F31123 778-2791 (502) TÉL. ALIMENTAIRE, ÉQUIPEMENT GROUPE DIVISION 40201-0696 LOUISVILLE, 696, P.O. VULCAN-HART www.vulcanhart.com à site notre visiter près, plus autorisé service pièces détaillant repérer pour Vulcan-Hart concernant détails amples plus Pour VC4GD MODÈLE ML-136495 VC66GC ML-126613...
Need help?
Do you have a question about the VC4GD ML-126611 and is the answer not in the manual?
Questions and answers