Table of Contents
Advertisement
Quick Links
ECO2D & ECO2C
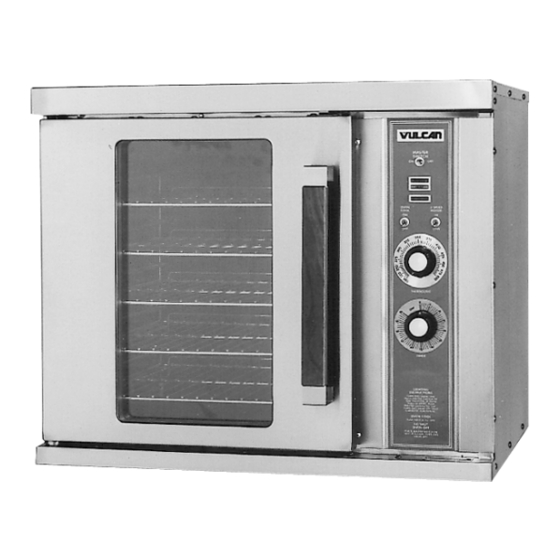
ELECTRIC CONVECTION OVENS
MODEL
ECO2D
ECO2C
For additional information on Vulcan-Hart Company or to locate an authorized
parts and service provider in your area, visit our website at www.vulcanhart.com
VULCAN-HART
DIVISION OF ITW FOOD EQUIPMENT GROUP, LLC
WWW.VULCANHART.COM
ML-114570
ML-114572
INSTALLATION &
OPERATION MANUAL
Model ECO2D
P.O. BOX 696
LOUISVILLE, KY 40201-0696
FORM 30976 Rev. D (Dec. 2007)
Advertisement
Table of Contents

Related Manuals for Vulcan-Hart ECO2C


Summary of Contents for Vulcan-Hart ECO2C
- Page 1 ELECTRIC CONVECTION OVENS MODEL ECO2D ML-114570 ECO2C ML-114572 For additional information on Vulcan-Hart Company or to locate an authorized parts and service provider in your area, visit our website at www.vulcanhart.com VULCAN-HART DIVISION OF ITW FOOD EQUIPMENT GROUP, LLC WWW.VULCANHART.COM INSTALLATION &...
-
Page 2: Installation
(0.37 KW) oven racks are optional. Each oven is provided with a standard 208 or 240 volt, 60 Hz., and 1- or 3-phase electrical service. Porcelain oven interior is standard; stainless steel interior is optional. Satinless steel exterior is standard. Door hinged on left is standard. -
Page 3: Installation Codes And Standards
The 4" (10 cm) or 6" (15 cm) legs are packed inside the oven during shipment and must be installed on the bottom of the oven. Position the oven on its left side, taking care not to scratch or damage it. - Page 4 Carefully place the top oven in position above the bottom oven. LEVELING Once the oven is in its permanent position, place a carpenter's level on the oven rack. If the oven is installed on legs, turn adjustable feet in or out to level oven front-to-back and side-to-side. If the oven is installed on casters, loosen set screws and turn casters in or out to level oven front-to-back and side- to-side.
-
Page 5: Electrical Connections
ELECTRICAL DATA Knockouts are provided on the back and bottom of the oven for making conduit connections. Remove the screws from the front control panel for access to the terminal block. Wire and required hardware for making connections between stacked ovens are furnished with the leg stack set. -
Page 6: Operation
FUSE HOLDERS Fig. 3 — Turns oven control circuits ON or OFF. — Allows the fan motor to run with the doors ajar to speed oven cooling. — Controls oven temperature during cooking operation. — Use to set cooking cycle time. Timer range is 0 to 60 minutes. -
Page 7: Before First Use
BEFORE FIRST USE Before using the oven for the first time, it must be "burned in" to release any odors that might result from heating the new surfaces in the chamber. 1. Using a clean damp cloth, wipe the inside of the oven, including the racks. -
Page 8: Thermostat Control
CONTROLS — Model ECO2C Built before October 1999 (Fig. 4) TEMPERATURE KNOB ROAST BUTTON THERMOMETER BUTTON START/STOP BUTTON GENTLE BAKE BUTTON THERMOSTAT CONTROL Temperature Display (When not timing product). Displays set cook temperature while the light in the Roast Button is lit. Will be overridden to display actual cavity temperature for 8 seconds when Thermometer Button is pushed. -
Page 9: Timer Control
1. Selects the Roast mode, indicated by the Roast Button Light described above. 2. Has no effect if timing in the Hold mode. Thermometer Button — When pressed, displays the actual oven temperature for about 8 seconds, then returns to the set temperature. - Page 10 1. When not timing, allows setting / enabling a hold mode setting of ---°F (---°C), meaning no hold will take effect. 2. Any other temperature means that when the actual cook time has ended, the oven will enter the Hold mode and use the hold temperature.
- Page 11 End of Day 1. Push ON / OFF / OVEN COOL switch to OVEN COOL. Leave door ajar while the fan is on to cool the oven. 2. When the oven has cooled sufficiently, push the ON / OFF / OVEN COOL switch to the OFF position and clean the oven.
-
Page 12: Menu Select
CONTROLS — Model ECO2C Built after October 1999 R & H MODE R & H OVEN OVEN MODE READY HEATING MENU SELECT OVEN PRIMARY READY SECONDARY OVEN HEATING PRIMARY SECONDARY ROAST & HOLD START STOP MENU RACK POWER LIGHTS OVEN... -
Page 13: Manually Setting The Temperature And Cook Time
MANUALLY SETTING THE TEMPERATURE AND COOK TIME To Set the Temperature • Press the SET button. Press the TEMPERATURE button; StPt displays to indicate Setpoint. • Use the Up and Down Arrow keys to increase or decrease the displayed Temperature value. •... - Page 14 At startup, the display will initially show a Point, the set temperature displays. The READY light is lit, the HEAT light goes out, and the oven is ready for you to select the Cook Time, Menu Item Cook Time, or Menu / Rack # Cook Time.
-
Page 15: Proper Utensils
Roast thermostat for the amount of time set on the Timer. After the lapsed time counts down to 00:00, Second Stage Cooking begins. During Second Stage Cooking, the heating elements are off as the temperature in the oven declines to the Hold Temperature. The doors should remain closed during Second Stage Cooking. -
Page 16: Operating Hints
OPERATING HINTS When using the convection oven for the first time with a particular food, check the degree of doneness periodically before the suggested time has elapsed to make sure the desired doneness is achieved. Record your temperature and time settings for various products. The convection oven can provide consistent, repeatable results. -
Page 17: Suggested Cooking Guidelines
SUGGESTED COOKING GUIDELINES The following lists are suggested baking times and temperatures for the ECO2D or ECO2C oven. These guidelines, which will vary depending on product temperature, size, shape, etc., are SUGGESTIONS ONLY and should be adjusted to suit your operation. - Page 18 The following are suggested roasting times and temperatures for model ECO2C. These guidelines, which will vary depending on product temperature, size, shape, etc., are SUGGESTIONS ONLY and should be adjusted to suit your operation. ROAST TEMPERATURE HOLD TEMPERATURE DONENESS WEIGHT OF ROAST POUNDS Overall oven interior dimensions may limit the size of larger roasts that can be accommodated.
-
Page 19: Maintenance
The door hinges and mechanism require occasional lubrication with mineral oil. SERVICE AND PARTS INFORMATION To obtain service and parts information concerning this model, contact the Vulcan-Hart Service Agency in your area (refer to our website, www.vulcanhart.com for a complete listing of Authorized Service and Parts depots). - Page 20 FORM 30976 Rev. D (Dec. 2007) PRINTED IN U.S.A. – 20 –...
Need help?
Do you have a question about the ECO2C and is the answer not in the manual?
Questions and answers