Polar Electro Mars 2415 Instruction For Users
Universal loading charger log
Hide thumbs
Also See for Mars 2415:
- Instruction for users (29 pages) ,
- Instruction for users (12 pages) ,
- Instruction for users (48 pages)
Table of Contents
Advertisement
Available languages
Available languages
Quick Links
Advertisement
Table of Contents

Related Manuals for Polar Electro Mars 2415


Summary of Contents for Polar Electro Mars 2415
- Page 1 UNIVERSAL LOADING CHARGER Istruzioni d’uso per l’utilizzatore. Istructions for users. Bedienungsanleitung für benutzer. Instrukcja obsługi dla użytkowników. Instrucciones de uso para el usuario. S.N.:...
-
Page 2: Eu Declaration Of Conformity
Leading in technology EU DECLARATION OF CONFORMITY I seguenti prodotti Polar/ Mars 2415/Mars 2430/Mars 1270BS/Mars 12140BS/Mars 4807/ The following products/ Mars 4815/Mars 2450/Mars 4830/Mars 12-4830/Mars 24100/ Die folgenden Produkte/ Mars 4860/Q1/Q2/Q3/Q4/Q5/Q6/Q7/Q8/Q9/Q10/Q11/Q209/ Następujące produkty/ Q210/Q211/Q209 LOG/Q210 LOG/Q211LOG/Q418 LOG/ Los siguientes productos:... - Page 3 FIG. A FIG. B Voltage/element Current V₂ V₁ V₃ start I /4 15%I Floa ng Bulk Absorp on Condi oning* Final Charge maintainer Max 10h Max 4h Max 4h...
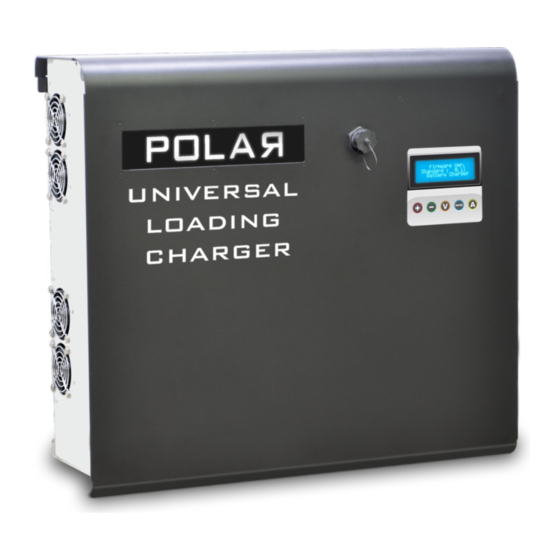
- Page 4 Riferimento FIG.A / Despription of FIG.A / Beschreibung zu FIG. A. / Opis do FIG.A / Referencia FIG.A - Display LCD con tasti touch Targa dati tecnici - LCD display with touch keys - Nameplate - Plakette mit technischen Daten - LC- Display mit Drucktasten - Wyświetlacz z klawiszami dotykowymi - Tabliczka znamionowa...
- Page 5 FIG. C POLAR s.r.l. Made in ITALY TIPO UNIVERSAL LOADING S.N. TYPE CHARGER LOG 50/60 Batteria Elementi max V Battery Cells Corrente di carica max A Charge current Curva di carica IP 44 IUIa Charging curve Riferimento FIG.C / Despription of FIG.C / Beschreibung zu FIG.
- Page 6 Legenda colori pannello LED/ LED panel colour legend / Farblegende LED-panel / Panel LED opis kolorów / Clave con colores del panel de LED Ba eria non connessa LAMPEGGIANTE BLU Ba erie ist nicht angekoppelt LICHT BLINKT BLAU Ba ery not connected FLASHING BLUE Bateria niepodłączona MIGAJĄCY NIEBIESKI...
- Page 7 MANUALE DI ISTRUZIONI UNIVERSAL LOADING CHARGER LOG LEGGERE ATTENTAMENTE LE SEGUENTI ISTRUZIONI PRIMA DI CONNETTERE IL DISPOSITIVO ALLA RETE DI ALIMENTAZIONE E/O ALLA BATTERIA. ASSICURARSI INOLTRE CHE LA TAGLIA DEL DISPOSITIVO SIA ADEGUATA ALLA BATTERIA AD ESSO CONNESSA. Leggere attentamente queste istruzioni per utilizzare il dispositivo al meglio ed evitare potenziali problemi in futuro.
- Page 8 CURVE DI CARICA I caricabatterie Universal Loading Charger LOG hanno la possibilità di caricare tutti i tipi di batterie comunemente in commercio a seconda della loro tecnologia di costruzione e delle necessità dell'utente. Ogni modello di caricabatterie Polar Universal Loading Charger LOG è...
- Page 9 COLLEGAMENTO ALLA RETE DI ALIMENTAZIONE Per il collegamento alla rete di alimentazione servirsi del cavo uscente dall'apparecchio alla cui estremità sarà sufficiente collegare una spina idonea corredata di morsetto di terra o usare la presa inclusa se presente. Evitare l'impiego di prolunghe. La presa di corrente a cui si collegherà il carica batterie dovrà...
- Page 10 LEGENDA SEGNALAZIONI COLORI PANNELLO LED I caricabatterie U.L.C. LOG sono dotati di un pannello frontale retroilluminato con LED RGB che segnala lo stato di carica attraversoil cambiamento di colore (Vedi fig pag. 2). Di seguito viene illustrato il significato dei colori nei vari stati del caricabatterie: BLU LAMPEGGIANTE: Caricabatterie pronto per iniziare la carica al collegamento della batteria.
- Page 11 Durante la carica il display mostra la 10.24.42 percentuale stimata di carica della batteria. Toccando il tasto durante la carica si possono visualizzare a scorrimento: 10.24.42 - Ampere-Ora (Ah) assorbiti dalla batteria dall’inizio della carica attuale. - Tensione (V) attuale della batteria. 10.24.42 - Corrente (A) attualmente erogata dal 51.7 V...
-
Page 12: Impostazione Data E Ora
IMPOSTAZIONE TENSIONE, CORRENTE e CURVA DI CARICA 10.24.42 Per impostare i parametri di carica occorre accendere il caricabatterie, scollegato dalla batteria. Battery Dalla schermata No Battery è possibile modificare le impostazioni di tensione, corrente e curva di carica con i seguenti tasti: Per impostare la tensione nominale. - Page 13 Arrivati a questa schermata premere il tasto per entrare nella modalità di programmazione data e ora. Premere i tasti per aumentare o diminuire i valori. Una volta impostato il primo valore, attendere la fine della barra sottostante per passare al valore successivo. Time: 10.16.33 L’ordine di impostazione è:...
- Page 14 Una volta impostata l’ora o il tempo di ritardo per l’avvio 10.26.14 della carica, collegare la batteria al caricabatterie. Start at: Apparirà la schermata con l’orario previsto Time: 12.56 per l’inizio della carica. ATTENZIONE! l’impostazione di partenza programmata effettiva sarà sempre l’ultima impostata. Per resettare ed annullare entrambe le impostazioni di partenza programmata, quindi sia la partenza ad un orario prefissato che la partenza dopo un certo lasso di tempo, dalla schermata ‘‘No Battery’’...
-
Page 15: Aggiornamento Firmware
I dati vengono salvati sulla chiavetta USB in un file denominato DATALOG.csv. Il file DATALOG.csv è consultabile tramite il software Polar Charger Analyzer. Il software Polar Charge Analyzer è incluso all’interno della chiavetta USB fornita insieme al caricabatterie oppure è scaricabile dal nostro sito web www.polar-electronics.com nell'apposita area download. -
Page 16: Garanzia
GARANZIA Durata: La garanzia ha validità di 12 mesi. Decorrenza: La data di spedizione dallo stabilimento POLARs.r.l. rappresenta la data di decorrenza. Copertura: La garanzia obbliga la ditta costruttrice POLAR s.r.l. a riparare o sostituire gratuitamente tutti i componenti soggetti a difetti accertati. Sarà... - Page 17 INSTRUCTION MANUAL OF UNIVERSAL LOADING CHARGER LOG CAREFULLY READ THE FOLLOWING INSTRUCTIONS BEFORE CONNECTING THE DEVICE TO THE POWER SUPPLY AND / OR THE BATTERY. ALSO, MAKE SURE THAT THE SIZE OF THE DEVICE IS APPROPRIATE FOR THE BATTERY CONNECTED TO IT. Read these instructions carefully to make the best use of your device and avoid future problems.
- Page 18 CHARGE CURVES The Universal Loading Charger LOG series chargers have the ability to charge all types of batteries commonly present on the market, depending on their construction technology and user needs. Each Universal Loading Charger LOG charger model can be customized by setting the charging curve according to user needs, modifying three parameters: nominal battery voltage, charging current and battery type.
- Page 19 CONNECTION TO THE POWER SUPPLY To connect the device to the power supply, use the cable coming out of the appliance. At its extremity it will be sufficient to connect a suitable plug equipped with a ground terminal or use the socket included, if present. Avoid the use of extensions.
- Page 20 LED PANEL- THE MEANING OF COLORS U.L.C. LOG chargers are equipped with a backlit front panel with RGB LED lights that indicates state of charge by changing color (See fig A on page 2). The meaning of the colors in the various states of charge is listed below: BLINKING BLUE: Charger is ready to start charging on battery connection.
- Page 21 10.24.42 While charging, the display shows the estimated battery charge percentage. Touching the key during charging, 10.24.42 you can scroll through: - Ampere hour (Ah) stored by the battery since the start of the current charge. 10.24.42 Battery voltage 51.7 V - Actual charging current (A).
-
Page 22: Date And Time Setting
VOLTAGE, CURRENT AND CHARGING CURVE SETTINGS 10.24.42 To set up the charging parameters, turn on the charger disconnected from the battery. Battery From the No Battery screen it’s possibleto change the voltage, current charging curve of the charger using the following buttons: Press to set the nominal voltage. -
Page 23: Delayed Start
At this screen, press to enter the date and time setup mode. Press to increase or decrease the values . Once the first value is set, wait till the progress bar disappears and it will move automatically Time: 10.16.33 Date: -10-2021 to the next value. -
Page 24: Saving Log Data
Once the start time of the charging or delayed start 10.26.14 has been set, connect the battery to the charger. Start at: Then the scheduled time for the start of charging Time: 12.56 will appear on the screen. ATTENTION! The actual start delay will always be the last one set. To reset and cancel programmed start to charge settings, both set up of start time to charge and delay charge start, when you see "No Battery '' press to enter... -
Page 25: Firmware Update
The data is saved on the USB flash drive in a file called DATALOG.csv. The DATALOG.csv file can be open with the Polar Charger Analyzer software. The Polar Charge Analyzer software is included in the USB flash drive supplied with the charger or can be downloaded from our website www.polar-electronics.com in download area. -
Page 26: Warranty
WARRANTY Duration: The guarantee is valid for 12 months. Effective date: The shipment date from POLARs.r.l plant represents the effective date. Coverage: The guarantee obliges the manufacturer POLAR s.r.l. to repair or replace all components subject to ascertained defects free of charge. POLAR assistance service will be responsible for carrying out the repair or replacement as soon as possible, compatibly with internal commitments and workload, without any obligation of indemnity or compensation for direct or indirect damage. - Page 27 BEDIENUNGSANLEITUNG FÜR UNIVERSAL LOADING CHARGER LOG LESEN SIE DIE FOLGENDEN ANWEISUNGEN SORGFÄLTIG DURCH, BEVOR SIE DAS GERÄT AN DAS NETZ ANSCHLIEßEN. STELLEN SIE AUßERDEM SICHER, DASS DIE EINSTELLUNG DES GERÄTES MIT DER VERBUNDENEN BATTERIE UEBEREINSTIMMT. Bitte lesen Sie diese Anweisungen sorgfältig durch, um Ihr Gerät optimal zu nutzen und mögliche Probleme in Zukunft zu vermeiden.
- Page 28 LADEKURVEN Die Ladegeräte der Universal Loading Charger LOG-Serie haben die Fähigkeit, Laden Sie alle marktüblichen Batterietypen, je nach Konstruktionstechnologie und Benutzeranforderungen. Jedes Ladegerätmodell der Universal Loading Charger LOG-Serie kann individuell angepasst werden, indem die Ladekurve an die Bedürfnisse des Benutzers angepasst w ird, indem drei Parameter geändert werden: Nennbatteriespannung, Ladestrom und Batterietyp.
- Page 29 ANSCHLUSS AN DAS NETZWERK Nutzen Sie, zum Anschließen an die Stromversorgung, das an dem Gerät angebaute Kabel, an dessen Ende ein geeigneter Stecker mit Erdungsklemme angeschlossen sein muss, oder verwenden Sie den vorhandenen Stecker. Vermeiden Sie die Verwendung von Verlängerungen. Die Steckdose, an die das Ladegerät angeschlossen wird, muss proportional zur Leistung desselben sein und Sicherungen oder einen anderen Standardschutz aufweisen.
- Page 30 ANZEIGEN UND LED LEISTE (FARBEN) U.L.C. LOG Ladegeräte sind mit einer hintergrundbeleuchteten Frontplatte mit RGB-LED ausgestattet, die den Ladestatus mit einem Farbwechsel anzeigen ( iehe Abb. Seite ). Die Bedeutung der Farben waehrend der verschiedenen Ladevorgaenge ist nachstehend aufgeführt: BLINKEND BLAU: Das Ladegerät ist ladebereit. ROT: Batterie ladet, Ladezustand unter 80% : Bulk (siehe Abb.
- Page 31 Während des Ladevorgangs zeigt das Display 10.24.42 den geschätzten Prozentsatz der Akkuladung an. Wenn Sie während des Ladevorgangs tippen, können Sie durch: 10.24.42 - Bisher von der Batterie gespeicherte Amperestunde (Ah) - Aktuelle Batteriespannung (V). 10.24.42 - Strom (A), der derzeit vom Ladegerät 51.7 V geliefert wird.
- Page 32 SPANNUNGS-, STROM- UND LADEKURVENEINSTELLUNGEN 10.24.42 Um die Ladeparameter zu ändern, schalten Sie das von der Batterie getrennte Ladegerät ein.e Battery Auf dem Bildschirm „Keine Batterie“ können Sie die Spannung, den Strom und die Ladekurve des Ladegeräts mit den folgenden Schaltflächen ändern: Drücken Sie , um die Nennspannung einzustellen.
- Page 33 Drücken Sie auf diesem Bildschirm , um in den Einstellungsmodus für Datum und Uhrzeit zu gelangen. Drücken Sie , um die Werte zu erhöhen oder zu verringern. Sobald der erste Wert eingestellt ist, warten Sie, bis das Ende des Balkens darunter zum nächsten Wert übergeht.
- Page 34 Nachdem die Zeit oder Verzögerungszeit für den 10.26.14 Ladestart eingestellt wurde, schließen Sie den Akku Start at: an das Ladegerät an.Der Bildschirm mit der Time: 12.56 geschätzten Zeit für den Ladebeginn wird angezeigt. ACHTUNG! Die aktuelle Einstellung für den geplanten Start ist immer die zuletzt eingestellte, unabhängig von der eingestellten Uhrzeit und Uhrzeit.
- Page 35 Die Daten werden auf dem USB-Stick in einer Datei namens DATALOG.csv gespeichert.Die Datei DATALOG.csv ist über die Polar Charger Analyzer-Software verfügbar.Die Polar Charge Analyzer Software ist auf dem mit dem Ladegerät gelieferten USB-Stick enthalten oder kann von unserer Website: www.polar-electronics.com im entsprechenden Downloadbereich heruntergeladen werden.Um die Polar Charge Analyzer Software zu verwenden, schlagen Sie im Handbuch des Programms nach.
-
Page 36: Garantie
GARANTIE Dauer: Die Garantie beträgt 12 Monate. Datum des Inkrafttretens: Das Datum des Versands aus dem Werk POLARs.r.l. repräsentiert das Datum des Inkrafttretens. Deckung: Die Garantie verpflichtet den Hersteller POLAR s.r.l. alle Komponenten, bei denen festgestellte Mängel festgestellt wurden, kostenlos zu reparieren oder auszutauschen. Der POLAR-Servicedienst ist dafür verantwortlich, die Reparatur oder den Austausch so schnell wie möglich, im Einklang mit den internen Verpflichtungen des Dienstes, durchzuführen, ohne verpflichtet zu sein, direkte oder indirekte Schäden zu ersetzen... - Page 37 INSTRUKCJA OBSŁUGI UNIVERSAL LOADING CHARGER LOG PRZECZYTAJ UWAŻNIE PONIŻSZE INSTRUKCJE PRZED PODŁĄCZENIEM URZĄDZENIA DO ZASILANIA I/LUB BATERII. UPEWNIJ SIĘ RÓWNIEŻ, ŻE URZĄDZENIE JEST ODPOWIEDNIE DO PODŁĄCZANEJ BATERII. Przeczytaj uważnie te instrukcje, aby jak najlepiej wykorzystać urządzenie i uniknąć potencjalnych problemów w przyszłości. Polar s.r.l.
- Page 38 KRZYWE ŁADOWANIA Ładowarki U.L.C. LOG mają możliwość ładowania wszystkich typów baterii powszechnie dostępnych w sprzedaży w zależności od technologii budowy i zapotrzebowania użytkownika. Każdy model z serii U.L.C. LOG można programować, poprzez zmianę trzech parametrów: napięcie nominalne baterii, prąd ładowania, typ baterii. Programowanie ładowarki odbywa się...
-
Page 39: Podłączenie Do Zasilania
PODŁĄCZENIE DO ZASILANIA Aby pod łączyć do zasilania należy użyć przewodu wyjściowego na końcu którego wystarczy zamontować odpowiednią wtyczkę wyposażoną w zacisk uziemiający lub skorzystać z dołączonego gniazda, jeśli występuje. Unikaj używania przedłużaczy. Gniazdko do którego podłączona będzie ładowarka, musi być proporcjonalne do jego mocy i musi mieć wbudowane bezpieczniki lub inne standardowe zabezpieczenia. - Page 40 OBJAŚNIENIE KOLORÓW PANEL LED Prostowniki U.L.C. LOG są wyposażone w przedni panel podświetlany diodami RGB, który sygnalizuje stan naładowania baterii poprzez zmiane koloru. (Patrz fig. A str. 2) Znaczenie kolorów na różnych etapach ładowania przedstawiono poniżej: MIGAJĄCY NIEBIESKI: Ładowarka gotowa do rozpoczęcia ładowania po podłączeniu baterii.
- Page 41 Podczas ładowania wyświetlacz pokazuje 10.24.42 szacowany poziom naładowania baterii w procentach. Każdemu naciśnięciu odpowiada zmiana ekranu, na którym kolejno wyświetlane są: 10.24.42 - Amperogodziny (Ah) naładowane od początku bieżącego ładowania. 10.24.42 - Aktualne napięcie baterii (V). 51.7 V - Aktualny prąd ładowania dostarczany przez ładowarkę...
-
Page 42: Ustawianie Daty I Godziny
USTAWIANIE NAPIĘCIA, PRĄDU I KRZYWEJ ŁADOWANIA 10.24.42 Aby ustawić parametry ładowania należy włączyć ładowarkę nie podłączoną do baterii. Battery Z ekranu "No battery" można zmienić napięcie, prąd i krzywą ładowania ładowarki za pomocą następujących przycisków: Naciśnij, aby ustawić napięcie 2, 6, 12, 24, 36, 48, 64, 72 Voltage 24 V Current... - Page 43 Po pojawieniu się tego podglądu należy nacisnąć przycisk aby wejść w tryb programowania daty i godziny. Naciskając zwiększa się bądź zmniejsza wyświetlane wartości. Po ustawieniu pierwszej wartości poczekaj do końca paska wyświetlanego poniżej, aby przejść do ustawienia kolejnej wartości. Kolejność ustawiania: Time: 10.16.33 dzień-miesiąc-rok-godzina-minuty...
- Page 44 Po ustawieniu godziny lub opóźnienia rozpoczęcia 10.26.14 ładowania, podłącz baterię do ładowarki. Start at: Po podłączeniu baterii na wyświetlaczu pojawi się Time: 12.56 informacja o zaplanowanej godzinie rozpoczęcia ładowania. UWAGA: faktyczne opóźnienie startu ładowania będzie zawsze ostatnim ustawionym, niezależnie od ustawionego czasu opóźnienia czy godziny. Aby zresetować...
-
Page 45: Aktualizacja Oprogramowania
Dane zostaną zapisane w pamięci USB w pliku o nazwie DATALOG.csv. Plik DATALOG.csv można otworzyć za pomocą oprogramowania Polar Charger Analyzer. Oprogramowanie Polar Charge Analyzer znajduje się w pamięci USB dołączonej do ładowarki lub można je pobrać z naszej strony internetowej www.polar-electronics.com w sekcji plików do pobrania. - Page 46 GWARANCJA Gwarancja jest ważna przez 12 miesięcy. Czas trwania gwarancji liczony jest od momentu wysyłki urządzenia z POLAR s.r.l. Zakres: Gwarancja zobowiązuje producenta POLAR s.r.l. do bezpłatnej naprawy lub wymiany wszystkich elementów jej podlegających. Serwis firmy POLAR przeprowadzi naprawę lub wymianę zepsutych urządzeń w możliwie najkrótszym czasie, zgodnie z wewnętrznymi zobowiązaniami serwisu, bez żadnego obowiązku do rekompensaty lub odszkodowania za bezpośrednie lub pośrednie szkody.
- Page 47 MANUAL DE INSTRUCCIONES UNIVERSAL LOADING CHARGER LOG LEA ATENTAMENTE LAS SIGUIENTES INSTRUCCIONES ANTES DE CONECTAR EL DISPOSITIVO A LA FUENTE DE ALIMENTACIÓN Y/O A LA BATERÍA. TAMBIÉN ASEGÚRESE DE QUE EL TAMAÑO DE LA DISPOSITIVO ES APROPIADO PARA LA BATERÍA CONECTADA. Lea atentamente estas instrucciones para utilizar el aparato de la mejor manera posible y evitar posibles problemas en el futuro.
- Page 48 CURVAS DE CARGA Los cargadores de baterías de la serie Universal Loading Charger LOG tienen la capacidad de cargar todos los tipos de baterías disponibles en el mercado en función de su tecnología de la construcción y las necesidades del usuario. Cada modelo de cargador de la serie U.L.C.
- Page 49 CONEXIÓN A LA RED DE ALIMENTACIÓN Para la conexión a la red de alimentación, utilice el cable que sale del aparato, a cuyo extremo bastará con conectar un enchufe provisto de un terminal de tierra o utilice la toma de corriente incluida si está disponible. Evitar el uso de alargadores.
- Page 50 LEYENDA DE COLORES DEL PANEL LED Los cargadores de baterías POLAR de la serie U.L.C. LOG están equipados con un panel frontal retroiluminado con LEDs RGB que señalan el estado de carga a través del cambio de color (véase la figura A de la página 2). A continuación se explica el significado de los colores en los distintos estados del cargador: AZUL PARPADEANTE: Cargador listo para iniciar la carga al conectar la batería.
- Page 51 10.24.42 Durante la carga, la pantalla muestra el porcentaje estimado de carga de la batería. Al tocar el botón durante la carga pueden visualizarse desplazándose: 10.24.42 - Amperios-hora (Ah) absorbidos por la batería desde el inicio de la carga actual. - Tensión actual de la batería (V).
-
Page 52: Ajustes De Fecha Y Hora
AJUSTES DE TENSIÓN, CORRIENTE y CURVA DE CARGA 10.24.42 Para configurar los parámetros de carga hay que encender el cargador, desconectado del batería. Battery Desde la pantalla "No battery" es posible cambiar los ajustes de tensión corriente y la curva de carga con los siguientes botones: Para ajustar la tensión nominal. - Page 53 En esta pantalla, pulse la tecla para entrar en el modo de programación de fecha y hora. Pulse las teclas para aumentar o disminuir los valores. Una vez fijado el primer valor, espere al final de la barra siguiente para pasar al siguiente valor.
- Page 54 Una vez ajustada la hora o el tiempo de retraso para 10.26.14 iniciar la carga, conecte la batería Start at: Aparecerá la pantalla con la hora prevista para Time: 12.56 el inicio de la carga. ATENCIÓN: La hora de inicio real programada será siempre la última establecida. Para restablecer y cancelar los dos ajustes de arranque programado, es decir, tanto la de inicio como la de inicio después de cierto tiempo, desde la pantalla ''No battery'' mantenga pulsada la tecla...
-
Page 55: Actualización Del Firmware
Los datos se guardan en la memoria USB en un archivo llamado DATALOG.csv. Se puede acceder al archivo DATALOG.csv a través del software Polar Charger Analyzer. El software Polar Charge Analyzer se incluye en la memoria USB suministrada con el cargador o puede descargarse de nuestro sitio web www.polar-electronics.com en la página de descargas. - Page 56 GARANTÍA Duración: La garantía es válida durante 12 meses. Fecha de entrada en vigor: La fecha de envío desde la fábrica POLAR s.r.l. es la fecha efectiva. Cobertura: La garantía obliga a POLAR s.r.l. a reparar o sustituir gratuitamente todos los componentes sujetos a defectos comprobados.
- Page 57 NOTE...
- Page 58 NOTE...
- Page 59 NOTE...
- Page 60 POLAR s.r.l. Via delle Albicocche, 170 47522 Cesena (FC) ITALY - Tel. +39 0541 627383 Fax. +39 0541 627124 e-mail: info@polar-electronics.com web: www.polar-electronics.com...
Need help?
Do you have a question about the Mars 2415 and is the answer not in the manual?
Questions and answers