
Related Manuals for VocoPro SONIC STATION


Summary of Contents for VocoPro SONIC STATION
- Page 1 Sonic Station All-In-One Surround Sound Tower Owner’s Manual ����� ������ ��� ������ ����� ������ ���� ��� ���� ����� ���� ��� ������ �������� ���� ���� ������ ������ ���� ���������� ����� ������ ������ ����� ���� �����...
- Page 2 Safety TO PREVENT FIRE OR SHOCK HAZARD. DO NOT EXPOSE THIS APPLIANCE TO RAIN OR MOISTURE. THIS APPLIANCE SHALL NOT BE EXPOSED TO DRIPPING OR SPLASHING WATER AND THAT NO OBJECT FILLED WITH LIQUIDS SUCH AS VASES SHALL BE PLACED ON APPARATUS.
- Page 3 Safety 13) Unplug this apparatus during lightning storms or when unused for long periods of time. 14) Refer all servicing to qualified service personnel. Servicing is required when the apparatus has been damaged in any way, such as power-supply cord or plug is damaged, liquid has been spilled or objects have fallen into the apparatus, the apparatus has been exposed to rain or moisture, does not operate normally, or has been dropped.
- Page 4 Club VocoPro for Karaoke news and events, chat rooms, club directories and even a KJ Service directory! We look forward to hearing you sound like a PRO, with VocoPro, your ultimate choice in Karaoke entertainment. Please record the model number and serial number below, for easy reference, in case of loss or theft. These numbers are located on the rear panel of the unit.
-
Page 5: Table Of Contents
Table of Contents FCC Information... Getting Started... - Accessories - Installing Microphone Clips Getting Connected... - Connecting Power - Powering another Device - Connecting to a TV / Video Monitor - Connecting to an Audio Mixer - Connecting the Microphones Connecting an Mp3 Player... -
Page 6: Fcc Information
UNIT!: This product, when installed as indicated in the instructions contained in this manual, meets FCC requirements. Modifications not expressly approved by Vocopro may void your authority, granted by the FCC, to use this product. 2. IMPORTANT: When connecting this product to accessories and/or another product use only high quality shielded cables. -
Page 7: Getting Started
Getting Started Make sure none of the following accessories are missing from the Sonic Station’s packaging: • 1 AC Power Cord • 1 A/V RCA cable • 2 AAA batteries Clip Screws • 1 Remote Control • 2 XLR to ¼” microphone cables AM Antenna •... -
Page 8: Getting Connected
Additional setup options include connecting to a TV / monitor (RCA, S-VIDEO, Component) or another audio input device (RCA or Coaxial). The sonic station can also be used to play an Mp3 Player such as an Ipod and up to two additional audio/video output devices such as CD and DVD players (RCA). -
Page 9: Connecting To A Tv / Video Monitor
1. Connect each end of the Component video cables to the Y Cb/Pb Cr/Pr outputs on the rear panel of the Sonic Station 2. Connect the other ends of the S-VIDEO cables to the Component inputs on a TV / video monitor [Fig. -
Page 10: Connecting To An Audio Mixer
1. Connect one end of the L/R (red & white) RCA cable to the red and white audio outputs labeled MIXED OUTPUT on the rear panel of the Sonic Station 2. Connect the other end of the L/R (red & white) RCA... -
Page 11: Connecting An Mp3 Player
Connecting an Mp3 player An Mp3 player or other audio device with an 1/8” output jack can be connected to the Sonic Station and played through the speakers. Connecting an Mp3 Player [Fig. J] 1. Pull out the 1/8” cord located in the Mp3 Player slot and connect it to the Mp3 player’s 1/8”... -
Page 12: General Operations
• Tuner: Turns on the AM/FM tuner for radio listening • AV1: For playing a device that is connected to the 1/8” Mp3 player jack on the top of the sonic station or the AV1 RCA audio/video inputs on the rear panel •... -
Page 13: Input Channels
• Digital (Disc mode only) This option is only available when the Sonic Station is in Disc Mode. Digital Mode provides true digital 5.1 surround sound and is most recommended for DVDs that are AC-3 equipped. In Digital mode, the signal bypasses the Sonic Station’s internal analog board and is purely digital. -
Page 14: Operations (Disc Mode)
Access DISC mode by either pressing DVD on the remote control or by pressing the SELECT button on the front panel until the display screen says disc. Loading a Disc 1. Press the OPEN/CLOSE button on the remote control or the EJECT button on the front panel of the Sonic Station to open the disc tray 2. Insert a disc 3. -
Page 15: Slow-Motion
Operations (Disc Mode) Slow-motion Playback using the SLOW button Use the SLOW button on the remote control to cycle between 4 slow-forward modes and 4 slow-reverse modes: 1/2 - Forwards at 1/2 the actual time 1/4 - Forwards at 1/4 the actual time 1/8 - Forwards at 1/8 the actual time 1/16 - Forwards at 1/16 the actual time 1/2 - Reverse at 1/2 the actual time... -
Page 16: Zooming In And Out
Operations (Disc Mode) Zooming in and Out The Sonic Station lets you zoom in and out on the video screen. Press the ZOOM button on the remote control to cycle through the available zoom settings. Zoom in • 2X - Zooms in 2X the original size •... - Page 17 2. Press the red POWER button on the remote to enter Standby mode. NOTE: Do not press the main power button on the Sonic Station itself, as this will turn the unit completely off. 3. Press the red POWER button on the remote control to turn the Sonic Station back on.
-
Page 18: Operations (Mp3 And Avi / Divx)
Operations (Mp3 and AVI / DivX) When playing Mp3 and DivX files, the Sonic Station must be connected to a TV in order to see and navigate through the file menu. Use the arrow buttons on the remote control to navigate through the file menu and the ENTER button to select a file to play. -
Page 19: Microphone Operations
Microphone Operations Turning on the Microphones Each microphone has a power switch on it. 1. Flip the microphone’s power switch UP to turn the microphone on 2. Flip the microphone’s power switch DOWN to turn the microphone off Setting the Speakers for Vocals When using the microphones, make sure the speakers are set to Karaoke mode for optimal vocal sound. -
Page 20: Adjusting The Tone
Microphone Operations Adjusting the Individual Microphone Volume controls Each microphone channel has its own volume control located on the front panel of the Sonic Station. Each one can be adjusted separately, providing a great sounding vocal mix. Turn the MIC 1 VOL and/or MIC 2 VOL control clockwise to raise the volume and counter-clockwise to lower the volume. -
Page 21: Am/Fm Tuner Operations
PRESET buttons on the remote control or front panel to search through radio stations that have been programmed into your preset list. Programming Preset Radio Stations The Sonic Station allows you to program up to 40 radio stations (20 in FM and 20 in AM) as presets for instant access. 1. Use the search buttons to find the desired radio station... -
Page 22: Descriptions And Functions
1. Open/Close button - Opens and closes the disc tray. 2. Power button - Turns the Sonic Station On or to Standby mode. To turn the Sonic Station completely off, use the power button on the front panel. NOTE: The main power must be on in order to use this power button. Turn on the main power with the power button on the front panel. - Page 23 Descriptions and Functions (B-Scan - F-Scan) buttons - Scans through a track when in DISC mode or searches through radio stations in TUNER mode: scans backwards through the current track or through radio stations and forwards through the current track or through radio stations. (prev and next) buttons - Skip tracks when in DISC mode or searches through preset radio stations in TUNER mode: jumps to the previous track or preset radio station and...
- Page 24 Descriptions and Functions 29. OSD button - Cycles through the different On Screen Display options. See the Operations section in this manual for detailed instructions on selecting OSD options. 30. Resume button - Resumes playback from exact spot where a disc has been stopped in standby mode. 31.
-
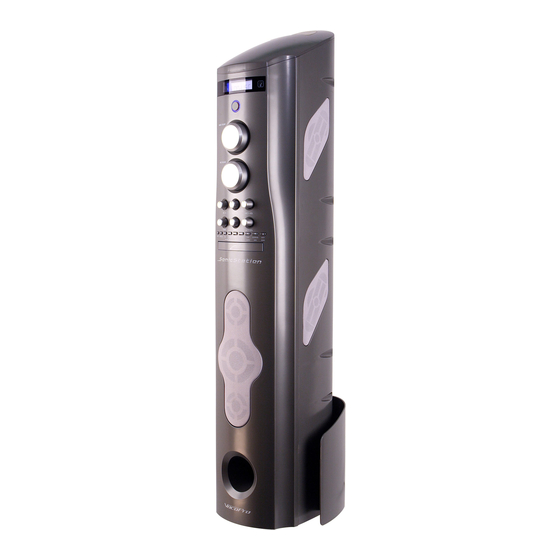
Page 25: Front
Front Panel 1. Mp3 player slot (AV1) - Connect an Mp3 player or other audio device to the Sonic Station using the 1/8” jack. NOTE: The Sonic Station must be set to AV1 mode to turn on the AV1 channel. See the Operations section of this manual for detailed instructions on setting the Sonic Station to AV1 mode. -
Page 26: Front
Descriptions and Functions Front Panel... -
Page 27: Remote Control
NOTE: The Sonic Station must be set to Component (V/Pb/Pr) video mode when using the component out- puts. Use the V-MODE button on the remote control to set the Sonic Station to Component video mode. 4. Digital Coaxial (audio-only) - Connects to a receiver/mixer with a Digital Coaxial input. -
Page 28: System Setup Menu
Use DIRECTION keys to make your selection. 6. Last Memory ON: Last Memory remembers the last spot played on a disc and returns to it when the Sonic Station is turned back on from Standby mode. -
Page 29: Audio Setup
System Setup Menu Audio Setup Page 1. Speaker Setup Opens up the Speaker Setup page 1.1 Downmix LT/RT - Sound output is divided with the Left coming out of the Left speaker and the Right coming out of the Right speaker. STEREO - Sound output is in Stereo Mode. - Page 30 Turn PRO LOGIC II surround sound on and off. When it is turned on, more options are available 5.1.2 MODE Select the PRO LOGIC II mode that best fits how you are using the Sonic Station 5.1.3 Panorama Turns Panorama effect on or off 5.1.4 Dimension Size...
-
Page 31: Video Setup
System Setup Menu Video Setup page 1. Component Select the digital video output • If using the S-Video output • If using the Component output and connected to a High-Definition Y/Cb/Cr TV • If using the Component output and connected to a Progressive scan Y/Pb/Pr TV 2. - Page 32 System Setup Menu 3. AUDIO Select the audio caption language for DVDs with multiple caption languages available. 4. Subtitle Select the subtitle language for DVDs with multiple subtitle languages available. NOTE: not all DVDs have multiple subtitle languages available. 5. Disc Menu Select the disc menu language for discs with multiple disc menu languages available NOTE: not all discs have multiple disc menu languages available.
-
Page 33: Troubleshooting
There is no power • Make sure the power cord is firmly connected to the back of the Sonic Station and to the power outlet • If using a power strip/surge-protector, make sure that it is plugged in and switched on •... - Page 34 Featured VocoPro Products Here are some of the other great VocoPro products featured in this manual. You can find more information at www.vocopro.com our website: LTV-5 5” LCD Monitor with Digital Tuner DA-8909RV World’s First Digital Karaoke Amplifier/ Mixer with...
- Page 35 Notes...
- Page 36 ���������������������������������� ���������������...
Need help?
Do you have a question about the SONIC STATION and is the answer not in the manual?
Questions and answers