
Related Manuals for Planet Networking & Communication IPX-1100

Summary of Contents for Planet Networking & Communication IPX-1100
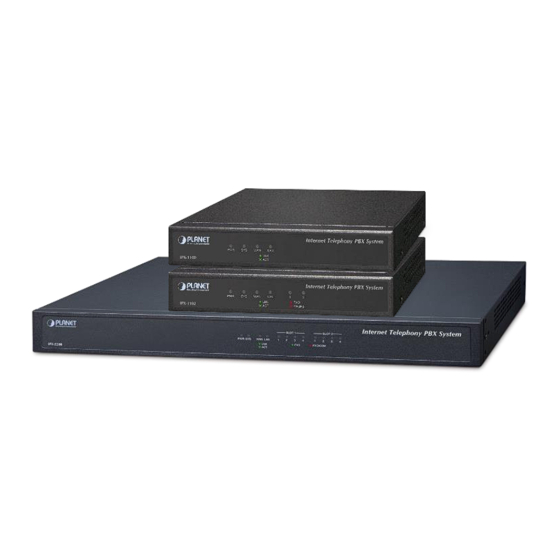
- Page 1 IPX-1100/IPX-1102/IPX-2200 Internet Telephony PBX System IPX-1100 / IPX1102 IPX-2200...
- Page 2 IPX-1100/IPX-1102/IPX-2200 Copyright Copyright (C) 2024 PLANET Technology Corp. All rights reserved. The products and programs described in this User’s Manual are licensed products of PLANET Technology. This User’s Manual contains proprietary information protected by copyright, and this User’s Manual and all accompanying hardware, software, and documentation are copyrighted.
- Page 3 The PLANET logo is a trademark of PLANET Technology. This documentation may refer to numerous hardware and software products by their trade names. In most, if not all cases, their respective companies claim these designations as trademarks or registered trademarks. Revision User’s Manual of PLANET Internet Telephony PBX System Model: IPX-1100/IPX-1102/IPX-2200v3 Release: Feb. 2024...
-
Page 4: Table Of Contents
1. Overview ....................... 9 1.1 Introduction ........................ 9 1.1.1 Package Contents ................15 1.2 Mechanical Design ....................16 1.2.1 IPX-1100/IPX-1102/IPX-2200 ............16 1.2.2 IPX-2200 ................... 19 1.3 Plug-in Modules for IPX-2100/IPX-2200/IPX-2500 ..........21 1.4 Specifications ......................24 1.5 Key Features ......................30 2. - Page 5 IPX-1100/IPX-1102/IPX-2200 4.2.5 Direct Routing ................... 64 4.2.6 Blacklist ..................... 66 4.3 Outbound Control ....................67 4.3.1 Trunks ....................67 4.3.2 Dial Rules ..................76 4.3.3 Dial Permissions ................78 4.3.4 PIN Sets .................... 80 4.4 Audio Library ......................81 4.4.1 Music On Hold .................. 81 4.4.2 IVR Prompts ..................
- Page 6 IPX-1100/IPX-1102/IPX-2200 4.7.3 Call Parking Feature Codes ............107 4.7.4 Call Transfer Feature Code ............. 108 4.7.5 Blacklist Feature Code ..............109 4.7.6 Call Spy Feature Code ..............110 4.7.7 Call Queue Feature Code ..............111 4.7.8 Conference Feature Code ..............111 4.7.9 Wakeup Call Feature Code .............
- Page 7 IPX-1100/IPX-1102/IPX-2200 6.4.2 Files ....................126 6.4.3 Custom Template ................126 7. System ......................127 7.1 Reboot /Reset ......................127 7.1.1 Cron Reboot ..................127 7.1.2 Reboot .................... 127 7.1.3 Reset ....................128 7.2 Region /Time ......................130 7.3 Storage ........................132 7.3.1 USB Storage ...................
- Page 8 IPX-1100/IPX-1102/IPX-2200 7.7.2 Intrusion Detection and Prevention ..........165 7.7.3 IP Blacklist ..................166 7.7.4 IP Whitelist ..................167 7.8 Backup/Upgrade ....................168 7.8.1 Upgrade ..................168 7.8.2 Backup .................... 169 7.9 System Logs ......................170 7.9.1 Web Log ..................170 7.9.2 Other Log ..................
-
Page 9: Overview
PSTN calls, analog phones, IP phones and SIP-based endpoints. The IPX-1100 is a simplified version of IPX-1102 and is instrumental in establishing a robust VoIP system for small- and medium-sized businesses (SMBs). When seamlessly integrated with PLANET VoIP gateways (VGW-series), the IPX-1100 extends support for analog connections. - Page 10 IPX-1100/IPX-1102/IPX-2200 Replacing Old PBX Easily without New Wiring Cost-effective, easy-to-install and simple-to-use, the Internet Telephony PBX system converts standard telephones into IP-based networks. It enables the service providers and enterprises to offer users traditional and enhanced telephony communication services via the existing broadband...
- Page 11 IPX-1100/IPX-1102/IPX-2200 With the Internet Telephony PBX system, home users and companies are able to save the installation cost and extend their past investments in telephones, conferences and speakerphones. The Internet Telephony PBX system can be the bridge between the traditional analog system and IP network without having to invest heavily.
- Page 12 IPX-1100/IPX-1102/IPX-2200 Standard Compliance Compliant with the Session Initiation Protocol 2.0 (RFC 3261), the Internet Telephony PBX system is able to broadly interoperate with equipment provided by VoIP infrastructure providers, thus enabling them to provide their customers with better multi-media exchange services.
- Page 13 IPX-1100/IPX-1102/IPX-2200 Features System Highlights IPX-1100 / IPX-1102 50 concurrent calls and up to 100 registers 30 conference attendees 400-hour recording 2 built-in FXO interfaces (only for IPX-1102) IPX-2200 80 concurrent calls and up to 200 registers 60 conference attendees 15000-hour recording (internal storage) ...
- Page 14 IPX-1100/IPX-1102/IPX-2200 Mitigates SIP Register DoS attacks Prevents Abort Invite DoS attacks Prevents SSH Login DoS attacks Firewall and enhances HTTPS connection Geo-IP (Security policy based on IP address geographical locations) Data backup and recovery ...
-
Page 15: Package Contents
IPX-1100/IPX-1102/IPX-2200 1.1.1 Package Contents Thank you for purchasing PLANET Internet Telephony PBX system. Open the box of the Internet Telephony PBX system and carefully unpack it. The box should contain the following items: Model Package Description Quick Installation Guide x 1 IPX-1100 ... -
Page 16: Mechanical Design
IPX-1100/IPX-1102/IPX-2200 1.2 Mechanical Design 1.2.1 IPX-1100/IPX-1102/IPX-2200 IPX-1100 Front and Rear Panels LED Definition Front Panel LED Status Description Steady Green PBX Power ON PBX Power OFF Blinking Green System is working System doesn’t boot System failure Blinking Green... - Page 17 IPX-1100/IPX-1102/IPX-2200 IPX-1102 Front and Rear Panels LED Definition Front Panel LED Status Description Steady Green PBX Power ON PBX Power OFF Blinking Green System is working System doesn’t boot System failure Blinking Green Data transfer PBX network connection is established...
- Page 18 IPX-1100/IPX-1102/IPX-2200 Physical interface descriptions Power Adapter DC 12V, 1A The WAN/LAN port facilitates auto-negotiating Fast Ethernet 10/100BASE-T networks. This port enables seamless connectivity of your WAN/LAN IP PBX to an Internet access device, such as a router, cable modem, or ADSL modem, using a Cat5 twisted-pair Ethernet cable.
-
Page 19: Ipx-2200
IPX-1100/IPX-1102/IPX-2200 1.2.2 IPX-2200 IPX-2200 Front and Rear Panels LED Definition Front Panel LED Status Description Steady Green PBX Power ON PBX Power OFF Blinking Green System is working System doesn’t boot System failure Blinking Green Data transfer PBX network connection is established... - Page 20 IPX-1100/IPX-1102/IPX-2200 Physical interface descriptions Power Switch Switch the power on or off Power Cord AC 100~240V, 50/60Hz, 1.5A max The WAN/LAN port facilitates auto-negotiating Fast Ethernet 10/100BASE-T networks. This port enables seamless connectivity of your WAN/LAN IP PBX to an Internet access device, such as a router, cable modem, or ADSL modem, using a Cat5 twisted-pair Ethernet cable.
-
Page 21: Plug-In Modules For Ipx-2100/Ipx-2200/Ipx-2500
IPX-1100/IPX-1102/IPX-2200 1.3 Plug-in Modules for IPX-2100/IPX-2200/IPX-2500 IPX-21FO Module The IPX-21FO module provides 4 FXO interfaces for connecting PSTN lines provided by the telecom. It can be installed on both slots of the IPX-2100, IPX-2200 and IPX-2500 and provides maximal 8 FXO interfaces. - Page 22 IPX-1100/IPX-1102/IPX-2200 IPX-21FS Module (optional per project) The IPX-21FS module provides 4 FXS interfaces for connecting fax machines or analog phones. It can be installed on both slots of the IPX-2100, IPX-2200 and IPX-2500 and provides maximal 8 FXS interfaces.
- Page 23 IPX-1100/IPX-1102/IPX-2200 IPX-21MA Module (optional per project) The IPX-21MA (WCDMA) module provides 4 GSM/3G voice channels; it can be installed on the IPX-2200 for making and receiving phone calls from the GSM/3G network. It is designed with the SIM5320 series module for global market, and the SIM5320 is a dual-band WCDMA and quad-band GSM engine that works on frequencies like UMTS 850MHz, UMTS 900MHz, UMTS 1900MHz, UMTS 2100MHz, GSM 850MHz, EGSM 900MHz, DCS 1800MHz and PCS 1900MHz.
-
Page 24: Specifications
IPX-1100/IPX-1102/IPX-2200 1.4 Specifications IPX-1100/IPX-1102 IPX-1100 IPX-1102 Internet Telephony PBX system with Product Internet Telephony PBX system 2-port FXO (100 SIP User (100 SIP User registrations) registrations) Hardware 1 x 10/100BASE-T RJ45 port for WAN, connecting to broadband modem or a WAN router... - Page 25 IPX-1100/IPX-1102/IPX-2200 T.38 Fax (pass-through) Fax over IP Note: T.38 support is dependent on fax machine, SIP provider and network, transport resilience DTMF detection and generation Voice Processing RFC 4733, SIP info, in-band and Auto Internet Sharing DDNS client (Planet DDNS and easy DDNS) DHCP server/SNMP v1/v2 IEEE 802.1Q VLAN...
- Page 26 IPX-1100/IPX-1102/IPX-2200 LDAP Server for phonebook Record Files Download Ring Group, SIP Trunk Skype for SIP, Smart DID, System Log T.38 fax (pass-through), voicemail and voicemail to e-mail Time-based Rule PBX log, web access log and PBX debug log Call Back, Call Forward, Call Group...
- Page 27 IPX-1100/IPX-1102/IPX-2200 IPX-2200 IPX-2200 Product Internet Telephony PBX system (200 SIP Users registrations) Hardware 1 x 10/100BASE-T RJ45 for WAN, connecting to broadband modem or a WAN router 1 x 10/100BASE-T RJ45 for LAN, connecting to a LAN switch For external storage device...
- Page 28 IPX-1100/IPX-1102/IPX-2200 network, transport resilience DTMF detection and generation Voice Processing RFC 4733, SIP info, in-band and auto Internet Sharing DDNS client (Planet DDNS and easy DDNS) DHCP server/SNMP v1/v2 IEEE 802.1Q VLAN IP assignment (DHCP/Static) Network Features IPv4/IPv6 Manual configuration of static route table...
- Page 29 IPX-1100/IPX-1102/IPX-2200 LDAP Server for phonebook Record Files Download Ring Group, SIP Trunk Skype for SIP, Smart DID, System Log T.38 fax (pass-through), voicemail and voicemail to e-mail Time-based Rule PBX log, web access log and PBX debug log Call Back, Call Forward, Call Group...
-
Page 30: Key Features
IPX-1100/IPX-1102/IPX-2200 1.5 Key Features BLF (Busy Lamp Field) Blacklist (blacklist the last caller) Caller ID Smart DID DND (Do Not Disturb) Quick Setup Wizard WebRTC Flexible Dial Permissions Extension User Portal ... -
Page 31: Getting Started
IPX-1100/IPX-1102/IPX-2200 2. Getting Started 2.1 Hardware Installation Hardware installation of each model is documented in the “Quick Installation Guide”, and the guide was packed with each of the IP PBX packages. Please refer to the guide to install the unit into your local LAN. -
Page 32: Configuration Wizard
IPX-1100/IPX-1102/IPX-2200 2.3 Configuration Wizard Quick Setup Wizard is specially designed on v4.0.0 software for Planet’s IP IPX series to help you quickly and easily set up your IP PBX system within minutes. After logging to the system, click on the button on the bottom left to start the Quick Setup Wizard journey. - Page 33 IPX-1100/IPX-1102/IPX-2200 Click on the button to edit the extension parameter values, such as password, extension name, outbound CID, and email. Click on the button to save. After the extension configuration is done, please click on the button to move to the next step.
- Page 34 IPX-1100/IPX-1102/IPX-2200 Step 3: SIP Trunk Manager Set up the system’s SIP trunk settings. For detailed configuration, please refer to section Telephony- >Outbound Control->Trunks. Click on the button to edit the SIP trunk parameter values. Generally, Client Mode is the most commonly used to connect to the VoIP providers for low cost long distance and international phone calls, while the Server Mode is only used when users want to do SIP trunking between IPPBX's.
- Page 35 IPX-1100/IPX-1102/IPX-2200 Step 4: Operator Configuration Set up the system’s operator extension number. By default (when there is no incoming call destination number), all incoming calls will go directly to the operator extension number. After the operator set up is done, please click on the button to move to the next step.
- Page 36 IPX-1100/IPX-1102/IPX-2200 As the above picture shows, number starting with 9 will be sent from the FXO-1 and FXO-2 trunks. After the Dial Rules set up is done, please click on the button to move to the next step. Step 6: Network Settings Please fill in the required network parameter.
- Page 37 IPX-1100/IPX-1102/IPX-2200 Step 8: Proxy Settings Please fill in the required proxy service user information to activate the service. Please refer to the Remote Settings for more detailed step-by-step guide. Step 1: Fill in the basic user information such as company name, company location, etc. Then, select the domain server and set your own domain name (please choose the nearest domain server from your location).
- Page 38 IPX-1100/IPX-1102/IPX-2200 Step 9: Complete After all the configurations are done, you should see the Complete checkmark shown below. Please click on the Reboot button to reboot the system and take effect on all configuration changes.
-
Page 39: Dashboard
IPX-1100/IPX-1102/IPX-2200 3. Dashboard 3.1 Monitor The index interface is the system status page, which mainly displays system information and system resource information, such as the number of trunks, call statistics, system storage, etc. SIP Extension: The number of registered SIP extensions and the total number of SIP extensions in the system. - Page 40 IPX-1100/IPX-1102/IPX-2200 System Info Model: The model of the current device. Device Name: The given name of the current device. You may change the Device name under path: system-Settings-Web-Web Customization Hardware Version: The hardware version number of the current device ...
-
Page 41: Extensions
IPX-1100/IPX-1102/IPX-2200 3.2 Extensions On the Extensions page, you can see all extensions’ real-time status, such as online, offline, busy, and ringing. The IP address displayed below is the registered extension number corresponding to the registered terminal’s IP address. 3.3 Trunks On the Trunks page, you can view the status of all SIP trunks, IAX trunks, analog trunks, and E1/T1 trunks. - Page 42 IPX-1100/IPX-1102/IPX-2200 Name: Trunk Name Trunk Type: Type of trunk(Server or Client) IP: IP address of the trunk Delay: Delay in trunk’s data Status: Registration status of trunk Analog No.: Order number of trunk ...
-
Page 43: Telephony
IPX-1100/IPX-1102/IPX-2200 4. Telephony 4.1 Extensions Path: Telephony -> Extensions Extensions and departments should have been created during the Quick Setup Wizard process. You may manage extensions and departments here on this screen. If you have skipped the Quick Setup Wizard, you may create them here on this screen as well. - Page 44 IPX-1100/IPX-1102/IPX-2200 Name: You may change the department name from the textbox. Ring Strategy: In the dropdown list select a desired ring strategy of how to ring the department (Ring Group) extensions upon incoming calls. Ring All: Ring all available member extensions until one answers (default).
-
Page 45: Ip Extensions
IPX-1100/IPX-1102/IPX-2200 4.1.2 IP Extensions Path: Telephony -> Extensions -> IP Extensions IP extensions are user extensions including desktop IP phones, softphones for Windows/Android/iPhone/Linux and other endpoints that support SIP/IAX2 protocol. The extensions are created through the quick setup wizard. To check or modify the extension properties please click the button. - Page 46 IPX-1100/IPX-1102/IPX-2200 Mobile Number: Note the mobile phone number of the extension Dial Permission: Defines which type of numbers the extension can dial. Language: Choose a specific system voice prompts. Outbound CID (1/2): Outbound CID will be passed to the called party while calling through the VoIP or digital trunk (E1/T1/BRI) lines.
- Page 47 IPX-1100/IPX-1102/IPX-2200 Voicemail: If this option is enabled and when an inbound call is not answered or the extension user is busy, the caller will be forwarded to voicemail. Remote Extension: If this option is enabled, users can remotely register extensions out of the LAN.
- Page 48 IPX-1100/IPX-1102/IPX-2200...
- Page 49 IPX-1100/IPX-1102/IPX-2200 Transport Protocol: The transport protocol to be used by SIP signaling. By default, it uses UDP protocol. If you choose to use TCP or TLS, please make sure the SIP IP phone uses the same protocol. Otherwise, you’ll get “403” error on SIP register.
- Page 50 IPX-1100/IPX-1102/IPX-2200 Define a Start Extension Number and the number of extensions to be created in the Count field. If you want to associate outbound CID numbers to the extensions, you’ll need to specify the first CID number in the Start Outbound CID (1/2) field and in the CID Calculation field specify the calculating of the following CID numbers.
-
Page 51: Analog Extensions
IPX-1100/IPX-1102/IPX-2200 4.1.3 Analog Extensions Path: Telephony -> Extensions -> Analog Extensions Analog extensions are generated automatically by the IP PBX system if FXS interfaces are detected. All you have to do is attach analog phones or fax machine to the FXS interface. The analog extensions can be used directly for phone calls;... - Page 52 IPX-1100/IPX-1102/IPX-2200 Extension number: This option can be defined as per your requirements. Alias: This option can be defined to identify this analog extension. Outbound CID: This option displays the number externally through digital trunk. Call Recording: This option could be enabled to record Inbound, Outbound or Both direction phone calls if necessary.
-
Page 53: Inbound Control
IPX-1100/IPX-1102/IPX-2200 4.2 Inbound Control Path: Telephony -> Inbound Control The Inbound Control section is where you define how Planet’s IPX IPPBX system handles incoming calls. Typically, you determine the phone number that outside callers have called (DID Number) and then indicate which extension, Ring Group, Voicemail, or other destination to which the call should be directed. - Page 54 IPX-1100/IPX-1102/IPX-2200 In the Name field a name is required to identify this IVR menu. In the Number field a number has been created for this IVR menu so that the user is able to dial this number and test the IVR options.
-
Page 55: Call Queue
IPX-1100/IPX-1102/IPX-2200 4.2.2 Call Queue Path: Telephony -> Inbound Control -> Call Queue A call queue places incoming calls in line to be answered while extension users are busy with other calls. The queued calls are distributed to the next available extension user in the order received. Once a call queue has been created, it can be assigned to specific extensions and configured to feature greetings, messages, and hold music. - Page 56 IPX-1100/IPX-1102/IPX-2200 Ring All: Ring all available agents until one answers (default). Leastrecent: Ring the extension of the Agent who has least recently received a call. Fewestcalls: Ring the extension of the Agent who has taken the fewest number of calls.
- Page 57 IPX-1100/IPX-1102/IPX-2200...
- Page 58 IPX-1100/IPX-1102/IPX-2200 Auto Fill if it’s set to be Yes, and multiple agents are available, the PBX will send one call to each waiting agent (depending on the ring strategy). Otherwise, it will hold all calls while it tries to find an agent for the top call in the queue, making the other callers wait.
- Page 59 IPX-1100/IPX-1102/IPX-2200 Caller Position Announcements is used to tell the callers how they’ve been waiting and the position in the queue. Announce Hold Time: Announce to the callers of the time they have been waiting, the first minute callers waiting in the queue will not hear such announcements.
-
Page 60: Time Conditions
IPX-1100/IPX-1102/IPX-2200 4.2.3 Time Conditions Path: Telephony -> Inbound Control -> Time Conditions Time conditions in Planet’s IPX series allow you to control what happens to inbound calls both during and outside (weekends/holidays) normal business hours. Time condition settings include Time Rule, Weekday and Holiday settings. - Page 61 IPX-1100/IPX-1102/IPX-2200 Now you could apply this time rule to the Inbound Routes. In the above example, there are only business hours and non-business hours for inbound calls. If you want inbound calls during your holidays to be handled by a holiday IVR, you could setup another IVR...
-
Page 62: Inbound Routes
IPX-1100/IPX-1102/IPX-2200 4.2.4 Inbound Routes Path: Telephony -> Inbound Control -> Inbound Routes The Inbound Routes settings tell your IPPBX system where to send those inbound calls coming in from the trunks. Calls can be sent to a variety of destinations, including extensions, departments (ring groups), call queues, IVRs, DISAs, conferences, paging groups, voicemail, fax, etc. - Page 63 IPX-1100/IPX-1102/IPX-2200 In the Inbound Destination field select a desired inbound destination for inbound calls from this trunk. Distinctive Ringtone is optional, if needed, you may specify the ringtone name of the phone, so when the callers call in from this trunk the phone will ring this specific ringtone. It requires the phone support distinctive ringtone feature.
-
Page 64: Direct Routing
IPX-1100/IPX-1102/IPX-2200 4.2.5 Direct Routing Path: Telephony -> Inbound Control -> Direct Routing You may set up Direct Routing based on the DID numbers of your VoIP/E1/T1/BRI trunk lines and the phone numbers of the external callers. Direct Routing has higher priority than time conditions (unless the inbound destination is a time rule) and other general inbound routes. - Page 65 IPX-1100/IPX-1102/IPX-2200 To add a Direct Routing rule base on the caller’s number, please click “Add” button as shown below. In the popup window, specify the caller’s number, and assign a call destination for inbound calls from this external phone number.
-
Page 66: Blacklist
IPX-1100/IPX-1102/IPX-2200 4.2.6 Blacklist Path: Telephony -> Inbound Control -> Blacklist Blacklist feature allows you to create a list of numbers that are not allowed to call in to the IP PBX system. Blacklist could be managed by both the admin user and operator user. The extension user could also add numbers to the system blacklist by using Blacklist Feature Codes. -
Page 67: Outbound Control
IPX-1100/IPX-1102/IPX-2200 4.3 Outbound Control By default if you’ve not configured any outbound control settings, the extension users are not able to make outbound phone calls yet. Please follow the instructions of this chapter to configure the IPPBX system for outbound phone calls. - Page 68 IPX-1100/IPX-1102/IPX-2200 Select the parameters you want to configure before modifying them. Usually if the trunks are working fine please do not change these settings. Remark: Add remark description of the trunk. Fax Wait Time (sec): Setup duration for fax timeout.
- Page 69 IPX-1100/IPX-1102/IPX-2200 Prompts Language: You can choose a desired language of the system voice prompts to play to the incoming calls from this trunk. For example, if the call is not answered or the user is busy, the IPPBX system will notify the caller to leave a voice message in the language you set.
- Page 70 IPX-1100/IPX-1102/IPX-2200 Most of the trunk settings will be given by the service provider, settings that are not mentioned by the provider you may leave them blank or use default values. Enable: The trunk will be active and usable only if it’s enabled.
- Page 71 IPX-1100/IPX-1102/IPX-2200 Type: In practical applications, client mode SIP trunks are the most commonly used to connect to the SIP providers for low cost, long distance and international phone calls, while server mode is only used when users want to do SIP trunking between IP PBXs.
- Page 72 IPX-1100/IPX-1102/IPX-2200 Fax Detect: Enable/disable fax detection on this trunk. SRTP: Secure Real-time Transport Protocol (SRTP) encrypts the RTP traffic to secure your VoIP phone calls. Before enabling this option, you need to ensure the end point can also support SRTP.
- Page 73 IPX-1100/IPX-1102/IPX-2200 Video Codecs: If the ITSP supports video calls then you can enable compatible video codecs here for video phone calls. Send RPID: Send the Remote Party ID header. PAI and RPID are mutually exclusive you can set one or the other but not both.
- Page 74 IPX-1100/IPX-1102/IPX-2200 Trunk Name: It should be the username of the IAX trunk account. Authentication: If the “Server Mode” trunk hasn’t enabled this option, then it doesn’t require a username and password for this account, you can disable this option and specify the Server Address for authentication.
- Page 75 IPX-1100/IPX-1102/IPX-2200 Dial Permission: Custom dial permission for this trunk, by default it uses the “default” dial permission. Configure only if this trunk is for remote IPPBX integration, so calls coming from the other side can dial out from this IPPBX trunk directly. DO NOT change unless you fully understand how this feature works.
-
Page 76: Dial Rules
IPX-1100/IPX-1102/IPX-2200 4.3.2 Dial Rules Path: Telephony -> Outbound Control -> Dial Rules On the Planet’s IPX IPPBX system you can set up different dial rules, for users to dial numbers in different format/pattern and cause the IPPBX system to call out through different trunk lines. For example, users dial the numbers with a prefix 9 to call out through the CO lines (land lines). - Page 77 IPX-1100/IPX-1102/IPX-2200 In the Time Rules dropdown list, you may select a time condition for this dial rule, so this dial rule will only be available to be used at business hours. Prepend option is used to always add specific digit/digits in front of the actual dialed number after the Dial Prefix is deleted.
-
Page 78: Dial Permissions
IPX-1100/IPX-1102/IPX-2200 4.3.3 Dial Permissions Path: Telephony -> Outbound Control -> Dial Permissions A dial permission consists of outbound dial permissions (dial rules) and internal dial permissions. Each extension number had been assigned with a dial permission. Dial rules are created for dial outbound phone calls, internal dial permissions are used for controlling extension number from using local phone system features. - Page 79 IPX-1100/IPX-1102/IPX-2200 In the Dial Rules section by moving the dial rules from the Available Rules field to the Selected Rules field to enable the dial rules in this dial permission. In the above given example, 2 dial rules had been enabled.
-
Page 80: Pin Sets
IPX-1100/IPX-1102/IPX-2200 4.3.4 PIN Sets Path: Telephony -> Outbound Control -> PIN Sets Pin sets can be used to secure your IPPBX system phone services and in particular for outbound dial rules and DISA. Each PIN Set consists of a series of PIN Codes. -
Page 81: Audio Library
IPX-1100/IPX-1102/IPX-2200 4.4 Audio Library 4.4.1 Music On Hold Path: Telephony -> Audio Library -> Music On Hold Music On Hold (MOH), commonly known on an IP PBX system, allows audio files (such as WAV or MP3 files) to be uploaded to the IP PBX system and played back when a caller is placed on hold or is waiting in a queue. -
Page 82: Ivr Prompts
IPX-1100/IPX-1102/IPX-2200 4.4.2 IVR Prompts Path: Telephony -> Audio Library -> IVR Prompts To configure an IVR menu on Planet’s IPX IPPBX system you'll first need to record your IVR prompts, these IVR prompts will communicate with the callers about the menu options that they have e.g. press one for sales. -
Page 83: Custom Prompts
IPX-1100/IPX-1102/IPX-2200 4.4.3 Custom Prompts Path: Telephony -> Audio Library -> Other Custom Prompts Custom prompts are to be used by call queue, call forward and some other advanced features, where customized voice prompts required. You could record the voice prompts in MP3 or WAV (16bit, 8000Hz, mono) format and upload here. -
Page 84: Advanced Features
IPX-1100/IPX-1102/IPX-2200 4.5 Advanced Features 4.5.1 Call Forward Path: Telephony -> Advanced Features -> Call Forward Call forward allows calls to an extension to be forwarded to a specific internal extension number or an external phone number. According to different application scenario, the forward type can be set as Forward All, Forward on Busy, Forward When Unavailable, No Answer and Busy, or No Answer and Unavailable. - Page 85 IPX-1100/IPX-1102/IPX-2200 In the Extension Number drop-down list select the extension to be configured with call forward. In Forward Type drop-down list select the condition of when to forward the incoming calls. In the Destination field specify the number to receive the forwarded phone calls. If it’s another internal extension number, just fill in with that extension number.
-
Page 86: Follow Me
IPX-1100/IPX-1102/IPX-2200 4.5.2 Follow Me Path: Telephony -> Advanced Features -> Follow Me Click on add a follow me feature like below. Select the Extension which will be configured with Follow Me. Ring Duration (Sec): To set the time in seconds to ring the extension before Follow Me process starts. -
Page 87: Wake Up Call
IPX-1100/IPX-1102/IPX-2200 4.5.3 Wake Up Call Path: Telephony -> Advanced Features -> Wake Up Calls Wake Up Call feature could be used to schedule reminders to the user extensions. Wakeup calls could be scheduled by admin user from admin Web interface, by operator user from operator Web interface, or could be scheduled by extension users by dialing Wake Up Call feature Codes. -
Page 88: Conference
IPX-1100/IPX-1102/IPX-2200 4.5.4 Conference Path: Telephony -> Advanced Features -> Conference Conferences allow two or more callers to be joined together so that all parties on the call can hear one another. Conferences are also referred as Conference Bridges or Conference Rooms. - Page 89 IPX-1100/IPX-1102/IPX-2200 There are options for each conference for you to customize the conference feature. Please click the button to change the options if needed. Guest Password is for ordinary conference users, only the users who enter the correct password can join in the conference.
-
Page 90: Disa
IPX-1100/IPX-1102/IPX-2200 4.5.5 DISA Path: Telephony -> Advanced Features -> DISA Direct inward system access (DISA) allows an outside caller to dial directly into the PBX system and accesses the system's features and facilities remotely. It’s useful if you want people to be able to, for example, it takes advantage of the low rate for international calls that you have available on your system, or to allow outside callers to be able to uses the paging or intercom features of the system. -
Page 91: Paging & Intercom
IPX-1100/IPX-1102/IPX-2200 4.5.6 Paging & Intercom Path: Telephony -> Advanced Features -> Paging & Intercom The Paging and Intercom feature allows you to use your phone system as an intercom system, provided that your endpoints (phone devices) support this functionality. The Paging and Intercom feature allows you to define an extension number that by calling the number will simultaneously page/intercom a group of phones. -
Page 92: Smart Did
IPX-1100/IPX-1102/IPX-2200 4.5.7 Smart DID Path: Telephony -> Advanced Features -> Smart DID With Smart DID feature, the IP PBX system has the ability to route an inbound call directly to an extension if the extension had previously called or tried to call the external number. It is convenient for the called party to make a call back and be directly routed to the extension that called them without going through the IVR menu or reception desk. -
Page 93: Phonebook
IPX-1100/IPX-1102/IPX-2200 4.5.8 Phonebook Path: Telephony -> Advanced Features -> Phonebook Phonebook feature for Planet’s IPX series IPPBX is just like a contact list on the mobile phones. You may add contacts to the IPPBX system, when the contacts calling in, on the ringing user extension phone screen will display the caller number and the contact name you have added before. -
Page 94: Ldap
IPX-1100/IPX-1102/IPX-2200 Or you may export the phonebook template file to add the contacts by MS Excel and then upload the file to generate contacts. Contacts could be added by admin user from admin web interface, by operator from operator web interface and by extension user from extension user web portal. -
Page 95: Callback
IPX-1100/IPX-1102/IPX-2200 4.5.10 Callback Path: Telephony -> Advanced Features -> Callback Callback is to allow a company employee who needs to make a call from their personal phone to call the IP PBX, the IP PBX calls them back and the cost of any future outbound calls are at the company’s expense. -
Page 96: Whitelist
IPX-1100/IPX-1102/IPX-2200 4.5.11 Whitelist Path: Telephony -> Advanced Features ->Whitelist An extension user can set up a whitelist, only the numbers in the whitelist can dial that extension number, otherwise the call will be rejected. After establishing the whitelist, user can select the association in the ‘IP Extension’. -
Page 97: Preferences
IPX-1100/IPX-1102/IPX-2200 4.6 Preferences 4.6.1 Global PBX Options Path: Telephony -> Preferences -> Global PBX Options Operator Extension: Choose an extension to be operator extension. When an incoming call has been directed to voicemail, then by pressing ‘0’ the caller will be put through to the operator extension. - Page 98 IPX-1100/IPX-1102/IPX-2200 Jitter Buffer: Jitter buffer can be used to resolve the sound distortion caused by network congestion, timing drift or route changes. Call Forward CID: The incoming call numbers are allowed to be transmitted through other digital trunks.
- Page 99 IPX-1100/IPX-1102/IPX-2200 The user extension number and system extension number ranges are defined here to avoid any conflicts within the IPPBX system. You can modify these number ranges as per your requirements. The user extension number could be 2 to 11 digits. And Call Retrieve Number range needs to be modified...
-
Page 100: Voip Advanced
IPX-1100/IPX-1102/IPX-2200 4.6.2 VoIP Advanced Path: Telephony -> Preferences -> VoIP Advanced Global SIP settings allow you to configure some general and advanced options for the IP PBX system global SIP preferences. UDP Port: SIP over UDP service port. By default, ZYCOO IPPBX system uses UDP as SIP transmission protocol. - Page 101 IPX-1100/IPX-1102/IPX-2200 STUN Server Address: By default, please keep it blank, if you got available STUN server, please specify the valid server address, otherwise an invalid STUN server address will cause phone system exception. RTP Port Range: The UDP ports used by the IPPBX system to carry RTP voice stream. Do not change the port range or you may encounter audio issue with phone calls.
- Page 102 IPX-1100/IPX-1102/IPX-2200 IAX2 extension support had been enabled by default for all extensions. And IAX2 works on UDP port 4569, you may modify the port number if required. Asterisk supports different QoS settings at the application level for various protocols on both signaling and media.
-
Page 103: Analog Settings
IPX-1100/IPX-1102/IPX-2200 4.6.3 Analog Settings Global Analog Settings are used for configuring the IPPBX system to seamlessly work with the telephone lines from your telecommunications providers. Caller ID Detection: Allow\Disallow to detect caller ID. Caller Name: In some countries/regions caller name can be passed through the PSTN lines, by enabling this option the caller name will be received by the IPPBX system along with the caller ID. - Page 104 IPX-1100/IPX-1102/IPX-2200 Opermode: Set the Opermode for FXO Ports. Tone Zone: Select the tone zone of your country. Send Caller ID After: Certain countries (UK) have ring tones with different ring tones (ring-ring),which means the caller ID needs to be set later on, and not just after the first ring, as per the default (1).
-
Page 105: Voicemail Settings
IPX-1100/IPX-1102/IPX-2200 4.6.4 Voicemail Settings Voicemail settings can be used to configure global voicemail options for all extension users. Max Greeting Time sets the max greeting message duration the extension users can record in their mailbox to greet the callers when they entering voicemail. -
Page 106: Feature Codes
IPX-1100/IPX-1102/IPX-2200 4.7 Feature Codes Path: Telephony -> Feature Codes Feature codes can be dialed from user extensions to enable and disable certain features or to achieve some call features. For example, enable and disable call forward, transfer incoming calls, check voice messages, etc. -
Page 107: Call Pickup Feature Code
IPX-1100/IPX-1102/IPX-2200 4.7.2 Call Pickup Feature Code Call pickup feature codes allow users to pick up calls that are not directed to them by dialing a feature code *8 or **. If there’s an incoming call ringing on an extension that belongs to your department, you may dial the general call pickup feature code *8 (end with #) to pick up the call. -
Page 108: Call Transfer Feature Code
IPX-1100/IPX-1102/IPX-2200 4.7.4 Call Transfer Feature Code Call Transfer is used to transfer a call in progress to some other destinations. There are two types of call transfer. Attended call transfer - Where the call is placed on hold, a call is placed to another party, and a conversation can take place privately before the caller on hold is connected to the new destination. -
Page 109: Blacklist Feature Code
IPX-1100/IPX-1102/IPX-2200 4.7.5 Blacklist Feature Code Blacklist feature codes allow the extension users to add external phone numbers to IP PBX system blacklist from their phones, consequently the numbers added will not be able to dial in to the IPPBX system. -
Page 110: Call Spy Feature Code
IPX-1100/IPX-1102/IPX-2200 4.7.6 Call Spy Feature Code Call Spy allows users to dial the spy feature codes following by an extension number to listen to the call conversation in real time. Normal Spy: For example, extension 410 is talking to someone on the phone, you can dial *90410 (end with #) to listen to their conversation, however, neither speaker will be able to hear you. -
Page 111: Call Queue Feature Code
IPX-1100/IPX-1102/IPX-2200 4.7.7 Call Queue Feature Code Call queue feature codes are for call queue agent extensions only. They are meaningless to the non-agent extensions. Agent Login and Agent Logout are for dynamic agents to login or out of the call queue. And for both static agents and dynamic agents, they can dial *95 to suspend their extensions temporarily, new calls will not be distributed to their extensions, until they dial *095 to resume. -
Page 112: Wakeup Call Feature Code
IPX-1100/IPX-1102/IPX-2200 When being in a conference room, if the conference admin user presses 0 they will get a dial tone for inviting others to participate in this conference. If the invited party agrees to join in the conference, conference admin user can dial ** to return to the conference with invited party. -
Page 113: Call Forward Feature Code
IPX-1100/IPX-1102/IPX-2200 4.7.10 Call Forward Feature Code Call forward could be configured from admin and operator web user interface. With the following feature codes, extension users can activate or deactivate call forward directly from their phones without configuration on the Web GUI. -
Page 114: Dnd Feature Code
IPX-1100/IPX-1102/IPX-2200 4.7.11 DND Feature Code DND (Do Not Disturb) could be set on the IP phones from the phone level, if the phone doesn’t have DND feature you may use the DND feature code to set DND from IP PBX system level. Any phone connected to the Planet’s IPX series IPPBX system can use the DND feature code, no matter it’s IP... -
Page 115: Other Feature Codes
IPX-1100/IPX-1102/IPX-2200 4.7.13 Other Feature Codes Announce WAN Port IP: By dialing this code you'll hear the system announce the IP address of the IPPBX WAN interface. Announce LAN Port IP: By dialing this code you'll hear the system announce the IP address of the IPPBX LAN interface. -
Page 116: Reports
IPX-1100/IPX-1102/IPX-2200 from an idle endpoint to switch the call to the idle endpoint. 5. Reports 5.1 Records 5.1.1 Call Record Path: Reports -> Records -> Call Record Call recordings to be checked here are for those extensions which had enabled call recording from the extension edit page. -
Page 117: Conference Recordings
IPX-1100/IPX-1102/IPX-2200 query and review the recordings but cannot delete them. 5.1.2 Conference Recordings Path: Reports -> Call Recordings -> Conference Recordings If the Conferences had call recording enabled, the conference held will be recorded and conference recordings could be found for review here. -
Page 118: Log
IPX-1100/IPX-1102/IPX-2200 5.2 Log 5.2.1 Call Log Path: Reports -> Logs -> Call Logs Call logs are also known as CDR (Call Detailed Records), on the call logs page you can check records for any call that went through the IPPBX system. -
Page 119: Fax Log
IPX-1100/IPX-1102/IPX-2200 5.2.2 Fax Log All fax records of the IP PBX system can be queried on the Fax Log page, select the start and end dates, and also specify the sender and receiver information to query all fax records that meet the conditions within a certain period of time. -
Page 120: Addons
IPX-1100/IPX-1102/IPX-2200 6. Addons 6.1 API 6.1.1 AMI Path: Addons -> API ->AMI This section defines the information of the AMI interface. If the AMI Account Settings is empty, it will consider that the AMI interface is closed. The AMI interface is mainly used for the connection of third-party systems and send commands to control traffic and obtain relevant data in the device. -
Page 121: Push Event
IPX-1100/IPX-1102/IPX-2200 6.1.2 Push Event Path: Addons -> API ->Push Event The Push Event is a data sending method based on HTTP POST, which can be used to connect with a third-party system to obtain call pop-up data or call recording data. When the Push Event is enabled, the device will push the selected event data to the specified URL. -
Page 122: Control Panel
IPX-1100/IPX-1102/IPX-2200 6.2 Control Panel 6.2.1 Group Path: Addons -> Control Panel->Group The extensions can be dispatched into different groups, and use the PBX Control Panel for paging, background music, tasks, etc. Please click on the “Add” button to create a new group, fill out the group name and select the extensions that you would like to dispatch into this group. -
Page 123: Settings
IPX-1100/IPX-1102/IPX-2200 6.2.2 Settings Path: Addons -> Control Panel->Settings The Control Panel is modules design, in which you can turn on and off specific modules on the Control Panel. Wake up: Enable/Disable the “Wake Up” module displayed on the Control Panel to manage wake-up calls. -
Page 124: Hot Standby
IPX-1100/IPX-1102/IPX-2200 6.3 Hot Standby Path: Addons -> Hot Standby The hot-standby function is using two same model of IPPBX servers with the same software version, one as the primary server and the other one work as secondary server. When the primary fails, all current calls can be automatically switched to the secondary server in a short time. -
Page 125: Autoconfig
IPX-1100/IPX-1102/IPX-2200 6.4 AutoConfig 6.4.1 Devices Path: Addons ->AutoConfig->Devices The AutoConfig function helps to realize the automatic discovery and configuration of IP phones in the LAN. It supports PnP and option66 methods. Step 1: Scan or Add a new phone. Simply click on the button, it can automatically discover the phone in the same LAN, or discover the phone through PnP subscription feature. -
Page 126: Files
IPX-1100/IPX-1102/IPX-2200 6.4.2 Files Path: Addons ->AutoConfig->Files This is a HTTP file server which is used to store phone configuration files. The phone configuration file can be obtained from the IPPBX by setting up static auto provisioning sever address on the IP phone side and realize automatic configuration function. -
Page 127: System
7. System 7.1 Reboot /Reset 7.1.1 Cron Reboot Path: System -> Reboot /Reset->Cron Reboot To periodically restart the driver or Asterisk service. Asterisk: Enable/Disable restart Asterisk service. DAHDI : Enable/Disable restart DAHDI service. Interval (days): The time period between each restart. ... -
Page 128: Reset
7.1.3 Reset Path: Maintenance -> Reboot and Reset Method 1: Reset from web UI Resetting the IP PBX system Click on button and confirm with the popup window, reset process will begin. During the reset process the IPPBX system will restart and the whole process will take around 4 to 5mins for restarting the system. Before resetting you may enable options “I’d like to keep the network profiles”... - Page 129 Method 3: Reset by Reset button at system booting stage. Resetting the IPPBX system by Reset button at system booting stage will erase everything on the IP PBX system, including backups. Resetting this way will fully recover the IPPBX system to factory defaults. So if you wish to restore the IP PBX configurations with a previous backup, please download it to you operating system first before resetting it.
-
Page 130: Region /Time
7.2 Region /Time Path: System -> Region / Time System time is very important for the IP PBX system, especially when the IP PBX system handles inbound phone calls according to time conditions, then only if the system time is correct will calls be handled properly. Also, call logs and call recordings files are named with system time. - Page 131 In the Set Current PBX Time blank, you may manually input the date and time to set it as the current PBX time. Then click on the button to save the manually set time to the IP PBX hardware.
-
Page 132: Storage
7.3.1 USB Storage Path: System -> Storage -> USB Storage The IPX-1100/IPX-1102 and IPX-2200 has 1 USB interface on the back panel. USB drives could be attached to the USB interface for data backup. Supported USB file system formats are: FAT16, FAT32, exFAT, NTFS, EXT3 and EXT4. If it's a portable USB hard drive, please make sure it uses external power supply. - Page 133 Frequency (days): The time interval between each data backup operation. Upload Time: The specific time when the data backup operation is performed. Call Logs: Whether to back up the call log data to the USB storage. Call Recordings: Whether to back up the call recording data to the USB storage.
-
Page 134: Ftp Storage
7.3.2 FTP Storage Path: System -> Storage -> FTP Storage Utilizing your existing FTP server, you can configure the IPPBX system to upload call recordings, voicemails and call log files to your FTP server. If you don’t have one you can even use your Windows PC to setup an FTP server for the IPPBX system to connect to. - Page 135 Once configurations done, click on button to connect the IP PBX system with the FTP server. Once connected, you’ll see the FTP Connect Status change to Connected. Each time after uploading, the call recordings, voicemails, system logs and system backup will be removed from the IP PBX internal storage, call logs will be kept on the IPPBX system and will make a duplicate on the FTP server.
-
Page 136: System Storage
7.3.3 System Storage Path: System -> Storage ->System Storage Storage management of recording files and voice data in the system When the system storage is full, you can clear the recording files and voice data files in the system storage. -
Page 137: Network Settings
7.4 Network Settings 7.4.1 Network Profiles Path: System -> Network Settings -> Network Profiles Network profiles could be configured through the quick setup wizard at the initial setup of the IP PBX system. When modification of the network profiles is required, it could be done here. The WAN network interface of Planet’s IPX series IPPBXs could be configured to work in Static IP, DHCP or PPPoE mode. -
Page 138: Vlan
7.4.2 VLAN Path: System -> Network Settings -> VLAN With a Layer 3 switch, you can configure VLAN on Planet’s IPX IPPBX system to separate the VoIP and data traffic. Voice VLAN can ensure that phones remain working even when the data network is congested. To set VLAN, navigate to web menu Network Settings->Network->VLAN. -
Page 139: Vpn
7.4.3 VPN Path: System -> Network Settings -> VPN VPN (Virtual Private Network) is mainly used for setting up long-distance and/or secure network connections. When used on the IP PBX system, all phone calls made and received are encrypted so it secures your remote offices/extensions' phone services. - Page 140 Configure the VPN server before turning it on. In the Certificate field, click on button to create the OpenVPN certificate. Specify your customized information and click on button to continue. Click on button to set up the OpenVPN server.
- Page 141 Stealth: Certain deep packet inspection firewalls might not allow OpenVPN traffic. Stealth SSL tunneling can disguise your OpenVPN traffic under the HTTPS traffic which is often seen as HTTPS traffic by the DPI. Port: OpenVPN service port; the default port is 1194. You will need to forward this port on your router for the clients being able to connect to the server.
- Page 142 Compress LZO: LZO is an efficient data compression library which is suitable for data de-compression in real time. TLS-Server: TLS is an excellent choice for authentication and key exchange mechanism of OpenVPN. Remote Network: The OpenVPN client network uses the first available IP assigned by the VPN server. ...
- Page 143 OpenVPN Client To configure OpenVPN client, please click on the button to show the configurations. The certificate files downloaded from the OpenVPN server should be uploaded here. In the CA Certificate field, upload the ca.crt file. In the Client Certificate field, upload the xxxx.crt file. In the Client Key field, upload the xxxx.key file.
- Page 144 In the Server Address field, you should specify the OpenVPN server address, which can be a public IP or a domain name. Enable Stealth if the OpenVPN server has enabled it. The port number should be identical to that configured on the OpenVPN server, typically set to the default value of 1194.
- Page 145 And you may check the VPN connection status in the VPN Client Status section. In the VPN client status section, the VPN client IP, the VPN type and the connection status will be displayed.
- Page 146 PPTP VPN Server PPTP (The Point-to-Point Tunneling Protocol) uses a control channel over TCP and a GRE tunnel operating to encapsulate PPP packets. The intended use of this protocol is to provide security levels and remote access levels comparable with typical VPN products. Click on button to show the configurations.
- Page 147 Alternative DNS: Secondary DNS for VPN connection. Timeout(S): Session timeout for PPTP tunnels. Authentication Method: Choose method/methods for the authentication of the VPN clients. chap: Challenge Handshake Authentication Protocol, CHAP takes a more sophisticated and secure approach to authentication by creating a unique challenge phrase (a randomly generated string) for each authentication.
- Page 148 Finally click on the Enable switch to turn the PPTP VPN server on. PPTP VPN Client To configure PPTP VPN client, please click on the button to show the configurations. Configure PPTP VPN client settings before enabling it.
- Page 149 Enable 40/148-bit encryption for MPPE: Tick to enable 40-bit key (standard) or 128-bit key (strong) MPPE encryption schemes. Server Address: PPTP VPN server public IP. Username: PPTP VPN username given by the VPN server. Password: PPTP VPN user password given by the VPN server. ...
-
Page 150: Static Routing
7.4.4 Static Routing Path: System -> Network Settings -> Static Routing Static Routing is a form of routing that occurs when a router uses a manually configured routing entry, rather than information from a dynamic routing protocol to forward traffic. When needed you may click on the button to add a manual static route. -
Page 151: Dhcp Server
7.4.5 DHCP Server Path: System -> Network Settings -> DHCP Server DHCP (Dynamic Host Configuration Protocol) is a standardized network protocol used on Internet Protocol (IP) networks for dynamically distributing network configuration parameters, such as IP addresses for interfaces and services. - Page 152 Just simply specify the MAC address of the client device and associate an IP address with it, and this IP will always be reserved for this specific client device.
-
Page 153: Snmp
7.4.6 SNMP Path: System -> Network Settings ->SNMP Enable: Enable/Disable SNMP Community: Community tag Network: The working network of SNMP No need to add them to the IP whitelist. -
Page 154: Email Services
7.5 Email Services 7.5.1 Mail Server Settings Path: System -> Email Services -> Mail Server Settings Various kinds of Emails could be sent from the Planet’s IPX series IPPBX system. The Emails could be automatically sent by the IPPBX system in certain circumstances or manually sent by admin and operator users. To configure the IPPBX system being able to send out emails, mail (SMTP) server needs to be configured at first priority. - Page 155 In the Email field, input the Email account to be used by the IPPBX system, All mails from the IP PBX system will be sent out by this mail account. In Password field, input the password of the Email account you have specified. Once done, click on button to make configurations effective.
-
Page 156: Voicemail To Email Settings
7.5.2 Voicemail to Email Settings Path: System -> Email Services -> Voicemail to Email Settings Voicemail to Email is a highly beneficial feature for extension users. The IPPBX system can send newly received voicemail messages from their extensions to their email inbox. . It could be an Email notification or administrator could set the IP PBX system to send Email with voice messages attached in the Email notifications. -
Page 157: Diagnostic
7.6 Diagnostic 7.6.1 PING Path: Maintenance -> Diagnostic -> PING The ping command is a very common method for troubleshooting the accessibility of devices. It uses a series of Internet Control Message Protocol (ICMP) Echo messages to determine: Whether a remote host is active or inactive. ... -
Page 158: Tcp Dump
During the whole process, each step will output in the Results field. You can view which routes the packets have taken before reaching their final destination. 7.6.3 TCP Dump Ethernet capture uses TCP DUMP which is a common packet analyzer that allows users to capture TCP/IP and other packets being transmitted or received over a network to which the Planet’s IPX IPPBX is attached. -
Page 159: Channel Monitor
7.6.4 Channel Monitor Path: Maintenance -> Diagnostic -> Channel Monitor Channel Monitor, technically DAHDI Monitor, allows you to monitor signal levels on analog channel and record the output to a file. Recorded audio files are, by default, in raw signed linear PCM. You can play them through the speaker to listen to the phone call signaling on the analog channel. -
Page 160: Asterisk Cli
7.6.5 Asterisk CLI The Asterisk CLI provides you with the access to execute the Asterisk CLI commands. To avoid incorrect operation that may affect the IPPBX system, it provides the pjsip and core command to check the status. Path: Maintenance -> Diagnostic ->Asterisk CLI... -
Page 161: Security Center
7.7 Security Center Planet’s IPX IPPBX system has been preconfigured with a built-in firewall which prevents your IP phone system from unauthorized access, malicious users and some other attackers. You may not need to specifically configure the firewall settings but for security precautions please always keep it on. - Page 162 Step 1: Enable Geo IP and Drop All Step 2: Select trusted countries/regions Besides selecting the trusted IP addresses from certain countries/regions, you’ll still need to add a common rule in the Common Rules section to grant access or the local network hosts/devices. Step 3: Add a common rule to grant access of your local LAN.
- Page 163 The Action of this rule needs to be set as Accept. Protocol should be set as TCP/UDP. IP should be the local network address instead of a single IP address. Netmask should be the subnet mask of the network address. ...
- Page 164 If you are going to add rules to block some IP addresses from accessing some kind of services on the IP PBX system, be sure you add the correct IP/network address (if not defined, the firewall will consider as ALL), and the correct service port number (if not defined, the firewall will consider as ALL);...
-
Page 165: Intrusion Detection And Prevention
7.7.2 Intrusion Detection and Prevention Path: System -> Security Center ->Intrusion Prevention Planet’s IPX series IPPBX system uses Fail2Ban to perform intrusion detection.Fail2Ban is an intrusion prevention framework written in the Python programming language. It works by reading Asterisk logs and some other logs in the IPPBX system, and uses iptables profiles to block brute-force attempts. -
Page 166: Ip Blacklist
7.7.3 IP Blacklist Path: System -> Security Center -> IP Blacklist IP Blacklist will list all suspected intruders/attackers’ IP addresses. The list is automatically generated by the system firewall if possible intrusion/attack has been detected. And the list will show the IP address of the banned hosts, as well as what kind of service intrusion is detected. -
Page 167: Ip Whitelist
7.7.4 IP Whitelist Path: System -> Security Center -> IP Whitelist IP Whitelist allows you to add IP addresses and network addresses to the IP PBX system as trusted entities. The IP addresses in the whitelist will always be treated as trusted IPs and will not be regulated by the firewall rules. -
Page 168: Backup/Upgrade
7.8 Backup/Upgrade 7.8.1 Upgrade Path: System->Backup/Upgrade -> Upgrade Please click on the button and select the corresponding firmware for the upgrade process. If an incorrect model of device firmware is uploaded, the upgrade will fail. After the upgrade is successful, the system will automatically restart. -
Page 169: Backup
7.8.2 Backup Taking a backup on Planet’s IPX IPPBX system is similar to creating a recovery point on your Windows system. By restoring the backup you can recover the Planet’s IPX IPPBX system configurations to the time when it is still functioning well. -
Page 170: System Logs
7.9 System Logs 7.9.1 Web Log Path: System-> System Logs -> Web Log On Web Access Logging page you may check all the logs of the web access records, including admin user, operator user and extension users. In the From and To fields set the start and end date, in User dropdown list select the user role if you want to search per the type of users, optionally if you want to search according to the user’s IP address you may also specify the IP address in the IP Address field and then finally click on button. -
Page 171: Other Log
7.9.2 Other Log Path: System-> System Logs -> Other Log Advanced logging can be employed for a higher level of troubleshooting on the IPPBX system. SSH Access Logging can be used to trace the SSH login records. PBX Logging can be used to analyze the phone services related issues. ... -
Page 172: Settings
7.10 Settings 7.10.1 Account The Account page is for managing different user roles and login accounts within the entire IP PBX system. Please click on the “Add” button to create a new user account and select the corresponding user role for this account. -
Page 173: Plug-In
7.10.2 Plug-in The Plug-in management page can control whether to enable or disable certain plug-in, such as the IP Phone auto provisioning, or the PBX panel. It is suggested to disable the plug-in that you are not using, because each plug-in requires extra system resources to run. -
Page 174: Web
7.10.3 Web Upload a custom logo, login page background image, and a device name for your IPPBX device. Device’s Name: Customize device name to display on the Home page and the browser’s title bar. Show Logo: Enable/Disable to display the default logo of the system. ... -
Page 175: Ssl
7.10.4 SSL First, click the “Select” button to select the corresponding .key and .pem files. Then, click on the “Upload” button to these files to the system. Lastly, click on the “Replace Certificate” button to use the new files to replace the old ones. -
Page 176: Ssh
7.10.5 SSH The IP PBX system disabled the SSH function by default. When the SSH is enabled, user can use the root credential to log in the system via command-line interface. The root user is generally used for system maintenance, and it is recommended to close it after use. You can change the SSH port number or root user’s password on this SSH page. -
Page 177: Http
7.10.6 HTTP By setting up the relevant parameters of the HTTP service of the web, you can modify the access port of the page. Type: For system security purpose, only HTTPS is allowed. Port 80 redirect: To facilitate access, directly enter the IP address into the browser and it will be automatically directed to the corresponding protocol and port.
Need help?
Do you have a question about the IPX-1100 and is the answer not in the manual?
Questions and answers