
Related Manuals for LawnMaster MEB1116K


Summary of Contents for LawnMaster MEB1116K
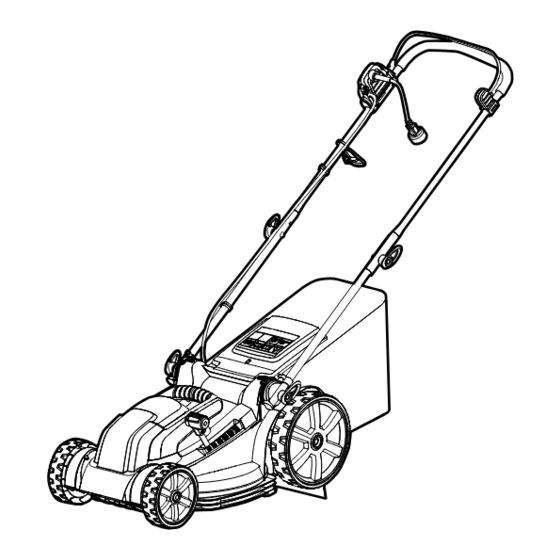
- Page 1 Operator's Manual 16" Electric Mower MEB1116K Save this manual for future reference Read all safety rules and instructions carefully before operating this tool.
-
Page 2: Table Of Contents
TABLE OF CONTENTS Section Page TABLE OF CONTENTS SPECIFICATIONS IMPORTANT SAFETY INSTRUCTIONS SYMBOLS 10-11 KNOW YOUR ELECTRIC MOWER ASSEMBLY 13-17 O P E R AT I O N 1 8 - 2 0 MAINTENANCE 21-25 TROUBLESHOOTING 26-27 EXPLODED VIEW PARTS LIST NOTES 30-31... -
Page 3: Specifications
SPECIFICATIONS ELECTRIC MOWER MEB1116K Voltage 120 V ~ 60 Hz Current 11 A Motor Speed 3500 RPM Deck Width 16.4 inch (416 mm) Cutting Width 16 inch (400 mm) Cutting Height Adjustment 1 inch -3 inch (25-75 mm) Collection Bag Capacity... -
Page 4: Important Safety Instructions
IMPORTANT SAFETY INSTRUCTIONS INTRODUCTION This product has many features for making its use more pleasant and enjoyable. Safety, performance, and dependability have been given top priority in the design of this product making it easy to maintain and operate. WARNING This symbol indicates important safety instructions. - Page 5 IMPORTANT SAFETY INSTRUCTIONS ■ This cutting tool is capable of amputating hands and feet and throwing objects. Failure to observe all safety instructions could result in serious injury or death. ■ Do not operate the tool while under the influence of alcohol or drugs. ■...
- Page 6 IMPORTANT SAFETY INSTRUCTIONS cause. Vibration is generally a warning of trouble. ■ Stop the motor and disconnect the plug from power source whenever leaving the equipment, before cleaning the mower housing, and before making any repairs or inspections. ■ Shut the motor off and wait until the blade comes to a complete stop before removing the grass catcher or before unclogging the chute.
- Page 7 IMPORTANT SAFETY INSTRUCTIONS MAINTENANCE AND STORAGE ■ Use caution when servicing blades. Wrap the blade(s) or wear gloves. Replace damaged blades. Do not repair or alter blade(s). ■ Store idle lawn mower indoors. When not in use, lawn mower should be stored in an indoor dry and locked-up place-out of reach of children.
- Page 8 IMPORTANT SAFETY INSTRUCTIONS DOUBLE INSULATED This lawn mower has a plug. The lawn mower is double insulated to provide a double thickness of insulation between you and the tool’s electrical system. All exposed metal parts are isolated from the internal metal motor components with protective insulation. WARNING USE ONLY IDENTICAL REPLACEMENT PARTS WHEN SERVICING THE LAWN MOWER TO AVOID INJURY.
- Page 9 IMPORTANT SAFETY INSTRUCTIONS Minimum Gauge for Extension Cords (AWG) (Using 120 V only) Total Length of Cord in Feet (meters) 120V 25ft (7.62m) 50ft (15.24m) 100ft (30.48m) 150ft (45.72m) Ampere Rating More Than Not More Than Not Recommended Make sure your extension cord is properly wired and in good electrical condition. Always replace a damaged extension cord or have it repaired by a qualified person before use.
-
Page 10: Symbols
SYMBOLS Some of the following symbols may be used on this product. Please study them and learn their meaning. Proper interpretation of these symbols will allow you to operate the product better and safer. SYMBOL NAME DESIGNATION/EXPLANATION Volts Voltage Amperes Current Hertz Frequency (cycles per second) - Page 11 SYMBOLS The following signal words and meanings are intended to explain the levels of risk associated with this product. SYMBOL SIGNAL MEANING Indicates an imminently hazardous situation, which, if not DANGER avoided, will result in death or serious injury. Indicates a potentially hazardous situation, which, if not WARNING avoided, could result in death or serious injury.
-
Page 12: Know Your Electric Mower
KNOW YOUR ELECTRIC MOWER The safe use of this product requires an understanding of the information on the product and in this Operator’s Manual as well as a knowledge of the project you are attempting. Before use of this product, familiarize yourself with all operating features and safety rules. Components 7.Cutting Height Adjustment Lever 13.Safety Flap... -
Page 13: Assembly
ASSEMBLY UNPACKING This product requires assembly. ■ Carefully remove the product and any accessories from the box. Make sure that all items listed in the packing list are included. ■ Inspect the product carefully to make sure no breakage or damage occurred during shipping. ■... - Page 14 ASSEMBLY INSTALLING THE HANDLE 1. Insert the lower handle into the bolts on the lawnmower housing. Fasten the handle using the locking lever and washer to tighten, then fold them back in. The tilt of the handle can be adjusted. Do not use excessive force;...
- Page 15 ASSEMBLY 3. Secure the control cable with the cable clips (Fig. 3). Control Cable Cable Clip Fig. 3 ASSEMBLE THE GRASS COLLECTION BAG 1. Check the grass collection bag before assembling to make sure there is no damage. 2. Pull the grass collection bag over the metal frame as shown (Fig. 4). 3.
- Page 16 ASSEMBLY 4. Make sure both rods are firmly seated on the holder hooks and the safety flap rests firmly against the top of the grass collection bag. Hooks Rods Fig. 6 Fig. 7 Removing the grass collection bag: 1. Lift the rear safety flap and hold it in position. 2.
- Page 17 ASSEMBLY To set the cutting height: 1.To raise the cutting height, grasp the cutting height adjustment lever and move it toward the back of the mower (Fig. 8). 2.To lower the cutting height, grasp the cutting height adjustment lever and move it toward the front of the mower (Fig.
-
Page 18: O P E R At I O
OPERATION WARNING Do not allow familiarity with this type of product to make you careless. Remember that a careless fraction of a second is sufficient to inflict serious injury. WARNING Always wear safety goggles or safety glasses with side shields when operating this product. Failure to do so could result in objects being thrown into your eyes, resulting in possible serious injury. - Page 19 OPERATION Start/Stop Bale Switch Safety Switch Button Fig. 10 MOWING TIPS 1. Make sure the lawn is clear of stones, sticks, wires, and other objects that could damage the lawn mower blades or motor. Such objects could be accidentally thrown by the mower in any direction and cause serious personal injury to the operator and others.
- Page 20 OPERATION MOWING ON A SLOPE (Fig. 12) 1. Slopes are a major factor related to slip and fall accidents that can result in severe injury. Mowing on slopes requires extra caution. If you feel uneasy on a slope, do not mow it. For your safety, do not attempt to mow slopes greater than 15 degrees.
-
Page 21: Maintenance
MAINTENANCE WARNING When servicing, use only identical replacement parts. Use of any other parts may create a hazard or cause product damage. WARNING Always wear safety goggles or safety glasses with side shields during power tool operation or when blowing dust. If operation is dusty, also wear a dust mask. GENERAL MAINTENANCE Avoid using solvents when cleaning plastic parts. - Page 22 REPLACING THE MOWER BLADE NOTE: Only use identical replacement blades. LawnMaster® mower blade replacement part NO.GM90BX.00.11. 1. Stop the motor and allow the blade to come to a complete stop. Disconnect the power supply.
- Page 23 MAINTENANCE SHARPENING THE BLADE For best mowing performance, the mower blade must be kept sharp. A dull blade does not cut grass evenly and overloads the motor. Under normal circumstances, sharpening the blade twice during the mowing season is usually sufficient. However, if your lawn has sandy soil, more frequent sharpening may be required.
- Page 24 MAINTENANCE To check the blade balance: 1. Clamp a screwdriver horizontally in a vise as shown. NOTE: If a vise is not available, a straight nail can also be used. 2. Place the center hole of blade on the screwdriver (or nail) shank. 3.
- Page 25 MAINTENANCE STORING THE MOWER 1. Disconnect the mower from the power supply. 2. Turn mower on its side and clean grass clippings that have accumulated on the underside of the mower deck. 3. Wipe the mower clean with a dry cloth. 4.
-
Page 26: Troubleshooting
TROUBLESHOOTING Suspected malfunctions are often due to causes that the user can fix themselves. Therefore check the product using this section. In most cases the problem can be solved quickly. WARNING Only perform the steps described within these instructions! All further inspection, maintenance and repair work must be performed by an authorized service center or a similarly qualified specialist if you cannot solve the problem yourself! Problem Possible Cause... - Page 27 TROUBLESHOOTING High grass and low cutting height. Rear of Mower is hard to push Raise the cutting height. mower housing and blade dragging in heavy grass. The cutting blade is not Tighten the blade bolts. assembled securely. Sharpen and balance the blade Mower vibrates overly The blade is not balanced.
-
Page 28: Exploded View
EXPLODED VIEW... -
Page 29: Parts List
PARTS LIST Key Number Drawing Number Description Quantity 111308101 Motor cover assembly 111308102 Motor assembly 111014103 Drive belt 111308103 Rear wheel assembly (255mm) 111006119 111008129 Cable clamp assembly 111308104 Front wheel assembly (170mm) 111005107 111308105 Deck assembly 211005103 Front axle assembly 111088110 Wheel shaft clamp assembly 111299106... -
Page 30: Notes
NOTES... - Page 31 NOTES...
Need help?
Do you have a question about the MEB1116K and is the answer not in the manual?
Questions and answers