
Subscribe to Our Youtube Channel
Related Manuals for Praktica Luxmedia BX-D18


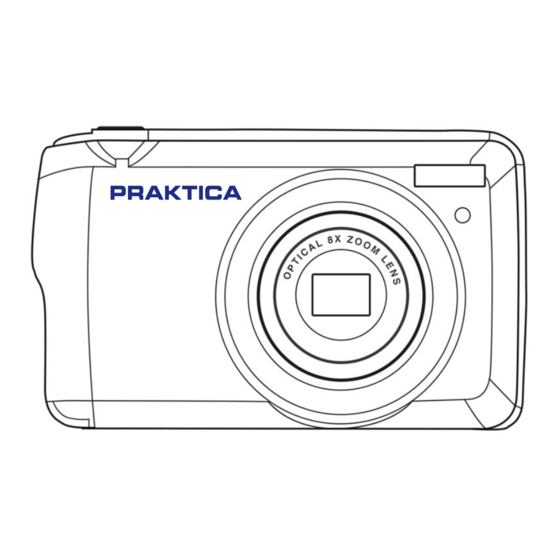
Summary of Contents for Praktica Luxmedia BX-D18
- Page 1 User Manual Please read this manual carefully before using this unit and keep it for future reference.
-
Page 2: Table Of Contents
Table of Contents Introduction ..............................2 Key Features...............................2 What Your Camera Package Includes .......................3 Computer System Requirements for Windows XP...................3 Computer System Requirements for Windows Vista/7 ................4 Computer System Requirements for Macintosh ..................4 Quick Look at Your Camera…………………………………………………………………………………….…...5 Preparing Your Camera for Use……………………………………………………………..…………...…………6 Installing SD Memory Card ........................7 How To Hold Your Camera Correctly When Capturing Images ...............9 Starting your Digital Camera…………………………………………………………………………………..…..10... -
Page 3: Introduction
Introduction Thank you for purchasing the Praktica Luxmedia BX-D18 Camera. Please read this manual to understand how to get the most out of your camera and if you have any further questions reach out to us on care@praktica.com. Key Features ... -
Page 4: What Your Camera Package Includes
What your camera package includes Digital Camera USB Cable User Manual Strap Li-ion Battery Camera Bag Computer System Requirements for Windows XP To be able to download photos to your PC, you will need the following minimum configuration: ... -
Page 5: Computer System Requirements For Windows Vista/7
Computer System Requirements for Windows Vista/7 To be able to download photos to your PC your will need the following minimum configuration: Windows Vista/7 800MHz processor and 512 MB of system memory 20GB hard drive with at least 15GB of available space ... -
Page 6: Quick Look At Your Camera
Quick Look at Your Camera... -
Page 7: Preparing Your Camera For Use
Preparing Your Camera for Use Lithium battery installation First install the lithium battery supplied with the camera according to the following instructions so that it can operate. Slide and open the battery door on the base of the camera. Insert the battery correctly with the correct polarity facing up. Close the battery door and slide it to lock it in place. -
Page 8: Installing Sd Memory Card
Lithium battery charging To recharge the lithium battery, simply connect the camera (without removing the battery) to your computer using the USB cable provided in the box. The red LED on the back of the camera will light up to indicate that the battery is being charged,and will turn off when fully charged. - Page 9 3. An SD icon shows up on the LCD screen when you turn the camera on indicating you that the card has been installed and all files will be stored on it. 4. Then close the battery cover and slide it to lock in place. 5.
-
Page 10: How To Hold Your Camera Correctly When Capturing Images
How to hold your camera correctly when capturing images First press the Power button to turn on the camera and activate the auto-focus zoom lens for it to open out like a periscope. Then steadily hold the camera, avoiding putting your fingers in front of the lens or the flash as shown on the diagram below. -
Page 11: Starting Your Digital Camera
Starting Your Digital Camera Power on Press the Power button once on the top of the camera to turn it on. Then the LCD screen will light up and the auto-focus zoom lens will open out indicating that your camera is on and ready for use. Power off Press the Power button once on the top of the camera to turn it off. -
Page 12: Camera Mode
Camera Mode By default, the photo mode shows up first when powering on the camera. Taking photos 1. Hold the camera steady and position your shot according to the image displayed on the screen. 2. Slightly press the Shutter button and wait for the camera to focus the object. 3. - Page 13 Digital zoom You can enlarge the object up to 8 times with the digital zoom by pressing (T) button to zoom in the object and press the (W) button to zoom out it. The icon will show up on the right of the LCD screen. Note: When using this function, the camera will automatically adjust the lens so do not touch the lens while the camera is focusing.
- Page 14 - Red-eye reduction: press the Flash button repeatedly until reaching the icon to activate the red eye reduction. - Flash off: press Flash button repeatedly until reaching the icon to turn the flash off. Note: A “Low battery” warning will show up on the LCD screen if the battery is too low to allow the flash to set off.
- Page 15 of the latest captured file. 3. Press Left / Right button to choose between “Yes” or “No” and delete the file or cancel the deletion. 4. Press MENU button to confirm. 5. If you chose “Yes”, the Delete menu options will move to the next file of the playback mode. Just press MODE button to return to photo mode.
- Page 16 Image size The image size and quality settings determine the number of photos that can be saved and the memory required for each photo. The higher the quality of the photo, the more memory it will take. The image size and quality will also affect the maximum size to which you can print your photo.
- Page 17 3. Press Up / Down buttons to choose between: On / Off. 4. Press the MENU button to confirm your choice and then the MODE button to return to photo mode. 5. The corresponding icon will then show up at the top of the LCD screen indicating that the function is on. Image quality The quality of your photos also affects the number of photos you can take.
- Page 18 submenu. 3. Press Up / Down buttons to select an option: Off / Date / Date & Time. 4. By choosing “Off”, there will be no date on your photos. 5. By choosing “Date”, the date will be displayed on each photo once taken. 6.
- Page 19 possible. Choosing the lower ISO value helps prevent spots appearing on your photo. 1. Press the MENU button to enter the settings menu of the photo mode. 2. Press Up / Down buttons to select ISO in the settings menu and then the MENU button to enter the submenu.
- Page 20 3. Press Up / Down buttons to select an option: Sharp / Normal / Soft. 4. Press the MENU button to confirm your choice and then the MODE button to return to photo mode. Metering This setting allows you to adjust the metering point. 1.
- Page 21 4. Press the MENU button to confirm your choice and then the MODE button to return to photo mode. General setup of the camera The camera setup menu can be accessed in all modes by pressing the MENU button once and then pressing the Right button, and is mainly used to modify certain settings specific to the camera operation.
- Page 22 4. Press the MENU button to confirm your choice and then the MODE button to return to photo mode. Auto power off This setting allows you to program an automatic camera shutdown if you have not used your camera for a while to save battery charge.
- Page 23 3. Press Left / Right buttons to select successively the year, month, day, time and the date layout. 4. Press Up / Down buttons to set the highlighted data. 5. Press the MENU button to confirm your choice and then the MODE button to return to photo mode. Language The camera supports many languages.
-
Page 24: Video Mode
enter the submenu. 3. Press Up / Down buttons to choose between: Yes / No. 4. Press the MENU button to confirm your choice. 5. “Please wait” then shows up on the LCD screen if you launched a formatting. Once it is finished, “Completed”... - Page 25 2.The video icon will show up at the top left of the LCD screen and the elapsed recording time in the upper right corner. 3. Press Shutter button to start recording. 4. A flashing red dot and a red chronometer will show up at the top right of the LCD screen to indicate that the video recording is in progress.
-
Page 26: Playback Mode
4. Press the MENU button to confirm your choice and then the MODE button to return to photo mode. 5. The icon corresponding to your image size choice will then show up at the top of the LCD screen. White balance This setting allows the camera to adjust the colour of your video according to the colour of the light source. - Page 27 In playback mode you can display all photo and video files stored on the memory card in thumbnails. 1. Press (W) / Zoom out button to enter the thumbnail display. 2. Press Up / Down / Left / Right buttons to select the thumbnail of a photo or video (these are marked with a icon to differentiate them).
- Page 28 submenu. 3. Press Up / Down buttons to select an option: Single / Lock All Images / Unlock All Images. 4. Press the MENU button to confirm your choice. 5. A protection confirmation message will then show up with “Yes” or “No” options. 6.
- Page 29 - Locked files cannot be deleted. - This procedure is irreversible, so all unprotected files will be definitively lost once you confirm the total deletion of files stored on the memory card. Rotate This function allows you to rotate photos. 1.
-
Page 30: Download Photos To Your Pc
2. Press the Up button to play the video file and press it again to pause. 3. Press the Down button to stop video file playing. Note: To protect and delete videos, follow the same procedures as explained above for photos. Download photos or video files to your PC First, connect your camera to the computer via a USB cable that can read data and then turn it on: “MSDC”... -
Page 31: Appendix A. Technical Specifications
Appendix A: Technical Specifications Image Sensor CMOS Sensor (18M)4896X3672pixels,(16M)4608X3456pixels,(14M),4288X3216pixels, (12M)4000X3000pixels, (10M) 3648X2736 pixels,(8M)3264x2448 pixels, Image Resolution (7M HD) 3648x2056 pixels, (5M) 2592x1944 pixels, (3M) 2048x1536 pixels, (2M HD) 1920x1080 pixels , (VGA) 640x480 pixels. 1080P (30fps),720P(30fps),VGA(30fps) Video Resolution File Format JPEG (Still Image)/AVI (Video) External Memory HCSD Class 6 Card (up to 64GB) -
Page 32: Appendix B. Troubleshooting
A: A full list of available manuals can be found on our Product Manuals page, as well as on each individual product page. If you still cannot find what you are looking for email us on care@praktica.com. Q: The camera lens is stuck and will not open, retract or extend, what can I do? A: Do not force the lens to go back in, the wrong battery may have been inserted or the battery charge may be low. - Page 33 Q: I have taken photos but my computer says, “No photos in camera.” What do I do? A: First ensure that you have in fact taken photos. Press the Shutter button a few times to take some sample photos and then try downloading them again. If you still get a “no photos”...
Need help?
Do you have a question about the Luxmedia BX-D18 and is the answer not in the manual?
Questions and answers