Advertisement
Quick Links
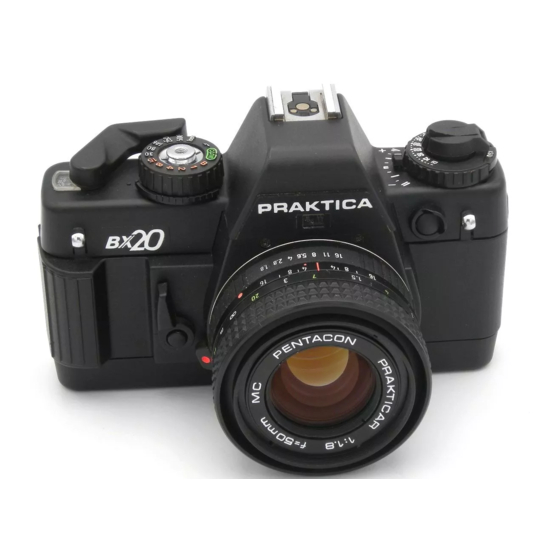
Praktica BX 20
This camera manual library is for reference
and historical purposes, all rights reserved.
This page is copyright by
This page may not be sold or distributed without
the expressed permission of the producer
I have no connection with any camera company
On-line camera manual library
If you find this manual useful, how about a donation of $3 to:
M. Butkus, 29 Lake Ave., High Bridge, NJ 08829-1701
and send your e-mail address so I can thank you.
Most other places would charge you $7.50 for a electronic copy
or $18.00 for a hard to read Xerox copy.
This will help me to continue to host this site,
buy new manuals, and pay their shipping costs.
It'll make you feel better, won't it?
If you use PayPal.. use the link below
Venmo is @mike-butkus-camera
Click here to go to main Camera Manual site
, M. Butkus, NJ.
Advertisement

Related Manuals for Praktica BX 20


Summary of Contents for Praktica BX 20
- Page 1 Praktica BX 20 This camera manual library is for reference and historical purposes, all rights reserved. This page is copyright by , M. Butkus, NJ. This page may not be sold or distributed without the expressed permission of the producer...
- Page 2 Introduction Shutter release Technical features Locking the metered value Guide to individual parts Exposure compensation Preparing to take pictures Semi-automatic mod e Inserting the battery Holding the camera Checking the battery Flash photography Opening the back Changing the lens Inserting the film Focusing Closing the back Depth-of-field indication...
- Page 3 The PRAKTICA BX 20 is also equipped with a system which, if a dedicated computerized flash unit is used on the camera, measures the light coming in from the flash unit, makes a split second evaluation, and closes the shutter as soon as the right amount of light has struck the film.
- Page 4 · PRAKTICA bayonet (flange focal length 44.4mm internal diameter 48.5 mm) · connection for motor winder · film information holder on camera back · indication of battery condition in viewfinder · power source: 6V primary battery (e. g. PX281Mallory) (Webmaster: a note stuck...
- Page 5 12. Memory and battery check key 13. Aperture setting ring 14. Focusing ring 15. Depth-of-field scale and infrared index 16. Lens positioning mark 17. Lug for carrying strap 18. Rewind release 19. Index for automatic mode 20. Shutter release lock 21.
- Page 6 23. Hot shoe with center contact 24. Center contact 25. Coupling point for computerized flash unit 26. Indicator of exposure compensation with index 27. Camera back 28. Film take-up spool 29. Film sprocket 30. Shutter blades 31. Film cartridge compartment 32.
- Page 7 Inserting the batteries A 6 V source is required to power the whole electronic system. It may be an alkali-manganese, silver oxide (SR) or lithium battery. Webmaster: On the left is an example of two PX-28 batteries from a Ricoh manual.
-
Page 8: Inserting The Film
Opening the back Pull the rewind button (18) up as far as it will go to unlock the back Open the back completely the frame counter (5) will automatically return to the starting position. Inserting the film Before the film is inserted the shutter speed dial should be set to a fast fixed shutter as otherwise a slow shutter speed may be formed in the "auto"... -
Page 9: Preparing To Shoot
If you shoot with a winder attached to the camera refer to the instructions for use of the PRAKTICA winder made by VEB PENTAGON DRESDEM We shad not be liable to you for damage caused by using a winder of different make. - Page 10 Preselecting the aperture The desired aperture is set against the mark on the lens by fuming the aperture setting ring (13). The set aperture is displayed at the bottom of the viewfinder image. If lever (4) is moved in the direction of the arrow, the diaphragm is stopped down to the aperture set, and the depth of field can be assessed in the viewfinder.
- Page 11 Shutter release After shutter speed has been checked in the viewfinder the shutter is operated by fully depressing the shutter release (22). When pressure is removed from the shutter release the electronics are automatically switched off. With slow shutter speeds the removal of pressure from the shutter release does not affect the exposure procedure.
- Page 12 If you want to shoot at a particular shutter speed, for reproductions or scientific work for example, set the PRAKTICA BX 20 to semi-automatic mode. Fixed shutter speeds from 1 s to 1/1 000 s and the B setting for any length of time are available.
- Page 13 Insert the PRAKTICA lens in such a way that the red marks (16 and 2) on the camera and lens are opposite each other. Press the lens against the camera body and turn clockwise until the locking pin is heard to engage.
- Page 14 By using the PRAKTICA adapter all original PRAKTICA lenses with the M 42x 1 thread can be connected. Lenses of other makes with the M 42x 1 thread must be suitable for PRAKTICA cameras and equipped for metering at working aperture.
-
Page 15: Infrared Photography
The limits of the depth of field for the selected aperture can be read off from the depth-of- field scale (15) on me lens. Example: distance 3 m, aperture 8 - depth of field ranges from around 2 m to 5 m. Infrared photography Infrared photography requires a slight correction to the focusing: match the distance determined in focusing Release button... - Page 16 · Never attempt to make your own repairs to the camera. Consult a service workshop where necessary. THIS IS NOTED ON AN EXTRA PAGE ADDED TO THE MANUAL Your PRAKTICA BX 20 has an improved battery compartment lid. Please note the following when inserting the battery: Push the lid (34) in the (changed) direction of the arrow and open it.
Need help?
Do you have a question about the BX 20 and is the answer not in the manual?
Questions and answers