Table of Contents
Advertisement
Quick Links
Installation
Start-Up
Maintenance
Parts
Warranty
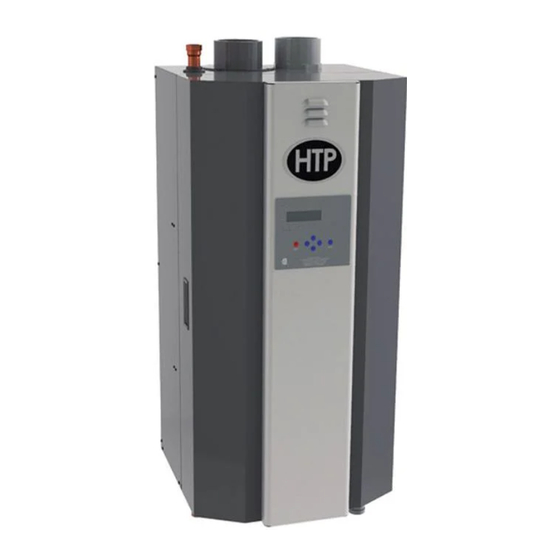
EFT-55 / EFT-80 / EFT-110
EFT-155 / EFT-199 / EFT-285
EFT-399
Models*
* "LP" Denotes Propane Gas Operation
"PU" Denotes Included Pump
This manual must only be used by a qualified installer / service technician. Read all instructions in this manual before
installing. Perform steps in the given order. Failure to do so could result in substantial property damage, severe
personal injury, or death.
Improper installation, adjustment, alteration, service, or maintenance could void product warranty and cause
property damage, severe personal injury, or death.
HTP reserves the right to make product changes or updates without notice and will not be held liable for typographical
errors in literature.
NOTE TO CONSUMER: PLEASE KEEP ALL INSTRUCTIONS FOR FUTURE REFERENCE.
272 Duchaine Blvd.
Commercial Boilers
New Bedford, MA 02745
Elite FT
Residential and
Heat Exchanger Bears the ASME "H" Stamp
www.htproducts.com
LP-387 Rev. 7.3.15
Advertisement
Table of Contents

Subscribe to Our Youtube Channel
Related Manuals for HTP Elite FT


Summary of Contents for HTP Elite FT
- Page 1 Improper installation, adjustment, alteration, service, or maintenance could void product warranty and cause property damage, severe personal injury, or death. HTP reserves the right to make product changes or updates without notice and will not be held liable for typographical errors in literature.
- Page 2 IF THE INFORMATION IN THIS MANUAL IS NOT FOLLOWED EXACTLY, A FIRE OR EXPLOSION MAY RESULT, CAUSING PROPERTY DAMAGE, PERSONAL INJURY, OR LOSS OF LIFE. DO NOT STORE GASOLINE OR OTHER FLAMMABLE VAPORS AND LIQUIDS IN THE VICINITY OF THIS OR ANY OTHER APPLIANCE. WHAT TO DO IF YOU SMELL GAS •...
- Page 3 AHJ. levels or to important product information. NOTE: HTP, Inc. reserves the right to modify product technical specifications and components without prior notice. DANGER indicates an imminently hazardous situation...
-
Page 4: Table Of Contents
In accordance with Section 325 (f) (3) of the Energy Policy heat load), the control will reduce the maximum fan speed. and Conservation Act, HTP, Inc. has provided this boiler with If the temperature difference exceeds 60°F, the control multiple features designed to save energy by reducing the will effectively sense there is little or no water flow or heat boiler water temperature as heating load decreases. -
Page 5: Part 1 - General Safety Information
J. Fill and Purge Heating System Part 10 - Start-Up Procedures for the Installer K. Glycol Antifreeze Solutions A. Boiler Control Status Menu L. Zoning with Zone Valves B. Cascade Menu M. Zoning with Circulators C. Boiler Test Mode N. Multiple Boilers Part 11 - Troubleshooting O. -
Page 6: Improper Combustion
Act of God, and IS NOT covered under product warranty. substantial property damage. Altering any HTP, Inc. boiler with parts not manufactured by HTP, Inc. WILL INSTANTLY VOID the boiler warranty and could •... -
Page 7: How The Boiler Operates
C. Optional Equipment connected boilers. Each cascaded boiler will have its own Optional equipment available from HTP (and Part #): pump to provide maximum flow and control heat exchanger • System Sensor (7250P-324) flow rate. -
Page 8: Part 3 - Prepare The Boiler
• Vision II (7250P-322) NOTE: When using an optional system sensor, pipe insulation Incorrect ambient conditions can lead to damage to the must be wrapped around it to improve temperature heating system and put safe operation at risk. Ensure that measurement accuracy and increase overall system efficiency. -
Page 9: Structure
B. Structure High heat sources (generating heat 100 F / 37 C or greater, such as boiler flue pipes, space heaters, etc.) may damage Assure that the structure of the installation location is sufficient plastic components of the boiler as well as plastic vent pipe to support the full installed weight of the boiler, including water materials. -
Page 10: Wall Mounting Considerations
Always take future maintenance into consideration when locating the boiler. If the boiler is located in an installation location with limited clearances, it may be necessary to remove the boiler from the space to perform maintenance. Failure to consider maintenance when determining installation location Figure 4 - Wall Mounting Bracket - NOTE: Drawing for could result in property damage. -
Page 11: Mounting To A Metal Frame
Required Amount of Bolts for Wall-Mounting the Boiler Model Amount of Bolts For closet or alcove installations, a two pipe venting system EFT-55 - 110 must be used. Failure to follow this warning could result in substantial property damage, severe personal injury, or death. EFT-155 - 285 EFT-399 Pilot Hole Size by Wood Type... -
Page 12: Indoor Combustion Air In Confined Or Unconfined Space
Failure to provide an adequate supply of fresh combustion air can cause poisonous flue gases to enter the living space, resulting in severe personal injury or death. To prevent combustion air contamination, see Table 2. I. Prevent Combustion Air Contamination Install intake air piping for the boiler as described in the Venting Section, this manual. -
Page 13: Water Chemistry Requirements
G of ANSI Z223.1. I. Water Chemistry Requirements* Areas Likely Have Products to Avoid Contaminants Chemical imbalance of the water supply may affect efficiency Spray cans containing Dry cleaning / laundry areas and cause severe damage to the boiler and associated fluorocarbons and establishments equipment. - Page 14 Figure 6 - Boiler Dimensions - NOTE: All Dimensions Are Approximate LP-387 Rev. 7.3.15...
-
Page 15: Part 4 - Piping
The boiler may be connected to an indirect water heater to scalding injury or property damage. supply domestic hot water. HTP offers indirect water heaters FAILURE TO COMPLY WITH THE ABOVE GUIDELINES in a wide range of gallon sizes in either stainless steel or glass- COULD RESULT IN FAILURE OF RELIEF VALVE OPERATION, lined construction. -
Page 16: Circulators
HTP (Part # 7600P-104 for 55 – 110 of the expansion tank. models, 7600P-990 for 155 – 399 models). Check with local Expansion Tank Sizing codes for additional requirements. - Page 17 Figure 7 - Boiler Pressure Drop The chart below represents various system design temperature rise through the boiler along with respective flows and friction loss. This is provided to aid in circulator selection. System Temperature Rise Chart 20°Δt 25°Δt 30°Δt Model Friction Ft Flow Rate (GPM)
-
Page 18: Check / Control Water Chemistry
through the boiler, causing inadvertent short cycling and poor H. Check / Control Water Chemistry system performance. NOTE: Boiler failure due to improper water chemistry is not Check Valves covered by warranty. Field supplied. Check valves are recommended for installation Water Chemistry* as shown in Applications. -
Page 19: Fill And Purge Heating System
The boiler cannot be drained completely of water without • A 30% mixture of glycol will result in a BTU output loss of purging the unit with an air pressure of 15 PSI. 15% with a 5% increase in head against the system circulator. 10. -
Page 20: Applications
O. Applications* CAUTION Mixing valves are required for the protection of low temperature loops. Figure 8 - Near Boiler Piping* - NOTE: This drawing is meant to show system piping concept only. Installer is responsible for all equipment and detailing required by local codes. *Top / Bottom Supply / Return Connections Available on 155 / 199 / 285 / and 399 Models ONLY. NOTE: In piping applications utilizing a single zone, it is recommended that the installer use flow / check valves with weighted seats at or near the appliance to prevent gravity circulation. - Page 21 Figure 9 - Piping Symbol Legend LP-387 Rev. 7.3.15...
- Page 22 Figure 10 - Standard Piping with Zone Valves and Indirect Priority NOTES: 1. This drawing is meant to show system piping concept only. Installer is responsible for all equipment and detailing required by local codes. 2. All closely spaced tees shall be within 4 pipe diameters center to center spacing. 3.
- Page 23 Figure 11 - Standard Piping with Pumps and Indirect Priority NOTES: 1. This drawing is meant to show system piping concept only. Installer is responsible for all equipment and detailing required by local codes. 2. All closely spaced tees shall be within 4 pipe diameters center to center spacing. 3.
- Page 24 Figure 12 - Primary / Secondary Piping with Zone Valves and Indirect Priority NOTES: 1. This drawing is meant to show system piping concept only. Installer is responsible for all equipment and detailing required by local codes. 2. All closely spaced tees shall be within 4 pipe diameters center to center spacing. 3.
- Page 25 Figure 13 - Primary / Secondary Piping with Pumps and Indirect Priority NOTES: 1. This drawing is meant to show system piping concept only. Installer is responsible for all equipment and detailing required by local codes. 2. All closely spaced tees shall be within 4 pipe diameters center to center spacing. 3.
- Page 26 Figure 14 - Multiple Boilers - Primary / Secondary Piping with Pumps and Indirect Priority NOTES: 1. This drawing is meant to show system piping concept only. Installer is responsible for all equipment and detailing required by local codes. 2. All closely spaced tees shall be within 4 pipe diameters center to center spacing. 3.
-
Page 27: Part 5 - Venting And Condensate Removal
Part 5 - Venting and Condensate Removal The boiler must be vented as detailed in this section. Ensure exhaust vent and intake piping complies with these instructions regarding vent system. Inspect finished exhaust vent and intake piping thoroughly to ensure all joints are well secured, airtight, and comply with all applicable code requirements, as well as the instructions provided in this manual. -
Page 28: Approved Materials For Exhaust Vent And Intake Pipe
B. Approved Materials for Exhaust Vent and Intake Pipe Standards for Installation In: Item Material United States Canada PVC Schedule 40/80 ANSI / ASTM D1785 PVC, CPVC, and PP Venting Must PVC-DWV* ANSI / ASTM D2665 be ULC-S636 Certified. IPEX is Exhaust Vent or Intake an approved manufacturer in CPVC Schedule 40/80... -
Page 29: Exhaust Vent And Intake Pipe Location
D. Exhaust Vent and Intake Pipe Location Area Where Terminal Is Not Permitted Intake Pipe Terminal Exhaust Vent Terminal Figure 15 - Exit Terminals for Direct Vent Systems - ANSI Z223.1 / NFPA 54 for US and CAN/CSA B149.1 for Canada In addition: DETERMINE EXHAUST VENT AND INTAKE PIPE LOCATION –... -
Page 30: Exhaust Vent And Intake Pipe Sizing
E. Exhaust Vent and Intake Pipe Sizing 1. The exhaust vent and intake pipe size is 3” for 55 - 285 models and 4” for the 399 model. 2. The maximum total equivalent length of exhaust vent and intake pipe should not exceed 200 feet for all models EXCEPT the 285 model. -
Page 31: Applications
16. Ensure the outdoor intake pipe termination is screened to prevent blockage caused by debris or birds. The following table lists optional exhaust/intake terminations 6/23/15 TWO PIPE SIDEWALL VENTING WITH TEE (INTAKE) available from HTP: AND COUPLING (EXHAUST) Description Stock Code 3” PVC Concentric Termination Kit KGAVT0601CVT 3”... - Page 32 Sidewall Venting with Kit Sidewall Venting with Concentric Vent SIDE VIEW FRONT VIEW Roof Venting with Concentric Vent FRONT VIEW Figure 18 - Venting with Optional Kits (NOT INCLUDED WITH THE BOILER) NOTE: These drawings are meant to demonstrate system LP-325-PP 03/03/11 venting only.
-
Page 33: Venting Through An Existing System
Concentric Venting Through an Existing System NOTE: The following instructions refer only to venting through an existing vent system, and not to venting with HTP’s optional concentric vent kits. Refer to Concentric Vent Kit installation manual (LP-166) for further information on venting with the optional concentric vent kits. -
Page 34: Indoor Combustion Air In Confined Or Unconfined Space
Concentric Venting Through an Existing System Concentric Venting Through an Existing System Chase Venting Through an Existing System INTAKE EXISTING VENT AIR INTAKE W/ SCREEN AIR INTAKE W/ SCREEN Figure 21 - 1, 2 - Concentric Venting Through an Existing System, 3, Chase Venting Through an Existing System NOTE: These drawings are meant to demonstrate system venting only. -
Page 35: Condensate Removal System
Condensate from the boiler is slightly acidic with a pH of 3.2 - 4.5. To avoid long term damage to the drainage system and to meet local code requirements, HTP recommends neutralizing condensate with a Condensate Neutralizer Kit (Part # 7450P-212 for EL-80/110/150/220/299/301, Part # 7350P-611 for EL-399). - Page 36 4.5. To avoid long term damage to the drainage system and to 3. Slide the condensate trap adapter onto the drain tube until meet local code requirements, HTP recommends neutralizing the holes line up with the groove. the condensate with a Condensate Neutralizer Kit (Part # 4.
- Page 37 Figure 26 - Condensate Piping Suggestions NOTES: 1. Condensate line must be pitched at least ¼” per foot to properly drain. If this cannot be done, or a very long length Power to the optional condensate pump is continuous. When of condensate hose is used, increase the condensate line the boiler is powered off the condensate pump will remain on.
-
Page 38: Part 6 - Wiring
Wiring must be NEC Class 1. If original wiring supplied with the boiler must be replaced, use only TEW 105 C wire or equivalent. Boiler must be electrically grounded as required by the National Electrical Code, ANSI/NFPA 70 - Latest Edition. -
Page 39: Alarm Connections
HTP 7250P-325 tank sensor. When a tank sensor is pump draw of 3 amps at 120 volts. If the pump requires more used, the boiler control will automatically detect its presence... -
Page 40: Optional 0-10 Volt Building Control Signal
(120 volt or greater) wiring. interprets the 0-10 volt signal as follows; when HTP recommends that the maximum length of communication bus cables not exceed 200 feet. the signal is between 0 and 1.5 volts, the boiler 4. -
Page 41: Cascade Master Pump And Sensor Wiring
5. Connect the boilers in a daisy chain configuration as shown (NEUT), and 3 (GND). below. It is best to wire the boilers using the shortest wire 2. An alarm bell or light can be connected to the alarm contacts runs rather than trying to wire them in the order that they of the follower boiler. - Page 42 Figure 33 - Internal Connection Diagram LP-387 Rev. 7.3.15...
-
Page 43: Part 7 - Gas Connections
6. Sealing compound must be approved for gas connections. Part 7 - Gas Connections Care must be taken when applying compound to prevent blockage or obstruction of gas flow which may affect the operation of the unit. Failure to follow all precautions could result in fire, explosion, severe injury, or death. -
Page 44: Check Inlet Gas Pressure
Do not do a gas conversion on this boiler without an officially to measure incoming pressure from 0-35” w.c. See Figure 35. approved conversion kit and instructions supplied by HTP. 4. Turn on the gas and power up the unit. -
Page 45: Boiler Gas Valve
Sodium less than 20 mGL C. Boiler Gas Valve Water pH between 6.0 and 8.0 1. Maintain boiler water pH between 6.0 and 8.0. Check with litmus paper or have it chemically analyzed by a water treatment company. 2. If the pH differs from above, consult local water treatment company for treatment needed. -
Page 46: Freeze Protection (When Used)
acceptable by sample testing. PROPANE BOILERS ONLY – The propane supplier mixes an It is important to purge the system of air to avoid damage to odorant with the propane to make its presence detectable. In the boiler. some instances the odorant can fade, and the gas may no longer have an odor. -
Page 47: Check Thermostat Circuit(S)
HTP (554200). This the LED fault indicator, and close the alarm relay contacts to aid pump is equipped with two leads that can be connected to an in recognition of the condition, diagnosis, and repair. -
Page 48: Lockout Condition
begin a demand sequence as described above. Once the boiler f. Exit the installer menu. ignites, the master boiler control will increase the firing rate NOTE: The temperature set point of the master must match command to that boiler until the system sensor temperature is the follower boiler set point in order for the system to operate at the set point temperature plus the differential, or that boiler is properly. -
Page 49: Part 9 - Start-Up Procedure
ENTER – The ENTER key is used to access parameter Part 9 - Start-Up Procedure programming mode. To access this mode, hold down the ENTER key for more than 4 seconds. The readout will change to: ENTER MENU CODE FOR YOUR OWN SAFETY READ BEFORE OPERATING 1. -
Page 50: Programming Boiler Settings
D. Programming Boiler Settings CLOCK MINUTE Adjusts the minute setting. Boiler Setting Program Access 08/28/2009 Fr 10:01A Note: Programming the boiler control is not possible when the CLOCK DAY OF WEEK boiler is firing. Make sure any input which can create a demand Adjusts the day of the week. - Page 51 Screen Description Function 16 Optional Inputs Function 6 DHW Post Pump Time Allows the user to select optional inputs to control or monitor the The indirect pump has the ability to OPTIONAL INPUT system. Default: RETURN (Range: post purge energy from the boiler RETURN SEN Off / Booster Board / 0-10 Volt / DHW to run the pump after the set point...
-
Page 52: Resetting The Maintenance Schedule
10,000 hours, if required. Function 30 Extra Boiler Mode Hours Allows for a non HTP boiler to be controlled when the cascade Allows the user to set the middle two SERVICE SCHEDULE EXTRA BOILER MODE output has risen above the percent digits of the amount of run hours 10000’s 000000... - Page 53 Displays the current tank temperature set point on the top line. The actual temperature measured by the tank or return sensor (HTP 7250P-325) is displayed on the bottom line. If a DHW SET mechanical aquastat is used in place of the recommended sensor, the second line will display ‘OFF’...
- Page 54 The top line displays the voltage on This screen displays the fourth oldest 0-10 V 0.0V the optional input. This voltage is only boiler control lockout fault. The top BOILER relevant if an external 0-10 volt signal is line will alternate between the words FAULT HISTORY being used to control the boiler.
- Page 55 This screen displays overall cascade B. Cascade Menu power output. The range of this This menu is accessed by pressing < at the default menu or > at value is the number of boilers the status menu. communicating with the Master x CASCADE PWR 100% Screen...
- Page 56 correct operation and no reoccurrence of fault message. Combustion Settings on All Models Natural Gas (NG) Propane (LP) Fan Speed Low Ignition High Low Ignition High When servicing or replacing components that are in direct Carbon contact with boiler water, be certain that: Monoxide 5-50 60-100...
- Page 57 D. User Interface Display Cascade Control Fault Codes Screen Description Possible Remedy Disconnect the system sensor from the wiring and measure it’s resistance. Compare the measured resistance E03 indicates a problem with the system to the table in this manual to see if it corresponds to the sensor circuit.
- Page 58 1. Check line voltage. It must be between 100 and 128 volts. 2. If available, connect a PC and use HTP service software to check the 24v supply display in the lower left corner of the screen. The number displayed here must be greater than 128 and should be no greater than 250.
- Page 59 F03 indicates the return temperature sensor of the boiler has failed. The boiler will not 1. Check circulator pump operation. restart until a technician replaces the sensor 2. Ensure adequate flow through the boiler by accessing RETURN SENSOR F03 and pushes RESET on the display. This is the status menu and determining there is less than a 50 PUMP ON a serious safety issue as indicated by the...
- Page 60 1. Watch the igniter through the observation window. 2. If there is no spark, check the spark electrode for the proper .156” (3.96 mm) gap. See below. 3. Remove any corrosion from the spark electrode and flame rectifier probe. 4. If there is a spark but no flame, check the gas supply to the boiler.
- Page 61 The fan is not running at the speed 1. Check the combustion fan wiring. determined by the control. Fan speed has 2. Measure DC voltage from the red fan wire to ground been more than 30% faster or slower than while it is connected to the fan.
- Page 62 e. Remove the combustion assembly. Part 12 - Maintenance 2. Spray water or solution into the combustion assembly and monitor the flow through the combustion system. Liquid A. Procedures should flow freely through each tube. If there is an obstruction, Periodic maintenance should be performed once a year by a increase the flow on the tube to force blockage out.
- Page 63 C. Cleaning Water Side of Heat Exchanger 1. Make sure power is turned off to the boiler. Run water through the hot water system ensure below room temperature. 2. Close isolation valves on the return and supply connections to the boilers as shown in the piping diagrams in this manual.
- Page 64 depressing and holding the RESET button for more than 1 second will remove the lockout state so additional trials for ignition can be performed. The unit will try to re-light once Do not operate the boiler without the clear hose attached every 6 minutes.
- Page 65 Figure 37 - Combustion System Replacement Parts - 55 - 110kBTU Models LP-387 Rev. 7.3.15...
- Page 66 Figure 38 - Replacement Parts - 55 - 110kBTU Models - *#20 - Switch on the Left is the Blocked Flue Pressure Switch on the Right is the Blocked Condensate Pressure Switch - Both share same Part Number LP-387 Rev. 7.3.15...
- Page 67 Figure 39 - Combustion System Replacement Parts - 155 - 399kBTU Models LP-387 Rev. 7.3.15...
- Page 68 Figure 40 - Replacement Parts - 155 - 399kBTU Models - *#15 - Switch on the Left is the Blocked Flue Pressure Switch on the Right is the Blocked Condensate Pressure Switch - Both share same Part Number LP-387 Rev. 7.3.15...
- Page 69 Part 14 - Installation Checklist Light Off Activities Date Completed: Check all piping and gas connections. Verify all are tight. Pressurize system. (12 - 15 psi) 1. Fill the Heating System Add water to prime condensate cup. Percentage of glycol in system (0 - 50%) Verify near boiler piping is properly supported.
- Page 70 Inspection Activities Date Last Completed Piping 1st Year 2nd Year 3rd Year 4th Year* Check boiler and system piping for any sign of leakage; make sure Near boiler piping pipes are properly supported. Check condition of all vent pipes and joints. Ensure the vent piping Vent terminations are free of obstructions and blockages.
- Page 71 ADDITIONAL INSTALLATION REQUIREMENTS FOR THE COMMONWEALTH OF MASSACHUSETTS In the Commonwealth of Massachusetts, the installer or service agent shall be a plumber or gas fitter licensed by the Commonwealth. When installed in the Commonwealth of Massachusetts or where applicable state codes may apply;...
- Page 72 3. SIGNAGE. A metal or plastic identification plate shall be permanently mounted to the exterior of the building at a minimum height of eight (8) feet above grade directly in line with the exhaust vent terminal for the horizontally vented gas fueled heating appliance or equipment.
- Page 73 D. If HTP is unable to repair or replace an Elite FT boiler so as connection, combustion air openings, electric service voltage, to conform to this warranty after a reasonable number of attempts, wiring, or fusing.
- Page 74 “in-warranty” (that is, within the applicable warranty These are the only written warranties applicable to the Elite FT period) by reviewing a copy of the original sales receipt. You must boiler manufactured and sold by HTP.
- Page 75 Maintenance Notes LP-387 Rev. 7.3.15...
- Page 76 Customer Installation Record Form The following form should be completed by the installer for you to keep as a record of the installation in case of a warranty claim. After reading the important notes at the bottom of the page, please also sign this document. Customer’s Name Date of Installation Installation Address...
Need help?
Do you have a question about the Elite FT and is the answer not in the manual?
Questions and answers