
Related Manuals for GreenWorks Pro ULTRAPOWER HTC402


Summary of Contents for GreenWorks Pro ULTRAPOWER HTC402
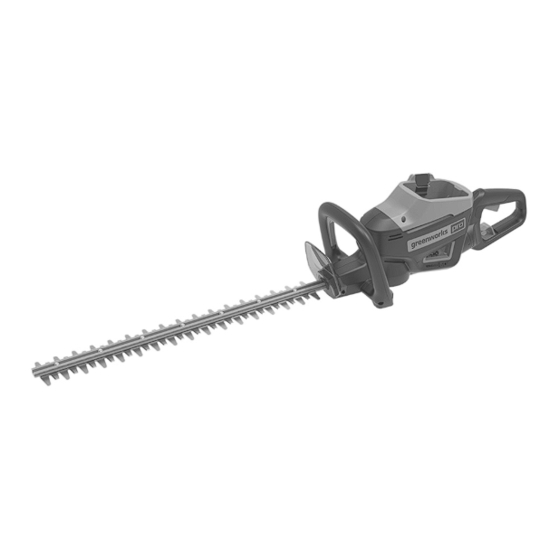
- Page 1 HT60L211 HT60L01 HEDGE TRIMMER OPERATOR MANUAL CORTADOR DE SETOS MANUAL DEL OPERADOR HTC402 www.greenworkstools.com...
-
Page 3: Table Of Contents
English Description......... 4 Environmentally safe battery Purpose.............. 4 disposal..........6 Overview............4 Installation......... 7 Packing list............4 Unpack the machine.......... 7 General power tool safety Operation........... 7 warnings..........4 Start the machine..........7 Work area safety..........4 Stop the machine..........7 Electrical safety.......... -
Page 4: Description
English DESCRIPTION PERSONAL SAFETY • Stay alert, watch what you are doing and use common PURPOSE sense when operating a power tool. Do not use a power tool while you are tired or under the influence This machine is intended for cutting and trimming hedges and of drugs, alcohol or medication. -
Page 5: Battery Tool Use And Care
English BATTERY TOOL USE AND CARE • Avoid body contact with earthed or grounded surfaces, such as pipes, radiators, ranges and • Recharge only with the charger specified by the refrigerators. There is an increased risk of electric shock manufacturer. A charger that is suitable for one type of if your body is earthed or grounded. -
Page 6: Risk Levels
English Symbol Explanation SYM- SIGNAL MEANING Frequency (cycles per second) CAUTION (Without Safety Alert Sym- Power bol) Indicates a situation that may result in property dam- Time age. Type or a characteristic of current Precautions that involve your safety. ENVIRONMENTALLY SAFE BATTERY DISPOSAL Read and understand all instructions before operating the product, and fol-... -
Page 7: Installation
English INSTALLATION • Remove all objects such as cords, lights, wire, or string which can become entangled in the cutting blade and create a risk of personal injury. UNPACK THE MACHINE WARNING WARNING If the blade jams on an electrical cord or line, DO NOT It is not necessary to assemble the machine. -
Page 8: Maintenance
English TROUBLESHOOTING 2. Release the rotating button until it locks into position. MAINTENANCE Problem Possible cause Solution Make sure that CAUTION The battery pack is you tighlty install not installed tight- The motor does Do not let brake fluids, gasoline, petroleum-based materials the battery pack in not start when you touch the plastic parts. -
Page 9: Limited Warranty
English LIMITED WARRANTY EXPLODED VIEW GARANTIE OUTIL & BATTERIE • GARANTÍA PARA HERRAMIENTAS Y BATERÍAS Greenworks hereby warranties this product, to the original purchaser with proof of purchase, for a period of four (4) years against defects in materials, parts or workmanship. Greenworks, at its own discretion will repair or replace any and all parts found to be defective, through normal use, free of charge to the customer. - Page 10 Español Descripción........11 Niveles de riesgo......13 Finalidad............11 Eliminación de batería segura Perspectiva general.......... 11 para el medio ambiente....14 Lista de embalaje ..........11 Instalación........14 Advertencias generales de Desembalaje de la máquina......14 seguridad para herramientas Funcionamiento....... 14 eléctricas........... 11 Puesta en marcha de la máquina......15 Seguridad de la zona de trabajo.......
-
Page 11: Finalidad
Español DESCRIPCIÓN eléctricas generan chispas que pueden encender el polvo o los gases. FINALIDAD • Mantenga alejados a los niños y los transeúntes mientras utilice una herramienta eléctrica. Las Esta máquina se ha diseñado para cortar y podar setos y distracciones pueden hacer que pierda el control. -
Page 12: Utilización Y Cuidado De Herramientas A Batería
Español reducen el riesgo de que la herramienta eléctrica se idénticas. Esto garantizará el mantenimiento de la arranque accidentalmente. seguridad de la herramienta eléctrica. • Almacene las herramientas eléctricas inactivas fuera ADVERTENCIAS DE SEGURIDAD del alcance de los niños y no permita que personas que PARA CORTASETOS no estén familiarizadas con la herramienta eléctrica o estas instrucciones puedan utilizarla. -
Page 13: Propuesta 65
Español PROPUESTA 65 Símbolo Explicación Potencia AVISO Tiempo Este producto contiene una sustancia química conocida en el estado de California como causante de cáncer, defectos Tipo o característica de la corriente de nacimiento u otros daños reproductivos. El polvo Precauciones relacionadas con su se- generado por el lijado eléctrico, el serrado, el esmerilado, la guridad perforación y otras actividades de construcción contiene... -
Page 14: Eliminación De Batería Segura Para El Medio Ambiente
Español INSTALACIÓN SÍMBO- INDICACIÓN SIGNIFICADO DESEMBALAJE DE LA MÁQUINA PRECAUCIÓN (Sin símbolo de alerta sobre seguridad) Indica una situa- AVISO ción que puede provocar da- No es necesario montar la máquina. ños materiales. AVISO ELIMINACIÓN DE BATERÍA SEGURA PARA EL MEDIO •... -
Page 15: Puesta En Marcha De La Máquina
Español • No utilice la máquina si alguna pieza ha sufrido daños o Puede utilizar el botón de rotación para ajustar el asa está doblada. posterior en posiciones diferentes para cortar los setos más fácilmente. • Retire todos los objetos, como cordones, luces, cables o cuerdas que puedan enredarse en la cuchilla de corte y 1. -
Page 16: Solución De Problemas
Español 1. Retire la batería. Capacidad de corte 1.1" (28 mm) 2. Deje que el motor se enfríe. Peso (sin batería) 7.17 lbs. (3.25 kg) 3. Compruebe que no haya componentes sueltos o dañados. Modelo de batería LB602, LB6025, LB603, En caso necesario, sustituya los componentes dañados, LB604, LB605, LB606 y apriete los tornillos y los pernos o consulte con una... -
Page 17: Vista Despiezada
Español del comprador. Es responsabilidad del comprador pagar los costes de transporte de cualquier pieza enviada para su sustitución bajo esta garantía, a menos que dicha devolución sea solicitada por escrito por Greenworks. Dirección en EE.UU.: Dirección en Canadá: Greenworks Tools Greenworks Tools Canada Inc. - Page 21 BL60L01 BL60L251 BLOWER OPERATOR MANUAL SOPLADOR MANUAL DEL OPERADOR BLC402 www.greenworkstools.com...
- Page 23 English 10.4 Remove the battery pack........7 Description......... 4 10.5 Attach the shoulder strap........7 Purpose.............. 4 11 Operation........... 7 Overview............4 Important safety instructions...4 11.1 Start the machine..........7 11.2 Stop the machine..........8 Battery-operated power tools...4 11.3 Cruise control lever........... 8 Child safety........
-
Page 24: Description
English DESCRIPTION • Do not operate power tools in an explosive atmosphere, such as in the presence of flammable liquids, gases, or dust. Power tools create sparks that may ignite the dust or PURPOSE fumes. The machine is used to propel air out of a tube to move •... -
Page 25: Child Safety
English PROPOSITION 65 • Prevent unintentional starting. Ensure the switch is in the off-position before connecting to battery pack, picking up or carrying the appliance. Carry the power tool with your WARNING finger on the switch or energize power tool that have the This product contains a chemical known to the state of switch on invites accidents. -
Page 26: Risk Levels
English WARNING Symbol Explanation Discard all toxic materials in a specified manner to prevent Keep all bystanders at least 50 feet away. contamination of the environment. Before discarding damaged or worn out Li-ion battery, contact your local Failure to keep loose clothing from being waste disposal agency, or the local Environmental drawn into air intake could result in per- Protection Agency for information and specific instructions. -
Page 27: Install The Blower Tube
English 10.2 INSTALL THE BLOWER TUBE 2. Push the battery pack into the battery compartment until the battery pack locks into place. 3. When you hear a click, the battery pack is installed. 10.4 REMOVE THE BATTERY PACK 1. Push and hold the battery release button. 2. -
Page 28: Stop The Machine
English MAINTENANCE 3. Release the trigger to decrease the speed. 11.2 STOP THE MACHINE CAUTION Do not let brake fluids, gasoline, petroleum-based materials 1. Release the trigger to stop the machine. touch the plastic parts. Chemicals can cause damage to the plastic, and make the plastic unserviceable. -
Page 29: Troubleshooting
English TROUBLESHOOTING LIMITED WARRANTY PROBLEM POSSIBLE SOLUTION CAUSE Make sure that The battery pack is you tighlty install The motor does not installed tight- the battery pack in not start when the machine. you pull the trig- ger. The battery pack is Charge the battery out of power. -
Page 30: Exploded View
English EXPLODED VIEW No. Part No. Qty Description R0201910-00 Blower tube R0201909-00 Concentrator nozzle RB37902144 Shoulder strap... - Page 31 Español 10.3 Instalación de la batería........15 Descripción........12 10.4 Retirada de la batería........15 Finalidad............12 10.5 Fijación de la correa de hombro...... 15 Perspectiva general.......... 12 11 Funcionamiento....... 16 Instrucciones importantes de 11.1 Puesta en marcha de la máquina......16 seguridad..........
-
Page 32: Descripción
Español DESCRIPCIÓN polvo, pelusas, pelos y cualquier cosa que pueda reducir el flujo de aire. FINALIDAD • Mantenga el cabello, la ropa suelta, los dedos y todas las partes del cuerpo lejos de las aberturas y de las piezas La máquina se utiliza para expulsar aire por un tubo para móviles. -
Page 33: Seguridad Infantil
Español SEGURIDAD INFANTIL • Recargue solo con el cargador especificado por el fabricante. Un cargador adecuado para un tipo de batería puede dar lugar a un riesgo de incendio cuando se usa con Pueden producirse accidentes trágicos si el operario no es otra batería. -
Page 34: Niveles De Riesgo
Español Símbolo Explicación SÍMBO- INDICACIÓN SIGNIFICADO Corriente PRECAUCIÓN (Sin símbolo de alerta sobre Potencia seguridad) Indica una situa- ción que puede provocar da- Tiempo ños materiales. Revoluciones, carreras, velocidad de su- /min perficie, órbitas, etc., por minuto ELIMINACIÓN DE BATERÍA Corriente continua SEGURA PARA EL MEDIO Debe leer y entender todas las instruc-... -
Page 35: Instalación
Español INSTALACIÓN 2. Conecte la boquilla en el tubo hasta que el tubo se bloquee en la boquilla. 10.1 DESEMBALAJE DE LA MÁQUINA SUGERENCIA AVISO Puede utilizar la boquilla para aumentar el flujo de aire en zonas estrechas. Asegúrese de montar correctamente la máquina antes del uso. -
Page 36: Funcionamiento
Español 2. Póngase la correa de hombro. 1. Tire de la palanca de control de crucero en sentido horario para aumentar la velocidad. Esto bloqueará la 3. Ajuste la longitud de la correa a una posición cómoda. velocidad en el ajuste deseado. FUNCIONAMIENTO 2. -
Page 37: Limpieza De La Máquina
Español 12.1 LIMPIEZA DE LA MÁQUINA PROBLEMA POSIBLE CAU- SOLUCIÓN PRECAUCIÓN El interruptor de La máquina debe estar seca. La humedad supone un riesgo encendido está de- de descargas eléctricas. fectuoso. Las piezas defec- tuosas deben ser La máquina no se El motor está... -
Page 38: Garantía Limitada
Español GARANTÍA LIMITADA VISTA DESPIEZADA Por la presente Greenworks garantiza este producto, al comprador original con el comprobante de compra, durante un periodo de cuatro (4) años frente a defectos en materiales, piezas o mano de obra. A su entera discreción Greenworks reparará... - Page 41 ST60L04 ST60L254 STRING TRIMMER OPERATOR MANUAL CORTABORDES MANUAL DEL OPERADOR www.greenworkstools.com STC404...
- Page 43 English Adjust the length of the cutting line....8 Description......... 4 Adjust the cutting diameter........9 Purpose.............. 4 Line cut-off blade..........9 Overview............4 Attach machine to shoulder strap...... 9 Packing list............4 Operation tips............ 9 Important safety instructions...4 Cutting tips ............. 10 Symbols on the machine....
-
Page 44: Description
English DESCRIPTION 6 Shoulder strap IMPORTANT SAFETY PURPOSE INSTRUCTIONS This machine is used to cut grass, light weeds, and other similar vegetation at or around ground level. The cutting READ ALL INSTRUCTIONS BEFORE USING (THIS plane must be approximately parallel to the ground surface. POWER TOOL) You cannot use the machine to cut or chop hedges, shrubs, bushes, flowers and compost. -
Page 45: Symbols On The Machine
English clean, and free from oil and grease. Failure to do so can • Have servicing performed by a qualified repair person cause serious injury. using only identical replacement parts. This will ensure that the safety of the product is maintained. •... -
Page 46: Risk Levels
English RISK LEVELS WARNING If the battery pack cracks or breaks, with or without leaks, The following signal words and meanings are intended to do not recharge it and do not use. Discard it and replace explain the levels of risk associated with this product. with a new battery pack. -
Page 47: Attach The Guard
English WARNING • If parts of the machine are damaged, do not use the machine. Release button • If you do not have all the parts, do not operate the machine. • If the parts are damaged or missing, contact the service Positioning hole center. -
Page 48: Install The Battery Pack
English INSTALL THE BATTERY PACK WARNING Be careful when you operate the machine. WARNING • If the battery pack or charger is damaged, replace the START THE MACHINE battery pack or the charger. • Stop the machine and wait until the motor stops before 1. -
Page 49: Adjust The Cutting Diameter
English ADJUST THE CUTTING 1. Attach the carabiner to the carrying ring on the drive tube. DIAMETER NOTE ① The machine is set at a 14 in. (35.6 cm) cutting diameter. You can adjust to a 16 in. (40.6 cm) cutting diameter. Set the cutting diameter to 14 in. -
Page 50: Cutting Tips
English IMPORTANT Make sure that all nuts, bolts and screws are tight. Examine regularly that you install the handles tightly. IMPORTANT Use only the replacement parts and accessories of the initial manufacturer. 10.1 GENERAL INFORMATION IMPORTANT Only your dealer or approved service center can perform maintenance that is not given in this manual. -
Page 51: Install The Cutting Line
English 3. Insert the line into the mounting hole, which is located inside the eyelet (b). Push the cutting line until it exits the 3. Remove any remaining line. opposite hole. 4. Clean dirt and debris from all parts. Replace spool (d) if it is worn or damaged. -
Page 52: Replace The Spool
English 10.5 REPLACE THE SPOOL NOTE If any parts of the spool retainer assembly are damaged or worn, replace the damaged part and reassemble them as following showing 1. Disassemble the trimmer head . Pull and remove the spool cover (b). 2. -
Page 53: Transportation And Storage
English TRANSPORTATION AND Item Temperature STORAGE Charger operation tempera- 39°F (4°C) - 104°F (40°C) ture range WARNING Battery storage temperature 32°F (0°C) - 113°F (45°C) Remove the battery pack from the machine before range transportation and storage. Battery discharging tempera- 32°F (0°C) - 113°F (45°C) ture range 11.1... -
Page 54: Troubleshooting
English TROUBLESHOOTING Problem Possible Cause Solution The machine does not start No electrical contact between the ma- 1. Remove battery pack. when you push the trigger. chine and the battery pack. 2. Check contact and install the battery pack again. The battery pack is depleted. -
Page 55: Limited Warranty
English Problem Possible Cause Solution Vibration increases obvi- The line is worn down at one side and Make sure that the line on both sides is normal. Ad- ously. not advanced in time. vance the line. LIMITED WARRANTY Mooresville, NC 28115 Greenworks hereby warranties this product, to the original purchaser with proof of purchase, for a period of four (4) years against defects in materials, parts or workmanship. -
Page 56: Exploded View
English EXPLODED VIEW No. Part No. Description No. Part No. Qty Description R0201836-00 Auxiliary Handle Assembly R0201834-00 Trimmer Head Assembly R0201826-00 Bolt R0201830-00 Hex Screw R0201827-00 Auxiliary handle R0201881-00 Guard Assembly R0201828-00 Bracket R0201770-00 Allen key R0201833-00 Knob RB37902144 Shouler strap... - Page 57 Español Ajuste de la longitud del hilo de corte..... 22 Descripción........18 Ajuste del diámetro de corte......23 Finalidad............18 Cuchilla de corte de hilo........23 Perspectiva general.......... 18 Fijación de la máquina a la correa de Lista de embalaje..........18 hombro.............23 Instrucciones importantes de Consejos de funcionamiento......23...
-
Page 58: Descripción
Español DESCRIPCIÓN 6 Correa de hombro INSTRUCCIONES FINALIDAD IMPORTANTES DE Esta máquina se utiliza para cortar hierba, maleza ligera y SEGURIDAD otra vegetación similar a nivel del suelo. El plano de corte debe estar aproximadamente paralelo a la superficie del suelo. LEA TODAS LAS INSTRUCCIONES ANTES DEL USO No puede utilizar la máquina para cortar o podar setos, (DE ESTA HERRAMIENTA ELÉCTRICA) -
Page 59: Símbolos En La Máquina
Español manera. Asegúrese de que el cabezal de hilo esté • No deseche las baterías en el fuego. Las celdas pueden correctamente instalado y bien fijado. Mantenga el filo explotar. Compruebe los códigos locales para conocer las afilado y limpio para un mejor rendimiento y para reducir posibles instrucciones especiales de eliminación. -
Page 60: Niveles De Riesgo
Español Utilice únicamente accesorios y piezas de repuesto idénticos Símbolo Explicación del fabricante. Debe leer y entender todas las instruc- ciones antes de manejar la máquina, así ELIMINACIÓN DE BATERÍA como seguir todas las advertencias e in- SEGURA PARA EL MEDIO strucciones de seguridad. -
Page 61: Propuesta 65
Español PROPUESTA 65 3. Alinee los orificios de tornillos de la protección con los orificios de tornillo del cabezal de corte. AVISO 4. Apriete los tornillos. Este producto contiene una sustancia química conocida en el estado de California como causante de cáncer, defectos de nacimiento u otros daños reproductivos. -
Page 62: Fijación Del Asa Auxiliar
Español FIJACIÓN DEL ASA AUXILIAR Presionar para soltar 1. Retire el mando (16) del asa. 2. Fije el asa auxiliar y la abrazadera inferior (15) en el eje. 3. Sitúe el asa auxiliar en una posición cómoda. 4. Introduzca el perno (14) por el orificio. 5. -
Page 63: Ajuste Del Diámetro De Corte
Español 2. El hilo se libera automáticamente y la cuchilla de corte eficiencia del corte disminuya. Esto mantendrá el mejor rendimiento y mantendrá el hilo el tiempo suficiente para corta la longitud sobrante. avanzar adecuadamente. FIJACIÓN DE LA MÁQUINA A LA CORREA DE HOMBRO ②... -
Page 64: Consejos De Corte
Español MANTENIMIENTO Le sugerimos lo siguiente cuando utilice la máquina • Mantenga una posición firme con las dos manos en la IMPORTANTE máquina mientras cabezal de hilo está girando. • Corte la hierba alta de arriba a abajo. Debe leer y entender los reglamentos de seguridad y las instrucciones de mantenimiento antes de limpiar, reparar o Si se enrolla hierba alrededor del cabezal de corte: realizar tareas de mantenimiento en la máquina. -
Page 65: Instalación Del Hilo De Corte
Español 10.4 INSTALACIÓN DEL HILO DE 2. Tire para retirar la cubierta del carrete (b). CORTE NOTA No ponga más de 15 ft (5 m) de hilo de corte cada vez. 1. Retire el hilo de corte restante del carrete. 2. -
Page 66: Sustitución Del Carrete
Español 3. Afloje los tornillos (e). Retire el carrete (d), la cubierta de la ranura (f) y la carcasa de ubicación (g) del conjunto del carrete. 4. Sustituya por un carrete nuevo. 5. Inserte la carcasa de ubicación y la cubierta de la ranura en la cubierta del carrete (b), a continuación, coloque el carrete sobre la cubierta de la ranura en la posición deseada. -
Page 67: Montaje Del Cabezal De Corte
Español 11.2 ALMACENAMIENTO DE LA MÁQUINA • Retire la batería de la máquina. • Asegúrese de que los niños no puedan acercarse a la máquina. • Mantenga la máquina alejada de agentes corrosivos, como sustancias químicas para jardín y sales para descongelación. -
Page 68: Solución De Problemas
Español SOLUCIÓN DE PROBLEMAS Problema Posible causa Solución La máquina no se pone en No hay contacto eléctrico entre la máqui- 1. Retire la batería. marcha cuando aprieta el na y la batería. 2. Compruebe el contacto e instale de nuevo la batería. gatillo. -
Page 69: Garantía Limitada
Español Problema Posible causa Solución La hierba se enrolla alre- Corte la hierba alta al nivel del suelo. 1. Corte la hierba alta de arriba a abajo. dedor del cabezal de corte 2. No quite más de 8" (20 cm) en cada pasada para evi- y de la carcasa del motor. - Page 70 Español VISTA DESPIEZADA Nº Nº pieza Descripción Nº Nº pieza Descripción R0201836-00 Conjunto de asa auxiliar R0201834-00 Conjunto de cabezal de corte R0201826-00 Perno R0201830-00 Tornillo hexagonal R0201827-00 Asa auxiliar R0201881-00 Conjunto de protección R0201828-00 Soporte R0201770-00 Llave Allen R0201833-00 Mando RB37902144 Correa de hombro...
Need help?
Do you have a question about the ULTRAPOWER HTC402 and is the answer not in the manual?
Questions and answers