Table of Contents
Advertisement
Available languages
Available languages
Advertisement
Chapters
Table of Contents
Troubleshooting

Related Manuals for GreenWorks Pro GST80320


Summary of Contents for GreenWorks Pro GST80320
- Page 1 User Manual of Product 1: Greenworks PRO 16-Inch 80V Cordless String Trimmer (Attachment Capable), Battery Not Included GST80320 User Manual of Product 2: Greenworks Pro 80V (170 MPH / 730 CFM) Brushless Cordless Axial Blower, Tool Only BL80L02...
- Page 2 2101202 STRING TRIMMER OPERATOR MANUAL COUPE-HERBE MANUEL DE L’UTILISATEUR CORTABORDES MANUAL DEL OPERADOR www.greenworkstools.com STB456...
-
Page 4: Table Of Contents
English Stop the machine..........8 Description......... 4 Adjust the length of the cutting line....8 Purpose.............. 4 Attach machine to shoulder strap...... 9 Install the battery pack........4 Operation tips............ 9 Overview............4 Cutting tips............9 Important safety instructions...4 Adjust the cutting diameter......10 Symbols on the machine.... -
Page 5: Description
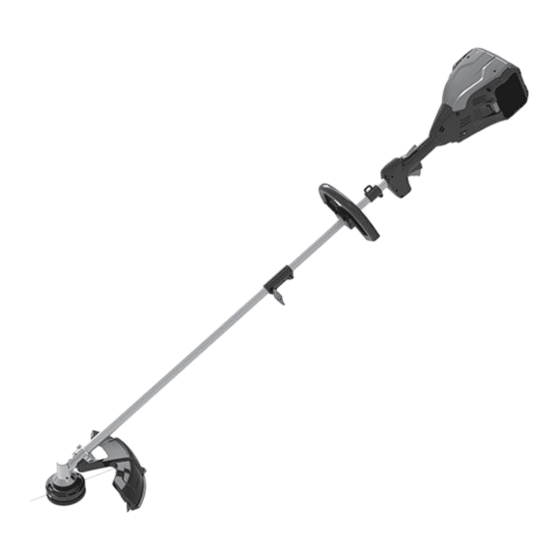
English DESCRIPTION IMPORTANT SAFETY INSTRUCTIONS PURPOSE READ ALL INSTRUCTIONS BEFORE USING (THIS This machine is used to cut grass, light weeds, and other POWER TOOL) similar vegetation at or around ground level. The cutting WARNING plane must be approximately parallel to the ground surface. You cannot use the machine to cut or chop hedges, shrubs, Read and understand all instructions before using this bushes, flowers and compost. -
Page 6: Symbols On The Machine
English • Check damaged parts before using the appliance, a guard • Keep guards in place and in working order. or other part that is damaged should be carefully checked • Keep hands and feet away from cutting area. to determine that it will operate properly and perform its •... -
Page 7: Risk Levels
English RISK LEVELS WARNING If the battery pack cracks or breaks, with or without leaks, The following signal words and meanings are intended to do not recharge it and do not use. Discard it and replace explain the levels of risk associated with this product. with a new battery pack. -
Page 8: Attach The Guard
English WARNING • If parts of the machine are damaged, do not use the machine. • If you do not have all the parts, do not operate the machine. • If parts are damaged or missing, contact the service center. 4. -
Page 9: Install The Battery Pack
English CONTROLS 4. Tighten the screws. START THE MACHINE 1. Push the lock-out lever (1) and pull the trigger (2). INSTALL THE BATTERY PACK WARNING • If the battery pack or charger is damaged, replace the battery pack or the charger. •... -
Page 10: Attach Machine To Shoulder Strap
English ATTACH MACHINE TO • Remove the battery pack. SHOULDER STRAP • Remove the grass. 1. Attach the carabiner to the carrying ring on the drive tube. CUTTING TIPS • Tilt the machine toward the area to be cut. Use the tip of the cutting line to cut grass. -
Page 11: Adjust The Cutting Diameter
English ADJUST THE CUTTING 10.1 GENERAL INFORMATION DIAMETER IMPORTANT NOTE Only your dealer or approved service center can do the maintenance that is not given in this manual. The machine is set at a 14" (356 mm) cutting diameter. You can adjust to a 16"... -
Page 12: Install The Cutting Line
English 3. Put the cutting line through the hole. Push the cutting line until it exits the opposite hole. 3. Remove any remaining line. 4. Clean dirt and debris from all parts. Replace spool (3) if it 4. Pull the cutting line through until there is an equal is worn or damaged. -
Page 13: Assemble The Trimmer Head
English TRANSPORTATION AND STORAGE WARNING Remove the battery pack from the machine before transportation and storage. 11.1 MOVE THE MACHINE When you move the machine, you must: • Stop the machine. • Remove the battery pack. 11.2 STORE THE MACHINE •... -
Page 14: Technical Data
English Problem Possible Cause Solution Problem Possible Cause Solution The ma- The guard is not Remove the battery pack The line The machine is 1. Cut with the tip of the chine stops attached to the ma- and attach the guard to keeps used incorrectly. -
Page 15: Limited Warranty
English USA address: Canadian address: Item Temperature Greenworks Tools Greenworks Tools Canada Inc. Charger operation tempera- 39°F (4°C) - 104°F (40°C) ture range P.O. Box 1238 P.O. Box 93095, Newmarket, Ontario Battery storage temperature 32°F (0°C) - 113°F (45°C) range Mooresville, NC 28115 L3Y 8K3 Battery discharging tempera-... -
Page 16: Exploded View
English EXPLODED VIEW No. Part No. Description No. Part No. Qty Description RB34130334V Auxiliary handle assembly R0201685-00 Trimmer Head Assembly R0201784-00 Knob R0201786-00 Guard assembly RB37902144 Shouler strap... - Page 17 Français Puesta en marcha de la máquina......22 Description........17 Arrêtez la machine...........22 But..............17 Réglez la longueur de la ligne de coupe..22 Install the battery pack........17 Attachez la machine à la bandoulière....22 Aperçu............. 17 Conseils sur l'utilisation........23 Instructions importantes sur la Conseils de coupe..........
-
Page 18: But
Français DESCRIPTION Garde protectrice INSTRUCTIONS IMPORTANTES SUR LA Cette machine est utilisée pour couper l'herbe, les mauvaises SÉCURITÉ herbes légères et d'autres végétaux similaires au niveau du sol ou à proximité. La surface de coupe doit être LISEZ TOUTES LES INSTRUCTIONS AVANT approximativement parallèle à... -
Page 19: Symboles Figurant Sur La Machine
Français • Effectuez l’entretien de l’appareil avec précaution - • N'exposez pas un bloc-batterie ou un appareil à un feu ou Remplacez la tête de coupe si elle est fissurée, ébréchée à une température excessive. L'exposition au feu ou une ou endommagée de quelque façon que ce soit. -
Page 20: Niveaux De Risques
Français Symbole Explication SYM- SIGNAL SIGNIFICATION BOLE Tours, coups, vitesse périphérique, or- /min bites, etc., par minute MISE EN (Sans symbole d’alerte de sé- GARDE curité) indique une situation Courant direct pouvant entraîner des dom- mages matériels. Précautions destinées à assurer la sécur- ité. -
Page 21: Proposition 65
Français DÉBALLEZ LA MACHINE AVERTISSEMENT Si la batterie se fend ou se brise, avec ou sans fuites, ne la AVERTISSEMENT rechargez pas et ne l'utilisez pas. Jetez-la et remplacez-la Assurez-vous d'assembler correctement la machine avant de par une nouvelle batterie. N'ESSAYEZ PAS DE LA l'utiliser. -
Page 22: Attachez La Poignée Auxiliaire
Français 3. Alignez le bouton de déclenchement (2) avec le trou de positionnement (4) et assemblez les deux arbres. 3. Placez la poignée auxiliaire dans la position la plus confortable pour l’utilisation. 4. Serrez les vis. 4. Tournez l'arbre inférieur jusqu'à ce que le bouton s'enclenche dans le trou de positionnement. -
Page 23: Commandes
Français 2. Retirez le bloc-batterie de la machine. UTILISATION IMPORTANT Avant d'utiliser la machine, lisez et comprenez les consignes de sécurité et les instructions d'utilisation. AVERTISSEMENT Soyez prudent lorsque vous utilisez la machine. COMMANDES PUESTA EN MARCHA DE LA MÁQUINA ATTACHEZ LA MACHINE À... -
Page 24: Conseils Sur L'utilisation
Français CONSEILS SUR L'UTILISATION ZONE DE COUPE AVERTISSEMENT DANGEREUSE Respectez l'espace libre entre le corps et la machine. AVERTISSEMENT N'utilisez pas la machine sans la garde protectrice en place. Voici quelques conseils pour l'utilisation de la machine • Tenez fermement la machine avec les deux mains pendant MEILLEURE ZONE son utilisation. -
Page 25: Entretien
Français ENTRETIEN IMPORTANT Lisez et comprenez les consignes de sécurité et les instructions d'entretien avant de nettoyer, de réparer ou d'effectuer des travaux d'entretien sur la machine. IMPORTANT Assurez-vous que tous les écrous, les boulons et les vis sont bien serrés. Vérifiez régulièrement que les poignées sont bien serrées. -
Page 26: Retirez La Tête De Coupe
Français 2. Alignez les fentes (1) de la bobine avec les fentes (2) de 5.1" 5.1" la tête de coupe. (130 (130 Tapuchon de bobine Tête de coupe Fentes 10.5 RETIREZ LA TÊTE DE COUPE 1. Insérez la tige métallique (1) dans le trou de transmission angulaire spécifié... -
Page 27: Transport Et Entreposage
Français 3. Tournez la tête de coupe dans le sens contraire des Problème Cause possible Solution aiguilles d'une montre pour la serrer. La machine La garde protec- Retirez le bloc-batterie et 4. Retirez la tige métallique. s’arrête trice n’est pas atta- installez la garde protec- lorsque chée à... -
Page 28: Données Techniques
Français Problème Cause possible Solution Article Température La ligne ne La machine n’est 1. Coupez avec le bout de Plage de température de re- 39°F (4°C) - 104°F (40°C) cesse de se pas utilisée cor- la ligne, évitez les chargement de la batterie briser. - Page 29 Français incombe à l'acheteur de payer les frais de transport pour toute pièce retournée pour remplacement en vertu de la présente garantie, à moins qu'un tel retour soit demandé par écrit par Greenworks. Adresse aux Etats-Unis : Adresse au Canada : Greenworks Tools Greenworks Tools Canada Inc.
- Page 30 Español Detención de la máquina......... 34 Descripción........30 Ajuste de la longitud del hilo de corte..... 35 Finalidad............30 Fijación de la máquina a la correa de Install the battery pack........30 hombro.............35 Perspectiva general.......... 30 Consejos de funcionamiento......35 Instrucciones importantes de Consejos de corte..........36 seguridad..........
-
Page 31: Descripción
Español DESCRIPCIÓN INSTRUCCIONES IMPORTANTES DE FINALIDAD SEGURIDAD Esta máquina se utiliza para cortar hierba, maleza ligera y LEA TODAS LAS INSTRUCCIONES ANTES DEL USO otra vegetación similar a nivel del suelo. El plano de corte (DE ESTA HERRAMIENTA ELÉCTRICA) debe estar aproximadamente paralelo a la superficie del suelo. AVISO No puede utilizar la máquina para cortar o podar setos, arbustos, matorrales, flores y compost. -
Page 32: Símbolos En La Máquina
Español afilado y limpio para un mejor rendimiento y para reducir • No abra ni desguace las baterías. El electrolito liberado es el riesgo de lesiones. Siga las instrucciones para la corrosivo y puede producir daños a los ojos o la piel. lubricación y el cambio de accesorios. -
Page 33: Niveles De Riesgo
Español ELIMINACIÓN DE BATERÍA Símbolo Explicación SEGURA PARA EL MEDIO Lleve siempre gafas de seguridad con AMBIENTE protectores laterales marcada para cum- plir la ANSI Z87.1 cuando utilice esta máquina. No exponga la máquina a la lluvia o a condiciones de humedad. Mantenga a los transeúntes al menos a 15 m. -
Page 34: Propuesta 65
Español PROPUESTA 65 3. Alinee los orificios de tornillo de la protección con los orificios de tornillo del cabezal de corte. AVISO 4. Apriete los tornillos. Este producto contiene una sustancia química conocida en el estado de California como causante de cáncer, defectos de nacimiento u otros daños reproductivos. -
Page 35: Instalación De La Batería
Español 2. Fije el asa auxiliar y la abrazadera inferior en el eje. RETIRADA DE LA BATERÍA 1. Pulse y mantenga pulsado el botón de desbloqueo de la batería. 2. Retire la batería de la máquina. FUNCIONAMIENTO 3. Sitúe el asa auxiliar en la posición de uso más cómoda. IMPORTANTE 4. -
Page 36: Ajuste De La Longitud Del Hilo De Corte
Español AJUSTE DE LA LONGITUD DEL HILO DE CORTE Mientras utiliza la máquina, el hilo de corte se desgasta y se acorta. Puede ajustar la longitud del hilo de corte. 1. Golpee el cabezal de corte contra el suelo mientras utiliza la máquina. -
Page 37: Consejos De Corte
Español AJUSTE DEL DIÁMETRO DE CORTE NOTA La máquina está ajustada a un diámetro de corte de 14" (356 mm). Puede ajustarla a un diámetro de corte de 16" (406 mm) . Ajuste el diámetro de corte a 14" (356 mm) para un tiempo de funcionamiento mayor y a 16"... -
Page 38: Información General
Español IMPORTANTE Utilice únicamente las piezas de repuesto y los accesorios del fabricante original. 10.1 INFORMACIÓN GENERAL IMPORTANTE Únicamente un distribuidor o un centro de servicio autorizado puede realizar el mantenimiento que no se indica en este manual. Antes de las operaciones de mantenimiento: •... -
Page 39: Retirada Del Cabezal De Corte
Español 5.1" 5.1" Tapa del carrete (130 (130 Cabezal de corte Ranuras 10.5 RETIRADA DEL CABEZAL DE CORTE Ranuras 1. Coloque la varilla metálica (1) en el orificio de transmisión del ángulo especificado para fijar el cabezal Orificio del cabezal de corte de corte. -
Page 40: Montaje Del Cabezal De Corte
Español SOLUCIÓN DE PROBLEMAS 10.6 MONTAJE DEL CABEZAL DE CORTE Problema Posible causa Solución 1. Coloque la varilla metálica en el orificio de transmisión La máquina No hay contacto 1. Retire la batería. del ángulo especificado para fijar el cabezal de corte. no se pone eléctrico entre la 2. -
Page 41: Datos Técnicos
Español Problema Posible causa Solución Problema Posible causa Solución La máquina La protección no Retire la batería y fije la El hilo se La máquina se está 1. Corte con la punta del se detiene está fijada a la má- protección a la máquina. -
Page 42: Garantía Limitada
Español COSTES DE TRANSPORTE: Elemento Temperatura Los costes de transporte por el desplazamiento de cualquier Intervalo de temperatura de 39°F (4°C) - 104°F (40°C) unidad o accesorio de equipos eléctricos son responsabilidad carga de la batería del comprador. Es responsabilidad del comprador pagar los Intervalo de temperatura de 39°F (4°C) - 104°F (40°C) costes de transporte de cualquier pieza enviada para su... -
Page 43: Vista Despiezada
Español VISTA DESPIEZADA Nº Nº pieza Descripción Nº Nº pieza Descripción RB34130334V Conjunto de asa auxiliar R0201685-00 Conjunto de cabezal de corte R0201784-00 Mando R0201786-00 Conjunto de protección RB37902144 Correa de hombro... - Page 46 BLOWER OPERATOR MANUAL SOUFFLEUSE MANUEL D’OPÉRATEUR SOPLADOR MANUAL DEL OPERADOR BLB489 www.greenworkstools.com...
- Page 48 English 10.4 Remove the battery pack........7 Description......... 4 11 Operation........... 7 Purpose.............. 4 Overview............4 11.1 Start the machine..........7 Important safety instructions...4 11.2 Stop the machine..........8 11.3 Cruise control lever........... 8 Battery-operated power tools...4 11.4 Turbo button............8 Child safety........
-
Page 49: Description
English DESCRIPTION • Do not operate power tools in an explosive atmosphere, such as in the presence of flammable liquids, gases, or dust. Power tools create sparks that may ignite the dust or PURPOSE fumes. The machine is used to propel air out of a tube to move •... -
Page 50: Child Safety
English SAVE THESE or carrying the appliance. Carry the power tool with your finger on the switch or energize power tool that have the INSTRUCTIONS switch on invites accidents. • Disconnect the battery pack from the power tool before SYMBOLS ON THE PRODUCT making any adjustments, changing accessories, or storing the power tool. -
Page 51: Environmentally Safe Battery Disposal
English WARNING SYM- SIGNAL MEANING If the battery pack cracks or breaks, with or without leaks, do not recharge it and do not use. Discard it and replace DANGER Indicates an imminently haz- with a new battery pack. DO NOT TRY TO REPAIR IT! To ardous situation, which, if not prevent injury and risk of fire, explosion, or electric shock, avoided, will result in death... -
Page 52: Install The Blower Tube
English 10.3 INSTALL THE BATTERY PACK WARNING • If parts of the machine are damaged, do not use the machine. • If you do not have all the parts, do not operate the machine. • If the parts are damaged or missing, contact the service center. -
Page 53: Stop The Machine
English MAINTENANCE 11.2 STOP THE MACHINE 1. Release the trigger to stop the machine. CAUTION Do not let brake fluids, gasoline, petroleum-based materials 11.3 CRUISE CONTROL LEVER touch the plastic parts. Chemicals can cause damage to the plastic, and make the plastic unserviceable. CAUTION Do not use strong solvents or detergents on the plastic housing or components. -
Page 54: Troubleshooting
English TROUBLESHOOTING LIMITED WARRANTY PROBLEM POSSIBLE SOLUTION CAUSE Make sure that The battery pack is you tighlty install The motor does not installed tight- the battery pack in not start when the machine. GARANTIE OUTIL & you pull the trig- BATTERIE •... - Page 55 English EXPLODED VIEW No. Part No. Qty Description R0201908-00 Cruise control assembly R0201909-00 Concentrator nozzle R0201910-00 Blower tube...
- Page 56 Français 10.3 Installer le bloc-batterie........15 Description........12 10.4 Retirer le bloc-batterie........16 But..............12 11 Utilisation......... 16 Aperçu............. 12 Instructions importantes sur la 11.1 Démarrer la machine........16 11.2 Arrêter la machine........... 16 sécurité..........12 11.3 Levier de régulateur de vitesse......16 Outils fonctionnant sur batterie..13 11.4 Bouton Turbo...........16 Sécurité...
-
Page 57: Description
Français DESCRIPTION • N’introduisez aucun objet dans les ouvertures. Veillez à ce qu'aucun objet ne se trouve dans l'orifice lors de l'utilisation de l'appareil; maintenir l'orifice dégagé de toutes poussière, fibre, cheveux, ou de tout ce qui pourrait réduire la circulation de l'air. La machine est utilisée pour propulser l'air hors d'un tube pour déplacer les matériaux indésirables tels que les feuilles •... -
Page 58: Outils Fonctionnant Sur Batterie
Français OUTILS FONCTIONNANT SUR • Suivez toutes les instructions de recharge et ne rechargez pas le bloc-batterie ou l'appareil en dehors de la plage de BATTERIE température spécifiée dans ces instructions. Un rechargement incorrect ou à des températures en dehors •... -
Page 59: Niveaux De Risques
Français ÉLIMINATION DES Symbole Explication BATTERIES SANS DANGER POUR L'ENVIRONNEMENT Portez un casque anti-bruit pendant l’uti- lisation de cet équipement. Portez toujours des lunettes de protection avec des protections latérales marquées conformément à la norme ANSI Z87.1 lorsque vous utilisez cet équipement. Ne pas exposer la machine à... -
Page 60: Installation
Français PROPOSITION 65 10.2 INSTALLEZ LE TUBE DE LA SOUFFLEUSE AVERTISSEMENT Ce produit contient un produit chimique connu dans l'état de Californie comme étant une cause de cancer, de malformations congénitales ou d'autres problèmes de reproduction. Certaines poussières produites par le ponçage mécanique, le sciage, le meulage, le perçage et d'autres activités de construction contiennent des produits chimiques connus pour causer le cancer, des malformations... -
Page 61: Retirer Le Bloc-Batterie
Français 11.3 LEVIER DE RÉGULATEUR DE 1. Alignez les languettes du bloc-batterie avec les rainures du compartiment de batterie. VITESSE 2. Poussez le bloc-batterie dans le compartiment de batterie jusqu'à ce qu'il soit bien encliqueté. 3. Vous devriez entendre un clic lorsque le bloc-batterie sera inséré... -
Page 62: Entretien
Français ENTRETIEN DÉPANNAGE ATTENTION PROBLÈME CAUSE POSSI- SOLUTION Évitez que les liquides de freins, l'essence et les matériaux à base de pétrole ne viennent en contact avec les pièces en Assurez-vous que La batterie n'est plastique. Les produits chimiques peuvent endommager le la batterie est cor- Le moteur ne dé- pas correctement... -
Page 63: Garantie Limitée
Français P.O. Box 1238 P.O. Box 93095, Newmarket, Article Température Ontario Plage de température de dé- 32°F (0°C) - 113°F (45°C) Mooresville, NC 28115 L3Y 8K3 chargement de la batterie VUE ÉCLATÉES GARANTIE LIMITÉE GARANTIE OUTIL & BATTERIE • GARANTÍA PARA HERRAMIENTAS Y BATERÍAS Greenworks garantit par la présente ce produit, à... - Page 64 Español 10.3 Instalación de la batería........23 Descripción........20 10.4 Retirada de la batería........24 Finalidad............20 11 Funcionamiento....... 24 Perspectiva general.......... 20 Instrucciones importantes de 11.1 Puesta en marcha de la máquina......24 11.2 Detención de la máquina......... 24 seguridad.......... 20 11.3 Palanca de control de crucero......
-
Page 65: Descripción
Español DESCRIPCIÓN polvo, pelusas, pelos y cualquier cosa que pueda reducir el flujo de aire. FINALIDAD • Mantenga el cabello, la ropa suelta, los dedos y todas las partes del cuerpo lejos de las aberturas y de las piezas La máquina se utiliza para expulsar aire por un tubo para móviles. -
Page 66: Seguridad Infantil
Español puede dar lugar a un riesgo de incendio cuando se usa con • Mantenga a los niños fuera de la zona de trabajo y bajo la otra batería. vigilancia de un adulto responsable. • Utilice únicamente el cargador suministrado por el •... -
Page 67: Niveles De Riesgo
Español AVISO Símbolo Explicación Deseche todos los materiales tóxicos de una manera No toque el ventilador cuando utilice la especificada para evitar la contaminación del medio máquina. ambiente. Antes de desechar una batería de ion de litio dañada o agotada, contacte con la agencia local de Si no evita que la ropa suelta se introduz- eliminación de residuos o con la agencia de protección ca en la entrada de aire, podrían produc-... -
Page 68: Instalación
Español PROPUESTA 65 10.2 INSTALACIÓN DEL TUBO SOPLADOR AVISO Este producto contiene una sustancia química conocida en el estado de California como causante de cáncer, defectos de nacimiento u otros daños reproductivos. El polvo generado por el lijado eléctrico, el serrado, el esmerilado, la perforación y otras actividades de construcción contiene sustancias químicas que se sabe que son causantes de cáncer, defectos de nacimiento u otros daños reproductivos. -
Page 69: Retirada De La Batería
Español 11.3 PALANCA DE CONTROL DE 1. Alinee las nervaduras de elevación de la batería con las ranuras del compartimento de la batería. CRUCERO 2. Introduzca la batería en el compartimento de la batería hasta que encaje en su posición. 3. -
Page 70: Mantenimiento
Español MANTENIMIENTO • Asegúrese de que los niños no puedan acercarse a la máquina. PRECAUCIÓN SOLUCIÓN DE PROBLEMAS No permita que líquidos de frenos, gasolina y otros derivados del petróleo toquen las piezas de plástico. Las PROBLEMA POSIBLE CAU- SOLUCIÓN sustancias químicas pueden dañar el plástico y hacer que quede inservible. -
Page 71: Garantía Limitada
Español Greenworks Tools Greenworks Tools Canada Inc. Elemento Temperatura P.O. Box 1238 P.O. Box 93095, Newmarket, Intervalo de temperatura de 32°F (0°C) - 113°F (45°C) Ontario descarga de la batería Mooresville, NC 28115 L3Y 8K3 GARANTÍA LIMITADA VISTA DESPIEZADA GARANTIE OUTIL & BATTERIE •...
Need help?
Do you have a question about the GST80320 and is the answer not in the manual?
Questions and answers