Table of Contents
Advertisement
Available languages
Available languages
Quick Links
GRZEJNIK KONWEKTOROWY
CONVECTOR HEATER
Bedienungsanleitung
KONVEKTIONSHEIZKÖRPER
PRZEZNACZONY DO MONTAŻU NAŚCIENNEGO Z MOŻLIWOŚCIĄ INSTALACJI NA NÓŻKACH
Dyrektywa Parlamentu Europejskiego i Rady 2009/125/WE
Elektryczny miejscowy ogrzewacz pomieszczeń
DESIGNED FOR WALL MOUNTING WITH THE POSSIBILITY OF INSTALLATION ON LEGS
Directive 2009/125/EC of the European Parliament and of the Council
Electric local space heater
ZUR WANDMONTAGE BESTIMMT, MIT INSTALLATIONSMÖGLICHKEIT AUF FÜSSEN
Richtlinie 2009/125/EG des Europäischen Parlaments und des Rates Elektrische Einzelraumheizgeräte
des Rates Elektrische Einzelraumheizgeräte
v. 1.05
Advertisement
Chapters
Table of Contents

Related Manuals for Warmtec EWE+ 1000 Wi-Fi


Summary of Contents for Warmtec EWE+ 1000 Wi-Fi
- Page 1 GRZEJNIK KONWEKTOROWY CONVECTOR HEATER Bedienungsanleitung KONVEKTIONSHEIZKÖRPER PRZEZNACZONY DO MONTAŻU NAŚCIENNEGO Z MOŻLIWOŚCIĄ INSTALACJI NA NÓŻKACH Dyrektywa Parlamentu Europejskiego i Rady 2009/125/WE Elektryczny miejscowy ogrzewacz pomieszczeń DESIGNED FOR WALL MOUNTING WITH THE POSSIBILITY OF INSTALLATION ON LEGS Directive 2009/125/EC of the European Parliament and of the Council Electric local space heater ZUR WANDMONTAGE BESTIMMT, MIT INSTALLATIONSMÖGLICHKEIT AUF FÜSSEN Richtlinie 2009/125/EG des Europäischen Parlaments und des Rates Elektrische Einzelraumheizgeräte...
- Page 2 Opis symboli Symbole użyte w niniejszej instrukcji mają na celu zwrócenie uwagi na możliwe zagrożenia. Symbole bezpieczeństwa i towarzyszące im objaśnienia muszą być prawidłowo zrozumiane. Ostrzeżenia same w sobie nie usuwają zagrożeń i nie mogą zastąpić prawidłowych działań zapobiegających wypadkom. Ten symbol ostrzega lub informuje o niebezpieczeństwie.
-
Page 3: Table Of Contents
SPIS TREŚCI Zasady bezpieczeństwa Budowa i instalacja grzejnika Panel sterowania Obsługa grzejnika Konfiguracja połączenia / sterowanie WiFi Konserwacja i przechowywanie Ochrona środowiska i recykling Specyfikacja techniczna Dziękujemy za wybór naszego produktu. Przed pierwszym użyciem należy zapoznać się z niniejszą instrukcją, a następnie zachować... -
Page 4: Zasady Bezpieczeństwa
- Zawsze odłączaj wtyczkę zasilania podczas przenoszenia lub czyszczenia grzejnika. Podczas odłączania urządzenia od sieci, najpierw wyłącz grzejnik, a następnie odłącz wtyczkę. Nie szarp za kabel zasilający. - Samodzielne rozkręcanie grzejnika jest surowo zabronione. W przypadku uszkodzenia grzejnika należy zwrócić się o pomoc do serwisu WARMTEC. - Page 5 - Produkt przeznaczony jest do użytku domowego. - Nie dotykaj powierzchni grzejnika kiedy urządzenie jest włączone lub niedawno zostało wyłączone - ryzyko poparzenia. - Dzieci w wieku poniżej 8 lat nie mogą korzystać z urządzenia. Z urządzenia mogą korzystać dzieci w wieku od 8 lat i starsze oraz osoby o ograniczonych zdolnościach fizycznych, sensorycznych lub umysłowych, a także osoby z brakiem doświadczenia i wiedzy pod warunkiem, że zostały one objęte nadzorem lub zostały poinstruowane w zakresie obsługi urządzenia w sposób bezpieczny i rozumieją...
-
Page 6: Budowa I Instalacja Grzejnika
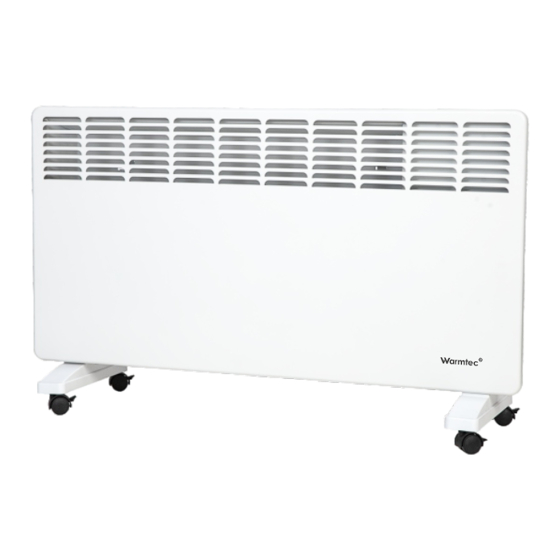
BUDOWA I INSTALACJA GRZEJNIKA Budowa urządzenia 1. Wyświetlacz i panel sterowania 2. Wyloty powietrza 3. Przednia obudowa 4. Tylna obudowa 5. Nóżki UWAGA! Nie wolno uruchamiać grzejnika przed założeniem nóżek lub zamontowaniem na ścianie. Montaż nóżek 1. Wyjmij urządzenie i wszystkie akcesoria z opakowania fabrycznego. 2. - Page 7 Montaż na ścianie Demontaż wspornika z grzejnika 1. Połóż grzejnik przodem do dołu. 2. Wypchnij wspornik zgodnie Otwórz zamek klamry wspornika. z kierunkiem strzałki. 3. Podnieś wspornik. 4. Wyciągnij wspornik.
- Page 8 Zaznacz na ścianie miejsca na otwory zgodnie z wymiarami podanymi poniżej dla Twojego modelu grzejnika. Wywierć otwory i włóż plastikowe kołki rozporowe do otworów. Zamontuj wspornik ścienny za pomocą dostarczonych śrub. Dystans Dystans EWE+ 1000 Wi-Fi EWE+ 1500 Wi-Fi EWE+ 2000 Wi-Fi EWE+ 2500 Wi-Fi 218 mm 218 mm 218 mm...
- Page 9 Montaż grzejnika do wspornika Przechyl grzejnik tak, aby dolne otwory zrównały się ze wspornikiem P1 i załóż dolnymi otworami na wspornik. Następnie przechyl górną część grzejnika aż do wejścia otworów we wspornik P2, opuść grzejnik w dół i zapnij zaczep blokady na grzejniku.
-
Page 10: Panel Sterowania
PANEL STEROWANIA wyświetlacz + panel sterowania Opis przycisków przycisk zwiększ, przycisk uruchomienia ustawień zmiana godziny na osi trybu programowalnego czasu do której przypisywany jest przycisk ustawień czasowych program - w trybie manualnym: ustawienie czasu do wyłączenia przycisk zmiana trybu, grzejnika aktywacja funkcji - w trybie programowalnym: otwartego okna... - Page 11 Opis symboli na wyświetlaczu bloki czasowe przypisane dla trybu komfortowego ikonka gotowości do połączenia z siecią bloki czasowe Wi-Fi / ikonka przypisane dla trybu połączenia z siecią ekonomicznego Wi-Fi aktualna czas do wyłączenia / temperatura aktualna godzina i w pomieszczeniu / minuty ustawiona temperatura...
-
Page 12: Obsługa Grzejnika
OBSŁUGA GRZEJNIKA Włączanie i wyłączanie grzejnika Naciśnij przycisk aby włączyć grzejnik. Naciśnij jeszcze raz ten sam przycisk, aby wyłączyć grzejnik. Ustawienie godziny i dnia tygodnia Przed rozpoczęciem korzystania z grzejnika należy ustawić godzinę i dzień tygodnia. Aby rozpocząć ustawianie czasu, uruchom tryb programowalny poprzez naciskanie przycisku aż... - Page 13 UWAGA! Jeżeli zmieniasz temperaturę w wariancie komfortowym automatycznie zmieniana jest temperatura w wariancie ekonomicznym, która jest zawsze niższa o 3°C niż temperatura w wariancie komfortowym. I odwrotnie jeśli zmieniasz temperaturę w wariancie ekonomicznym to automatycznie jest zmieniana temperatura w wariancie komfortowym. Timer Naciskaj przycisk , aby uruchomić...
- Page 14 Blokada rodzicielska Naciśnij i przytrzymaj przycisk , aby aktywować blokadę rodzicielską. Naciśnij i przytrzymaj przycisk , aby wyłączyć blokadę rodzicielską. Funkcja działa zarówno w trybie czuwania jak i przy włączonym grzejniku. Funkcja otwartego okna Naciśnij i przytrzymaj przycisk , aby aktywować funkcję otwartego okna. Potwierdzeniem uruchomienia funkcji jest wyświetlenie ikony na wyświetlaczu urządzenia.
-
Page 15: Konfiguracja Połączenia / Sterowanie Wifi
KONFIGURACJA POŁĄCZENIA / STEROWANIE WIFI Pobranie i instalacja aplikacji Grzejnik konwektorowy Warmtec EWE+ Wi-Fi oprócz zwykłego sterowania za pomocą przycisków na panelu sterowania, może być również obsługiwany przez aplikację Tuya Smart, którą można zainstalować na smar onie lub tablecie. Aplikację możesz ściągnąć poprzez zeskanowanie poniższych kodów QR. Wybierz właściwy, w zależności od posiadanego systemu operacyjnego na swoim telefonie /... - Page 16 UWAGA! Z racji ciągłego rozwoju i przeprowadzanych aktualizacji, niektóre polecenia w nowszych wersjach aplikacji, wygląd ekranu sterowania oraz działanie niektórych przycisków służących do obsługi grzejnika mogą się nieznacznie różnić się, od tych podanych w niniejszej instrukcji. Najnowsza wersja instrukcji jest zawsze dostępna na www.warmtec.pl.
- Page 17 Na podany adres e-mail zostanie wysłany kod weryfikacyjny. Wprowadź otrzymany kod (zrzut ekranu 3), aby dokonać weryfikacji, a następnie utwórz hasło i kliknij Zakończono (zrzut ekranu 4). Po pomyślnej rejestracji zostaniesz automatycznie zalogowany do aplikacji. zrzut ekranu 3 zrzut ekranu 4...
- Page 18 Po zalogowaniu, na ekranie urządzenia ukaże się menu, w Po lewej stronie ekranu którym możesz dodać urządzenie wybierz typ urządzenia do aplikacji. Aby dodać grzejnik (małe urządzenia), a wybierz „Dodaj urządzenie” lub następnie Grzejnik przycisk „+” znajdujący się w (Wi-Fi). prawym górnym rogu.
- Page 19 Następnym krokiem jest Naciśnij przycisk „Urządzenie jest Jeśli wybierzesz połączenie AP wybranie sieci Wi-Fi (musi to włączone i miga dioda lub Mode musisz zmienić źródło sieci być 2,4 GHz) i wpisanie do niej usłyszałem dźwięk”. Następnie w swoim urządzeniu na Smart Life- hasła.
- Page 20 Po wyborze i zatwierdzeniu Po udanym połączeniu grzejnika z trybu gotowości do połączenia siecią Wi-Fi, na ekranie aplikacji nastąpi próba połączenia ukaże się komunikat o udanym aplikacji z urządzeniem. połączeniu z siecią Wi-Fi. Możesz zmienić domyślną nazwę urządzenia. Po wszystkim kliknij Zakończono.
- Page 21 Interfejs sterowania grzejnikiem powrót do listy urządzeń przycisk wyłączający wyświetlacz nazwa aktualnie uruchomionego programu aktualna temperatura w pomieszczeniu ustawiona temperatura przycisk zmniejsz przycisk zwiększ temperaturę temperaturę oś czasu z przypisanymi programami komfortowy ustawienie czasu do ekonomiczny wyłączenia antyzamarzaniowy grzejnika w trybie manualnym przycisk wybór trybu pracy:...
- Page 22 Uruchomienie i ustawienie trybu programowalnego 1. Naciśnij przycisk wybór 2. Wybierz tryb 3. Kliknij na jeden z bloków trybu pracy. programowalny Weekly czasowych. program.
- Page 23 4. Kliknij Start time. 5. Ustaw czas rozpoczęcia 6. Kliknij End time. pracy danego bloku czasowego i zatwierdź klikając Confirm.
- Page 24 7. Ustaw czas zakończenia 8. Kliknij Mode Select. 9. Wybierz program, pracy danego bloku który ma działać w czasowego i zatwierdź wybranych wcześniej klikając Confirm. godzinach. W podobny sposób ustaw bloki dla reszty dnia, a następnie dla pozostałych dni tygodnia.
-
Page 25: Konserwacja I Przechowywanie
KONSERWACJA I PRZECHOWYWANIE Konserwacja 1. Przed konserwacją urządzenia upewnij się, że grzejnik wystarczająco ostygł oraz został odłączony od zasilania. 2. Do czyszczenia wlotów i wylotów powietrza używaj odkurzacza. 3. Obudowę urządzenia czyść za pomocą wilgotnej szmatki, a następnie wytrzyj suchą. 4. -
Page 26: Ochrona Środowiska I Recykling
OCHRONA ŚRODOWISKA I RECYKLING INFORMACJA O ZUŻYTYM SPRZĘCIE ELEKTRYCZNYM I ELEKTRONICZNYM Niniejszym informujemy, iż głównym celem regulacji europejskich oraz ustawy z dnia 11 września 2015 r. o zużytym sprzęcie elektrycznym i elektronicznym jest ograniczenie ilości odpadów powstałych ze sprzętu, zapewnienie odpowiedniego poziomu zbierania, odzysku i recyklingu zużytego sprzętu oraz zwiększenie świadomości społecznej o jego szkodliwości dla środowiska naturalnego, na każdym etapie użytkowania sprzętu elektrycznego i elektronicznego. -
Page 27: Specyfikacja Techniczna
SPECYFIKACJA TECHNICZNA Model EWE+ 1000 Wi-Fi EWE+ 1500 Wi-Fi EWE+ 2000 Wi-Fi EWE+ 2500 Wi-Fi Napięcie ~230V / 50Hz 1000 W 1500 W 2000 W 2500 W Stopień ochrony IP24 Klasa ochrony 7,5 kg Waga urządzenia 4,5 kg 5,5 kg... - Page 28 Description of the symbols The symbols used in this manual are intended to draw your attention to possible hazards. The safety symbols and accompanying explanations must be properly understood. Warnings in themselves do not remove hazards and cannot replace correct action to prevent accidents.
- Page 29 Environmental protec on and recycling Technical specifica on The latest version of the Manual is available on our website: www.warmtec.pl Thank you for purchasing our product. Please read this user manual carefully before using this product for the first time and keep...
-
Page 30: Safety Rules
Do not tug on the power cord. - It is strictly forbidden to unscrew the heater yourself. In the event of damage to the heater, contact WARMTEC service for assistance. - Page 31 - The product is intended for home use. - Do not touch the surface of the heater when the device is on or has recently been turned off - risk of burns. - Children under the age of 8 are not allowed to use the device. The device can be used by children from 8 years of age and older and by people with reduced physical, sensory or mental abilities, as well as people with no experience and knowledge, provided they have been given supervision or instruction to operate the device safely...
-
Page 32: Construc On And Installa On
CONSTRUCTION AND INSTALLATION Construction of the device 1. Display and control panel 2. Air outlets 3. Front housing 4. Back housing 5. Feet ATTENTION! The heater must not be put into operation before the feet have been attached or the heater has been mounted on the wall. Assembling the feet 1. - Page 33 Wall mounting Removing the bracket from the heater 1. Lay the heater face down. Open 2. Push the bracket out with the the bracket buckle lock. direction of the arrow. 3. Lift up the bracket. 4. Pull out the bracket.
- Page 34 Mark the holes on the wall in accordance with the dimensions given below for your heater model. Drill holes and insert plastic wall plugs into the holes. Install the wall bracket using the supplied screws. Distance EWE+ 1000 Wi-Fi EWE+ 1500 Wi-Fi EWE+ 2000 Wi-Fi EWE+ 2500 Wi-Fi 218 mm 218 mm...
- Page 35 Mounting the heater to the bracket Tilt the heater so that the lower holes are aligned with the P1 bracket and put the bottom holes on the bracket. Then, tilt the upper part of the heater until the holes enter the bracket P2, lower the heater down and fasten the locking catch on the heater.
-
Page 36: Control Panel
CONTROL PANEL display + control panel Description of the buttons increase button, button to start programmable changing the time on mode settings the timeline to which the program is timer button assigned - in manual mode: setting the time until the radiator turns off mode change button, - in programmable mode: setting activation of the open... - Page 37 Description of the symbols on the display time blocks assigned to the comfort mode Wi-Fi ready icon / network connection time blocks icon WiFi assigned to economy mode current time to shutdown / temperature current hour and in the room / minutes set temperature Days of the week...
-
Page 38: Opera On
OPERATION Switching the heater on and off Press the button to turn on the heater. Press the same button again to turn off the heater. Setting the time and day of the week Set the time and day of the week before using the heater. To start setting the time, enter programmable mode by pressing the button until programmable mode is activated (letter P on the display). - Page 39 ATTENTION! If you change the temperature in the comfort variant, the temperature in the economic variant is automatically changed, which is always 3°C lower than the temperature in the comfort variant. And vice versa, if you change the temperature in the economy variant, the temperature in the comfort variant is automatically changed.
- Page 40 Child lock Press and hold the button to activate the child lock. Press and hold the button to turn off the child lock. The function works both in standby mode and when the heater is on. Open window function Press and hold the button to activate the open window function.
-
Page 41: Connec On Set Up/Wifi Control
CONNECTION SETUP / WiFi CONTROL Download and install the application The Warmtec EWE+ Wi-Fi convector heater, in addi on to simple control using the bu ons on the control panel, can also be operated by the Tuya Smart applica on, which can be installed on a smartphone or tablet. - Page 42 The latest version of the manual is always available at www.warmtec.pl.
- Page 43 A verifica on code will be sent to the provided e-mail address. Enter the code you received (screenshot 3) to verify, then create a password and click Done (screenshot 4). A er successful registra on, you will be automa cally logged into the applica on. screenshot 3 screenshot 4...
- Page 44 A er logging in, a menu will appear on the screen of the device where On the left side of the you can add the device to the screen, select the device applica on. To add a heater, select type (Small Home "Add device"...
- Page 45 The next step is to select a Wi- Press the "Confirm the indicator is If you choose AP Mode connection, Fi network and enter the blinking" button. Then you need to change network source password for it. Click Next. select indicator status on your device to Smart Life-XXXX (the way the icons flash on the or SL-XXXX.
- Page 46 After selecting and confirming A er successful connec on of the standby mode for the heater to the Wi-Fi connection, an attempt to network, a message about connect the application with successful connec on to the the device will be made. Wi-Fi network will appear on the applica on screen.
- Page 47 Heater control interface return to the devices list display off button name of the currently running current room temperature set temperature decrease increase tempersture temperature button timeline with assigned programs comfort setting the time economy until the heater is free-frost turned off in manual mode ON/OFF...
- Page 48 Starting and setting the programmable mode 1. Press the select button 2. Select the weekly 3. Click on one of the time operating mode. program mode. blocks.
- Page 49 4. Click Start time. 5. Set the start time for 6. Click End time. the given time block and confirm it by clicking Confirm.
- Page 50 7. Set the end time for 8. Click Mode Select. 9. Select a program to run the given time block and during the previously confirm by clicking selected hours. Confirm. Similarly, set the blocks for the rest of the day and then for the rest of the week.
-
Page 51: Meintenance And Storage
MAINTENANCE AND STORAGE Maintenance 1. Before maintenance, make sure the heater has cooled down sufficiently and has been disconnected from the power supply. 2. Use a vacuum cleaner to clean the air inlets and outlets. 3. Clean the housing of the device with a damp cloth, then wipe it with a dry cloth. -
Page 52: Environmental Protec On And Recycling
ENVIRONMENTAL PROTECTION AND RECYCLING INFORMATION ABOUT WASTE ELECTRICAL AND ELECTRONIC EQUIPMENT We hereby would like to inform you that the main purpose of European regula ons and the Act of September 11, 2015 on waste electrical and electronic equipment is to reduce the amount of waste arising from the equipment, to ensure an appropriate level of collec on, reuse and recycling of spent equipment, and to increase public awareness of its harmfulness to the natural environment at every stage of the use of... -
Page 53: Technical Specifica On
TECHNICAL SPECIFICATION Model EWE+ 1000 Wi-Fi EWE+ 1500 Wi-Fi EWE+ 2000 Wi-Fi EWE+ 2500 Wi-Fi Voltage ~230V / 50Hz Power 1000 W 1500 W 2000 W 2500 W IP Rating IP24 Protection class 4,5 kg 5,5 kg 6,5 kg 7,5 kg... - Page 54 Beschreibung der Symbole Die in dieser Anleitung verwendeten Symbole sollen Ihre Aufmerksamkeit auf mögliche Gefahren lenken. Die Sicherheitssymbole und begleitenden Erklärungen müssen richtig verstanden werden. Warnungen an sich beseitigen keine Gefahren und können richtige Maßnahmen zur Unfallverhütung nicht ersetzen. Dieses Symbol warnt oder informiert über eine Gefahr. Das Ignorieren dieser Warnung kann zu einem Unfall von Ihnen oder anderen führen.
- Page 55 Umweltschutz und Recycling Technische Daten Die neueste Version der Bedienungsanleitung ist verfügbar auf der Website www.warmtec.pl. Vielen Dank, dass Sie sich für unser Produkt entschieden haben. Machen Sie sich vor dem ersten Gebrauch mit der vorliegenden Bedienungsanleitung vertraut und bewahren Sie diese für zukün ige Zwecke auf.
-
Page 56: Sicherheitsregeln
Wenn Sie das Gerät vom Stromnetz trennen, schalten Sie zuerst die Heizung aus und ziehen Sie dann den Stecker. Ziehen Sie nicht am Netzkabel. - Es ist strengstens verboten, das Heizgerät selbständig zu demontieren. Wenden Się sich bei Schäden am Heizgerät an den WARMTEC-Service für Hilfe. - Page 57 - Das Produkt ist für den Heimgebrauch bestimmt. - Nicht die heißen Oberflächen des Heizgeräts berühren, wenn das Gerät eingeschaltet oder vor Kurzem ausgeschaltet wurde - Verbrennungsgefahr. - Kinder unter 8 Jahren dürfen das Gerät nicht benutzen. Das Gerät darf von Kindern ab 8 Jahren und Personen mit eingeschränkten körperlichen, sensorischen oder geistigen Fähigkeiten sowie von Personen mit Unerfahrenheit und Unkenntnis benutzt werden, wenn sie beaufsichtigt werden oder zum sicheren Umgang mit dem Gerät...
-
Page 58: Au Au Und Installa On Des Heizgeräts
AUFBAU UND INSTALLATION DES HEIZGERÄTS Aufbau des Geräts 1. Anzeige- und Bedienfeld 2. Luftaustritte 3. Vorderes Gehäuse 4. Hinteres Gehäuse 5. Füße ACHTUNG! Das Heizgerät darf erst eingeschaltet werden, wenn die Füße angebracht sind oder das Gerät an der Wand montiert ist. Montage der Füße 1. - Page 59 Wandmontage Demontage der Halterung vom Heizgerät 1. Legen Sie das Heizgerät mit der 2. Drücken Sie die Halterung in Vorderseite nach unten ab. Öffnen Pfeilrichtung heraus. Sie das Schloss der Halterungsklammer. 3. Heben Sie die Halterung an. 4. Ziehen Sie die Halterung heraus.
- Page 60 Heizkörpermodell an der Wand. Bohren Sie Löcher und stecken Sie Spreizdübel aus Kunststoff in die Löcher. Montieren Sie die Wandhalterung mit den mitgelieferten Schrauben. En ernung EWE+ 1000 Wi-Fi EWE+ 1500 Wi-Fi EWE+ 2000 Wi-Fi EWE+ 2500 Wi-Fi 218 mm 218 mm...
- Page 61 Montage des Heizgeräts an der Halterung Neigen Sie das Heizgerät so, dass die unteren Löcher mit der P1-Halterung ausgerichtet sind, und platzieren Sie es mit den unteren Löchern auf der Halterung. Kippen Sie dann den oberen Teil des Heizgeräts, bis die Löcher in die Halterung P2 einrasten, senken Sie das Heizgerät ab und befestigen Sie den Verriegelungshaken am Heizgerät.
-
Page 62: Bedienfeld
BEDIENFELD Anzeige + Bedienfeld Opis przycisków Taste erhöhen, Taste zum Aufruf der Ändern der Uhrzeit Einstellungen des auf der Zeitachse, der programmierbaren Modus das Programm zugeordnet wird Taste für Zeiteinstellungen - im manuellen Modus: Taste Modusänderung, Einstellen der Zeit bis zum Aktivierung der Ausschalten der Heizung Offenes-... - Page 63 Beschreibung der Symbole auf dem Display dem Komfortbetrieb zugeordnete Zeitblöcke Wi-Fi- Bereitschaftssymbol dem Sparbetrieb /Wi-Fi- zugeordnete Verbindungssymbol Zeitblöcke aktuelle Zeit bis zum Raumtemperatur / Ausschalten / eingestellte aktuelle Stunde und Temperatur Minuten Wochentage MON - Montag Komfortmodus-Symbol TUES - Dienstag WED - Mittwoch Symbol für den Sparmodus THUR - Donnerstag...
-
Page 64: Bedienung Des Heizgeräts
BEDIENUNG DES HEIZGERÄTS Ein-/Ausschalten des Heizgeräts Drücken Sie die Taste um die Empfindlichkeit einzugeben. Drücken Się dieselbe Taste erneut, um die Heizung auszuschalten. Uhrzeit und Wochentag einstellen Stellen Sie Uhrzeit und Wochentag ein, bevor Sie das Heizgerät verwenden. Um mit der Einstellung der Uhrzeit zu beginnen, rufen Sie den programmierbaren Modus auf, indem Sie die Taste drücken bis der programmierbare Modus aktiviert wird... - Page 65 ACHTUNG! Wenn Sie die Temperatur in der Komfortvariante ändern, wird automatisch die Temperatur in der Sparvariante geändert, die immer 3 °C niedriger ist als die Temperatur in der Komfortvariante. Und umgekehrt, wenn Się die Temperatur in der Sparvariante ändern, wird die Temperatur in der Komfortvariante automatisch geändert.
- Page 66 Kindersicherung Drücken und halten Sie die Taste gedrückt, um die Kindersicherung zu aktivieren. Drücken und halten Sie die Taste gedrückt, um die Kindersicherung auszuschalten. Die Funktion ist sowohl im Standby-Modus als auch bei eingeschaltetem Heizgerät möglich. Offenes-Fenster-Funktion Drücken und halten Sie die Taste gedrückt, um die Offenes-Fenster-Funktion zu aktivieren.
-
Page 67: Konfigura On Und Bedienung Über Das Wi-Fi Netzwerk
KONFIGURATION UND BEDIENUNG ÜBER DAS WI-FI Download und Installation der Anwendung Die Warmtec EWE+ Wi-Fi-Konvektorheizung kann neben der einfachen Steuerung über die Tasten auf dem Bedienfeld auch über die Tuya Smart-Anwendung bedient werden, die auf einem Smartphone oder Tablet installiert werden kann. - Page 68 Befehle in neueren Versionen der Anwendung, das Erscheinungsbild des Steuerbildschirms und die Bedienung einiger Tasten zur Bedienung des Heizgeräts geringfügig von den Angaben in diesem Handbuch abweichen. Die neueste Version der Bedienungsanleitung, die eventuelle Änderungen berücksichtigt, ist verfügbar auf www.warmtec.pl.
- Page 69 Ein Ak vierungslink wird an die angegebene E-Mail-Adresse gesendet. Geben Sie den Bestä gungscode (Bildschirmfoto 3) zur Bestä gung ein, erstellen Sie dann ein Passwort und klicken Sie auf „Fer gstellung“ (Bildschirmfoto 4). Nach erfolgreicher Registrierung werden Sie automa sch bei der Anwendung angemeldet. Bildschirmfoto 3 Bildschirmfoto 4...
- Page 70 Nach der Anmeldung erscheint auf dem Bildschirm des Geräts Wählen Sie auf der linken ein Menü, auf dem Sie das Gerät Seite des Bildschirms den zur Anwendung hinzufügen Gerätetyp (Kleines können. Um eine Heizung Haushaltsgerät) hinzuzufügen, wählen Sie „Gerät und dann das Heizgerät hinzufügen“...
- Page 71 Im nächsten Schri wählen Się Drücken Sie die Taste „Bestätigen Wenn Sie die Verbindung im AP ein Wi-Fi-Netzwerk aus und Sie, dass die Anzeige blinkt“. Dann Mode wählen, müssen Się die geben das Passwort dafür ein. Wählen Sie den Indikatorstatus aus Netzwerkquelle auf Ihrem Gerät Klicken Sie auf Weiter.
- Page 72 Nach Auswahl und Bestätigung Nach erfolgreicher Verbindung des Bereitschaftsmodus für die des Heizgeräts mit dem Wi-Fi Verbindung wird versucht, die Netzwerk erscheint auf dem Anwendung mit dem Gerät zu Anwendungsbildschirm eine verbinden. Meldung über die erfolgreiche Verbindung mit dem Wi-Fi Netzwerk.
- Page 73 Bedienoberfläche des Heizgeräts zurück zur Geräteliste Taste zum Ausschalten der Anzeige Taste zum Ausschalten der Anzeige aktuelle Raumtemperatur eingestellte Temperatur Taste zum Senken Taste der Temperatur Temperatur erhöhen Zeitachse mit zugeordneten Programmen Komfort Einstellung der Zeit Spar bis zum Ausschalten Frostschutz der Heizung im manuellen Modus...
- Page 74 Inbetriebnahme und Einstellung des programmierbaren Modus 1. Auswahltaste für 2. Programmierbar 3. Einen der Zeitblöcke Betriebsmodus drücken. en Modus wählen anklicken. (weekly program).
- Page 75 4. Klicken Sie auf Start 5. Legen Sie die Startzeit 6. Klicken Sie auf End time. time. für den angegebenen Zeitblock fest und bestätigen Sie diese, indem Sie auf Confirm klicken.
- Page 76 7. Zeit für Betriebsende 8. Mode Select klicken. 9. Programm des jeweiligen Zeitblocks auswählen, das in den einstellung und zuvor ausgewählten bestätigen, indem Się Stunden arbeiten soll. Confirm klicken. Auf ähnliche Weise Blöcke für den restlichen Tag und anschließend für die restlichen Wochentage einstellen.
-
Page 77: Instandhaltung Und Lagerung
INSTANDHALTUNG UND LAGERUNG Instandhaltung 1. Stellen Sie vor Wartungsarbeiten am Gerät sicher, dass das Heizgerät ausreichend abgekühlt und von der Stromversorgung getrennt ist. 2. Verwenden Sie einen Staubsauger, um die Luftein- und -auslässe zu reinigen. 3. Reinigen Sie das Gehäuse des Geräts mit einem feuchten Tuch und wischen Się es anschließend mit einem trockenen Tuch ab. -
Page 78: Umweltschutz Und Recycling
UMWELTSCHUTZ UND RECYCLING INFORMATION ÜBER ELEKTRO- UND ELEKTRONIK-ALTGERÄTE Wir informieren Sie hiermit darüber, dass das Hauptziel der europäischen Verordnungen und des Gesetzes vom 11. September 2015 über Elektro- und Elektronik-Altgeräte darin besteht, die Menge des von Geräten erzeugten Abfalls zu reduzieren, ein angemessenes Maß... -
Page 79: Technische Daten
TECHNISCHE DATEN Modell EWE+ 1000 Wi-Fi EWE+ 1500 Wi-Fi EWE+ 2000 Wi-Fi EWE+ 2500 Wi-Fi Spannung ~230V / 50Hz Leistung 1000 W 1500 W 2000 W 2500 W Schutzart IP24 Schutzart Gerätegewicht 4,5 kg 5,5 kg 6,5 kg 7,5 kg Maße des Heizgeräts:... - Page 80 NOTATKI...
- Page 84 www.warmtec.pl...