
Related Manuals for ErGear EGESD6B-4


Summary of Contents for ErGear EGESD6B-4
- Page 1 55” Electric Standing Desk Instruction Manual Rev03(A) EGESD6B-4 / EGESD6V-4 Technical Support: (US/CA) 1-800-651-9525 Mon–Fri, 8am–8pm (CST) (UK) 44-808-196-3875 Mon–Fri, 2pm–10pm (UTC) Other Info: support@ergear.com Website: https://ergear.com...
- Page 2 Tools Needed (Not lncluded) Drill Phillips Screwdriver Specifications Height Adjustment Range RATED 28.3”–46.5” (72-118cm) Power Input Max. Speed Operating Noise Max. Load 100V-240V 20mm/s 176 lbs / 80 kg <55dB Step 1 Supplied Parts and Hardware Crossbar Left Desk Leg Right Desk Leg Leg Base Bolt...
- Page 3 x 10 Large Allen Wrench Small Allen Wrench Rubber Pad 3/16” (5mm) 5/64” (2mm) Step 3 x 16 Supplied Parts and Hardware Desktop Screw Wood Dowel Pin M5 X 16mm Storage Hook Controller Step 4 Supplied Parts and Hardware Keyboard Tray Keyboard Stopper Wrist Rest Left Keyboard Tray...
- Page 4 Assembling and Connecting Step 1 the Desk Legs Large Allen Wrench HEAVY! You may need assistance with this step. Large Allen Wrench...
- Page 5 Attaching the Side Plates and the Step 2 Transmission Rod Large Allen Wrench Coupling nut Loosen the coupling nut.
- Page 6 Fig 1 Turn anti-clockwise Left Leg Fig 2 Before attaching the transmission rod, measure the heights of the two desk legs to see if they are set at the same level. If not, insert the transmission rod into the hole in the left leg. Turn clockwise Turn the rod to adjust the left leg so it's level Left Leg...
- Page 7 Small Small Allen Wrench Allen Wrench Secure the transmission rod to the motor drive shaft by turning the set screw clockwise. Tighten the coupling nut to fine-tune transmission rod fit.
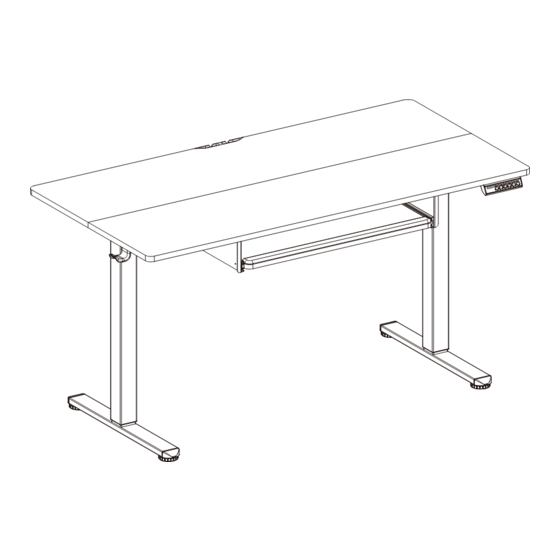
- Page 8 Step 3 Assembling and Attaching the Desktop Assemble the desktop. Attach the desktop to the frame. Phillips Drill Screwdriver (not included) (not included) You can use a drill (with suitable torque and speed) or a Phillips screwdriver.
- Page 9 Attach the controller and hooks to the desktop. Assembling and Attaching the Step 4 Keyboard Tray Attach the stopper to the keyboard tray. Phillips Drill Screwdriver You can use a drill (with (not included) (not included) suitable torque and speed) or a Phillips screwdriver.
- Page 10 Attach the wrist rest to the keyboard tray. Pull out the inner parts of the drawer slides a little for easier keyboard tray alignment. Then align and insert the tray.
-
Page 11: Connecting The Cables
Attach the assembled keyboard tray to the desk. You can use a Phillips screwdriver instead of a drill for easier access to screw in the screws. Phillips Screwdriver (not included) NOTE: Note the position of the stopper on the keyboard tray in this step. -
Page 13: Using The Controller
Using the Controller Save Current Height Setting Short-press the button, and the display will flash. Press the , or button to save the current height setting to that button. Select Height Setting 1 Press the button, and the desk will move to the height that was previously set for that button. - Page 14 Settings Press and hold the button until a flashing ‘S-’ is displayed. Change Display Press again, and ‘Un’ is displayed. Press to select it, Height Units press to switch between ‘IN’ (imperial) and ‘SI’ (metric), and press to save your choice. Long press the button, ‘S-‘...
- Page 15 Overvoltage Protection: Input voltage too high. If the correct AC adapter is being used, power off the desk, check the connection between power and the controller, and power on again. Undervoltage Protection: Input voltage too low. If the correct AC adapter is being used, power off the desk, check the connection between power and the controller, and power on again.
- Page 16 Thank you for choosing this product. We strive to provide you with the best quality products and service in the industry. Should you have any issues, please don't hesitate to contact us. Technical Support (US/CA) 1-800-651-9525 Mon–Fri, 8am–8pm (CST) (UK) 44-808-196-3875 Mon–Fri, 2pm–10pm (UTC) Other Info support@ergear.com Website https://ergear.com 860-00405-03 Rev03...
Need help?
Do you have a question about the EGESD6B-4 and is the answer not in the manual?
Questions and answers