Table of Contents

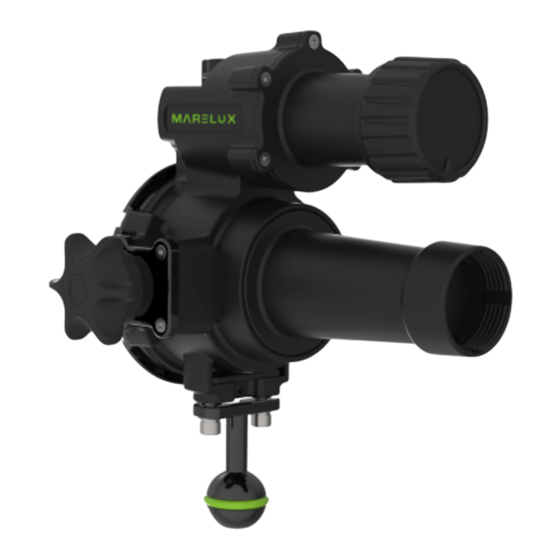
Summary of Contents for MARELUX SOFT Lite
- Page 1 Smart Optical Flash Tube Lite (SOFT Lite) User Manual Please read this user manual carefully before starting to use the product, and use the product properly based on the thorough understanding of this user manual. https://www.marelux.co/...
-
Page 2: Table Of Contents
⚫ ------------------------------------------ INON Z240 ⚫ ------------------------------------------ INON Z330 ⚫ ----------------------------------------------- Retra ⚫ --------------------------------------- Sea & Sea YS-D3 ⚫ --------------------------------------- Sea & Sea YS-D2 ⚫ ------------------------------------------ Seacam 150/160 ⚫ ------------------------------------------- SOFT Lite Installation -------------------------------------------------- Usage ---------------------------------------------- Warranty -------------------------------------- Maintenance And Storage... -
Page 3: Package Contents
Package Contents SOFT Lite Main Body Screw *2 Mounting Ball * 1 Allen Wrench * 1 Oring * 2 protective cover * 1 (one thick and the other thin)... -
Page 4: Product Features
Product Features Use with strobe to narrow down the beam coverage 155mm Length : 600g d) Neutral buoyancy underwater. Weight : (on lan 100m Depth Rating : - 130mm Focal Length (Underwater): 3~50mm Beam Spot Adjustment Range: Beam light switchable between white and red colors with adjustable luminance (SOFT-LITE XR/XW only has single-color light)and adjustable delay shutoff time of beam light. -
Page 5: Ldentification Of Parts
Identification of Parts (1) (2) (1) Power Switch (2) Beam Spot Adjustment Knob... -
Page 6: Battery Installation
Battery Installation This product requires one 21700 Lithium battery Remove the battery end cap by rotating it counter clockwise then insert the battery in the direction shown in the figure. Attach the battery end cap by rotating it clockwise. -
Page 7: Dock Installation
Dock Installation AOI UCS-Q1 Align the bulge (1) of [the dock for AOI UCS-Q1 ] to the slot (2) of the strobe. (1) (2) Tighten the screw to secure the dock onto the strobe. -
Page 8: Ikelite Ds-160
IKelite DS-160 (1) Remove the shroud (1) from the strobe then attach the ring and the dock to the strobe. Tighten the screw to secure the dock onto the strobe. -
Page 9: Inon S2000
INON S2000 (1) (2) Align the bulge(1) of [the dock for INON S2000 ] to the slot(2) of the strobe. (2) (1) Tighten the screw to secure the dock onto the strobe. -
Page 10: Inon Z240
INON Z240 (1) (2) Attach the dock to the strobe so that the notch(1) of the dock aligns to the gear(2) of the strobe. Tighten the screw to secure the dock onto the strobe. -
Page 11: Inon Z330
INON Z330 Align the bulge(1) of [the dock for INON Z330 ] to the slot(2) of the strobe. (2) (1) Then attach the dock to the strobe by rotating its ring clockwise. -
Page 12: Retra
Retra Use screws to attach the mounting ball lock to the dock and tighten them. (1) (2) ) Attach the dock to the strobe so that the lock(1) aligns to the threaded hole (2) of the strobe. Attach the mounting ball to the strobe. -
Page 13: Sea & Sea Ys-D3
Sea & Sea YS-D3 (1) (2) Attach the dock to the strobe so that the notch(1) of the dock aligns to the fiber port(2) of the strobe. Tighten the screw to secure the dock onto the strobe. -
Page 14: Sea & Sea Ys-D2
Sea & Sea YS-D2 (1) Attach the dock on the strobe and ensure that the notch(1) of dock aligns with the fiber port(2) of strobe. Screw the [Dock for Sea&Sea YS D2] on the strobe. -
Page 15: Seacam 150/160
Seacam 150/160 Attach the dock to the strobe as shown in the diagram. Attach part(1) to the dock(2) using the screws provided, and make sure that part(3) is securely attached to the strobe(4) and not loose. (1) (2) (3) (4)... -
Page 16: Soft Lite Installation
SOFT Lite Installation Insert the SOFT as shown in the diagram into the dock, then rotate it clockwise into position. -
Page 17: Usage
(1) for 2 seconds to turn on the beam light ⚫ Press the power button to switch between white light (2) and red light(The SOFT Lite XR/XW does not support this feature. ) ⚫ Long press the power button for 3 seconds till the led turns... -
Page 18: Warranty
Warranty 1. Marelux provides 2 years warranty for its SOFT body and 1 year warranty for electronic parts and components made of silicon, rubber and plastic. 2. Repairs caused by following reasons will be charged by Marelux even during the 2 years warranty period. -
Page 19: Maintenance And Storage
Maintenance And Storage After each underwater use, always remove this product from the ⚫ strobe and soak it in fresh water for several hours to dissolve any salt buildup. Wipe off water with soft cloth and let it dry in shaded and well-ventilated area.


Need help?
Do you have a question about the SOFT Lite and is the answer not in the manual?
Questions and answers