Advertisement
USER MANUAL
Emergency Exit Sign Light Series 6
EX Series - Type C,W
SL Series - Type C,W
Installation and Operation
1. Install the emergency exit sign light fixture by securing it in the desired location for displaying
the emergency exit symbol.
2. Install properly and securely to prevent accidents that could cause damage to the unit or
other people and property.
3. Plug the device's power plug into the power outlet of the building or household with an electrical
voltage of 220-240VAC/50Hz. The emergency exit sign lights will illuminate. Please observe the
operation of the device as follows:
3.1 The LED "AC" will turn on indicating that the unit is receiving power.
3.2 LED "On/Test" lit indicates the status of the unit ready to use.
3.3 The LED "Charge/Full" will be on when the battery is charging.
3.4 The LED "Charge/Full" will be off when the battery is fully charged.
4. When the unit is operational, tests can be performed.
4.1 Press the Off/Test button on the emergency exit sign light fixture. The light from the sign will
continuously illuminate.
5. When you want to turn off the light without plugging in the emergency exit sign light fixture,
press the Off/Test button.
Caution: Please always read the manual prior to installation and operation.
EX Series - Type F
SL Series - Type R
Switch Off/Test
Press to turn off the lamp and the system of the unit
(while the power is off or the unit is not plugged in) /
Press to test the device's availability
(during normal circumstance and the unit is plugged in)
LED AC
Indicates that the unit is receiving a power supply
LED Charge/Full
Indicates that the unit's battery is charging
IR
Infrared signal receiver
LED On/Test
Indicates that the unit is receiving a power /
Indicates if the unit is performing a self-test
LED Fail
Indicates there is a problem with the battery
Status Indicators and Testing Buttons
1
Advertisement
Table of Contents

Related Manuals for Sunny 6 Series


Summary of Contents for Sunny 6 Series
- Page 1 USER MANUAL Emergency Exit Sign Light Series 6 EX Series - Type C,W EX Series - Type F Switch Off/Test Press to turn off the lamp and the system of the unit (while the power is off or the unit is not plugged in) / SL Series - Type C,W SL Series - Type R Press to test the device’s availability...
-
Page 2: Indication Lights
Important Note on Using the Unit 1. The unit should be installed indoors, out of direct sunlight and humidity. It should not be installed in environment with temperatures higher than 50 degrees Celsius. 2. The unit should be stored in temperatures under 25 Degree Celsius and the battery should be charged every 3 months to maintain its operational life. -
Page 3: Remote Testing
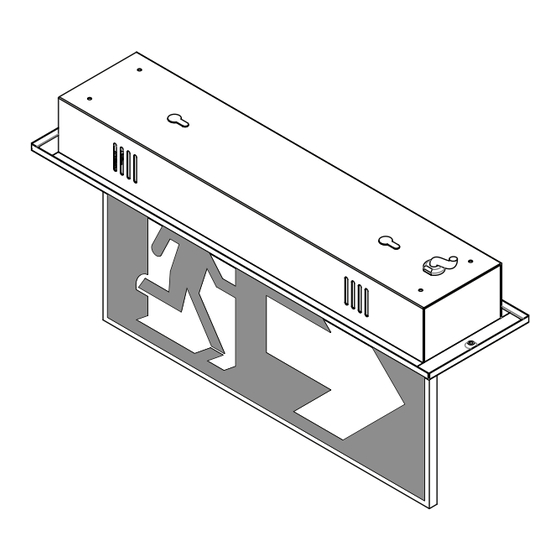
Remote Testing Button for testing the device's function for 5 seconds. Remote Testing Button for testing the device's function for 30 minutes. Button for testing the device's function for 60 minutes. Button for turning on auto battery test system. Button for turning off auto battery test system. Button for turning ON/OFF the light bulb. - Page 4 Types Of Mounting Options SL SERIES Ceiling (Type C) Recessed (Type R) Wall (Type W) (installation without accessories) (installation without accessories) (installation with kit included) Suspended (Optional) (installation with kit not included) EX SERIES Wall (Type W) Flag (Type F) Ceiling (Type C) (installation without accessories) (installation without accessories)
-
Page 5: Installation Steps
Installation Steps SLS6-10LED (C) Step 1 Step 2 Step 3 Attach the exit sign to the slide rail. Push the exit sign to the end of Embed the anchor bolt and secure the slide rail into the ceiling. the rail as shown in the picture. *Units are in millimeters. - Page 6 SLS6-10LED (W) Step 1 Step 2 Embed the anchor bolt and Attach the exit sign to the screw. fasten the screw into the wall. *Units are in millimeters. Suspended (Optional) Step 1 Step 2 Step 3 Assemble the mounting accessories Assemble the Hanger Rod with Attach the exit sign to the slide rail.
- Page 7 EXS6-10LED (C) Step 1 Step 2 Step 3 Use a screwdriver to Embed the anchor bolt and Attach the exit sign to the screw. press the hanging hole. fasten the screw into the ceiling. *Units are in millimeters. EXS6-10LED (W) Step 1 Step 2 Step 3...
- Page 8 EXS6-10LED (F) Step 1 Step 2 Step 3 Remove the side panel. Secure the box to the wall. Insert the exit sign into the box. *Units are in millimeters. Suspended (Optional) Step 1 Step 2 Step 3 Drill the mounting accessories Assemble the Hanger Rod with Remove the screws from according to the size of...
- Page 9 Note : Please read the manual carefully before installation and operation to understand how to properly operate the unit. For any further questions about your product IsOn Import-Export Co., Ltd. please feel free to contact SUNNY’s customer 2915-2917 Ladprao Road, Klongjan, service department. Tel. (+66) 02-948-4450-2 Bangkapi, Bangkok 10240 E-mail: service@sunnyemergencylight.com...
Need help?
Do you have a question about the 6 Series and is the answer not in the manual?
Questions and answers