Table of Contents
Advertisement
Instruction Manual
Washing Machine
Front Loading
Model
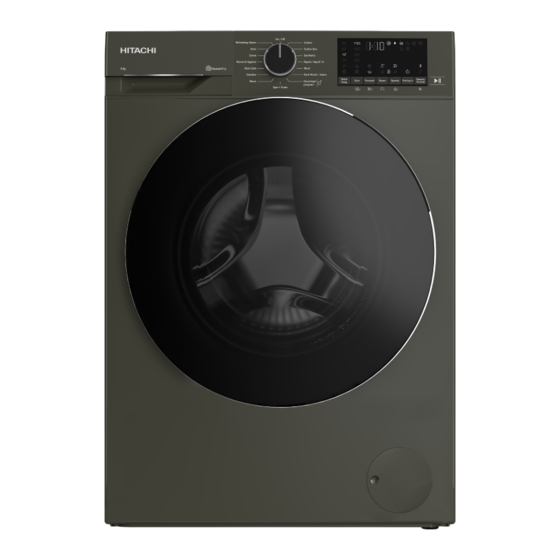
BD-90YFVEM
Thank you for purchasing a Hitachi front loading washing
machine.
■
Please read this Instruction Manual carefully for proper
operation of the machine.
■
Please keep this Instruction Manual for future reference.
Contents
Preparation for use
Safety Instructions .......................................
Important Instructions for Environment ......
Technical Specifications ..............................
Installation .....................................................
Preparation ....................................................
Operation
Operating the Product ..................................
Maintenance
Maintenance and Cleaning ...........................
Troubleshooting ............................................
For household use only
EN
3CM ONLY
4
9
10
11
14
19
35
37
Advertisement
Table of Contents
Troubleshooting

Related Manuals for Hitachi BD-90YFVEM


Summary of Contents for Hitachi BD-90YFVEM
- Page 1 Operating the Product ........Maintenance Maintenance and Cleaning ......Troubleshooting ..........For household use only 3CM ONLY Thank you for purchasing a Hitachi front loading washing machine. ■ Please read this Instruction Manual carefully for proper operation of the machine. ■...
-
Page 2: Table Of Contents
Auxiliary Function Selection..26 Table of Contents 6.8.1 Auxiliary Functions..... 26 1 Safety Instructions......6.8.2 Functions/Programmes Selec- Intended Use........ted by Pressing the Function Safety of Children, Vulnerable Keys for 3 Seconds ....Persons and Pets ......End Time ........28 Electrical Safety...... - Page 3 Please read this user manual first! Dear Customer, Thank you for choosing Hitachi product. We hope that you get the best results from your product which has been manufactured with high quality and state-of-the-art technology. Therefore, please read this entire user manual and all other accompanying documents carefully before using the product.
-
Page 4: Safety Instructions
1 Safety Instructions This section includes the safety • This appliance is intended to instructions necessary to pre- be used in household and sim- vent the risk of personal injury or ilar applications. For example; material damage. – Personnel kitchens of stores, Our company shall not be held offices and other work envir- responsible for damages that... -
Page 5: Electrical Safety
• Electrical products are danger- • If the power cable is damaged, ous for children and pets. Chil- it must be replaced by the au- dren or pets should not play thorised service in order to with, climb on top or inside the avoid possible risks. -
Page 6: Installation Safety
• The product is heavy, do not • Check for any damage on the move alone. Do not hold ex- product before installing it. Do truding parts such as the laun- not have the product installed dry loading door to lift and if it is damaged. -
Page 7: Operational Safety
• Do not plug the product to • If a drier is to be placed on the loose, broken, dirty, greasy product, fix with a suitable con- sockets or sockets that has nection apparatus obtained come out their seats or sock- from the authorised service. -
Page 8: Maintenance And Cleaning Safety
• Unplug the product and turn • Do not place your hand or a off the tap if you will not be us- metal object under the wash- ing the product for long peri- ing machine. ods. • If washing laundry at high tem- •... -
Page 9: Important Instructions For Environment
• Do not use sharp or abrasive • There may be detergent tools to clean the product. Do residues in the detergent not use household cleaners, drawer when you open it for soap, detergent, gas, gasoline, cleaning. thinner, alcohol, varnish, etc. •... -
Page 10: Technical Specifications
3 Technical Specifications Supplier’s name or commercial brand Hitachi BD-90YFVEM Model name 7175749200 Nominal Capacity (kg) Maximum spin speed (cycle/min) 1400 Built-In Height (cm) 84,5 Width (cm) Depth (cm) Single Water inlet / Double Water inlet + / - Electrical connection (V/Hz) -
Page 11: Installation
4 Installation 4.1 Appropriate Installation Loca- Please read the “Safety Instruc- tion tions” section first! • Place the product on a hard and level Your washing machine automatic- floor. Do not place it onto a carpet with ally detects the amount of laundry high pile or other similar surfaces. -
Page 12: Removing Transportation Safety Bolts
Cover A 3. Attach the plastic covers supplied in the User Manual bag into the holes on the rear panel. NOTICE Remove the transportation safety Tilt the machine back slightly. Rest the tabs bolts before operating the product. of Cover A against the lower panel. Com- Otherwise, the product will get plete the assembly by rotating the cover. -
Page 13: Connecting The Drain Hose To The Drain
the nut carefully again. In order to pre- of the hose into the waste water or do vent the water leaks and resultant dam- not insert it into the drain for more than ages, keep the taps closed when you do 15 cm. -
Page 14: Start Up
that shall be incurred due to using the Damaged power cables should be product without grounding according to replaced by the authorised service local regulations. in order to prevent possible danger. • Connection must comply with national 4.8 Start Up regulations. -
Page 15: Tips For Energy And Water Saving
• Do not wash colours and whites together. running. The door lock will open once New, dark coloured cottons release a lot the programme is completed. Then you of dye. Wash them separately. can open the loading door. If the door •... - Page 16 (2) for main washing, • Wash woollens at suggested programme with special detergent made specifically (3) for softener, for woollens. ( ) a syphon piece in the softener com- • Please review the programme descrip- partment, tions part for suggested programme for ) there is a liquid detergent apparatus different textiles.
- Page 17 Using Liquid Detergents Using Starch • Put in the liquid starch, powder starch or If the Product Has a Liquid Detergent fabric dye in the softener compartment. Apparatus • Do not use softener and starch in the • Press and rotate the apparatus at where same washing programme simultan- it is shown when you want to use liquid eously.
-
Page 18: Tips For Efficient Washing
5.7 Tips for Efficient Washing Clothes Light Colours and Black/Dark Col- Delicates/Wool- Colours Whites ours lens/Silks (Recommended (Recommended (Recommended temperat- (Recommended temper- temperature temperature range ure range based on soil ature range based on range based on based on soil level: level: 40-90 °C) soil level: cool -40 °C) soil level: cool -30... -
Page 19: Operating The Product
6 Operating the Product Please read the “Safety Instruc- tions” section first! 6.1 Control Panel 1 Programme Selection Button 2 Temperature Level Lights 3 Spin Level Indicator Lights 4 Display 5 Start/Pause Button 6 Remote Control Button 7 End Time Setting Button 8 Auxiliary Function Button 3 9 Auxiliary Function Button 2 10 Auxiliary Function Button 1... -
Page 20: Symbols On The Display
6.2 Symbols on the Display 1 Temperature Indicator 2 Spin Speed Indicator 3 Duration information 4 Door lock is engaged symbol 5 Programme follow-up indicator 6 No Water indicator 7 Add Garment Indicator 8 Bluetooth Connection Indicator 9 Remote Control Indicator 10 Delayed Start Enabled Indicator 11 Auxiliary Function Indicators 3 12 Child Lock Enabled symbol... -
Page 21: Programme And Consumption Table
6.3 Programme and Consumption Table Auxiliary Functions Programme Temperature °C 2,75 1400 • • • • • Cold - 90 Cotton 2,00 1400 • • • • • Cold - 90 1,10 1400 • • • • • Cold - 90 Cotton Eco 60** 70,9... -
Page 22: Programme Selection
6.4 Programme Selection Please read Installation section of the manual before first use. 1. Determine the programme suitable for The auxiliary functions in the table the type, quantity and soiling level of the may vary according to the model of laundry in accordance with "Programme your machine. - Page 23 • Synthetic Do not load more than 1 double You can wash your laundry (such as shirts, fibre duvet (200 x 200 cm). blouses, synthetic/cotton blended fabrics Do not wash your duvets, pillows etc.) in this programme. When the quick and etc.
- Page 24 programme to help the wrinkle reducing • Outdoor function. The special spin profile and You can use this programme to wash steam applied at the end of the programme sports and outdoors garments that contain reduce the wrinkles on your shirts. When cotton/synthetics mix and water repellent the quick wash function is selected, the covers such as gore-tex etc.
-
Page 25: Temperature Selection
1. Select the stain programme. 6.6 Temperature Selection 2. Select the stain you want to clean by locating it in the groups above and se- lecting the related group with the quick auxiliary function button. 3. Read the garment tag carefully and en- sure that correct temperature and spin Whenever a new programme is selected, speed are selected. -
Page 26: Auxiliary Function Selection
Press the Spin Speed Adjustment button to 6.8 Auxiliary Function Selection change the spin speed. Spin speed de- creases gradually. Then, depending on the model of the product, "Rinse Hold " and "No Spin " options appear on the display. Select the desired auxiliary functions be- If you are not going to unload your laundry fore starting the programme. -
Page 27: Functions/Programmes Selec
ditional rinsing steps to the program. You • Speedy can select and use some auxiliary func- After selecting a programme, you can press tions even though they are not found on the Quick Wash setting button to shorten your product. You can increase and de- the programme duration. -
Page 28: End Time
low-up light for the relevant step turns on. Lock symbol appears on the display. When When the function is selected, the drum ro- this warning is displayed, you can release tates for up to 8 hours for preventing the the Auxiliary Function button 3. laundry from creasing at the end of the pro- To deactivate the child lock: gramme. -
Page 29: Starting The Programme
remaining time to complete the programme When you have activated the End after your programme starts is shown in Time function, do not add liquid de- hours and minutes as in the 01:30 example. tergent in the powder detergent compartment no 2. There is the risk Programme duration may differ of staining of the clothes from the values in section "Pro-... -
Page 30: Loading Door Lock
4. Programme follow-up indicator lights on the display will show the current pro- gramme step. 6.11 Loading Door Lock There is a locking system on the loading door of the machine that prevents opening of the loading door in cases when the water level is unsuitable. -
Page 31: Cancelling The Programme
If the water level in the machine is not suit- The loading door will not open if the able when you press Start/Pause button, water temperature in the machine the door lock cannot be deactivated and is high or the water level is above the door lock symbol on the display re- the loading door baseline. -
Page 32: Homewhiz Setup
In order to use the Bluetooth feature of your All the safety measures described machine, you must download HomeWhiz in "GENERAL SAFETY INSTRUC- application from the application store of TIONS" section of your user your smart appliance. manual apply to the remote opera- Make sure your smart appliance is connec- tion through HomeWhiz function as ted to the internet to install the application. -
Page 33: Setting Up A Washing Machine Connected To Someone Else's Account
4. Follow the instructions in display of HomeWhiz application. HomeWhiz Application may require 5. Wait until the installation is complete. you to type the product number Once the setup is completed, give your shown on the product label. You washing machine a name. Now, you can can find the product label inside of tap and see the product you have added the appliance door. -
Page 34: Remote Control Function And Using It
6.15.3 Remote Control Function ing the front door. Once access is estab- lished to the product, you will see a screen and Using It similar to the one below. Bluetooth is automatically turned on after setting up HomeWhiz. To activate or deac- tivate the Bluetooth connection, please see Bluetooth 3’’’. -
Page 35: Maintenance And Cleaning
2. Restart the product application. 4. If the connection cannot be established with the above processes, repeat the ini- 3. Turn bluetooth off and then on via user tial set-up settings on the washing ma- control panel. chine. If the problem persists, consult an Author- ised Service Agent. -
Page 36: Cleaning The Body And Control Panel
7.3 Cleaning the Body and Control draining of washing water. Thus, the water will be drained without any problem and the Panel service life of the pump will extend. Wipe the body of the product with soapy If the product fails to drain water inside it, water or non-corrosive mild gel detergents the pump filter is clogged. -
Page 37: Troubleshooting
• When the water drain is finished, close If the product has an emergency water the end with the plug again and fix the draining hose, in order to drain the wa- hose in its place. ter: • Unscrew the pump filter. 1. - Page 38 • Excessive laundry is loaded in the and pull down the emergency handle po- product. >>> Take out some of the laun- sitioned at the rear side of the said cap. dry from the product or distribute the See Loading Door Lock [} 30] load by hand to balance it homogen- Washing takes longer than specified in eously in the product.
- Page 39 Programme duration does not count- Washing performance is poor: Stains down. (*) persist or the laundry is not whitened. (**) • There is unbalanced load in the product. >>> Automatic unbalanced load detection • Insufficient amount of detergent is used. system is activated due to the unbal- >>>...
- Page 40 • A higher temperature was selected. >>> take this detergent during rinsing or Select the proper programme and tem- softener step. Wash and clean the drawer perature according to the type and soiling with hot water. Put the detergent in the degree of the laundry.
- Page 41 • Some meshed laundry such as tulle may Check the HomeWhiz section for foam too much because of their texture. the relevant troubleshooting in- >>> Use smaller amounts of detergent for formation. this type of item. • Detergent was put in the wrong compart- ment.
- Page 44 2WPL181481...
Need help?
Do you have a question about the BD-90YFVEM and is the answer not in the manual?
Questions and answers