Table of Contents
Advertisement
Quick Links
Operating & Installation Instructions
EN
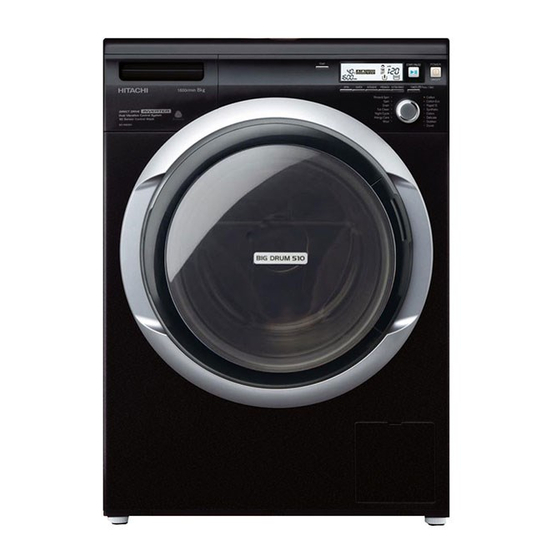
Front Loading Washing Machine
Model BD-W70PV
Thank you for purchasing a Hitachi front loading washing machine.
■
Please read these operating & installation instructions carefully for proper
operation of the machine.
■
Please keep these operating & installation instructions for future reference.
Contents
3
4
6
7
9
11
14
16
17
19
21
22
28
29
29
3WPL079681-2
Advertisement
Table of Contents

Related Manuals for Hitachi BD-W70PV


Summary of Contents for Hitachi BD-W70PV
-
Page 1: Table Of Contents
Error Codes How to Install the Washing Machine Customer Service Consumption Values Specifi cations Thank you for purchasing a Hitachi front loading washing machine. ■ Please read these operating & installation instructions carefully for proper operation of the machine. ■... - Page 2 Memo 3WPL079681-2...
-
Page 3: Environmentally Friendly Waste Disposal
Environmentally Friendly Waste Disposal The shipping package has protected your new washing machine on its Disposing of the way to your home. All materials are ecologically harmless and recyclable. packaging Please contribute to a better environment by disposing of packaging materials in an environmentally conscious manner. -
Page 4: Safety Instructions
Safety Instructions Before operating the washing machine, please read these safety instructions carefully. Warning Issues which could cause death or serious injury ■ Do not dismantle, repair or modify the appliance. General safety This could cause malfunction, fi re, electric shock or injury. For repair, please contact your local service center. - Page 5 Safety Instructions ■ Keep packaging out of reach of children and babies. Child safety Danger of suffocation. ■ Do not let children climb onto the washing machine or open the drum lid, and do not leave a box or chair near the washing machine which could enable children to climb onto it.
-
Page 6: Product Descriptions
Product Descriptions Detergent Dispenser Softener Cap Dispenser : For fabric softener Dispenser : For prewash Dispenser : For main wash Drain Hose Control Panel Door Handle Door Lock Power Cord Emergency Door Lock Release Drain Tube Drain Filter Filter Cover Adjustable Feet (4 pcs.) Packed-In Accessories Hose Guide... -
Page 7: Control Panel And Display
Control Panel and Display POWER button START/PAUSE button TEMP START/PAUSE POWER Jog Dial TIME LEFT Temperature button r/min ON/OFF SPIN button ( Press 3 Sec) QUICK button INTENSIVE button PREWASH button EXTRA RINSE button TIMER button LCD multi function display Press this button to switch power on and off. - Page 8 Control Panel and Display Lets you program a wash to fi nish up to 24 hours later. The symbol is TIMER button shown on the display. Child lock: To prevent accidental operation by children, this disables the operation buttons and dial, and also locks the door. Press the TIMER button for 3 seconds to activate this option.
-
Page 9: Before You Start Washing
Control Panel and Display The following indications are displayed when washing time is prolonged due to : TIME LEFT r/min ● Excessive foam in the drum. Pouring in extra water to remove excessive foam. EXTRA RINSE option pictogram lights up, and three horizontal bars light up in order. - Page 10 Before You Start Washing ■ Use the amount of detergent recommended on the detergent package. Detergent and The type and amount of detergent depends on the type of fabric, load additives size, degree of soiling and hardness of the water used. Use less detergent if : - you wash a small load.
-
Page 11: How To Use The Washing Machine
How to Use the Washing Machine TEMP POWER START/PAUSE TIME LEFT r/min ON/OFF ( Press 3 Sec) Sort and load ■ Sort the laundry according to type of fabric, care label symbol, color the laundry and degree of soiling. Page 9 : Preparation of the washing. ■... - Page 12 How to Use the Washing Machine ■ Pause the program. Press the START/PAUSE button. The washing machine switches itself off if it is not restarted within 1 hour. Switch the power on and the program starts again from the beginning. ■...
- Page 13 How to Use the Washing Machine Washable Items with the Duvet program : ● Washable Duvets Machine washable duvets stuffed with not more than 1 kg of down or synthetic material (polyester). - Do not wash duvets stuffed with wool or duvets with a silk covering. - Do not add other items in the same wash.
-
Page 14: Program Overview
Program Overview Temperature Program Max Load Spin Setting Type of Laundry / Setting 400-1600r/min, For daily washing of cotton and linen items s Cotton 7 kg No Spin /30-90ºC towels, bed linen and table linen. Rinse Hold 400-1600r/min, For cotton and linen items. Eco operation tha Cotton Eco 7 kg 30-60ºC... - Page 15 Selectable Options Laundry / Notes TIMER PREWASH QUICK INTENSIVE EXTRA RINSE nen items such as shirts, underwear, ○ ○ ○ ○ ○ peration that saves energy and water that ○ ○ ○ ○ ○ rmance as the Cotton program. lightly soiled clothes and small items .
-
Page 16: In Case Of Emergency
In Case of Emergency The washing machine features a Fully Auto Restart function. In the event of a If the power is shut off part way through a wash, the cycle (wash/rinse/spin) power outage at the time is memorized, and when power is restored, the same cycle automatically restarts from the beginning. -
Page 17: Care And Maintenance
Care and Maintenance Cleaning the Drain tube drain fi lter Drain fi lter Filter cover Risk of injury! Hot water may come out from the drain tube and drain fi lter. - Do not open the drain fi lter when a program is running. - Do not clean the drain fi... - Page 18 Care and Maintenance 1. Remove the detergent dispenser. Cleaning the detergent Push the dent dispenser Pull the detergent dispenser while pushing the dent. 2. Remove dirt or detergent remaining in the detergent dispenser casing with a brush. Detergent dispenser casing 3.
-
Page 19: Troubleshooting
Troubleshooting Problem Possible Cause Solution ● ● Door cannot be There is still some water in the washing Run the Drain program to opened. machine. drain water. ● ● Child lock may be activated. Deactivate the child lock. (See page 8) ●... - Page 20 Troubleshooting Problem Possible Cause Solution ● ● Foam remains You may have used too much detergent. Use the appropriate amount of ● on the door or Laundry is new or not that soiled. detergent. the door seal. ● ● Fabric softener You may have exceeded the max.
-
Page 21: Error Codes
Error Codes Code Description Possible Cause Solution ● Water is not Water tap may not be turned on. Check water tap, water ● supplied. Water inlet fi lter may be clogged. inlet fi lter, water line and ● Water line or water hose may be frozen. water hose. -
Page 22: How To Install The Washing Machine
How to Install the Washing Machine ■ The washing machine is heavy. Use caution when lifting it. Safety Instructions ■ When lifting the washing machine, do not hold the jog dial or the detergent dispenser casing. Lift the washing machine with two persons holding the bottom and the back of the washing machine. - Page 23 How to Install the Washing Machine ■ Remove the four transport bolts and insert the cover caps using the Removing the packed-in 13 mm box spanner. transport bolts ■ The transport bolts must always be removed before using the washing machine for the fi...
- Page 24 How to Install the Washing Machine ● Water supply hose Conecting the water supply ■ Optimum water pressure is 0.03-0.8MPa. ■ Do not connect to the mixer tap of an unpressurised hot-water apparatus. ■ Use a horizontal tap. Horizontal tap Extension tap Square tap Connect the water supply hose to the rear panel of...
- Page 25 How to Install the Washing Machine ■ Make sure that the union nut between the water supply hose and main unit is tightly screwed. ■ Turn the tap on to check if the water supply hose is properly connected before starting. If it is loosely connected, water leakage may occur. ●...
- Page 26 How to Install the Washing Machine ■ Connect the washing machine to an alternating current via a correctly Connecting the installed earthed socket only. power ■ The mains voltage must correspond to the voltage specifi cation on the washing machine. ■...
- Page 27 How to Install the Washing Machine ■ You need a space of 600 mm (W) x 560 mm (D) x 850 mm (H) with at Under-counter least 3 mm of clearance on the sides, above and back. installation ■ If the height of the space ranges from 823 mm to 852 mm, use upper plate (sold separately).
-
Page 28: Customer Service
Before calling, make a note of the model name, serial no. and purchase date of your washing machine. You can fi nd the model name and serial no. on the label attached to the fi lter cover. Model Name : BD-W70PV Serial No : XXXXXXXX... -
Page 29: Consumption Values
Specifi cations Model BD-W70PV Power supply See the rating plate attached to the rear of the washer Standard water level... - Page 30 Memo 3WPL079681-2...
- Page 31 Memo 3WPL079681-2...
- Page 32 3WPL079681-2 3WPL079681-2...
Need help?
Do you have a question about the BD-W70PV and is the answer not in the manual?
Questions and answers