Table of Contents
Advertisement
Quick Links
Advertisement
Table of Contents

Related Manuals for GME XRS-660


Summary of Contents for GME XRS-660
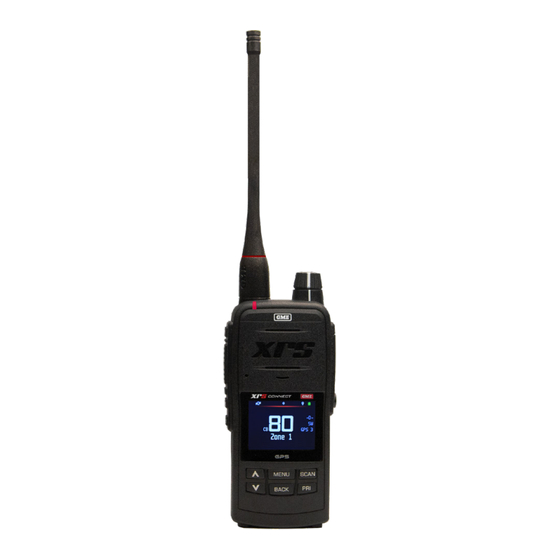
- Page 1 XRS-660 CONNECT HANDHELD UHF CB RADIO ™ INSTRUCTION MANUAL...
-
Page 2: Table Of Contents
XRS Connect .....................12 XRS Location Services ................13 Pairing ......................13 GETTING STARTED ................14 Controls ....................14 Display ......................15 Battery .....................16 Conserving Your Battery ................17 GENERAL ....................18 On/Off and Volume ...................18 Selecting Channels ...................18 Squelch .....................19 Adjusting the Squelch Level ..............19 Signal Meter .....................19 XRS-660... - Page 3 Dual Watch ....................29 Triple Watch .....................29 Open Scan ....................30 Priority Scan .....................31 Network Scan (Net-Scan) .................32 CTCSS AND DCS ..................34 Choosing CTCSS Or DCS ................34 CTCSS Tone Set Compatibility ..............34 Enabling CTCSS/DCS On A Channel (Silent Mode) ........35 Busy Lockout ....................36 XRS-660...
- Page 4 Storing Group Call Idents .................41 Receiving Group Calls ................41 MENU ....................42 Menu Navigation ..................42 Context Menu...................42 Context Menu Examples .................43 Text Entry ....................43 Menu Table ....................44 Functions ....................48 Programmable Buttons ................48 Radio Settings ..................50 Audio Equaliser ..................53 Scan Settings ...................53 User Interface ...................54 XRS-660...
- Page 5 RECEIVE-ONLY CHANNELS (ZONES) ............67 Select a Zone ....................67 Edit a Zone Name ..................67 Add Channels to a New Zone ..............68 Edit Existing Channels in a Zone..............70 FREQUENCY AND SUBTONE TABLES .............71 SPECIFICATIONS ..................74 GME CONTRACT WARRANTY AGAINST DEFECTS ........76 XRS-660...
-
Page 6: Preface
PREFACE COPYRIGHT NOTICE GME Pty Ltd reserves all rights to this document and the information contained herein. Reproduction, use or disclosure to third parties without express permission is strictly prohibited. © 2023 GME Pty Ltd, Sydney, Australia SAFETY INFORMATION The XRS-660 is a radio transmitting device. -
Page 7: Emergency Channels
Channel 5 is the primary Simplex Emergency Channel. Where a channel 5 repeater is available, you should select Duplex on channel 5. Channel 35 is the input channel for the channel 5 repeater. Therefore channel 35 should also not be used for anything other than emergency transmissions. XRS-660... -
Page 8: Telemetry Channels
• Always charge your radio at normal room temperature. • Always switch off your radio where notices restrict the use of two-way radio or mobile telephones. • Use only GME approved rechargeable battery packs with the supplied charger. • Avoid storing or charging your radio in direct sunlight. -
Page 9: Introduction
GME’s ongoing commitment to the development of new technology for UHF CB Radio users. The XRS-660 is the first Handheld UHF CB radio to feature a colour TFT LCD screen, providing the ultimate Handheld radio display for all environmental conditions –... -
Page 10: Features
• Priority Channels: Two separate Priority Channels allow any channels of your choice to be instantly recalled at the press of one of the Priority keys. • Dual Watch: Scans two channels, working and Priority. • Triple Watch: Scans three channels, working and both Priority. XRS-660... - Page 11 • Physical Properties • Water & Dust Proof IP67: Provides protection against dust and temporary immersion in water. • Removable Antenna: High performance flexible antenna included. • Rugged Construction: With die-cast chassis. • Battery Pack: Heavy duty 7.4V 2550 mAh Li-ion. XRS-660...
-
Page 12: Xrs Connect App
After you have configured your preferences in the app, select Write to Radio to update your radio with your new settings. For information on pairing your smart device with your XRS Connect radio, see the ‘Pairing’ section that follows. XRS-660... -
Page 13: Xrs Location Services
CB channels. This feature complies with the Radiocommunications (Citizen Band Radio Stations) Class Licence 2015. GME values your privacy, and does not collect any of your location data. The location data is only stored within the XRS Connect app and is transmitted by your XRS Connect radio. -
Page 14: Getting Started
Transmit / Receive LED Programmable (XRS1) Function Key Speaker Belt Clip Push-To-Talk (PTT) Button Microphone Accessory Port Programmable (XRS2) Function Key Programmable (XRS3) Colour TFT Function Key Display Channel Up Scan Channel Down Priority Charger Port Menu / Enter Back XRS-660... -
Page 15: Display
Battery Low Ready to Send (Flashes if Critical) Bluetooth Headset Connected Battery Medium (Flashes if Connection is Poor) Bluetooth is Enabled Battery High Bluetooth is Connected Battery Very High/Full Channel is Set as Duplex VOX (Voice Activated PTT) Enabled XRS-660... -
Page 16: Battery
You should fully charge the battery before using it for the first time. If left unused your radio’s battery pack may slowly discharge over time. If you have not used your XRS-660 for some time, you should recharge the battery pack before use. -
Page 17: Conserving Your Battery
Power Saving mode after around 5 seconds of inactivity (i.e. no transmission or reception). As soon as a signal is received or any keys are pressed, the XRS-660 will wake up again. This sleep function is automatic and by itself can greatly extend the battery life in standby mode by many hours. -
Page 18: General
SELECTING CHANNELS To select a channel, press the key. Press to select a higher channel to select a lower channel. The selected channel is displayed on the display. Press and hold either key to advance quickly through the channels. XRS-660... -
Page 19: Squelch
The brightness level can be smoothly adjusted in steps from 0 to 10. To adjust brightness level: 1. Press the MENU key. 2. Navigate to USER INTERFACE > BRIGHTNESS. You can use the key to adjust the brightness. XRS-660... -
Page 20: Transmitting
Since the microphone is quite sensitive, it is not necessary to raise your voice or shout. 3. Release the PTT when you have finished talking, the icon and red LED will disappear. Always listen to ensure the channel is free before transmitting. XRS-660... -
Page 21: Transmit Power
PTT to avoid transmitting over others who may be already transmitting on the channel. To enable/disable busy lockout: 1. Press the MENU key. 2. Navigate to RADIO SETTINGS > BUSY LOCK. You can use the MENU key to turn this function ON or OFF. XRS-660... -
Page 22: Beep Tone Volume
The scrambler is compatible with the majority of scramblers used by other manufacturers, allowing you to enjoy scrambled communications with owners of non-GME radios. Once the scrambler has been activated your transmission and reception will only be intelligible to others using the same scrambler technology. -
Page 23: Selecting The Active Speaker
You can use the MENU key to turn this function ON or OFF. SELECTING THE ACTIVE SPEAKER The XRS-660 radio has an internal speaker and supports a second accessory speaker in the MC013 speaker microphone. By default, sound is reproduced by both speakers; however, if you prefer, one of these speakers can be switched off, leaving either the radio’s speaker or the... -
Page 24: Roger Beep
When Duplex is selected, your radio receives on the selected channel (e.g. CH 1) but transmits 30 channels higher (CH 31). The repeater hears your signal on CH 31 and retransmits it on CH 1 for others to hear. XRS-660... -
Page 25: Priority Channel
They are also used in conjunction with the Priority Scan mode, Dual Watch and Triple Watch modes. Priority Channels are programmed using the Priority keys. Priority Channel 1 is accessed using the PRI key and Priority Channel 2 can be assigned to one of the programmable XRS keys. XRS-660... -
Page 26: Power Saving
The radio will sleep during periods of inactivity but will respond quickly to incoming signals. Select HIGH to enable the Power Saving function at a more aggressive • setting. The radio will conserve the most amount of power but may not be as responsive to incoming signals. XRS-660... -
Page 27: Scanning
Each Scan Group has its own separate channel memory allowing you complete freedom to program your choice of channels into each group. To add/remove channels from the selected scan memory: 1. Select the required channel using the key. 2. Check to see if the icon is displayed on that channel. XRS-660... -
Page 28: Auto Skip
You can skip as many busy channels from the Scan Group as you wish, however if you attempt to skip the last remaining channel, all the previously skipped channels will be restored to the Scan Group. The length of the skip period can be adjusted through the XRS Connect App. XRS-660... -
Page 29: Dual Watch
3. ‘TW’ is displayed and the icon will animate. You can change your working channel by pressing the keys. To exit Triple Watch, press or hold your programmable button (depends on how the key is configured for your radio), or press the SCAN button. XRS-660... -
Page 30: Open Scan
The skipped channel will be reinstated in the scan sequence after 30 seconds (see Auto Skip). If you press the PTT while the radio is scanning, the scan will pause and the radio will transmit on the working channel. XRS-660... -
Page 31: Priority Scan
Priority channel and will stay there for as long as the channel remains busy. During this time you can transmit and receive on the Priority channel. Once the Priority channel has been clear for 5 seconds the radio will resume scanning the other channels. XRS-660... -
Page 32: Network Scan (Net-Scan)
Other radios scanning in the same Net-Scan group will detect the common CTCSS/DCS code and lock onto that channel allowing all members of the group to join the conversation. XRS-660... - Page 33 To stop scanning, briefly press SCAN. A low beep will be heard and the icon will stop animating. As long as the radio was not on a busy channel, it will return to the last channel you selected, otherwise it will stay on the busy channel. XRS-660...
-
Page 34: Ctcss And Dcs
CTCSS TONE SET COMPATIBILITY The GME CTCSS tone set comprises 50 tones made up of the standard CCIR-38 Tone Set plus an additional 12 tones added to the end. If communicating with other brands of radios that only use the CCIR-38 tone set, please select from one of the first 38 tones to ensure compatibility with these radios. -
Page 35: Enabling Ctcss/Dcs On A Channel (Silent Mode)
Alternatively, you can enable Busy Lockout in the menu which will automatically prevent your radio from transmitting if the channel is already in use. XRS-660... -
Page 36: Busy Lockout
QUIET mode. Your radio will then remain quiet to all incoming signals until your SelCall number is called. You can store up to 20 of your most frequently called SelCall numbers in memory and each number can be labelled for easy identification. XRS-660... -
Page 37: Selcall Identification Number
However, unless someone transmits your SelCall Ident, nothing will be heard in the speaker. You can activate the QUIET mode on individual channels (i.e. Some channels can be set to remain Quiet while others can remain open to all incoming signals) by storing those channels into a Quiet Memory. XRS-660... -
Page 38: Sending A Selcall
Quiet mode and all stored channels will remain quiet to all incoming signals unless your SelCall Ident is received. Channels not stored in the Quiet memory will remain open to all signals and will operate normally. XRS-660... - Page 39 If your SelCall Ident is received on any channel – Open or QUIET – the Quiet mode will be cancelled and the alarm will beep to alert you to the call. In addition, the caller’s name and number will be displayed. All channels will now be open for normal transmission and reception. XRS-660...
-
Page 40: Group Calling
If the radios in your fleet do not have sequential SelCall number and you want to make use of this function, you will need to re-program the SelCall Idents in your radios by changing the numbers in your radio’s ‘OWN’ SelCall memory. XRS-660... -
Page 41: Programming And Sending Group Calls
Receiving a Group Call is identical to receiving a normal SelCall except that the alarm sound is a LOW tone beep instead of the normal High tone beep. The caller’s name and number is displayed in the usual way. XRS-660... -
Page 42: Menu
A context menu is included at the bottom of some screens. The options offered will change depending on the selected topic. Press: <OPTION> = Briefly press the MENU key to select the option. Hold: <OPTION> = Press and hold the MENU key to select the option. XRS-660... -
Page 43: Context Menu Examples
Numbers 0 1 2 3 4 5 6 7 8 9 Punctuation . * + <space> XRS-660... -
Page 44: Menu Table
XRS3 Button Press Silent Mem XRS3 Button Hold Quiet Mem Quiet Mode Scrambler Squelch Squelch Level Selcall Selcall Resend Pri2 Set Pri2 Recall Voice Playback Active Mute Dual Watch Triple Watch Show Location Cycle Tx Power Key Lock Zones XRS-660... - Page 45 CB01 to CB80 Priority Ch1 CB01 to CB80 Roger Beep On/Off Scrambler On/Off Speaker Radio/Ext/Both Squelch Level 1 to 9 Squelch Tail On/Off Selcall Ack On/Off TX Power 5w/1w/0.1w Versions Model Serial # Firmware Reset Settings Cancel Reset Radio Factory Set XRS-660...
- Page 46 XRS FEATURES Location TX On/Off > LOCATION GPS Power On/Off SERVICES LOC Source GPS/App+ Set ID/Status User ID/Status LOC Timeout None – 180 Min; ’30 Min’ is the default option. MIC Display LOC/Txt/Off GPS Display On/Off GPS Assist On/Off XRS-660...
- Page 47 ’30 minutes’ is the default option > ACTIVE MUTE Reduce Volume Mute, 75%, 50%, Or 25% Reduction in current volume; ‘mute’ is the default option ZONES Zone 1 Go/Edit Zone 2 Zone 3 Zone 4 Zone 5 Zone 6 Zone 7 Zone 8 XRS-660...
-
Page 48: Functions
4. The XRS Button option list is displayed. The currently selected option is marked with a dot. Use the keys to select to desired option then press MENU to select. 5. Press BACK to exit back to the previous menu or hold BACK to return to the main screen. XRS-660... - Page 49 Enable Triple Watch to monitor the current working channel and both Priority Channels. Enable VOX voice activated PTT. Show Location Show current latitude, longitude and elevation. Cycle TX Power Cycle through transmitter power levels. Key Lock Lock or unlock radio keypad. XRS-660...
-
Page 50: Radio Settings
4. To alter a value press MENU then use the keys to adjust the value. Press MENU to accept. To toggle an ON/OFF setting, press MENU. 5. Press BACK to return to the previous menu or hold the BACK key to return to the main screen. XRS-660... - Page 51 PRIORITY CH2 Sets the channel that is selected when the PRI CB01 – CB80 [Cb02] key is pressed. ROGER BEEP Automatically transmits a tone whenever the On/Off [Off] PTT is released. SCRAMBLER Enables/Disables the Scrambler option On/Off [On] XRS-660...
- Page 52 Reset Radio: Restores the radio to its default settings (i.e Squelch level, beep level, Subtone, etc. but retains user data such as SelCall memories and Zones. Factory Reset: Restores the radio to its ‘out-of-the-box’ state. Deletes all user data and restores default settings. XRS-660...
-
Page 53: Audio Equaliser
MENU to select. NOTE: If you select Net-Scan as your CB Scan Memory without selecting a sub-tone, you will not be able to scan. Pressing the SCAN key will produce a low ‘error’ beep. XRS-660... -
Page 54: User Interface
3. Select BLUETOOTH and press MENU to select ON or OFF. To pair to a nearby Bluetooth accessory: 1. Press the MENU key. 2. Navigate to BLUETOOTH > VISIBLE DEVICES. 3. Use the keys to select the desired accessory and press MENU. XRS-660... -
Page 55: Selcall
• Select MAKE SELCALL to enter and send a SelCall number. • Select Last to resend or save the last SelCall number you sent. • Select Own to edit your radio’s own SelCall number. XRS-660... -
Page 56: Making A Selcall
1. To resend the last Selcall number, use the keys to select Last. 2. Hold MENU to send. SAVING THE LAST SELCALL NUMBER 1. Use the keys to select Last. 2. Press MENU. 3. Use the keys to scroll down to an empty SelCall memory. XRS-660... -
Page 57: Editing Your Radio's Own Selcall Number
4. Press MENU to step forward to the NEXT digit position or BACK to step back to the previous digit position. 5. Continue until the required name has been entered, then hold MENU to save the new number. XRS-660... -
Page 58: Adding Or Editing A Selcall Contact
XRS Location Services allows the radio to broadcast its GPS location at the end of a normal voice transmission. The XRS-660 has a built-in GPS module to determine your current location. This feature can be used together with the XRS Connect app to see the location of other XRS Location Services users on your map. -
Page 59: Gps Data Acquisition
1 to 5 minutes. For best results, ensure the radio has a clear view of the sky. The XRS-660 will acquire satellites if LOC SOURCE is set to GPS or App+. If LOC SOURCE is App+ the radio will prioritise the location data from the XRS Connect app if connected. - Page 60 The GPS ASSIST function uses the radio’s last known location to speed up location acquisition when the radio next turns on. The previous location data is valid for approximately 3 hours if the radio remains in the same location. The default setting for GPS ASSIST is ON. XRS-660...
- Page 61 3. Select TX DATA LIMIT and press MENU to select ON or OFF. To view GPS Location: 1. Press the MENU key. 2. Navigate to XRS FEATURES > LOCATION SERVICES. 3. Select SHOW OWN LOC and press MENU to display GPS Coordinates. XRS-660...
- Page 62 TX DATA LIMIT Allows you to select if data transmission On/Off occurs with every PTT or once every 30 seconds. SHOW OWN Displays GPS Coordinates as a longitude Longitude/Latitude/ and latitude plus elevation Elevation XRS-660...
-
Page 63: Voice Playback
XRS1, XRS2 or XRS3 keys. When the key is pressed, it will begin playback. To exit the voice playback feature, press the BACK key. Pressing one of the Priority channel recall keys or PTT key will also immediately exit the voice playback feature. XRS-660... -
Page 64: Active Mute
Tap the Active Mute slider to turn on/off. When the slider turns green, the active mute feature is on. To navigate to the Active Mute feature on your radio: Press the MENU key. Navigate through the following selections: XRS FEATURES > ACTIVE MUTE. XRS-660... -
Page 65: Crewtalk
If other radios in the group are configured to enable CrewTalk with the same Group number, and they are scanning, the radios in the group can communicate with limited outsider interference, using Net-Scan in a transparent way. XRS-660... - Page 66 Group 47 Group 57 Group 8 Group 18 Group 28 Group 38 Group 48 Group 58 Group 9 Group 19 Group 29 Group 39 Group 49 Group 59 Group 10 Group 20 Group 30 Group 40 Group 50 Group 60 XRS-660...
-
Page 67: Receive-Only Channels (Zones)
8 zones with each zone containing up to 50 channels. Zones and channels can each be individually named for easy identification. Programming is done either through the radio menu or through the GME XRS Connect App. The XRS Connect App also offers a range of pre-programmed frequencies in various categories sorted by locations making the selection of suitable channels and frequencies much easier. -
Page 68: Add Channels To A New Zone
Zone channels can be found immediately above CB Channel 80. ADD CHANNELS TO A NEW ZONE 1. Press the MENU key. 2. Select ZONES and press MENU. 3. Select the desired Zone from the Zone list and hold MENU to edit the zone. XRS-660... - Page 69 9. When the desired name has been entered, press the MENU key repeatedly to step to the RX frequency. Channel names may contain up to 16 characters. 10. To save the new channel, hold MENU. The display returns to the Zone screen. XRS-660...
-
Page 70: Edit Existing Channels In A Zone
10. Press MENU to step forward to the NEXT character or digit position or the BACK key to step back to the previous character or digit position. 11. Continue until the name or frequency has been edited. 12. Hold MENU to save. XRS-660... -
Page 71: Frequency And Subtone Tables
177.3 79.7 123.0 192.8 183.5 82.5 127.3 203.5 189.9 85.4 131.8 210.7 196.6 88.5 136.5 218.1 199.5 91.5 141.3 225.7 206.5 94.8 146.2 233.6 229.1 97.4 151.4 241.8 254.1 100.0 156.7 250.3 – – 103.5 162.2 69.4 – – XRS-660... - Page 72 The table that follows details the DCS tones of the XRS Connect radio. DCS Tone Chart DCS Code Code DCS Code DCS Code DCS Code DCS Code – – – – – – – – XRS-660...
- Page 73 477. 2375 (Duplex) 476.900 476.5875 477.2625 Officially 476.925 476.6125 477.2875 designated call channel 476.950 476.6375 477.3125 476.975 476.6625 477.3375 Road channel 477.000 476.6875 477.3625 Caravan and 477.025 476.7125 477.3875 motor home 477.050 476.7375 477.4125 4WD / Off road 477.075 476.7625 XRS-660...
-
Page 74: Specifications
48 Hours 56.5 Hours 64 Hours Transmitter High: 5W R F Output: Low: 1W Ultra-Low: 100mW Frequency Stability: ± 2.5 PPM Modulation: Spurious Emission: < -40 dBm Maximum Deviation: ± 2.5 kHz Modulation 0.4% @ 1kHz / 1.5kHz Deviation Distortion: XRS-660... - Page 75 Dimensions 59mm (W) x 42mm (D) x 137mm (H) (not including antenna) Weight 337 Grams (with battery and antenna) Operating -20° C to +60° C Temperature Ingress Protection IP67 (dust tight and waterproof) Accessory Connector GME Spring Loaded Connector XRS-660...
-
Page 76: Gme Contract Warranty Against Defects
GME CONTRACT WARRANTY AGAINST DEFECTS Consumer guarantees Our goods come with guarantees that cannot be excluded under the Australian Consumer Law. You are entitled to a replacement or refund for a major failure and for compensation for any other reasonably foreseeable loss or damage. - Page 77 A customer support team member will troubleshoot and validate if your product is faulty. If so, they will email you a product RMA (Return Material Authorisation). Products that are authorised to be returned to GME must include the following: RMA form (Return Material Authorisation)
- Page 78 Goods where the serial number has been removed or made illegal. Warranty period: We provide the following warranty on GME products. No repair or replacement during the warranty period will renew or extend the warranty period past the period from original date of purchase.
Need help?
Do you have a question about the XRS-660 and is the answer not in the manual?
Questions and answers