
Related Manuals for Omcan CE-CN-0082T-WG


Summary of Contents for Omcan CE-CN-0082T-WG
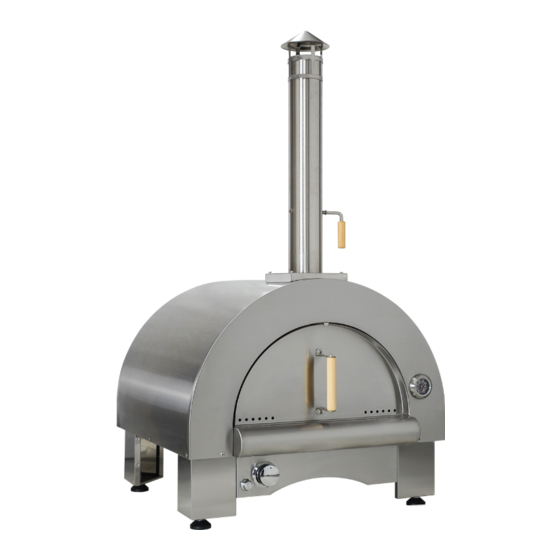
- Page 1 Wood and Gas Oven Model CE-CN-0082T-WG Item 47875 Instruction Manual Revised - 10/24/2023 Toll Free: 1-800-465-0234 Fax: 905-607-0234 Email: service@omcan.com www.omcan.com...
-
Page 2: Table Of Contents
Table of Contents Model CE-CN-0082T-WG Section Page General Information --------------------------------------------------------------------------- 3 - 4 Safety and Warranty --------------------------------------------------------------------------- 4 - 8 Technical Specifications -------------------------------------------------------------------------- 8 Installation -------------------------------------------------------------------------------------- 9 - 15 Operation ------------------------------------------------------------------------------------- 16 - 19 Maintenance --------------------------------------------------------------------------------- 19 - 24 Parts Breakdown... -
Page 3: General Information
If the package has suffered rough handling, bumps or damage (visible or concealed), please note it on the bill of lading before accepting the delivery and contact Omcan within 24 hours, so we may initiate a claim with the carrier. A detailed report on the extent of the damage caused to the machine must be filled out within three days, from the delivery date shown in the shipping documents. -
Page 4: Safety And Warranty
Si el paquete ha sufrido un manejo de poco cuidado, golpes o daños (visible o oculto) por favor anote en la factura antes de aceptar la entrega y contacte Omcan dentro de las 24 horas, de modo que podamos iniciar una reclamación con la compañia. - Page 5 Safety and Warranty YOUR SAFETY AND THE SAFETY OF OTHERS ARE VARY IMPORTANT We have provided many important safety messages in this manual and on your appliance. Always read and obey all safety messages. All safety messages will follow the safety alert symbol and either the word “DANGER” or “WARNING”. These words mean: •...
- Page 6 Safety and Warranty Warning: accessible parts may be vary hot. Keep young children away. 3. This appliance must be kept away from flammable materials during use. 4. Do not move the appliance during use. 5. Turn off the gas supply at the gas container after use. 6.
- Page 7 Safety and Warranty Code, CSAB149.1. WARNING LP-gas cylinders are not to be stored in any compartments on the appliance that are not intended for cylinder storage and that such unauthorized storage could lead to an explosion, fire, or personal injury. WARNING Gas appliance pressure regulators, regarding protection (when supplied) to prevent freezing rain, snow, etc., from collecting over the vent hole of propane first.
-
Page 8: Technical Specifications
1 YEAR PARTS AND LABOUR BENCH WARRANTY Within the warranty period, contact Omcan Inc. at 1-800-465-0234 to schedule a drop off to either an Omcan authorized service depot in the area, or to an Omcan Service warehouse to repair the equipment. -
Page 9: Installation
Installation ASSEMBLE YOUR OVEN FIRST WITH FOLLOWED STEPS: 1. Bottom shelf installment with 4pcs of 1/4x14mm screws. Note: use a brush to clean the screws. 2. Fasten legs on the oven body with 12pcs of 1/4”x14mm screws. - Page 10 Installation 3. Ash support installment with 4pcs of 1/4”x14mm screws. 4. Install the gas system assembly and the oven knob as shown in the figure.
- Page 11 Installation 5. Install the igniter. 6. Install the electrode and igniter.
- Page 12 Installation 7. Install the electrode fixed cover and orifice connector. 8. Install the ash box on the oven bottom.
- Page 13 Installation 9. Install the door handle with each 2 pieces of 1/4”x14mm screws + insulation mat + flat washer + spring washer + 1/4” bolts. 10. Put 8 firebricks and a mesh cover inside the pizza oven.
- Page 14 Installation 11. Install the chimney cap. 12. Install Chimney with 4pcs of 1/4”x14mm screws.
- Page 15 4. Turn the gas back on and recheck. 5. Should the gas continue to leak from any of the fittings, turn off the gas supply and contact Omcan. Only those parts recommended by the manufacturer should be used on the grill. Substitution will void the warranty.
-
Page 16: Operation
Operation GAS USE CAUTION BEFORE USING YOUR GAS FIRED PIZZA OVEN, PLEASE FOLLOW THE INSTRUCTION BELOW. IF YOU SMELL GAS: 1. Close the gas. 2. Extinguish free flames. 3. Open the oven door. THE GAS ESCAPE COULD CAUSE FIRE OR EXPLOSIONS CAUSING SERIOUS INJURIES OR DAMAGES TO OBJECTS. - Page 17 Operation Any alteration of the product may be potentially hazardous. Use only low pressure flexible pipes and regulators allowed by the current regulation. To replace the pressure regulators and flexible pipes please refer only to the manufacturer instructions. Check hose each time before using the oven for nicks, cracking, abrasions or cuts.
- Page 18 Operation WARNING Do not store a spare LP-Gas cylinder under or near the appliance. WARNING If the information in above warning is not followed exactly, a fire causing death or serious injury may occur. WARNING When lighting, keep your face and hands as far away from the grill as possible. WARNING This appliance will be hot during and after use.
-
Page 19: Maintenance
Operation IF THE OVEN COOLS DOWN TOO QUICKLY The cause could be either from the first starting or starting the oven after a long period of inactivity. Avoid making a small or fast fire that would not heat the oven to capacity. Verify that water and/or humidity have not infiltrated the oven. - Page 20 Maintenance recommended cleaning agents. WIPE INSIDE AND OUT Put a small amount of powdered cleanser onto a clean, dry cloth and wipe all exterior parts of your oven to remove soot and stains and to restore your oven’s shine. Always wipe in the direction of the stainless steel grain for best results.
- Page 21 Maintenance 2. Use a screwdriver to separate 27 from the pizza oven body and disassemble it. 3. Use 2pcs M5x8 screw to connect 5 and 4. Install 4, 5 and 27 to use 4pcs 5/32x8 screw.
- Page 22 Maintenance 4. Install 4, 5, 27 connection assembly using 6 pcs 1/4x14mm screws to attach the base of oven dome.
- Page 23 Maintenance 5. Connect 4 and 14 with a wrench. 6. Use a wrench to separate and disassemble 2 from the burner. Use 10 to separate 1 from 2. Put 2 back into the burner.
- Page 24 Maintenance 7. Separate 16 and 12. Use 3 to debug 12 as shown in the figure. Put 16 back into 12. 8. Connect 8 and 4 with a wrench. Remark: the quick connector is installed to the natural gas pipeline interface. After installation, insert the NG intake hose and use it.
-
Page 25: Parts Breakdown
Parts Breakdown Model CE-CN-0082T-WG 47875... - Page 26 Parts Breakdown Model CE-CN-0082T-WG 47875 Item No. Description Position Item No. Description Position Item No. Description Position AO176 Ball Nut for 47875 AO191 Knob for 47875 AO206 Gas Pipe for 47875 AO177 Chimney Top for 47875 AO192 Oven Door for 47875...
-
Page 27: Warranty Registration
Warranty Registration Thank you for purchasing an Omcan product. To register your warranty for this product, complete the information below, tear off the card at the perforation and then send to the address specified below. You can also register online by visiting: Merci d’avoir acheté... - Page 28 Since 1951 Omcan has grown to become a leading distributor of equipment and supplies to the North American food service industry. Our success over these many years can be attributed to our commitment to strengthen and develop new and existing relationships with our valued customers and manufacturers.
Need help?
Do you have a question about the CE-CN-0082T-WG and is the answer not in the manual?
Questions and answers