
Related Manuals for Omcan CE-IT-0500


Summary of Contents for Omcan CE-IT-0500
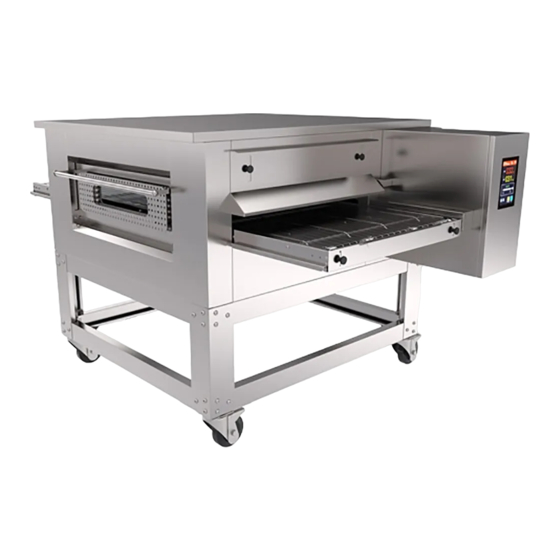
- Page 1 Conveyor Oven Model CE-IT-0500 Item 46725 Instruction Manual Revised - 09/09/2021 Toll Free: 1-800-465-0234 Fax: 905-607-0234 Email: service@omcan.com www.omcan.com...
-
Page 2: Table Of Contents
Table of Contents Model CE-IT-0500 Section Page General Information --------------------------------------------------------------------------- 3 - 4 Safety and Warranty --------------------------------------------------------------------------- 4 - 6 Technical Specifications -------------------------------------------------------------------------- 6 Installation --------------------------------------------------------------------------------------- 7 - 8 Operation --------------------------------------------------------------------------------------- 9 - 19 Maintenance --------------------------------------------------------------------------------- 19 - 21 Troubleshooting... -
Page 3: General Information
If the package has suffered rough handling, bumps or damage (visible or concealed), please note it on the bill of lading before accepting the delivery and contact Omcan within 24 hours, so we may initiate a claim with the carrier. A detailed report on the extent of the damage caused to the machine must be filled out within three days, from the delivery date shown in the shipping documents. -
Page 4: Safety And Warranty
Si el paquete ha sufrido un manejo de poco cuidado, golpes o daños (visible o oculto) por favor anote en la factura antes de aceptar la entrega y contacte Omcan dentro de las 24 horas, de modo que podamos iniciar una reclamación con la compañia. - Page 5 1 YEAR PARTS AND LABOUR WARRANTY Within the warranty period, contact Omcan Inc. at 1-800-465-0234 to schedule an Omcan authorized service technician to repair the equipment locally. Unauthorized maintenance will void the warranty. Warranty covers electrical and part failures, not improper use.
-
Page 6: Technical Specifications
In any case, for suitable recycling, we suggest disposing of the products separately (differentiated waste) according to the current norms. DO NOT DISCARD ANY PACKAGING MATERIALS IN THE ENVIRONMENT! Technical Specifications Model CE-IT-0500 Stand Included Power 14.2 kW Current Output per Hour 40 pizzas with 13”/330mm diameter... -
Page 7: Installation
Installation TO BE INSTALLED BY A CERTIFIED ELECTRICIAN. OVEN UNLOADING AND HANDLING The oven must be unloaded and handled by a qualified forklift operator. OVEN POSITIONING AND OVERLAPPING Remove the conveyor belt. Use a forklift truck with adequate capacity. Raise the caps and insert the forks, suitably covered with soft material to prevent damage, in the cooking chamber, through the inlet or the tunnel exit (Fig.1). - Page 8 Installation MAXIMUM NUMBER OF OVERLAYABLE OVENS: 3 Remove any polystyrene protections and remove the protective film, avoiding the use of tools that can damage the surfaces. CONNECTION TO UTILITIES (ELECTRICAL CONNECTION) The oven is supplied with a power cord without a plug. Connection to the electric network must be performed by interposing a differential magneto-thermal switch with suitable characteristics, in which the minimum opening distance between the contacts is at least 3 mm.
-
Page 9: Operation
Operation CONTROL PANEL 1. Off button. 2. Date and time display. 3. Top setpoint. 4. Top temperature. 5. Bottom setpoint. 6. Bottom temperature. 7. Conveyor commands. 8. INCREASE and DECREASE keys. 9. Program key. 10. Menu key. 11. Logo button to access Technical Data. 12. - Page 10 Operation SELECT LANGUAGE • Press the menu button. • Press the LCD Settings button. • Select the language. • Save. • Exit.
- Page 11 Operation DATE AND TIME SETTING • Press the Menu button. • Press the LCD settings button. • Year setting. • Month setting. • Day setting. • Time setting. • Minute setting. • Data saving. WORK SETPOINT SETTINGS The procedures for setting the top and bottom temperature are described below.
- Page 12 Operation TOP SETPOINT • Press on the Top setpoint to change the set value. • Increase or decrease with “+” and “-”. • Confirm data. BOTTOM SETPOINT • Press on the Bottom setpoint to change the set value. • Increase or decrease with “+” and “-”. •...
- Page 13 Operation COOKING TIME SETTINGS The procedures for setting the cooking time are described below. • Press the conveyor timer. • Confirm by pressing the timer again. • Start conveyor motion. • Stop conveyor movement. • Conveyor motion reversal. • Reversed motion.
- Page 14 Operation COOKING PROGRAM SETTINGS You can set up to ten different cooking programs, by using the top, bottom and cooking time according to your recipes and needs. Proceed as follows to set the cooking programs. • Press the icon Programs. •...
- Page 15 Operation SET FUNCTION POWER ON/OFF “Set function power on/off” allows you to set the oven on/off program and simultaneously start a different program. Power on and off can be managed: Manual, Daily and Weekly. To access the programming of this function proceed as follows.
- Page 16 Operation DAILY SWITCH ON/OFF This function automatically switches the oven on and/or off by setting the desired Start and Stop times. • Press the Menu button. • Press the Calendar button. • Select Daily. • Set hours and minutes. • Set the flag to Start and Stop.
- Page 17 Operation WEEKLY SWITCH ON/OFF This function automatically switches the oven on and off by following a weekly calendar on days and times set according to your production needs. • Press the Menu button. • Press the Calendar button. • Select Weekly. •...
- Page 18 Operation METHOD OF USE FUNCTIONAL VERIFICATION Before switching the oven on, make sure that: • You have removed the protective film, where present. • You have correctly inserted the plug into the power supply socket. • That supply voltage, frequency and system power are compatible with the values shown on the plate on the right side of the oven.
-
Page 19: Maintenance
Operation Bruschetta. 270°C / 518°F 2 min. 30 sec. Taralli. 280°C / 536°F 4 min. 20 sec. Lasagna pie. 170°C / 338°F 20 min. Cheeseburger. 190°C / 374°F 15 min. On conveyor Grilled aubergines. Grilled peppers. 320°C / 608°F 6 min. 30 sec. Grilled courgettes. - Page 20 Maintenance ROUTINE MAINTENANCE TO BE PERFORMED BY THE USER Before carrying out any maintenance operation, disconnect the power supply and follow the “Safety precautions”. In order to keep the oven always clean and efficient, regular cleaning and maintenance must be carried out at regular intervals as follows: DAILY CLEANING Clean the external parts of the oven such as doors, door handles and the front panel with a soft cloth and a...
- Page 21 Maintenance MESH PULL Once the “Safety precautions” have been carried out, proceed as follows: To tighten the mesh, twist the nuts clockwise; twist them counterclockwise to relax it. SPECIAL MAINTENANCE TO BE PERFORMED BY SPECIALIZED TECHNICIANS For any operation that is not the responsibility of the user, it is necessary to request the intervention of a specialized technician.
-
Page 22: Troubleshooting
Troubleshooting Problem Possible Cause Solution The oven does not switch on, the Lack of electricity. Check socket, plug and power display is off. cable, and internal terminal board in the control compartment. Possible activation of the safety Open the electrical system thermostat. -
Page 23: Parts Breakdown
Parts Breakdown Model CE-IT-0500 46725... - Page 24 Parts Breakdown Model CE-IT-0500 46725...
- Page 25 Parts Breakdown Model CE-IT-0500 46725...
- Page 26 Parts Breakdown Model CE-IT-0500 46725...
- Page 27 Parts Breakdown Model CE-IT-0500 46725...
- Page 28 Parts Breakdown Model CE-IT-0500 46725 Item No. Description Position Item No. Description Position Item No. Description Position 40645 Wheels for Stands (Set of 4) for 46725 AH475 Conveyor Transmission for 46725 AH488 Relay 24V for 46725 AH463 Tunnel Tape Protection for 46725...
-
Page 29: Electrical Schematics
Electrical Schematics Model CE-IT-0500 46725... -
Page 30: Notes
Notes ________________________________________________________________________________________ ________________________________________________________________________________________ ________________________________________________________________________________________ ________________________________________________________________________________________ ________________________________________________________________________________________ ________________________________________________________________________________________ ________________________________________________________________________________________ ________________________________________________________________________________________ ________________________________________________________________________________________ ________________________________________________________________________________________ ________________________________________________________________________________________ ________________________________________________________________________________________ ________________________________________________________________________________________ ________________________________________________________________________________________ ________________________________________________________________________________________ ________________________________________________________________________________________ ________________________________________________________________________________________ ________________________________________________________________________________________ ________________________________________________________________________________________ ________________________________________________________________________________________ ________________________________________________________________________________________ ________________________________________________________________________________________ ________________________________________________________________________________________ ________________________________________________________________________________________... -
Page 31: Warranty Registration
Warranty Registration Thank you for purchasing an Omcan product. To register your warranty for this product, complete the information below, tear off the card at the perforation and then send to the address specified below. You can also register online by visiting: Merci d’avoir acheté... - Page 32 Since 1951 Omcan has grown to become a leading distributor of equipment and supplies to the North American food service industry. Our success over these many years can be attributed to our commitment to strengthen and develop new and existing relationships with our valued customers and manufacturers.
Need help?
Do you have a question about the CE-IT-0500 and is the answer not in the manual?
Questions and answers