
Related Manuals for Omcan CE-CN-0098-WG


Summary of Contents for Omcan CE-CN-0098-WG
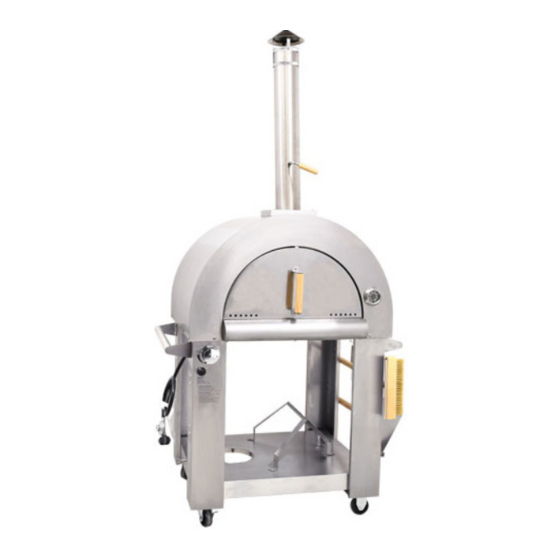
- Page 1 Outdoor Wood and Gas Oven Model CE-CN-0098-WG Item 49113 Instruction Manual Revised - 04/20/2022 Toll Free: 1-800-465-0234 Fax: 905-607-0234 Email: service@omcan.com www.omcan.com...
-
Page 2: Table Of Contents
Table of Contents Model CE-CN-0098-WG Section Page General Information --------------------------------------------------------------------------- 3 - 4 Safety and Warranty --------------------------------------------------------------------------- 4 - 7 Technical Specifications -------------------------------------------------------------------------- 7 Installation -------------------------------------------------------------------------------------- 8 - 14 Operation ------------------------------------------------------------------------------------- 14 - 22 Maintenance --------------------------------------------------------------------------------- 22 - 23 Troubleshooting... -
Page 3: General Information
If the package has suffered rough handling, bumps or damage (visible or concealed), please note it on the bill of lading before accepting the delivery and contact Omcan within 24 hours, so we may initiate a claim with the carrier. A detailed report on the extent of the damage caused to the machine must be filled out within three days, from the delivery date shown in the shipping documents. -
Page 4: Safety And Warranty
Si el paquete ha sufrido un manejo de poco cuidado, golpes o daños (visible o oculto) por favor anote en la factura antes de aceptar la entrega y contacte Omcan dentro de las 24 horas, de modo que podamos iniciar una reclamación con la compañia. - Page 5 Safety and Warranty DANGER - IF YOU SMELL GAS: 1. Shut off gas to the appliance. 2. Extinguish any open flame. 3. Open lid. 4. If odor continues, keep away from the appliance and immediately call your gas supplier or your fire department.
- Page 6 Safety and Warranty 2. Instructions to the effect that this appliance shall be used only outdoors, and shall not be used in a building, garage, or any other enclosed area. 3. A statement that this appliance is not intended to be installed in or on a boat. For other than a recreational vehicle gas grill, a statement that this appliance is not intended to be installed in or on a recreational vehicle.
-
Page 7: Technical Specifications
1 YEAR PARTS AND LABOUR WARRANTY Within the warranty period, contact Omcan Inc. at 1-800-465-0234 to schedule an Omcan authorized service technician to repair the equipment locally. Unauthorized maintenance will void the warranty. Warranty covers electrical and part failures, not improper use. -
Page 8: Installation
Installation STEP 1 1. Use 1/4” x 14 screw 16 pcs. to install the support leg and strengthen bottom plate. STEP 2 1. Installation of cylinder fixing rod and reinforced bottom plate. - Page 9 Installation STEP 3 1. Use 5/32” x 10 screw 1 pcs. to install the electrode and T shape burner. 2. Use 1/4” x 14 screw 2 pcs. to install the T shape burner and oven.
- Page 10 Installation STEP 4 1. Use 1/4” x 14 screw 4 pcs and 5/32” x 10 screw 2 pcs. to install the oil collecting box. - The front of the oil collecting box is facing up, and the end with the card slot is inserted into the oil collecting box bracket in parallel.
- Page 11 Installation STEP 6 1. Install the support leg and oven. STEP 7 1. Left and right handle. 2. Install the hook 1 and hook 2.
- Page 12 Installation STEP 8 1. Install the main value, igniter and left front support.
- Page 13 Installation STEP 9 1. Put the gas system pre-installed assembly as shown in the line drawing, pass 40” and 46” through 51”, as shown in Figure 1, place it at 45”, use cable ties to bind. 2. Manually align 39” to 47” and tighten clockwise as shown in Figure 3 and Figure 4. STEP 10 1.
-
Page 14: Operation
Installation STEP 11 1. When working with gas burning, please take out 52”, when working with wood burning, please put in 52”, completely cover the burner, pay attention to the direction of placement. Operation LEAK TESTING GENERAL Although all gas connections on the grill are leak tested at the factory prior to shipment, a complete gas tightness check must be performed at the installation site due to possible mishandling in shipment, or excessive pressure unknowingly being applied to the unit. - Page 15 4. Turn the gas back on and recheck. 5. Should the gas continue to leak from any of the fittings, turn off the gas supply and contact Omcan. Only those parts recommended by the manufacturer should be used on the grill. Substitution will void the warranty.
- Page 16 Operation • Do not paint or apply anything on the oven. • Please follow the instructions for the connection of the regulator. • After a period of non-use, please check for gas leaks or burner obstructions. • Any flammable materials must be at least 100cm / 39.3” far from the oven. •...
- Page 17 Operation 1. Make sure burner knobs are turned to off. 2. For gas oven using a propane tank. Slowly open the tank valve. Note: If flow limiting device activates, your oven may not light. If your oven does not light, the flames will be low and will not heat properly.
- Page 18 Operation WARNING If the information in above warning is not followed exactly, a fire causing death or serious injury may occur. LPG CYLINDER USES ADVICE • The LPG is heavier than air. Any LPG leak may collect in low areas and prevent dispersion. •...
- Page 19 Operation WHERE TO KEEP THE OVEN • If the gas fired oven is not used please close the gas cylinder feeding valve. • If the gas fired oven is stored in an enclosed area, please disconnect the gas feeding. The gas cylinder must be placed outside in a well aired area.
- Page 20 Operation WOOD USE GETTING STARTED Carefully unpack your wood-fired pizza oven, it’s not too heavy, but use two people to lift it out of the box. Be sure to place the outdoor oven on the matched cabinet. Remove all the protective film and discard. Assemble the cap/chimney by sliding the ring hardware around the bottom of the cap, fit the chimney and cap together - secure by sliding the ring in position and tighten with a flat head screwdriver.
- Page 21 Operation Cherry: Slightly sweet fruity smoke that’s great with just about everything. Good with all meats. Hickory: The most common hardwood, sweet to strong, heavy bacon flavor. Good for all smoking, particularly pork and ribs. Mesquite: Sweeter and more delicate than hickory, it’s a perfect complement to richly flavored meats such as steak, duck or lamb, but be careful as it can overpower.
-
Page 22: Maintenance
Operation them (a cast iron grill grate with legs works the best). Now cook your steak, vegetables, fish and seafood the way you normally would when using a gas or charcoal grill. Low Temperature Cooking: When the cooking stone is between 160°C - 215°C, you are at a good temperature for baking breads, pies and desserts. -
Page 23: Troubleshooting
Maintenance COLD SEASON We suggest to store the oven during the cold season in an enclosed dry area to protect it from weathering. Before storage, lightly lubricate the metal parts with food safe oil in order to avoid corrosion. After storage, please check for any malfunctions. - Page 24 Troubleshooting Flame is noisy, low or erratic. Is the gas supply fully turned on? Check that the 10 kg gas fuel tank valve is fully open. Is the gas supply in the 10 kg fuel Check the gas level. gas tank low? Does only one burner appear low? Check and clean the burner ports if clogged or dirty.
-
Page 25: Parts Breakdown
Parts Breakdown Model CE-CN-0098-WG 49113... - Page 26 Parts Breakdown Model CE-CN-0098-WG 49113 Item No. Description Position Item No. Description Position Item No. Description Position AJ627 Left Legs for 49113 AJ645 Thermometer for 49113 AJ663 5/32” x 10mm Screw for 49113 AJ628 Right Legs for 49113 AJ646 Rigid Caster for 49113...
-
Page 27: Warranty Registration
Warranty Registration Thank you for purchasing an Omcan product. To register your warranty for this product, complete the information below, tear off the card at the perforation and then send to the address specified below. You can also register online by visiting: Merci d’avoir acheté... - Page 28 Since 1951 Omcan has grown to become a leading distributor of equipment and supplies to the North American food service industry. Our success over these many years can be attributed to our commitment to strengthen and develop new and existing relationships with our valued customers and manufacturers.
Need help?
Do you have a question about the CE-CN-0098-WG and is the answer not in the manual?
Questions and answers