Advertisement
Table of Contents
https://wiki.teltonika-networks.com/view/TRB145_Powering_Options
TRB145 Powering Options
Main Page
>
TRB Gateways
This chapter contains information on powering options supported by TRB145 devices.
Contents
1 Power socket
2 RS485
Power socket
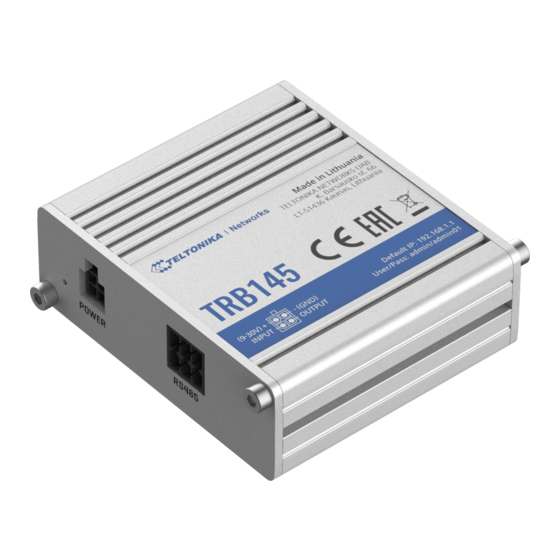
The TRB145 device can be powered over the 4 pin connector using a 9-30 VDC power supply unit
(PSU). Refer to the image below for the power socket pinout information:
If you decide not to use the standard 9 VDC PSU and want to power the device from a higher
voltage, please make sure that you choose a power supply of high quality. Some power supplies can
produce voltage peaks significantly higher than the declared output voltage, especially during
connection and disconnection.
While the device is designed to accept input voltage in the range of 9-30 VDC, high voltage power
supplies can harm the device. If you want to use high voltage power supplies it is recommended to
also use additional safety equipment to suppress voltage peaks from the power supply.
RS485
You can also power the device over the RS485 connector. In order to do so, follow the steps
described below.
Unscrew the two hex bolts and remove the back panel.
>
TRB145
>
TRB145 Manual
> TRB145 Powering Options
Advertisement
Table of Contents

Related Manuals for Teltonika TRB145


Summary of Contents for Teltonika TRB145
- Page 1 2 RS485 Power socket The TRB145 device can be powered over the 4 pin connector using a 9-30 VDC power supply unit (PSU). Refer to the image below for the power socket pinout information: If you decide not to use the standard 9 VDC PSU and want to power the device from a higher voltage, please make sure that you choose a power supply of high quality.
- Page 2 Remove the PCB board from the case. Solder a 0 Ohm resistor or 2 pin header with jumper between the "RS PWR ENABLE" pins (marked 1 & 2 in the figure below) on the PCB board: Connect pins 3 (GND) and 6 (PWR) to a 9-30 VDC power supply. If the PWR LED lights up, the device was successfully powered over the RS485 connector.
Need help?
Do you have a question about the TRB145 and is the answer not in the manual?
Questions and answers