Table of Contents
Advertisement
Advertisement
Table of Contents

Related Manuals for Uniden TRU 448 Series


Summary of Contents for Uniden TRU 448 Series
- Page 3 w w w. u n i d e n . c o m...
-
Page 4: Table Of Contents
WELCOME/FEATURES QUICK REFERENCE GUIDE CONTROLS AND FUNCTIONS GETTING STARTED Read This First Checking the Package Contents Setting up the Phone Terminology Mounting the Base Unit on a Wall Setting Caller ID Options Selecting a Language BASICS Making and Receiving Calls Redialing a Call Ringer Volume Setup Ringer Tone Setting... -
Page 5: Welcome/Features
Welcome Congratulations on your purchase of the Uniden cordless telephone. This phone is designed and engineered to exacting standards for reliability, long life and outstanding performance. To enjoy the best performance from this phone’s features, please read this manual carefully and save it for future reference. - Page 6 The TRU448 series features include AutoTalk™ and AutoStandby™. AutoTalk allows you to answer a call by just removing the handset from the base so you don’t have to waste time pushing buttons. AutoStandby allows you to hang up by simply returning the handset to the base.
-
Page 7: Quick Reference Guide
Step 2 Connecting INSTALL THE HANDSET BATTERY CONNECT TO A PHONE LINE When the handset battery pack is fully charged, plug the telephone cord into the base unit and Remove the cover. then into a telephone wall jack. Connect the battery pack connector with the correct polarity. -
Page 8: Controls And Functions
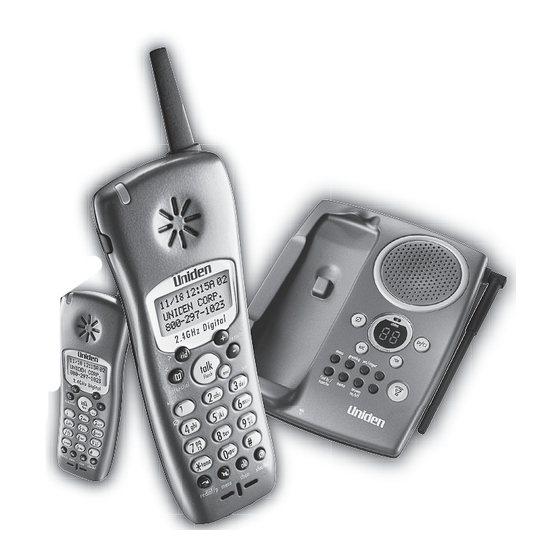
Controls and Functions [ 6 ] [ 6 ] C O N T R O L S A N D F U N C T I O N S 1. Handset Antenna 2. Headset Jack Cover 3. Beltclip Hole 4. Handset Battery Compartment 5. - Page 9 32. Memo Key 48. Charge LED (TRU448-2 only) 33. Base charging contacts 49. DC Power Input (TRU448-2 only) C O N T R O L S A N D F U N C T I O N S (play/stop) Key...
-
Page 10: Getting Started
Read this First This cordless telephone must be set up before use. Follow these steps: Step 1 (page 9) Unpack the telephone and accessories. Step 2 (page 10) Next, choose the best location to set up the base unit. Step 3 (page 11 to 14) Then, insert the battery pack into the handset. -
Page 11: Checking The Package Contents
Uniden Parts Department (800) 554-3988 Hours: M-F 7:00 a.m. to 5:00 p.m. CST. We can also be reached on the web at www.uniden.com. G E T T I N G S T A R T E D [ 9 ]... -
Page 12: Setting Up The Phone
Setting up the Phone Do the following steps: A. Choose the best location B. Install the battery pack A. Choose the best location Before choosing a location for your new phone, read “Installation Considerations” on page 64. Here are some important guidelines you should consider: Avoid heat sources, such as radiators, air ducts, and sunlight Avoid television sets and... - Page 13 3) Securely close the battery compartment cover by sliding it up until it snaps into place. 4) Place the handset in the charging cradle with the keypad either facing up or down. • Use only the Uniden battery (BT-446) supplied with your phone. Replacement...
-
Page 14: Low Battery Alert
• 10 days when the handset is in the standby mode When you charge the handset, Caller ID summary screen and the name of the handset, HS1 appears. For TRU448-2, if HS2 appears, you are charging the handset No.2. Low battery alert When the battery pack is very low and needs to be charged, the phone is programmed to eliminate functions in order to save power. - Page 15 1) Connect the AC adapter to the DC IN 9V jack and to a standard 120V AC wall outlet. 2) Set the base and charger (for TRU448-2 only) on a desk or tabletop, and place the handset in the base unit as shown.
-
Page 16: Terminology
D. Choose the dialing mode Most phone systems use tone dialing, which sends DTMF tones through the phone lines. However some phone systems still use pulse dialing such as in rural areas. The default setting is tone dialing. Depending on your dialing system, set the mode as follows: •... -
Page 17: Mounting The Base Unit On A Wall
The retainer holds the handset in place. Standard wall plate mounting This phone can be mounted on any standard telephone wall plate. 1) Plug the AC adapter into the DC IN 9V jack. Route the AC adapter cord inside the molded wiring channel as shown. - Page 18 2) Set the retainer clip if necessary. 3) Refer to steps 1 through 6 on page 15 to mount the telephone. [ 16 ] G E T T I N G S T A R T E D...
-
Page 19: Setting Caller Id Options
Setting Caller ID Options There are three Caller ID setup options available: AutoTalk, CIDCW (Caller ID on Call Waiting), and Area Code. See page 18 for Area Code setup instructions. AutoTalk allows you to answer the phone without pressing talk/flash. If the phone rings when AutoTalk is On, simply remove the handset from the base and the phone automatically answers the call. - Page 20 Entering your Area Code If you enter a 3-digit area code number in the “ code does not appear in Caller ID messages. For calls received from outside your local area code, you will see a full 10-digit number. 1) When the phone is in the standby mode, press menu/mute. •...
-
Page 21: Selecting A Language
Selecting a Language Language option can be used to choose the language of your display. You can select English, French, or Spanish. 1) When the phone is in the standby mode, press menu/mute. 2) Press - to move the pointer to “ then press select/ch. -
Page 22: Basics
Making and Receiving Calls From the handset To answer a call Refer to page 17 “Setting Caller ID To make a call Options” to turn the AutoTalk feature On if desired. Any key answer can be used only when AutoTalk is set to On. -
Page 23: Redialing A Call
Redialing a Call The last three phone numbers dialed can be quickly redialed. Redialing from Standby Mode 1) Press redial/p. The phone number that was last dialed appears on the display. 2) Press redial/p again. Each press of redial/p will display one of the last three numbers dialed. -
Page 24: Ringer Volume Setup
Ringer Volume Setup 1) When the phone is in the standby mode, press menu/mute. 2) Press select/ch. • If you select 3) Press + or - to move the pointer through the ringer “Ringer Off”, “ ” settings (Ringer Off, Ringer Low, or Ringer High). appears on the You will hear a ringer or melody at the selected volume. -
Page 25: Distinctive Ringer Setup
Distinctive Ringer Setup “Distinctive Ringer” allows you to preset memory locations with a designated ring tone. When an incoming call is received and the Caller ID information matches the information in one of the memory locations, the Distinctive Ring that has been stored for that particular caller will sound. -
Page 26: Mute Microphone
Mute Microphone You can temporarily turn Off the microphone so that the person you are talking with cannot hear you. During a telephone call press and hold menu/mute to turn Off the microphone, and “ the display. Press menu/mute again to cancel muting. -
Page 27: Selecting A Different Channel
Paging is canceled when pressing any key on the handset or find hs/transfer on the base. Additionally, if you receive an incoming call, page is canceled. 3-Way Conferencing The Uniden TRU448 series permits 3-way conversations between the handset, base, and an outside line. When speaking on the handset 1) Press (talk) on the base to initiate the 3-way conversation. -
Page 28: Transferring A Call
Transferring a Call • If you transfer a call and it is not picked up after 5 minutes, the call will be disconnected. • Returning the handset to the base will not cancel the transfer. • When the handset is off the base, and if you place the handset on the base while the To transfer from the handset to the base 1) Press xfer/del on the handset during a call. -
Page 29: Flash And Call Waiting
The LED stops flashing when all new messages are played back (see “Using your Answering System” on page 47). You must subscribe through your local telephone company to receive Call Waiting Service. B A S I C S [ 27 ]... -
Page 30: Phonebook
Phonebook Phonebook allows you to dial a number using just a few key presses. Your phone stores names/numbers in the phonebook memory location, and you can search names in alphabetical order. You have a total of 100 locations that can be used for the phonebook (including the Speed dial locations) and Caller ID messages. -
Page 31: Steps For Entering Names And Special Characters
6) “ ” appears. Then press + or - to move the pointer to one of the Distinctive Ring options, then press select/ch. If you choose not to store a “ simply select the “ 7) “ ” appears. Then press - to move the pointer to select the speed dial location (10 locations: SPD1-SPD0). - Page 32 7) Press 3 five times. 8) Press 6 five times. 9) When finished, press select/ch. To continue to store the telephone number, proceed to step 5 on page 28. [ 30 ] P H O N E B O O K...
-
Page 33: Viewing The Phonebook
“Steps for Entering Names and Special Characters” on page 29). For example, to search for “Uniden”, press 8 two times. Press - or + until the name is displayed. If you press + while the first name in “U” is displayed, a name starting with “T”... -
Page 34: Making Calls Using The Phonebook
Making Calls Using the Phonebook From Standby Mode 1) When the phone is in the standby mode, press pb/rocket/<. 2) Press + or - to view the phonebook locations (see “Viewing the Phonebook” on page 31). 3) Press talk/flash. The displayed number is dialed. From Talk Mode 1) Press talk/flash. -
Page 35: Editing Or Erasing A Stored Name, Phone Number Distinctive Ring, And Speed Dial
Editing or Erasing a Stored Name, Phone Number, Distinctive Ring, and Speed Dial 1) When the phone is in the standby mode, press pb/rocket/<. 2) Press + or -, or the number keypad to view the phonebook locations (see “Viewing the Phonebook” on page 31). a. -
Page 36: Chain Dialing
Storing the RocketDial 1) When the phone is in the standby mode, press pb/rocket/<. 2) Press - once to display the RocketDial menu, then press select/ch. Store the name, phone number, and distinctive ring by following the steps 3 to 6 under “Storing the Phone Numbers, Names, Distinctive Rings, and Speed Dial”... -
Page 37: Caller Id
You must subscribe to Caller ID service to use this feature. When the telephone rings, the Caller ID feature allows you to view the caller’s name and phone number on the display before you answer the phone. Additionally, you can dial the displayed number and store the information for memory dialing. -
Page 38: Viewing The Caller Id List
Viewing the Caller ID List The Caller ID list stores information for incoming calls – even unanswered calls. You can store 100 of the Caller ID messages and phonebook locations (including Speed dials) in total. You can view the Caller ID list during a call or when the phone is in the standby mode. •... -
Page 39: Deleting Information From The Caller Id List
Deleting Information from the Caller ID List Deleting a Caller ID message 1) While the incoming Caller ID information is displayed, press xfer/del. “ ” appears. 2) Press + or - to choose “ ” or “ 3) Press select/ch or xfer/del. When the pointer is at “... -
Page 40: Using The Caller Id Message List
3) View the Caller ID message you want to dial. • If a call comes in via 4) Press select/ch. The displayed phone number will be dialed. a telephone system Long Distance calls and Area Code Setting/Cancellation that does not offer... -
Page 41: Call Waiting Deluxe Features
• If data is already stored in the RocketDial, the old data will be overwritten by the new data. Call Waiting Deluxe Features Your TRU448 series gives you new options for call waiting. At the touch of a button, you can place the caller on hold, send them to your voice mail service, or conference them into your current call. -
Page 42: The Integrated Answering Device
The Integrated Answering Device The TRU448 series has a built-in answering system that answers and records incoming calls. You can also use your answering system to record a conversation, leave a voice memo message, or to announce a special outgoing message to callers when you’re away from your phone. -
Page 43: Setting Up Your Answering System
Screen Incoming Calls You can screen calls when the answering system is On. 1) After the answering system answers, the base speaker will let you hear the calls as the machine records the message. 2) To answer the call, press (talk) or pick up the handset from the base (when AutoTalk is set to On). -
Page 44: Setting The Base Ringer Volume
Choosing between the two outgoing messages When the phone is in the standby mode, press greeting. Press greeting again when the outgoing message is played. Each time greeting is pressed, the outgoing message is switched between the pre-recorded and the personal outgoing message. Deleting an outgoing message To delete the personal outgoing message, press announces “greeting has been deleted”. - Page 45 Adjusting the speaker volume level When the base speaker is in use, press volume for louder or for softer. The numbers 0-9 appear on the base indicating the volume levels. 0 being the softest and 9 being the loudest. Using the Menu Mode The Menu mode allows you to set the following Answering System functions.
-
Page 46: Setting The Time
Setting the Time The clock on the TRU448 series answering system starts when power is supplied to the base. Follow these steps to set the clock to the correct time. 1) Press menu. The system announces the current time. The message counter displays the day of the •... -
Page 47: Announce Only Feature
Setting the Ring Time The ring time setting allows you to set the number of rings the caller hears before your answering system plays the outgoing message. You can set the ring time to answer after two, four, or six rings. Setting “TS” (Toll Saver), the answering system picks up after two rings if you have new messages, and after four rings if there are none. -
Page 48: Selecting The Language
A confirmation tone sounds. If you want to use your own greeting, you may want to change your greeting to omit the prompt to leave a message. Refer to “Recording a personal outgoing message (Greeting)” on page 41. The following message is pre-recorded: “Hello, no one is available to take your call. -
Page 49: Using Your Answering System
The message counter displays the number of messages stored in memory. If the display flashes, then there are new messages waiting for you. The TRU448 series is designed to play your new messages first. After you play all your new messages, you can then play your old messages. - Page 50 Skipping a message 1) Press 2) Press Each time messages, press scroll through a message, press and hold playback at double speed. 3) Press message counter shows the number of messages stored in memory. Deleting a message To maintain maximum record time, delete the old messages. 1) Press 2) Press You hear a beep and the message is deleted.
-
Page 51: Voice Memo
Voice memo The voice memo function allows the user to record messages (more than 2 seconds and within 10 minutes). 1) Press and hold memo. You hear a beep. 2) Start your recording after the announcement “Record memo message” and a confirmation tone. -
Page 52: Remote Operation
(refer to page 67). 1) Call your telephone number. 2) During the greeting message, press # and enter your PIN code within 2 seconds. (See “Setting a Personal Security Code”, page 44). 3) The answering system announces the current time and the number of messages stored in memory. - Page 53 If you have forgotten to turn On your answering system, you can turn it On remotely from any touch-tone telephone. 1) Call your telephone number. 2) Wait ten rings until the system answers. You hear a beep. 3) Press # and then enter your PIN code within 2 seconds. The answering system announces the day and time, and the number of messages stored in memory.
-
Page 54: Playing Incoming Messages
Playing incoming messages 1) When the phone is in the standby mode, press -/remote on the handset. The answering system announces the current time and the number of messages stored in the memory. You will hear a confirmation tone. Messages will be played in the order in which they were received and “... -
Page 55: Expanding Your Phone
Additionally, you can transfer an outside call to another handset. • We refer to the TXC400 handset and the TRU448-2 handset No.2 as the second handset, and the TRU448 handset and TRU448-2 handset No.1 as the original handset in this section. -
Page 56: Call Transfer Feature
Call Transfer Feature You can transfer an outside call to the other handset. • If you transfer the call and it is not picked up after 5 minutes, the call • For information on transferring a call between the original handset and To transfer a call (to the second handset) 1) Press xfer/del on the handset (or transfer on the base) during a call. -
Page 57: Second Handset Operation
Registration For the TRU448-2 handset No.2, you can use it with the TRU448-2 base without registering the handset. However, you need to register the TRU448-2 handset No.2 each time you change the digital security code of the original base. Follow the instructions under “Registering the Second Handset”... - Page 58 • Save this owner’s manual. The TXC400 owner’s manual describes only the instructions specific to the second handset. For detailed operation, refer to this owner’s manual (for TRU448). [ 56 ] E X PA N D I N G Y O U R P H O N E...
-
Page 59: Additional Information
(See “About the digital security code”, page 8.) In the rare situation that you suspect another cordless telephone is using the same security code, you can change the code. To change the digital security code, deregister the code, then register a different code. -
Page 60: Installing The Beltclip
Pull both sides of the beltclip to release the tabs from the holes. Headset Installation Your phone may be used with an optional headset, the Uniden HS910. To use this feature, insert the headset plug into the headset jack. Your phone is ready for hands-free conversations. -
Page 61: Note On Power Sources
Please contact your place of purchase or the Uniden Parts Department for a replacement battery (See page 9). Warning: To avoid the risk of personal injury or property damage from fire or electrical shock, only use the Uniden battery model and Uniden adapter model specifically designated for this product. -
Page 62: General Information
A replacement Uniden adapter and battery may be purchased at your local Uniden dealer or by contacting the Uniden Parts Department (800) 554-3988. Hours are from 7:00 a.m. to 5:00 p.m. CST, Monday through Friday. We can also be reached on the web at www.uniden.com. -
Page 63: Troubleshooting
• Press select/ch to help eliminate background noise. • Make sure that you are not too far from the base. • Check both ends of the base telephone line cord. • Make sure the AC adapter is plugged into the base and wall outlet. - Page 64 • The handset was picked up before the second ring. • The call was placed through a switchboard. • Call your local telephone company to verify your Caller ID service is current. • Charge the handset. • Change the digital security code (See page 57).
-
Page 65: Precautions & Warranty
The FCC Wants You To Know Changes or modifications to this product not expressly approved by Uniden, or operation of this product in any way other than as detailed by the owner’s manual, could void your authority to operate this product. The equipment cannot be used on public coin phone service provided by the telephone company. -
Page 66: Installation Considerations
WARRANTOR: UNIDEN AMERICA CORPORATION (“Uniden”) ELEMENTS OF WARRANTY: Uniden warrants, for one year, to the original retail owner, this Uniden Product to be free from defects in materials and craftsmanship with only the limitations or exclusions set out below. -
Page 67: I.c. Notice
The REN assigned to each terminal equipment provides an indication of the maximum number of terminals allowed to be connected to a telephone interface. The termination on an interface may consist of any combination of devices subject only to the requirement that the sum of the Ringer Equivalence Numbers of all the devices does not exceed five. -
Page 68: Index
Index 0 - 9 3-way conferencing ...25 10 ring options ...22 Announce only feature ...45 Answering system Deleting a message ...48 Playing your messages ...47 Recording a conversation ...49 Remote access ...51 Repeating a message ...47 Skipping a message ...48 Turning on/off ...40 Area Code ...18 AutoTalk ...17... -
Page 69: Remote Operation Card
Remote Operation Card C U T REMOTE OPERATION CARD Remote access away from Turn on the answering home system remotely 1. Call your phone number from a 1. Call your phone and let it ring touch-tone phone. 2. During the outgoing message, 2. - Page 70 C U T Task Repeat a Message Playing incoming Messages Skipping a Message Deleting a Message Stop Operation Answering System On Memo Record/Stop Greeting Message Record/Stop Answer System Off Help Guidance [ 68 ] R E M O T E O P E R A T I O N C A R D...
- Page 71 1-800-297-1023 PLEASE DO NOT RETURN THIS PRODUCT TO THE PLACE OF PURCHASE. Our Uniden representatives will be happy to help you with any matters regarding the operation of this unit, available accessories, or any other related matters. Thank you for purchasing a Uniden product.
Need help?
Do you have a question about the TRU 448 Series and is the answer not in the manual?
Questions and answers