Table of Contents
Advertisement
Available languages
Available languages
Quick Links
USA office: Fontana
AUS office: Truganina
GBR office: Ipswich
If you're having difficulty, our friendly
customer team is always here to help.
FRA office: Saint Vigor d'Ymonville
USA:cs.us@costway.com
AUS:cs.au@costway.com
GBR:cs.uk@costway.com
FRA:cs.f r @costway.com
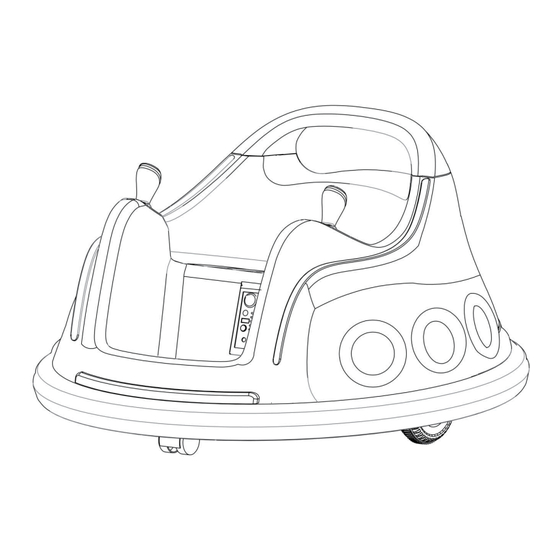
Kids Bumper Car
Auto Tamponneuse pour Enfants
TQ10170
THIS INSTRUCTION BOOKLET CONTAINS IMPORTANT SAFETY INFORMATION. PLEASE READ AND KEEP FOR FUTURE REFERENCE.
Advertisement
Table of Contents

Related Manuals for Costway TQ10170


Summary of Contents for Costway TQ10170
- Page 1 GBR office: Ipswich FRA office: Saint Vigor d'Ymonville USA:cs.us@costway.com If you're having difficulty, our friendly AUS:cs.au@costway.com customer team is always here to help. GBR:cs.uk@costway.com THIS INSTRUCTION BOOKLET CONTAINS IMPORTANT SAFETY INFORMATION. PLEASE READ AND KEEP FOR FUTURE REFERENCE. FRA:cs.f r @costway.com...
-
Page 2: Before You Start
Before You Start Avant de Commencer Please read all instructions carefully and keep it for future reference. Veuillez lire attentivement toutes les instructions et les conserver pour la référence ultérieure. Warnings Avertissements Attention! Use it with protective equipment. Attention ! Utilisez ce produit avec un équipement de protection. Attention! Do not use it in the traffic. -
Page 3: Specification
Styles and colors may vary Keep the package away from children and dispose of properly before use 1. Specification: Motor 380*20000 *2 Battery 12V4.5AH Charger 12V500MA/12V1000MA Speed 1.2~2 km/hr Suitable age: 37-96 months Load capacity: Under 30KG/66LBS Size of car: 73*73*44CM/28.5"*28.5"*17" Power way: Charging type Charge time: 8-12 hours 2. - Page 4 Assembly tools required: B. Install push handle switch As shown in the figure: install the forward backward switch to the designated position of the body. 1. Clip the push handle into the specified position on the body. 2/3. Fix the push handle on the vehicle body with cross screwdriver and M3.5 * 20 screw.
- Page 5 C. Power Connecting & Install Seat D. Function introduction 1. Forward-backward button: Control the car forward or backward, middle is stop. 2. Power button: Turn the vehicle on and off. 3. Power display: Clearly see the battery power, in order to charge. 4.Socket: 1.
- Page 6 E. Buffer strip installation F. Use The Remote Control As shown in the figure: wrap the buffer strip around the specified position on NOTE: This product does not included the AAA(1.5v) batteries. the body, and clip one end of the buffer fixing block into the body slot and the Only allow adult to use remote control, can not let the children touch.
- Page 7 4. Safety Wash hands after handling. ● Do not open the battery. Battery contains lead acid and other materials that are toxic and corrosive. WARNING! ● Do not open the charger. Exposed wiring and circuitry inside case electric shock. Only adults may handle or charge the batter. NEVER allow child to PREVENT INJURIES AND DEATHS: handle or charge the battery.
-
Page 8: Battery Replacement
6. Battery Replacement Vehicle runs Battery low on power Recharge battery, contact sluggishly qualified technician. To avoid losing power, follow these guidelines: ● Do not overload the vehicle. Battery is old Recharge battery, contact ● Do not tow anything behind the vehicle. qualified technician. -
Page 9: Fcc Statement
FCC Statement Completely read through this manual and the troubleshooting guide table before calling. If you still need help resolving the problem, please contact us. Caution: 8. Maintaining This device complies with Part 15 of the FCC Rules. Operation is subject to the following two conditions: (1) this device may not cause harmful ●... -
Page 10: Spécifications
Carrier Frequency of Channels Les styles et les couleurs peuvent varier Gardez l'emballage hors de portée des enfants et jetez-le correctement avant utilisation Frequency Frequency Frequency Channel Channel Channel (MHz) (MHz) (MHz) 2405 2431 2457 1. Spécifications: 2406 2432 2458 2407 2433 2459... -
Page 11: Instructions D'utilisation
Outils de montage nécessaires : B. Installez l'Interrupteur à Poignée-poussoir Comme indiqué sur la figure : Installez l'interrupteur avant-arrière dans la position désignée de la carrosserie. 1. Accrochez la poignée de poussée à la position spécifiée sur le corps. 2/3. Fixez la poignée de poussée sur la carrosserie de la voiture avec un tournevis cruciforme et une vis M3,5*20. - Page 12 C.Connexion Électrique & Installation du Siège D. Introduction à la Fonction Boîte à fusibles Batterie Connecteur d'alimentation 1. Bouton avant-arrière : Contrôlez la voiture vers l'avant ou vers l'arrière, le centre est l'arrêt. 2. Bouton d'alimentation : Allumez et éteignez le véhicule. 3.
- Page 13 E. Installation des bandes tampons F. Utilisation de la Télécommande REMARQUE : Ce produit n'inclut pas les piles AAA (1,5 V). Comme indiqué sur la figure : Enroulez la bande de coussinet à la position Autorisez uniquement les adultes à utiliser la télécommande, ne laissez pas spécifiée sur le corps et fixez une extrémité...
- Page 14 4. Sécurité Se laver les mains après manipulation. ● Ne pas ouvrir la batterie. La batterie contient de l'acide au plomb et d'autres matériaux toxiques et corrosifs. AVERTISSEMENT ● Ne pas ouvrir le chargeur. Les fils exposés et les circuits internes peuvent provoquer un choc électrique.
-
Page 15: Remplacement De La Batterie
6. Remplacement de la batterie Le véhicule roule Batterie faible Remplacez la batterie et contactez lentement un technicien qualifié. Pour éviter de perdre de la puissance, suivez ces directives : Ne surchargez pas le véhicule. ● La batterie est Remplacez la batterie et contactez Ne pas remorquer d'objets derrière le véhicule. -
Page 16: Déclaration Fcc
Lisez entièrement ce manuel et le tableau du guide de dépannage avant d'appeler. Si Déclaration FCC vous avez encore besoin d'aide pour résoudre le problème, veuillez nous contacter. Avertissement : 8. Maintenance Cet appareil est conforme à la partie 15 des règles de la FCC. Son ●... - Page 17 Fréquence Porteuse des Canaux Fréquence Fréquence Fréquence Canal Canal Canal (MHz) (MHz) (MHz) Return / Damage Claim Instructions 2405 2431 2457 2406 2432 2458 DO NOT discard the box / original packaging. 2407 2433 2459 In case a return is required, the item must be returned in original box. Without this 2408 2434 2460...
Need help?
Do you have a question about the TQ10170 and is the answer not in the manual?
Questions and answers