Table of Contents
Advertisement
Quick Links
Advertisement
Table of Contents

Related Manuals for ProSoft Technology RadioLinx RLXIB-IHW-66


Summary of Contents for ProSoft Technology RadioLinx RLXIB-IHW-66
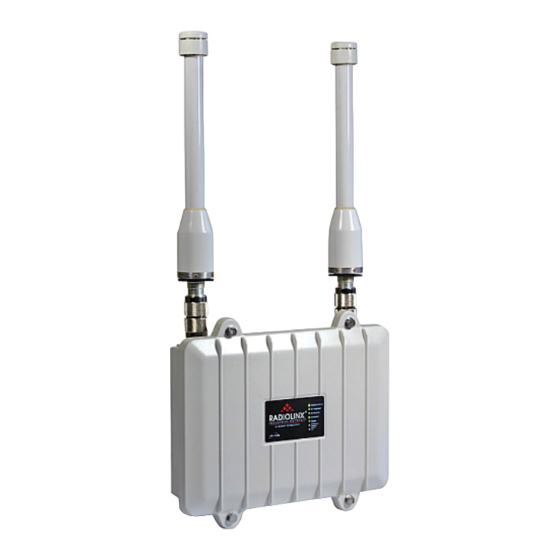
- Page 1 RLXIB-IHW-66 802.11a,b,g Industrial Hotspot May 18, 2009 SETUP GUIDE...
-
Page 2: United States Fcc & Industry Canada Rules
United States FCC & Industry Canada rules OQ7IHW 3656A-IHW Note: This equipment has been tested and found to comply with the limits for a Class A digital device, pursuant to Part 15 of the FCC Rules. These limits are designed to provide reasonable protection against harmful interference when the equipment is operated in a commercial environment. -
Page 3: Rlxib-Ihw-66: Atex Approval
RLXIB-IHW-66: ATEX Approval II 3 G Ex nA IIC T6 X -30C° <= Ta <60°C ProSoft Technology, Inc., Bakersfield, CA USA Model: RLXIB-IHW-66 S/N: XXXXXXXXXX Caution: Read instructions before operating in Hazardous Areas N. America Product name: RLXIB-IHW-66 Safety Warning Statements... -
Page 4: Your Feedback Please
ProSoft Technology® Product Documentation In an effort to conserve paper, ProSoft Technology no longer includes printed manuals with our product shipments. User Manuals, Datasheets, Sample Ladder Files, and Configuration Files are provided on the enclosed CD, and are available at no charge from our web site: http://www.prosoft-technology.com... -
Page 5: Table Of Contents
RLXIB-IHW-66: ATEX Approval......................3 European CE certification ........................3 Connecting Power to the RLXIB-IHW-66 Radio ................. 3 Your Feedback Please........................4 ProSoft Technology® Product Documentation ...................4 Before You Begin Install the IH Browser Configuration Tool Start IH Browser Plug In the Cables... - Page 6 RLXIB-IHW-66 ♦ 802.11a,b,g Before You Begin Industrial Hotspot Setup Guide Page 6 of 20 ProSoft Technology, Inc. May 18, 2009...
-
Page 7: Before You Begin
Note: This Startup Guide is designed for use with two RLXIB-IHW-66 radios. One radio will be setup as a Master (AP) while the other radio will be set up as a remote repeater. ProSoft Technology, Inc. Page 7 of 20... -
Page 8: Install The Ih Browser Configuration Tool
When the installation finishes, you may be prompted to restart your computer if certain files were in use during installation. The updated files will be installed during the restart process. Page 8 of 20 ProSoft Technology, Inc. May 18, 2009... -
Page 9: Start Ih Browser
Start IH Browser To start IH Browser Click the Start button, and then choose Programs. In the Program menu, navigate to ProSoft Technology. In the ProSoft Technology menu, navigate to RadioLinx. Click RadioLinx IH Browser. The window lists all the radios your computer can access. The MAC ID number is essentially the serial number of the radio;... -
Page 10: Plug In The Cables
Ethernet connection is working. The RF Transmit and RF Receive LEDs should blink. For information on making connections, see Radio power requirements and Cable specifications. Page 10 of 20 ProSoft Technology, Inc. May 18, 2009... -
Page 11: Detecting The Radio
Tip: If a radio listing does not appear in the window, open the File menu and choose Scan. If you still do not see a radio listing, refer to Diagnostics and troubleshooting in the RLXIB User Guide. ProSoft Technology, Inc. Page 11 of 20... -
Page 12: Assign A Temporary Ip Address
Open the Operations menu, and choose Assign IP. This action opens the Assign Temporary IP Address dialog box. Accept the dynamically assigned address, and then click OK. For information, see Radio Access settings. Page 12 of 20 ProSoft Technology, Inc. May 18, 2009... -
Page 13: Set Up The Master Radio
Note: The master is the "root" or top-level radio in a network. You must have at least one master radio per network. For redundancy, you can assign more than one master to a network. To configure a Master radio, make the following changes to the web configuration form: ProSoft Technology, Inc. Page 13 of 20 May 18, 2009... - Page 14 Encryption Type: Encryption scrambles data so that only intended viewers can decipher and understand it. Although "none" is an available encryption type, ProSoft Technology strongly recommends encrypting all data sent and received from every radio on your network, to help prevent your data from being intercepted and decoded.
- Page 15 Important: If you intend to assign IP addresses manually, you must not duplicate an IP address that is already in use on your network. If you are not sure what IP addresses are available, ask your network administrator for assistance. ProSoft Technology, Inc. Page 15 of 20 May 18, 2009...
-
Page 16: Save The Radio Configuration
Before closing the Radio Configuration window, you must apply your changes. Click Apply Changes to save your configuration and restart the radio. Note: To discard your changes and start over, click Cancel Changes. Page 16 of 20 ProSoft Technology, Inc. May 18, 2009... -
Page 17: Adding And Configuring Additional Radios
Network SSID as your master. The only difference in procedure will be in setting up each additional radio. Instead of setting your additional radios as Masters, they should be set as Repeaters or, more rarely, Clients, depending on their intended purpose. ProSoft Technology, Inc. Page 17 of 20 May 18, 2009... -
Page 18: 10 Verify Communication
(for Repeater), or a C (for Client) in the IH Browser window. Look at the LEDs to ensure good link quality, as explained in LED display. After a repeater is configured, you can unplug the Ethernet cable from it. Page 18 of 20 ProSoft Technology, Inc. May 18, 2009... -
Page 19: 11 If You Encounter Problems
Power/Status LED should be green, meaning that the radio has power. If the Ethernet LED is green, then the Ethernet connection is working. The RF Transmit and RF Receive LEDs should blink. ProSoft Technology, Inc. Page 19 of 20 May 18, 2009... -
Page 20: Retrieve The Default Password
Radio Configuration/Diagnostic Utility, logging into the radio, and clicking on the Factory Defaults button. This will remove all changes you have made to the radio configuration, including addressing, naming, and security settings. Page 20 of 20 ProSoft Technology, Inc. May 18, 2009...
Need help?
Do you have a question about the RadioLinx RLXIB-IHW-66 and is the answer not in the manual?
Questions and answers