GreenWorks STF305 Operator's Manual
Hide thumbs
Also See for STF305:
- Operator's manual (41 pages) ,
- Operator's manual (28 pages) ,
- Operator's manual (28 pages)
Table of Contents
Advertisement
Available languages
Available languages
Quick Links
Advertisement
Chapters
Table of Contents
Troubleshooting

Related Manuals for GreenWorks STF305


Summary of Contents for GreenWorks STF305
- Page 1 User Manual of Product 1: Greenworks 40V 12" Cordless String Trimmer, 2.0Ah Battery and Charger Included User Manual of Product 2: Greenworks 40V (120 MPH / 500 CFM / 75+ Compatible Tools) Cordless Axial Leaf Blower, Tool Only...
- Page 2 2101602A STRING TRIMMER OPERATOR MANUAL CORTABORDES MANUAL DEL OPERADOR STF305 www.greenworkstools.com...
-
Page 4: Table Of Contents
English Start the machine..........8 Description......... 4 Stop the machine..........8 Purpose.............. 4 Adjust the length of the cutting line....8 Overview............4 Adjust the length of the cutting line Important safety instructions...4 manually............8 Symbols on the machine....5 Operation tips............ -
Page 5: Description
fire. Use • Always wear safety glasses with side shields marked to only Greenworks 29462/2901319/29472 battery or other comply with ANSI Z87.1. Everyday glasses have only BAG series. impact resistant lenses. They are NOT safety glasses. -
Page 6: Symbols On The Machine
Symbol Explanation another battery pack. Use only Greenworks 29482 charger or other CAG series. Voltage • When battery pack is not in use, keep it away from other... -
Page 7: Service
English PROPOSITION 65 SYM- SIGNAL MEANING WARNING CAUTION (Without Safety Alert Sym- This product contains a chemical known to the state of bol) Indicates a situation that California to cause cancer, birth defects or other may result in property dam- reproductive harm. -
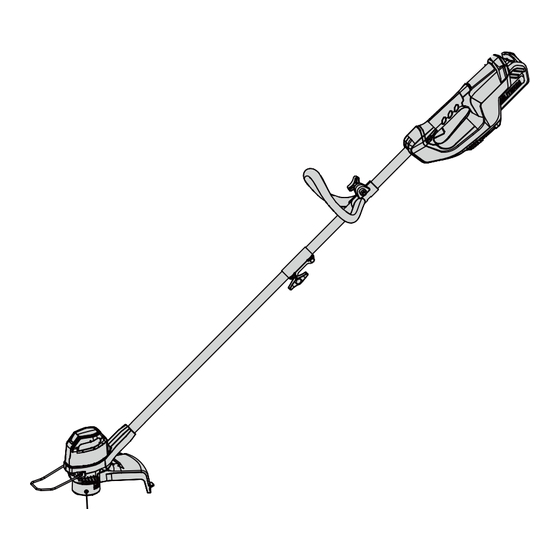
Page 8: Assemble The Shaft
English 5. Tighten the knob. LOOSEN TIGHTEN 2. Put the guard (2) onto the trimmer head. ATTACH THE AUXILIARY HANDLE 3. Align the screw holes on the guard (3)with the screw holes on the trimmer head (4). 1. Press the auxiliary handle (1) onto the upper shaft. 2. -
Page 9: Remove The Battery Pack
English 1. Align the lift ribs (3) on the battery pack with the NOTE grooves in the battery compartment. If the cutting line does not automatically advance, it can be 2. Push the battery pack into the battery compartment until tangled or empty. -
Page 10: Cutting Tips
English MAINTENANCE IMPORTANT Read and understand the safety regulations and the maintenance instructions before you clean, repair or do the maintenance work on the machine. CUTTING TIPS IMPORTANT • Tilt the machine toward the area to be cut. Use the tip of Make sure that all nuts, bolts and screws are tight. -
Page 11: Replace The Spool
English 10.3 REPLACE THE SPOOL 1. Push the tabs on the sides of the trimmer head at the same time. 10.4 REPLACE THE CUTTING LINE NOTE Remove the remaining cutting line on the spool. 2. Pull and remove the spool cover. NOTE Use only with the nylon cutting line of 0.065"... -
Page 12: Transportation And Storage
English TRANSPORTATION AND Problem Possible Cause Solution STORAGE The ma- The guard is not Remove the battery pack chine stops attached to the ma- and attach the guard to WARNING when you chine. the machine. cut. Remove the battery pack from the machine before Heavy cutting line Use only with the nylon tranportation and storage. -
Page 13: Technical Data
(4) in time. years against defects in materials, parts or workmanship. Greenworks, at its own discretion will repair or replace any and all parts found to be defective, through normal use, free TECHNICAL DATA of charge to the customer. -
Page 14: Exploded View
34105874 Auxiliary handle 34120186 Button 2101602 Bare tool assembly 3340646A Spring 33306874 Metal ring 3220313-3 Screw 34116884AB Auxiliary handle knob 31101724 Spool 333011426 Edge guide 34121186-2 Spool cover 341041426 Guard 34107511AC Knob Greenworks Tools PO Box 1238 Mooresville, NC 28115... - Page 15 Español Puesta en marcha de la máquina......19 Descripción........15 Detención de la máquina......... 19 Finalidad............15 Ajuste de la longitud del hilo de corte..... 20 Perspectiva general.......... 15 Ajuste manual de la longitud del hilo de Instrucciones importantes de corte..............20 seguridad..........
-
Page 16: Finalidad
Español DESCRIPCIÓN • Lleve siempre gafas de seguridad con protectores laterales marcadas para cumplir la ANSI Z87.1. Las gafas normales solo tienen lentes resistentes a impactos. NO FINALIDAD son gafas de seguridad. Si sigue esta regla reducirá el riesgo de lesiones oculares. Utilice máscara facial si Esta máquina se utiliza para cortar hierba, maleza ligera y trabaja en espacios de trabajo con polvo. -
Page 17: Símbolos En La Máquina
Un cargador adecuado para un tipo de batería CONSERVE ESTAS INSTRUCCIONES puede dar lugar a un riesgo de incendio cuando se usa con otra batería. Utilice únicamente el cargador Greenworks SÍMBOLOS EN LA MÁQUINA 29482 u otra serie CAG. -
Page 18: Niveles De Riesgo
Español AVISO Símbolo Explicación Deseche todos los materiales tóxicos de una manera Los objetos proyectados pueden rebotar y especificada para evitar la contaminación del medio provocar lesiones personales o daños ma- ambiente. Antes de desechar una batería de ion de litio teriales. -
Page 19: Propuesta 65
Español PROPUESTA 65 AVISO Este producto contiene una sustancia química conocida en el estado de California como causante de cáncer, defectos de nacimiento u otros daños reproductivos. El polvo generado por el lijado eléctrico, el serrado, el esmerilado, la perforación y otras actividades de construcción contiene sustancias químicas que se sabe que son causantes de 2. -
Page 20: Fijación Del Asa Auxiliar
Español 5. Apriete el mando. 1. Alinee las nervaduras de elevación (3) de la batería con las ranuras del compartimento de la batería. 2. Introduzca la batería en el compartimento de la batería hasta que encaje en su posición. 3. Cuando escuche un clic, la batería está instalada. AFLOJAR APRETAR FIJACIÓN DEL ASA AUXILIAR... -
Page 21: Ajuste De La Longitud Del Hilo De Corte
Español AJUSTE DE LA LONGITUD DEL • Retire la batería. HILO DE CORTE • Quite la hierba. NOTA La máquina tiene un cabezal con autoalimentación. Dañará la máquina si golpea el cabezal para intentar avanzar el hilo. NOTA Si el hilo de corte no avanza automáticamente, puede estar enredado o haberse terminado. -
Page 22: Mantenimiento
Español • No pulverice agua sobre el motor ni los componentes eléctricos. 10.3 SUSTITUCIÓN DEL CARRETE 1. Presione las pestañas de los laterales del cabezal de corte al mismo tiempo. Pestaña MANTENIMIENTO IMPORTANTE Debe leer y entender los reglamentos de seguridad y las instrucciones de mantenimiento antes de limpiar, reparar o 2. -
Page 23: Sustitución Del Hilo De Corte
Español TRANSPORTE Y 7. Presione las pestañas e instale la cubierta del carrete en la carcasa del carrete. ALMACENAMIENTO 8. Introduzca la cubierta del carrete hasta que encaje en su AVISO posición. Retire la batería de la máquina antes del transporte y el almacenamiento. -
Page 24: Datos Técnicos
Español Problema Posible causa Solución Problema Posible causa Solución La máquina La protección no Retire la batería y fije la El hilo se La máquina se está 1. Corte con la punta del se detiene está fijada a la má- protección a la máquina. -
Page 25: Garantía Limitada
(4) años contra defectos de material, piezas o mano de obra. Greenworks, a su propia discreción, reparará o reemplazará todas y cada una de las piezas que se encuentren defectuosas, en base a un uso normal, sin costo alguno para el cliente. -
Page 26: Vista Despiezada
2101602 Conjunto de herramienta des- 3340646A Muelle nuda 33306874 Anillo metálico 3220313-3 Tornillo 34116884AB Mando de asa auxiliar 31101724 Carrete 333011426 Guía de borde 34121186-2 Cubierta de carrete 341041426 Protección 34107511AC Mando Greenworks Tools PO Box 1238 Mooresville, NC 28115... - Page 30 BL40B02 BLOWER OPERATOR MANUAL SOUFFLEUSE MANUEL D’OPÉRATEUR SOPLADOR MANUAL DEL OPERADOR BLF349 www.greenworkstools.com...
- Page 32 English 10.3 Install the battery pack........7 Description......... 4 10.4 Remove the battery pack........7 Purpose.............. 4 11 Operation........... 7 Overview............4 Packing list............4 11.1 Start the machine..........7 11.2 Stop the machine..........7 Important safety instructions...4 11.3 Turbo button............7 Battery-operated power tools...4 11.4 Cruise control lever...........
-
Page 33: Description
English DESCRIPTION • Do not put any object into openings. Do not use with any opening blocked; keep free of dust, lint, hair, and anything that may reduce air flow. PURPOSE • Keep hair, loose clothing, fingers and all body parts away The machine is used to propel air out of a tube to move from openings and moving parts. -
Page 34: Child Safety
English • Use appliances only with specifically designated battery • Use extreme care when approaching blind corners, packs. Use of any other battery packs may create a risk of doorways, shrubs, trees, or other objects that may obscure injury and fire. your view of a child who may run into the path of the machine. -
Page 35: Risk Levels
English ENVIRONMENTALLY SAFE Symbol Explanation BATTERY DISPOSAL Wear ear protection when operating this equipment. Always wear eye protection with side shields marked to comply with ANSI Z87.1 when operating this equipment. The toxic and corrosive materials below are in the batteries Do not expose the product to rain or used in this machine: Lithium-Ion, a toxic material. -
Page 36: Install The Blower Tube
English 2. Push the battery pack into the battery compartment until WARNING the battery pack locks into place. • If the parts are damaged, do not use the machine. 3. When you hear a click, the battery pack is installed. •... -
Page 37: Cruise Control Lever
English 11.4 CRUISE CONTROL LEVER 12.1 CLEAN THE MACHINE CAUTION The machine must be dry. Humidity can cause risks of electrical shocks. • Clear the unwanted material out of the air vent with a vacuum cleaner. • Do not spray the air vent or put the air vent in solvents. •... -
Page 38: Technical Data
Nozzle years against defects in materials, parts or workmanship. Greenworks, at its own discretion will repair or replace any and all parts found to be defective, through normal use, free of charge to the customer. This warranty is valid only for... - Page 39 Français 10.2 Installez le tube de la souffleuse......14 Description........11 10.3 Installez le bloc-batterie........14 But..............11 10.4 Retirez le bloc-batterie........14 Aperçu..............11 11 Utilisation......... 15 Liste du contenu de l’emballage...... 11 11.1 Démarrez la machine........15 Instructions importantes sur la 11.2 Arrêtez la machine...........15 sécurité..........11 11.3 Bouton Turbo...........15 Outils fonctionnant sur batterie..12...
-
Page 40: But
Français DESCRIPTION • Utilisez uniquement comme de la façon décrite dans ce manuel. Utilisez uniquement les accessoires recommandés par le fabricant. • Si l'appareil ne fonctionne pas comme il le devrait, s'il est La machine est utilisée pour propulser l'air hors d'un tube tombé, s'il a été... -
Page 41: Outils Fonctionnant Sur Batterie
Français • Pour réduire le risque de choc électrique - Ne pas exposer • Faites effectuer l'entretien par un réparateur qualifié en à la pluie - Entreposer à l’intérieur. n'utilisant que des pièces de rechange identiques. Cela garantira le maintien de la sécurité du produit. •... -
Page 42: Conservez Ces Instructions
Français CONSERVEZ CES NIVEAUX DE RISQUES INSTRUCTIONS Les termes de mise en garde suivants et leur signification ont pour but d'expliquer les niveaux de risques associés à SYMBOLES FIGURANT SUR l'utilisation de ce produit. LA MACHINE SYM- SIGNAL SIGNIFICATION BOLE Certains des symboles suivants peuvent être utilisés sur cet outil. -
Page 43: Installation
Français 10.2 INSTALLEZ LE TUBE DE LA AVERTISSEMENT SOUFFLEUSE Si la batterie se fend ou se brise, avec ou sans fuites, ne la rechargez pas et ne l'utilisez pas. Jetez-la et remplacez-la par une nouvelle batterie. N'ESSAYEZ PAS DE LA RÉPARER ! Pour prévenir les blessures et les risques d'incendie, d'explosion ou de choc électrique, et pour éviter tout dommage à... -
Page 44: Utilisation
Français UTILISATION 11.4 LEVIER DE RÉGULATEUR DE VITESSE AVERTISSEMENT Assurez-vous que le tube de la souffleuse est en place avant de l'utiliser. 11.1 DÉMARREZ LA MACHINE 1. Faites tourner le levier de régulateur de vitesse dans le sens des aiguilles d’une montre pour augmenter la vitesse. -
Page 45: Nettoyez La Machine
Français DÉPANNAGE ATTENTION N'utilisez pas de solvants ou de détergents puissants sur le PROBLÈME CAUSE POSSI- SOLUTION boîtier ou les composants en plastique. Assurez-vous que AVERTISSEMENT La batterie n'est la batterie est cor- Le moteur ne dé- pas correctement Retirez la batterie de la machine avant l’entretien. rectement installée marre pas lorsque installée. -
Page 46: Garantie Limitée
YEAR AÑOS LIMITED WARRANTY GARANTIE LIMITÉE GARANTÍA LIMITADA Greenworks garantit par la présente ce produit, à l'acheteur No de pièce Qté Description original avec preuve d'achat, pour une période de trois (3) ans R0200982-00 1 Levier de régulateur de vitesse contre tout défaut de matériaux, de pièces ou de main-... - Page 47 Español 10.3 Instalación de la batería........22 Descripción........19 10.4 Retirada de la batería........22 Finalidad............19 11 Funcionamiento....... 22 Perspectiva general.......... 19 Lista de embalaje..........19 11.1 Puesta en marcha de la máquina......23 11.2 Detención de la máquina......... 23 Instrucciones importantes de 11.3 Botón turbo............
-
Page 48: Descripción
Español DESCRIPCIÓN • Si el aparato no funciona como debería, se ha caído, ha sufrido daños, se ha dejado al aire libre o se ha caído al agua, llévelo a un centro de servicio. FINALIDAD • No maneje el aparato con las manos mojadas. La máquina se utiliza para expulsar aire por un tubo para •... -
Page 49: Herramientas Eléctricas A Batería
Español HERRAMIENTAS temperaturas fuera del intervalo especificado puede dañar la batería y aumentar el riesgo de incendio. ELÉCTRICAS A BATERÍA SEGURIDAD INFANTIL • No utilice un aparato a batería bajo la lluvia. • Apague todos los controles antes de retirar la batería. Pueden producirse accidentes trágicos si el operario no es •... -
Page 50: Niveles De Riesgo
Español Símbolo Explicación SÍMBO- INDICACIÓN SIGNIFICADO Tensión ADVERTEN- Indica una situación de peli- Corriente gro potencial que, de no evita- rse, podría provocar lesiones Potencia graves o incluso la muerte. Tiempo PRECAUCIÓN Indica una situación de peli- Revoluciones, carreras, velocidad de su- gro potencial que, de no evita- /min perficie, órbitas, etc., por minuto... -
Page 51: Instalación
Español 1. Mueva el tubo hasta que el botón de desbloqueo del tubo AVISO se acople en la ranura. Si la batería se agrieta o se rompe, con o sin fugas, no la 2. Conecte la boquilla en el tubo hasta que el cierre del tubo recargue ni la utilice. -
Page 52: Puesta En Marcha De La Máquina
Español 11.1 PUESTA EN MARCHA DE LA 11.4 PALANCA DE CONTROL DE MÁQUINA CRUCERO 1. Apriete el gatillo (1) para poner en marcha la máquina. 2. Apriete el gatillo para aumentar la velocidad. 1. Tire de la palanca de control de crucero en sentido 3. -
Page 53: Limpieza De La Máquina
Español SOLUCIÓN DE PROBLEMAS AVISO Retire la batería de la máquina antes de realizar tareas de PROBLEMA POSIBLE CAU- SOLUCIÓN mantenimiento. Asegúrese de que 12.1 LIMPIEZA DE LA MÁQUINA La batería no se ha ha instalado bien El motor no se instalado bien. -
Page 54: Garantía Limitada
(3) años frente a defectos en materiales, R0200982-00 1 Palanca de control de crucero piezas o mano de obra. A su entera discreción Greenworks reparará o sustituirá cualquiera y todas las piezas que resulten R0201797-00 1...
Need help?
Do you have a question about the STF305 and is the answer not in the manual?
Questions and answers