Table of Contents
Advertisement
Available languages
Available languages
Quick Links
Advertisement
Chapters
Table of Contents
Troubleshooting

Related Manuals for GreenWorks BST4000


Summary of Contents for GreenWorks BST4000
- Page 1 User Manual of Product 1: Greenworks 40V 14" Brushless Cordless Chainsaw (Great For Storm Clean-Up, Pruning, and Firewood / 75+ Compatible Tools), 2.5Ah Battery and Charger Included User Manual of Product 2: Greenworks 40V 12-Inch Cordless String Trimmer, Battery and...
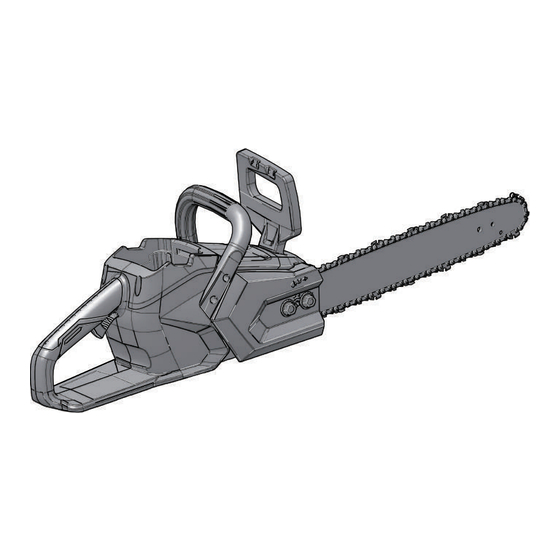
- Page 2 CHAINSAW OPERATOR MANUAL SIERRA DE CADENA MANUAL DEL OPERADOR CSF403...
-
Page 3: Table Of Contents
English Description........5 Remove the battery pack......9 Install the battery pack....... 9 Purpose............5 10 Operation........9 Overview............ 5 General power tool safety 10.1 Start the machine........9 10.2 Stop the machine........9 warnings........5 10.3 Prepare for cutting........9 Work area safety........5 10.4 Basic operation procedures......9 Electrical safety.......... -
Page 4: Description
English DESCRIPTION WORK AREA SAFETY Cluttered or dark • Keep work area clean and well lit. PURPOSE areas invite accidents. • Do not operate power tools in explosive This chainsaw is designed for cutting branches, trunks, atmospheres, such as in the presence of flammable logs and beams of a diameter determined by the cutting Power tools create sparks liquids, gases or dust. -
Page 5: Battery Tool Use And Care
English CHAINSAW SAFETY • Do not use the power tool if the switch does not turn it on and off. Any power tool that cannot be WARNINGS controlled with the switch is dangerous and must be repaired. • Keep all parts of the body away from the saw chain •... -
Page 6: Prevent Operator Kickback
English PREVENT OPERATOR obscure your view of a child who may run into the KICKBACK path of the machine. SYMBOLS ON THE PRODUCT Kickback may occur when the nose or tip of the guide bar touches an object, or when the wood closes in and Some of the following symbols may be used on this pinches the saw chain in the cut. -
Page 7: Environmentally Safe Battery Disposal
English WARNING SYM- SIGNAL MEANING If the battery pack cracks or breaks, with or without leaks, do not recharge it and do not use. Discard it WARNING Indicates a potentially haz- and replace with a new battery pack. DO NOT TRY ardous situation,which, if TO REPAIR IT! To prevent injury and risk of fire, not avoided, could result in... -
Page 8: Remove The Battery Pack
English 10.1 START THE MACHINE 2. Remove the chain cover nuts with the wrench. 3. Remove the chain cover. Figure 1. 4. Put the chain drive links into the bar groove. 1. Press the lock-out button. 5. Put the chain cutters in the direction of the chain 2. -
Page 9: Remove The Buttress Roots
English • Release the trigger as soon as the cut is completed 2. Make the felling cut no less than 50 mm and higher and stop the machine. If you run the machine than the level notching cut. Make sure that this cut without a cutting load, unnecessary wear can occur a) Is parallel to the level notching cut. -
Page 10: Maintenance
English 3. Hold the handles tightly. IMPORTANT 4. Release the cut pressure near the end of the Do not use dirty, used or contaminated oil. Damage cut. can occur to the bar or chain. NOTE 11.2 ADJUST THE CHAIN TENSION Do not let the chainsaw touch the ground. -
Page 11: Guide Bar Maintenance
English TROUBLESHOOTING • The length of the cutting edges is less than 5 mm. • There is too much space between the drive links and the rivets. Problem Possible cause Solution • The cut speed is slow The guide bar The chain is too Adjust the chain •... -
Page 12: Technical Data
English Problem Possible cause Solution Problem Possible cause Solution The motor runs Sharpen or re- The motor runs, Release the trig- The chain is The machine is and the chain ro- place the saw but the chain ger and start the blunt. -
Page 13: Limited Warranty
Transportation charges for the movement of any power equipment unit or attachment are the responsibility of the purchaser. It is the purchaser’s responsibility to pay transportation charges for any part submitted for replacement under this warranty unless such return is ® requested in writing by Greenworks... -
Page 14: Exploded View
Bushing 341022030 Side cover 32209590A Clip 32206590 Screw 33902102C Sprocket 32211590 Screw 311122030 341062030 Assistant handle 311021068 Saw chain 322032030 Spacer bushing 311202030 Chainsaw housing assembly 14 311052703B 1 Oil cap assembly Greenworks Tools PO Box 1238 Mooresville, NC 28115... - Page 15 Español Descripción........17 Desembalar la máquina......21 Montaje de la espada y la cadena....21 Uso previsto..........17 Retire la batería........21 Descripción general........17 Instalación de la batería......21 Advertencias de seguridad 10 Modo de empleo......21 generales para herramientas 10.1 Cómo poner la máquina en marcha..22 eléctricas........
-
Page 16: Uso Previsto
Español DESCRIPCIÓN PARA HERRAMIENTAS ELÉCTRICAS USO PREVISTO AVISO Esta motosierra ha sido diseñada para cortar ramas, Lea todas las advertencias de seguridad y todas las troncos, leños y vigas con un diámetro determinado por instrucciones. En caso de no seguir las advertencias e la longitud de corte de la espada. -
Page 17: Uso Y Cuidado De La Herramienta Eléctrica
Español herramienta a la red eléctrica y/o instalar la batería, • Mantenga las herramientas de corte limpias y o al coger o transportar la herramienta. Transportar afiladas. Las herramientas de corte bien cuidadas y las herramientas eléctricas con el dedo en el afiladas son menos propensas a trabarse y más interruptor, o energizarlas con el interruptor en la fáciles de controlar. -
Page 18: Prevención De Los Retrocesos
Español • Sujete la motosierra solo por las superficies de estén hechos de madera. El uso de la motosierra agarre aisladas, ya que la cuchilla podría entrar en para otros fines distintos al previsto puede provocar El contacto de las situaciones de peligro. -
Page 19: Símbolos En El Producto
Español NIVELES DE RIESGO • Mantenga a los niños fuera de la zona de trabajo y bajo la estrecha vigilancia de un adulto responsable. Las siguientes señales, palabras y significados tienen • No permita que los niños menores de 14 años como fin explicar los niveles de riesgo asociados a este utilicen este aparato. -
Page 20: Instalación
Español 2. Quite las tuercas de la cubierta de la cadena con la AVISO llave de tuercas. Si la batería se agrieta o rompe, con o sin fugas de 3. Retire la cubierta de la cadena. líquido, no deberá recargarla ni utilizarla. Deséchela y 4. -
Page 21: Modo De Empleo
Español MODO DE EMPLEO AVISO No sujete la motosierra con las manos colocadas al NOTA revés de lo indicado ni en cualquier otra postura que Quite el acumulador y mantenga las manos apartadas pudiera colocar su cuerpo o brazo en la línea de corte del botón de desbloqueo cuando traslade la de la cadena. -
Page 22: Desrame De Árboles
Español • golpea líneas de suministro. Si el árbol toca las 2. Quite las ramas pequeñas con un corte. líneas de suministro, avise inmediatamente a la 3. Las ramas que están en tensión deben cortarse de compañía. abajo hacia arriba. •... -
Page 23: Añadir Lubricante Para La Espada Y La Cadena
Español 4. Una vez que haya tensado la cadena como desee, AVISO apriete las tuercas. Antes de realizar el mantenimiento, retire la batería de la máquina. 11.3 AFILAR LOS DIENTES DE CORTE Afile los dientes de corte si la cadena no penetra 11.1 AÑADIR LUBRICANTE PARA LA fácilmente en la madera. -
Page 24: Transporte Yalmacenamiento
Español TRANSPORTE Y Problema Causa posible Solución ALMACENAMIENTO El motor funcio- La cadena está Ajuste la tensión na, pero la cade- demasiado ten- de la cadena. Antes de desplazar la herramienta, haga siempre lo na no gira. siguiente: Cambie la espa- •... -
Page 25: Datos Técnicos
® Greenworks Por la presente, se garantiza este rectamente o el No fuerce la má- proteger la placa producto al comprador original en posesión de la... -
Page 26: Vista En Despiece
Es responsabilidad del comprador pagar los gastos de transporte de cualquier pieza enviada para su reemplazo bajo esta garantía, salvo que dicha ® devolución sea solicitada por escrito por Greenworks VISTA EN DESPIECE N.º N.º de pieza Ctad Descripción... - Page 27 Español Greenworks Tools PO Box 1238 Mooresville, NC 28115...
- Page 28 2101602A STRING TRIMMER OPERATOR MANUAL CORTABORDES MANUAL DEL OPERADOR STF305 www.greenworkstools.com...
- Page 30 English Start the machine..........8 Description......... 4 Stop the machine..........8 Purpose.............. 4 Adjust the length of the cutting line....8 Overview............4 Adjust the length of the cutting line Important safety instructions...4 manually............8 Symbols on the machine....5 Operation tips............
-
Page 31: Description
fire. Use • Always wear safety glasses with side shields marked to only Greenworks 29462/2901319/29472 battery or other comply with ANSI Z87.1. Everyday glasses have only BAG series. impact resistant lenses. They are NOT safety glasses. -
Page 32: Symbols On The Machine
Symbol Explanation another battery pack. Use only Greenworks 29482 charger or other CAG series. Voltage • When battery pack is not in use, keep it away from other... -
Page 33: Service
English PROPOSITION 65 SYM- SIGNAL MEANING WARNING CAUTION (Without Safety Alert Sym- This product contains a chemical known to the state of bol) Indicates a situation that California to cause cancer, birth defects or other may result in property dam- reproductive harm. -
Page 34: Assemble The Shaft
English 5. Tighten the knob. LOOSEN TIGHTEN 2. Put the guard (2) onto the trimmer head. ATTACH THE AUXILIARY HANDLE 3. Align the screw holes on the guard (3)with the screw holes on the trimmer head (4). 1. Press the auxiliary handle (1) onto the upper shaft. 2. -
Page 35: Remove The Battery Pack
English 1. Align the lift ribs (3) on the battery pack with the NOTE grooves in the battery compartment. If the cutting line does not automatically advance, it can be 2. Push the battery pack into the battery compartment until tangled or empty. -
Page 36: Cutting Tips
English MAINTENANCE IMPORTANT Read and understand the safety regulations and the maintenance instructions before you clean, repair or do the maintenance work on the machine. CUTTING TIPS IMPORTANT • Tilt the machine toward the area to be cut. Use the tip of Make sure that all nuts, bolts and screws are tight. -
Page 37: Replace The Spool
English 10.3 REPLACE THE SPOOL 1. Push the tabs on the sides of the trimmer head at the same time. 10.4 REPLACE THE CUTTING LINE NOTE Remove the remaining cutting line on the spool. 2. Pull and remove the spool cover. NOTE Use only with the nylon cutting line of 0.065"... -
Page 38: Transportation And Storage
English TRANSPORTATION AND Problem Possible Cause Solution STORAGE The ma- The guard is not Remove the battery pack chine stops attached to the ma- and attach the guard to WARNING when you chine. the machine. cut. Remove the battery pack from the machine before Heavy cutting line Use only with the nylon tranportation and storage. -
Page 39: Technical Data
(4) in time. years against defects in materials, parts or workmanship. Greenworks, at its own discretion will repair or replace any and all parts found to be defective, through normal use, free TECHNICAL DATA of charge to the customer. -
Page 40: Exploded View
34105874 Auxiliary handle 34120186 Button 2101602 Bare tool assembly 3340646A Spring 33306874 Metal ring 3220313-3 Screw 34116884AB Auxiliary handle knob 31101724 Spool 333011426 Edge guide 34121186-2 Spool cover 341041426 Guard 34107511AC Knob Greenworks Tools PO Box 1238 Mooresville, NC 28115... - Page 41 Español Puesta en marcha de la máquina......19 Descripción........15 Detención de la máquina......... 19 Finalidad............15 Ajuste de la longitud del hilo de corte..... 20 Perspectiva general.......... 15 Ajuste manual de la longitud del hilo de Instrucciones importantes de corte..............20 seguridad..........
-
Page 42: Finalidad
Español DESCRIPCIÓN • Lleve siempre gafas de seguridad con protectores laterales marcadas para cumplir la ANSI Z87.1. Las gafas normales solo tienen lentes resistentes a impactos. NO FINALIDAD son gafas de seguridad. Si sigue esta regla reducirá el riesgo de lesiones oculares. Utilice máscara facial si Esta máquina se utiliza para cortar hierba, maleza ligera y trabaja en espacios de trabajo con polvo. -
Page 43: Símbolos En La Máquina
Un cargador adecuado para un tipo de batería CONSERVE ESTAS INSTRUCCIONES puede dar lugar a un riesgo de incendio cuando se usa con otra batería. Utilice únicamente el cargador Greenworks SÍMBOLOS EN LA MÁQUINA 29482 u otra serie CAG. -
Page 44: Niveles De Riesgo
Español AVISO Símbolo Explicación Deseche todos los materiales tóxicos de una manera Los objetos proyectados pueden rebotar y especificada para evitar la contaminación del medio provocar lesiones personales o daños ma- ambiente. Antes de desechar una batería de ion de litio teriales. -
Page 45: Propuesta 65
Español PROPUESTA 65 AVISO Este producto contiene una sustancia química conocida en el estado de California como causante de cáncer, defectos de nacimiento u otros daños reproductivos. El polvo generado por el lijado eléctrico, el serrado, el esmerilado, la perforación y otras actividades de construcción contiene sustancias químicas que se sabe que son causantes de 2. -
Page 46: Fijación Del Asa Auxiliar
Español 5. Apriete el mando. 1. Alinee las nervaduras de elevación (3) de la batería con las ranuras del compartimento de la batería. 2. Introduzca la batería en el compartimento de la batería hasta que encaje en su posición. 3. Cuando escuche un clic, la batería está instalada. AFLOJAR APRETAR FIJACIÓN DEL ASA AUXILIAR... -
Page 47: Ajuste De La Longitud Del Hilo De Corte
Español AJUSTE DE LA LONGITUD DEL • Retire la batería. HILO DE CORTE • Quite la hierba. NOTA La máquina tiene un cabezal con autoalimentación. Dañará la máquina si golpea el cabezal para intentar avanzar el hilo. NOTA Si el hilo de corte no avanza automáticamente, puede estar enredado o haberse terminado. -
Page 48: Mantenimiento
Español • No pulverice agua sobre el motor ni los componentes eléctricos. 10.3 SUSTITUCIÓN DEL CARRETE 1. Presione las pestañas de los laterales del cabezal de corte al mismo tiempo. Pestaña MANTENIMIENTO IMPORTANTE Debe leer y entender los reglamentos de seguridad y las instrucciones de mantenimiento antes de limpiar, reparar o 2. -
Page 49: Sustitución Del Hilo De Corte
Español TRANSPORTE Y 7. Presione las pestañas e instale la cubierta del carrete en la carcasa del carrete. ALMACENAMIENTO 8. Introduzca la cubierta del carrete hasta que encaje en su AVISO posición. Retire la batería de la máquina antes del transporte y el almacenamiento. -
Page 50: Datos Técnicos
Español Problema Posible causa Solución Problema Posible causa Solución La máquina La protección no Retire la batería y fije la El hilo se La máquina se está 1. Corte con la punta del se detiene está fijada a la má- protección a la máquina. -
Page 51: Garantía Limitada
(4) años contra defectos de material, piezas o mano de obra. Greenworks, a su propia discreción, reparará o reemplazará todas y cada una de las piezas que se encuentren defectuosas, en base a un uso normal, sin costo alguno para el cliente. -
Page 52: Vista Despiezada
2101602 Conjunto de herramienta des- 3340646A Muelle nuda 33306874 Anillo metálico 3220313-3 Tornillo 34116884AB Mando de asa auxiliar 31101724 Carrete 333011426 Guía de borde 34121186-2 Cubierta de carrete 341041426 Protección 34107511AC Mando Greenworks Tools PO Box 1238 Mooresville, NC 28115...
Need help?
Do you have a question about the BST4000 and is the answer not in the manual?
Questions and answers