U-Line BI-2015 Installation Manual
Echelon series
Hide thumbs
Also See for BI-2015:
- Specifications (2 pages) ,
- Service and parts manual (118 pages) ,
- User manual (36 pages)
Table of Contents
Troubleshooting

Subscribe to Our Youtube Channel
Related Manuals for U-Line BI-2015


Summary of Contents for U-Line BI-2015
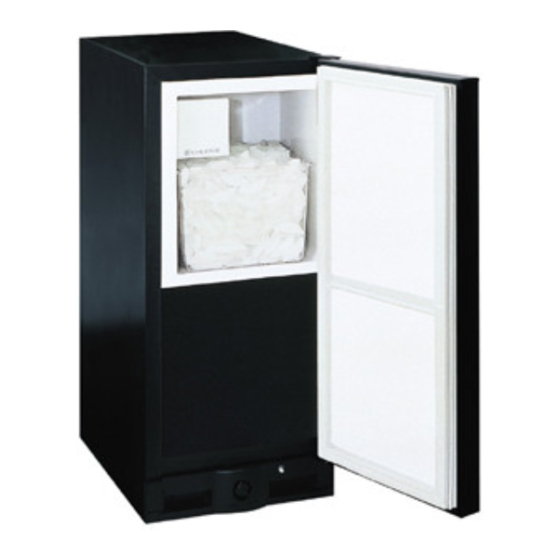
- Page 1 ™ Installation Guide BI2015 — Ice Maker www.U-LineService.com Phone (414) 354-0300 • FAX (414) 354-7905 Service & Parts Tech Lines Phone (800) 779-2547 • FAX (414) 354-5696 OnlineService@U-Line.com ©2005 U-Line Corporation 02/2005...
-
Page 2: Table Of Contents
Contents Exterior Cleaning ......Cut-Out Dimensions ......Product Dimensions . - Page 3 ™ General Precautions Use this appliance for its intended purpose only and follow these general precautions along with those listed throughout this guide: WARNING SHOCK HAZARD — Electrical Grounding Required. • Keep the unit unplugged throughout installation except during testing. •...
-
Page 4: Exterior Cleaning
BI2015 — Ice Maker 3 Prepare Site Your U-Line product has been designed for either free- standing or built-in installation. When built-in, your unit does not require additional air space for top, sides or rear. However, the front grille must NOT be obstructed and clearance is required for water, drain and electrical connections in the rear. -
Page 5: Product Dimensions
Figure 3 02/2005 BI2015 — Ice Maker Reversing the Door (Black and White Units Only) All U-Line units (except Stainless Steel models) may be left- or right-hand opening. The door opening is easily reversed by moving the hinge hardware to the opposite side. -
Page 6: Other Site Requirements
4. Remove the two door closer inserts from the existing bottom hinge and install as shown on the new bottom hinge (see Figure 8). Hinge Screw Door Closer Inserts Figure 7 Figure 8 5. Remove existing bottom hinge (3 screws) and remount on opposite side TOP. -
Page 7: Side-By-Side Installation Instructions
Side-By-Side Installation Instructions For a complete refreshment center, install your BI2015 Ice Maker beside a U-Line Refrigerator, Combo, or Wine Captain Model (see Figure 11 for typical cut-out). Note that each Side-By-Side Installation will be different. • Cut-out width for a side-by-side installation is the total of the widths listed under Cut-Out Dimensions in each unit’s Installation Guide. -
Page 8: Full Overlay Door Panel
A full overlay door panel completely covers the doorframe and handle to give a built-in appearance. See your U-Line dealer for the optional Full Overlay Door Panel Kit (P/N U-OL2015B — Black or P/N U-OL2015W — White). Appropriate hardware, Modified Handle, Replacement Hinges and a copy of these instructions will be included in the kit. - Page 9 ™ 13/32" 0.177" Dia. (#16 Drill) x 11/16" Deep 3/8" Door Bottom: 13/16" 5/16" Dia. x 1/4" Deep Chamfer 1/32" x 45° Top View 1/8" 13/32" 1/32" R 13/16" 1-17/32" 7/16" 1/8" R 13/16" 5/16" Dia. x 1/2" Deep Back View Figure 16 Route notch in top corner of overlay panel as shown (see Top and Side Views).
- Page 10 4. Remove the top handle and discard. (This handle will be replaced with the Modified Handle included in the Full Overlay Door Panel Kit.) 5. Remove the two screws located on both sides of the lower handle. Remove the handle. 6.
- Page 11 ™ Typical Wood Panel Pivot Plate Plastic Spacer Six Required Figure 22 5. Remove the existing bottom pivot plate and replace with the Full Overlay pivot plate (see Figure 23). Existing Door Existing Bottom Pivot Plate (Remove and Discard) Figure 23 IMPORTANT Door panel and overlay panel must be aligned properly or the door will not operate correctly.
-
Page 12: Checking Door Alignment
5 Adjust Door Checking Door Alignment The unit’s door is aligned at the factory before shipment. However, its alignment could have been disturbed during shipment or during door panel installation. IMPORTANT Properly aligned, the door should be 1/8" below the top of the unit’s cabinet, NOT flush with the top (see Figure 26). -
Page 13: Water Supply Connection
(see Figure 32). However, make certain that the tubing is not pinched or damaged during installation. • U-Line recommends the use of copper tubing for installation. To connect to water supply: 1. Install the 1/4 inch OD copper water line from the main water source (see Figure 30). -
Page 14: Electrical Specifications
7 Prepare Power Supply Electrical Specifications CAUTION Electrical installation must observe all state and local codes. This unit requires connection to a grounded (three- prong), polarized receptacle that has been placed by a qualified electrician. The unit requires a grounded and polarized 115 VAC, 60 Hz, 15A power supply (normal household current). -
Page 15: Installation Of The Bi2015
™ 9 Install the Unit Installation of the BI2015 1. Open the water supply valve in the main water source. 2. Make sure the ON/OFF switch is in the OFF position (see Figure 36). 3. Plug in the power cord. 4. -
Page 16: Start-Up Troubleshooting
Start-Up Troubleshooting Problem Unit does not appear to turn on when switch is set to ON. Solution Make sure unit is plugged in and outlet has power (circuit breaker has not tripped). Remember that the ice maker mechanism will not fill the mold with water until the mold reaches the proper temperature. -
Page 17: Service Information
For more than four decades, U-Line has distinguished itself as the leader in built-in undercounter ice making, refrigeration and wine storage appliances. U-Line Corporation, located in Milwaukee, WI, is a family operated manufacturer of built-in undercounter icemakers, Combo ®...
Need help?
Do you have a question about the BI-2015 and is the answer not in the manual?
Questions and answers