U-Line Echelon CLRCO2175B40 Use And Care Manual
Echelon series
Hide thumbs
Also See for Echelon CLRCO2175B40:
- Installation instructions (4 pages) ,
- Installation instructions manual (6 pages) ,
- Specifications (2 pages)

Related Manuals for U-Line Echelon CLRCO2175B40


Summary of Contents for U-Line Echelon CLRCO2175B40
-
Page 1: Use And Care Guide
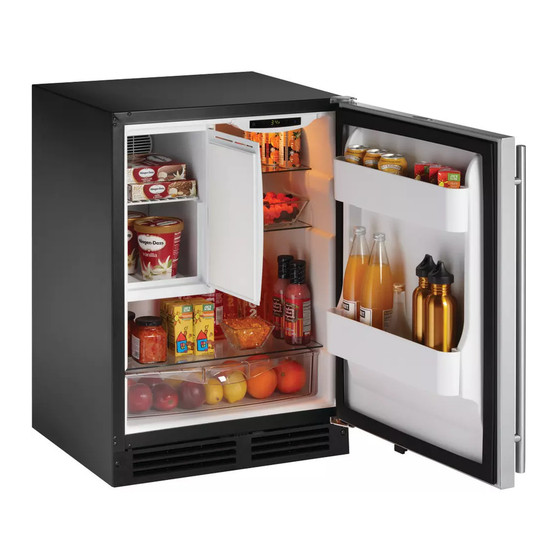
Use and Care Guide Clear Ice Maker Model: CLR2160 ® Clear Combo Ice Maker/Refrigerator Model: CLRCO2175 CLRCO2175 CLR2160... -
Page 2: Introduction
If your product registration is not on file and a request for warranty coverage is received, the date of sale to the U-Line Selling Dealer or Distributor will be established as the first date of warranty coverage for your product. -
Page 3: Table Of Contents
TABLE OF CONTENTS Introduction ... Inside Front Cover Warranty Registration ... Inside Front Cover Please Record Your Model Information ... Inside Front Cover 1-Safety Precautions ...2 Safety Alert Definitions ...2 General Precautions ...2 2-Product Features ...3 3-Service ...3 Before Calling for Service ...3 If Service is Required ...3 4-Replacement Parts ...3 5-Installation ...4... -
Page 4: 1-Safety Precautions
An INSTALLATION GUIDE for your unit, providing complete installation information is available from U-Line Corporation directly, and must be consulted before any installation is begun. U-Line contact information appears on the rear cover of this guide. -
Page 5: 2-Product Features
SERVICE Before Calling for Service If your U-Line product appears to be malfunctioning, read through the OPERATION section of this guide to ensure that the function of all controls are clearly understood. If the malfunction persists, the TROUBLESHOOTING GUIDE... -
Page 6: 5-Installation
(Figure 1). 2. Locate the U-Line supplied garden hose fitting. Ensure the end of the copper tubing has been cut straight and free of burrs. Slide the compression nut and ferrule onto the copper tubing as shown (Figure 2). -
Page 7: Drain Connection
The CLR2160 or CLRCO2175 can be installed using a Gravity Drain, a Factory-Installed Drain Pump (U-Line P60) or a Locally-Installed (U-Line P60) Drain Pump. Drain lines must have a 5/8” inside diameter. The floor drain must be large enough to accommodate drainage from all attached drains. - Page 8 CLR2160 or CLRCO2175 with factory- installed pump, we strongly recommend the use of the U-Line P60 drain pump. The U-Line P60 drain pump is available through your Dealer, with complete installation instructions. If a pump other than the U-Line P60 drain...
- Page 9 IMPORTANT IMPORTANT In the event of a power outage, restricted drain or pump failure, the failure to use the U-Line P60 drain pump or a pump with the above listed specifications, could result in substantial water leakage and pooling with severe and costly water damage and related consequential damages and harm.
-
Page 10: Final Water/Drain Connection
Final Water/Drain Connection 1. Connect the water supply fitting by screwing the brass garden hose fitting to the watervalve in the rear of the unit. 2. Tighten this fitting with pliers. Note: Do not use Teflon tape or joint compound on this fitting. -
Page 11: 6-Electrical Specifications
Preferred Location 24" for Receptacle All U-Line units are shipped with controls that are preset. No initial adjustments are required. 1. Open the door and remove the cover in front of the evaporator by gently compressing and pulling forward. This will enable you to observe the water flow over the evaporator. -
Page 12: 8-Operation
Allow the unit to run for at least 24 hours to stabilize before making any temperature or ice adjustments. IMPORTANT IMPORTANT • U-Line recommends the unit be allowed to run overnight prior to loading the Model CLRCO2175 refrigerator with product. IMPORTANT IMPORTANT •... -
Page 13: 9-Normal Operating Sounds
OUTDOOR USAGE Light Some U-line models are designed to operate in outdoor environments. For best performance, keep the unit out of direct sunlight. If the unit will be shut off for five days or more, prop the door open to allow for air circulation and prevent mold and mildew. -
Page 14: 12-Product Disposal
MAINTENANCE & CLEANING Proper maintenance of your U-Line unit will ensure efficiency, top performance and long life. The maintenance intervals listed are based on normal conditions. You may want to shorten the intervals if you have pets or other special considerations. -
Page 15: Condenser Cleaning
WARNING DO NOT use any type of electrical heating device, ice pick, knife or other sharp instrument to defrost; this could damage the inner lining or refrigeration system and void the warranty. IMPORTANT IMPORTANT The drain pan was not designed to capture the water created when manually defrosting. -
Page 16: Clear Ice Maker Cleaning
Read and understand all labels printed on the package before use. U-Line Ice Machine Cleaner is used to remove lime scale and other mineral deposits. Refer to the following steps to initiate the self-cleaning cycle. -
Page 17: Ice Cube Thickness Adjustment
8. When water begins flowing over the evaporator (approximately 3 minutes), pour 1 packet of CLR cleaner into the water trough. The cleaning process will last approximately 45 minutes. Brush Figure 23 9. Following the cleaning process, sanitize the ice bin with a bleach solution. -
Page 18: Leveling
1/4" TO 1/2" DIMPLE GOOD Leveling IMPORTANT IMPORTANT It is extremely important that Clear Ice models are level. If not level, the ice mold will not fill evenly. Figure 26 A unit that is not level can cause a reduction in ice rate, uneven sized cubes or water spilling into the storage area, which will cause the ice in the bin to melt prematurely (Figure 26). -
Page 19: Door Alignment Check And Adjustment
Door Alignment Check and Adjustment IMPORTANT IMPORTANT When properly aligned: • The door will not be flush with the top of the cabinet. The top edge of the door will be 1/8” (3.175 mm) below the cabinet top. • The door gasket will be firmly in contact with the perimeter of the cabinet and not pinched on the hinge side of the door. -
Page 20: Door Reversal - Black And White Models Only
Door Reversal - Black and White Models Only Figure 33 Black and white units may be left- or right-hand opening. Stainless steel unit doors cannot be reversed. The doors are easily reversed by moving the hinge hardware to the opposite side. The top hinge hardware will be used on the bottom of the other side and the bottom hinge hardware will be used on the top of the other side (Figure 33). -
Page 21: Door Shelf Removal/Insertion
2. Continue to slide the shelf into the unit at an angle until it clears the door. 3. Lower the shelf and push it in completely. Light Bulb Replacement - Model Boss CLRCO2175 Only To replace the light bulb in your U-Line unit: Lens CLR2160, CLRCO2175 ULIN_0276_A Figure 40 ULIN_0001_A... -
Page 22: 14-Troubleshooting Guide
3. Replace the bulb only with a genuine U-Line Part No. 31317 replacement. 4. Replace the lens by first inserting the tab side back into the housing at a slight angle. - Page 23 PROBLEM POSSIBLE CAUSE Fresh food section too cold (Model Temperature control set too cold CLRCO2175) Unit runs but no ice is produced. No water being supplied to the unit Unit runs but produces very little ice. Dirty condenser coils High air temperature around unit Scale and mineral buildup in unit Inadequate airflow at the front of the unit...
-
Page 24: 15-Electronic Control Quick Guide
ELECTRONIC CONTROL QUICK GUIDE All Models Task Touch Turn ON/OFF Hold 10 seconds Adjust Temperature Touch and release View Actual Hold 5 seconds Temperature Change °F-°C Hold Blackout Hold 10 seconds Mode * Drawer Wine Cooler: Initially, top bar will flash to set to zone. After five seconds of inactivity (or touching light button), the bottom zone (bottom bar on F flashing) can be adjusted. - Page 25 This page intentionally left blank. CLR2160, CLRCO2175...
- Page 26 This page intentionally left blank. CLR2160, CLRCO2175...
- Page 27 During the initial one-year warranty period for all U-Line products U-Line shall: (1) at U-Lines option, repair any product or replace any part of a product that breaches this warranty;...
- Page 28 When you need replacement parts, always request genuine U-Line replacements be used. Visit www.U-Line.com to locate a parts distributor in your area. U-Line Corporation, located in Milwaukee, WI, is a family operated manufacturer of built-in undercounter ice makers, Combo ice maker/refrigerators, Wine Captain ®...