Makita HR3200C Instruction Manual
Hide thumbs
Also See for HR3200C:
- Instruction manual (72 pages) ,
- Technical information (24 pages) ,
- Instruction manual (57 pages)
Table of Contents
Advertisement
Available languages
Available languages
Quick Links
Advertisement
Table of Contents

Related Manuals for Makita HR3200C


Summary of Contents for Makita HR3200C
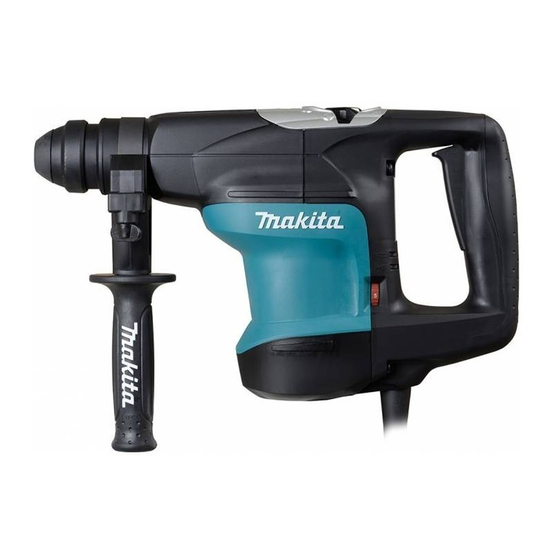
- Page 1 INSTRUCTION MANUAL MANUEL D'INSTRUCTION MANUAL DE INSTRUCCIONES Rotary Hammer Marteau Perforateur Martillo Rotativo HR3200C HR3210C HR3210FCT DOUBLE INSULATION DOUBLE ISOLATION DOBLE AISLAMIENTO IMPORTANT: Read Before Using. IMPORTANT : Lire avant usage. IMPORTANTE: Lea antes de usar.
-
Page 2: Specifications
ENGLISH (Original instructions) SPECIFICATIONS Model HR3200C HR3210C HR3210FCT Capacities Concrete Tungsten-carbide 32 mm (1-1/4") tipped bit Core bit 90 mm (3-1/2") Steel 13 mm (1/2") Wood 32 mm (1-1/4") No load speed (RPM) 315 - 630/min. Blows per minute 1,650 - 3,300 Overall length 398 mm (15-5/8") - Page 3 18. Do not use the power tool if the switch does 23. Use the power tool, accessories and tool bits not turn it on and off. Any power tool that cannot etc. in accordance with these instructions, tak- be controlled with the switch is dangerous and ing into account the working conditions and must be repaired.
-
Page 4: Functional Description
Symbols Lighting up the lamps The followings show the symbols used for tool. For Model HR3210FCT volts amperes hertz alternating current no load speed Class II Construction ► 1. Lamp revolutions or reciprocation per minute CAUTION: number of blow • Do not look in the light or see the source of light directly. - Page 5 Grasp the change cover and place the quick change CAUTION: drill chuck on the spindle of the tool. • If the tool is operated continuously at low Make sure that the quick change drill chuck is secured speeds for a long time, the motor will get over- by trying to pull it several times.
-
Page 6: Indicator Lamp
Hammering only The red service indicator lamp lights up when the car- bon brushes are nearly worn out to indicate that the tool needs servicing. After approx. 8 hours of use, the motor will automatically be shut off. ASSEMBLY CAUTION: •... -
Page 7: Depth Gauge
Depth gauge ► 1. Bit 2. Chuck cover If the bit cannot be pushed in, remove the bit. Pull the ► 1. Depth gauge 2. Clamp screw chuck cover down a couple of times. Then insert the bit again. Turn the bit and push it in until it engages. The depth gauge is convenient for drilling holes of After installing, always make sure that the bit is securely uniform depth. -
Page 8: Operation
Chipping/Scaling/Demolition OPERATION CAUTION: • Always use the side grip (auxiliary handle) and firmly hold the tool by both side grip and switch handle during operations. Hammer drilling operation Set the change lever to the symbol. Hold the tool firmly with both hands. Turn the tool on and apply slight pressure on the tool so that the tool will not bounce around, uncontrolled. -
Page 9: Maintenance
It should be relubri- Use the optional drill chuck assembly. When installing it, cated regularly. Send the complete tool to Makita Authorized refer to "Installing or removing the bit" described on the or Factory Service Center for this lubrication service. - Page 10 MAKITA LIMITED WARRANTY Please refer to the annexed warranty sheet for the most current warranty terms applicable to this product. If annexed warranty sheet is not available, refer to the warranty details set forth at below website for your respective country.
-
Page 11: Spécifications
FRANÇAIS (Mode d’emploi original) SPÉCIFICATIONS Modèle HR3200C HR3210C HR3210FCT Capacités Béton Foret avec pointe 32 mm (1-1/4") en carbure de tungstène Trépan 90 mm (3-1/2") Acier 13 mm (1/2") Bois 32 mm (1-1/4") Vitesse à vide (T/MIN) 315 - 630 /min. - Page 12 12. Évitez les démarrages accidentels. Assurez- 20. Après l'utilisation d'un outil électrique, rangez-le hors de portée des enfants et ne vous que l'interrupteur est en position d'arrêt avant de brancher l'outil et/ou d'insérer la bat- laissez aucune personne l'utiliser si elle n'est terie, ainsi qu'avant de saisir ou de transporter pas familiarisée avec l'outil électrique ou les l'outil.
- Page 13 CONSIGNES DE SÉCURITÉ POUR MISE EN GARDE : NE VOUS LAISSEZ MARTEAU ROTATIF PAS tromper (au fil d'une utilisation répé- tée) par un sentiment d'aisance ou de Portez des protections d'oreilles. L'exposition familiarité avec le produit en négligeant les au bruit peut entraîner des lésions de l'ouïe. consignes de sécurité...
-
Page 14: Description Du Fonctionnement
DESCRIPTION DU NOTE : • Utilisez un chiffon sec pour essuyer la saleté qui FONCTIONNEMENT recouvre la lentille de la lampe. Prenez garde de rayer la lentille de la lampe, pour éviter une diminution de l'éclairage. ATTENTION : Changement de vitesse •... - Page 15 Changer le mandrin à adaptateur Sélection du mode de fonctionnement rapide pour SDS-plus Rotation avec martelage Pour le modèle HR3210FCT Il est facile de remplacer le mandrin à adaptateur rapide pour SDS-plus par le mandrin à adaptateur rapide. Retirer le mandrin à adaptateur rapide pour SDS-plus ►...
-
Page 16: Poignée Latérale
Pour les opérations de burinage, d'écaillage et de ASSEMBLAGE démolition, appuyez sur le bouton de verrouillage et tournez le levier de changement de façon que l'index soit dirigé sur le symbole . Utilisez une pointe à ATTENTION : béton, un ciseau à froid, un ciseau à écailler, etc. •... - Page 17 Appuyez sur le bouton de verrouillage et tournez le levier de changement de façon que l'index soit dirigé sur le symbole . Puis, vérifiez que le foret est bien fixé en le tournant légèrement. Jauge de profondeur ► 1. Embout 2. Couvercle du mandrin S'il n'est pas possible d'enfoncer le foret, retirez-le.
- Page 18 Burinage/Ecaillage/Démolition UTILISATION ATTENTION : • Utilisez toujours la poignée la latérale (poignée auxiliaire) et saisissez fermement l'outil par la poignée latérale et la poignée de l'interrupteur pendant l'utilisation. Perçage avec martelage Réglez le levier de changement sur le symbole Tenez votre outil fermement à deux mains. Mettez le contact et appliquez une légère pression sur l'outil de façon qu'il ne risque pas de sauter d'un côté...
-
Page 19: Entretien
Mettez le levier de changement de mode sur le sym- réglage doivent être effectués dans un centre de service bole Makita agréé ou un centre de service de l'usine Makita, Vous pouvez percer des trous d'un diamètre allant exclusivement avec des pièces de rechange Makita. - Page 20 NOTE : Certains éléments de la liste peuvent être inclus avec l’outil comme accessoires standards. Ils peuvent varier suivant les pays. GARANTIE LIMITÉE MAKITA Pour les conditions de garantie en vigueur qui s’ap- pliquent à ce produit, veuillez vous reporter à la feuille de garantie en annexe.
-
Page 21: Especificaciones
ESPAÑOL (Instrucciones originales) ESPECIFICACIONES Modelo HR3200C HR3210C HR3210FCT Especificaciones ele'ctricas en Me'xico 120 V 8,2 A 50/60 Hz Capacidades Concreto Broca con punta de 32 mm (1-1/4") carbón de tungsteno Corona perforadora 90 mm (3-1/2") Acero 13 mm (1/2") Madera 32 mm (1-1/4") - Page 22 12. Impida el encendido accidental. Asegúrese 20. Guarde la herramienta eléctrica que no use de que el interruptor esté en la posición de fuera del alcance de los niños y no permita apagado antes de conectar a la alimentación que las personas que no están familiarizadas eléctrica y/o de colocar el cartucho de la con ella o con las instrucciones la operen.
- Page 23 ADVERTENCIA DE SEGURIDAD ADVERTENCIA: NO DEJE que la como- PARA USO DEL MARTILLO didad o familiaridad con el producto (a base de utilizarlo repetidamente) sustituya ROTATIVO la estricta observancia de las normas de Utilice protectores para oídos. La exposición al seguridad para dicho producto.
-
Page 24: Descripción Del Funcionamiento
DESCRIPCIÓN DEL NOTA: • Utilice un paño seco para quitar la suciedad FUNCIONAMIENTO de la lente de la lámpara. Tenga cuidado de no rayar la lente de la lámpara, porque podrá dis- minuir la iluminación. PRECAUCIÓN: Cambio de velocidad • Asegúrese siempre de que la herramienta esté... - Page 25 Cambio del mandril de cambio Selección del modo de rápido para SDS-plus accionamiento Para modelo HR3210FCT Rotación de martillo El mandril de cambio rápido para SDS-plus puede intercambiarse fácilmente por el mandril de cambio rápido convencional. Extracción del mandril de cambio rápido para SDS-plus ►...
-
Page 26: Luz Indicadora
Acción de martillo solamente La lámpara indicadora de herramienta encendida (verde) se enciende cuando la herramienta está conec- tada. Si la lámpara indicadora no se enciende, el cable de alimentación o el controlador podrán estar defectuo- sos. Si la lámpara indicadora está encendida pero la herramienta no se pone en marcha aun poniéndola en encendido, las escobillas de carbón podrán estar gas- tadas, o el controlador, el motor o el interruptor ON/OFF... - Page 27 Instalación o extracción del cincel. Ángulo de cincel (al cortar, demoler o tallar) ► 1. Zanco de la broca/cincel 2. Grasa para broca/ cincel ► 1. Palanca de cambio 2. Botón de bloqueo 3. Apuntador o puntero Limpie el zanco del cincel/broca y aplíquele grasa antes de instalarlo.
-
Page 28: Operación
Contenedor de polvo (opcional) PRECAUCIÓN: • Cuando la broca comienza a romper el hormi- gón o si la broca se topa con varillas de refuerzo de hormigón armado, la herramienta puede reaccionar peligrosamente. Mantenga un buen equilibrio y postura firme mientras sostiene la herramienta firmemente con ambas manos para evitar una reacción peligrosa. -
Page 29: Mantenimiento
"rotación con martilleo", la corona perforadora diamantada puede dañarse. ► 1. Base de mandril 2. Anillo MANTENIMIENTO Para modelo HR3200C,HR3210C PRECAUCIÓN: Utilice el montaje opcional del mandril. Al instalarlo, consulte la sección "Instalación o remoción de la •... -
Page 30: Accesorios Opcionales
• Este servicio deberá ser realizado en Centros términos más vigentes de la garantía aplicable a este o Servicios de fábrica Autorizados por Makita producto. En caso de no disponer de esta hoja de solamente. garantía anexa, consulte los detalles sobre la garantía descritos en el sitio web de su país respectivo indicado... - Page 32 Para reducir la exposición a estos productos químicos: trabaje en un área bien ventilada y póngase el equipo de seguridad indicado, tal como las máscaras contra polvo que están especialmente diseñadas para filtrar partículas microscópicas. Makita Corporation 3-11-8, Sumiyoshi-cho, Anjo, Aichi 446-8502 Japan 884769D949...
Need help?
Do you have a question about the HR3200C and is the answer not in the manual?
Questions and answers