Advertisement
- 1 About Your Camera
- 2 First Use
-
3
Using the Camera
-
3.1
Photo Shooting
- 3.1.1 Photo Size
- 3.1.2 White Balance
- 3.1.3 Exposure
- 3.1.4 Metering
- 3.1.5 Sharpness
- 3.1.6 Flash
- 3.1.7 ISO
- 3.1.8 Time Stamp
- 3.1.9 File Compression
- 3.1.10 Image Rotation
- 3.1.11 Frequency
- 3.1.12 LED Indicator
- 3.1.13 Screen Saver
- 3.1.14 Auto Power Off
- 3.1.15 Button Sound
- 3.1.16 Language
- 3.1.17 Date Format
- 3.1.18 Date & Time Set
- 3.1.19 Format Memory Card
- 3.1.20 Device Info
- 3.1.21 Restore Default Settings
-
3.2
Interval Photo
- 3.2.1 Photo Size
- 3.2.2 Interval Duration
- 3.2.3 White Balance
- 3.2.4 Exposure
- 3.2.5 Metering
- 3.2.6 Sharpness
- 3.2.7 Flash
- 3.2.8 ISO
- 3.2.9 Time Stamp
- 3.2.10 File Compression
- 3.2.11 Image Rotation
- 3.2.12 Frequency
- 3.2.13 LED Indicator
- 3.2.14 Screen Saver
- 3.2.15 Auto Power Off
- 3.2.16 Button Sound
- 3.2.17 Language
- 3.2.18 Date Format
- 3.2.19 Date & Time Set
- 3.2.20 Format Memory Card
- 3.2.21 Device Info
- 3.2.22 Restore Default Settings
-
3.3
Photo Burst
- 3.3.1 Photo Size
- 3.3.2 Photo Burst
- 3.3.3 White Balance
- 3.3.4 Exposure
- 3.3.5 Metering
- 3.3.6 Sharpness
- 3.3.7 ISO
- 3.3.8 Time Stamp
- 3.3.9 File Compression
- 3.3.10 Image Rotation
- 3.3.11 Frequency
- 3.3.12 LED Indicator
- 3.3.13 Screen Saver
- 3.3.14 Auto Power Off
- 3.3.15 Button Sound
- 3.3.16 Language
- 3.3.17 Date Format
- 3.3.18 Date & Time Set
- 3.3.19 Format Memory Card
- 3.3.20 Device Info
- 3.3.21 Restore Default Settings
-
3.4
Video Recording
- 3.4.1 Movie Size (Video Resolution)
- 3.4.2 White Balance
- 3.4.3 Exposure
- 3.4.4 Metering
- 3.4.5 Sharpness
- 3.4.6 Video Quality
- 3.4.7 ISO
- 3.4.8 Time Stamp
- 3.4.9 Record Audio
- 3.4.10 File Compression
- 3.4.11 Image Rotation
- 3.4.12 Frequency
- 3.4.13 LED Indicator
- 3.4.14 Screen Saver
- 3.4.15 Auto Power Off
- 3.4.16 Button Sound
- 3.4.17 Language
- 3.4.18 Date Format
- 3.4.19 Date & Time Set
- 3.4.20 Format Memory Card
- 3.4.21 Device Info
- 3.4.22 Restore Default Settings
-
3.5
Slow Motion
- 3.5.1 Slow Motion Rate
- 3.5.2 White Balance
- 3.5.3 Exposure
- 3.5.4 Metering
- 3.5.5 Sharpness
- 3.5.6 Video Quality
- 3.5.7 File Compression
- 3.5.8 Image Rotation
- 3.5.9 Frequency
- 3.5.10 LED Indicator
- 3.5.11 Screen Saver
- 3.5.12 Auto Power Off
- 3.5.13 Button Sound
- 3.5.14 Language
- 3.5.15 Date Format
- 3.5.16 Date & Time Set
- 3.5.17 Format Memory Card
- 3.5.18 Device Info
- 3.5.19 Restore Default Settings
-
3.6
Loop Recording
- 3.6.1 Movie Size (Video Resolution)
- 3.6.2 Loop Duration
- 3.6.3 White Balance
- 3.6.4 Exposure
- 3.6.5 Metering
- 3.6.6 Sharpness
- 3.6.7 Video Quality
- 3.6.8 ISO
- 3.6.9 Time Stamp
- 3.6.10 Record Audio
- 3.6.11 File Compression
- 3.6.12 Image Rotation
- 3.6.13 Frequency
- 3.6.14 LED Indicator
- 3.6.15 Screen Saver
- 3.6.16 Auto Power Off
- 3.6.17 Button Sound
- 3.6.18 Language
- 3.6.19 Date Format
- 3.6.20 Date & Time Set
- 3.6.21 Format Memory Card
- 3.6.22 Device Info
- 3.6.23 Restore Default Settings
-
3.7
Time Lapse
- 3.7.1 Movie Size (Video Resolution)
- 3.7.2 Interval Duration
- 3.7.3 White Balance
- 3.7.4 Exposure
- 3.7.5 Video Duration
- 3.7.6 Metering
- 3.7.7 Sharpness
- 3.7.8 Video Quality
- 3.7.9 ISO
- 3.7.10 File Compression
- 3.7.11 Image Rotation
- 3.7.12 Frequency
- 3.7.13 LED Indicator
- 3.7.14 Screen Saver
- 3.7.15 Auto Power Off
- 3.7.16 Button Sound
- 3.7.17 Language
- 3.7.18 Date Format
- 3.7.19 Date & Time Set
- 3.7.20 Format Memory Card
- 3.7.21 Device Info
- 3.7.22 Restore Default Settings
- 3.8 Playback Mode
- 3.9 Technical Specifications
-
3.1
Photo Shooting
-
4
Safety and Handling Precautions
- 4.1 Camera Information
- 4.2 Battery Information
- 4.3 USB Adaptor Information
- 4.4 Notes about Opening and Closing the Battery Door
- 4.5 Precautions When Cleaning
- 4.6 Do Not Apply Strong Impact to the Camera
- 4.7 Avoid Sudden Changes in Temperature
- 4.8 Keep Away from Strong Magnetic Fields
- 4.9 Do Not Point the Lens at Strong Light Sources for Extended Periods
- 4.10 Turn the Product Off before Removing or Disconnecting the Power Source or Memory Card
- 4.11 Notes about the LCD Screen
- 4.12 The Battery
- 4.13 Cleaning After Using the Camera
- 4.14 Storage
- 5 Documents / Resources
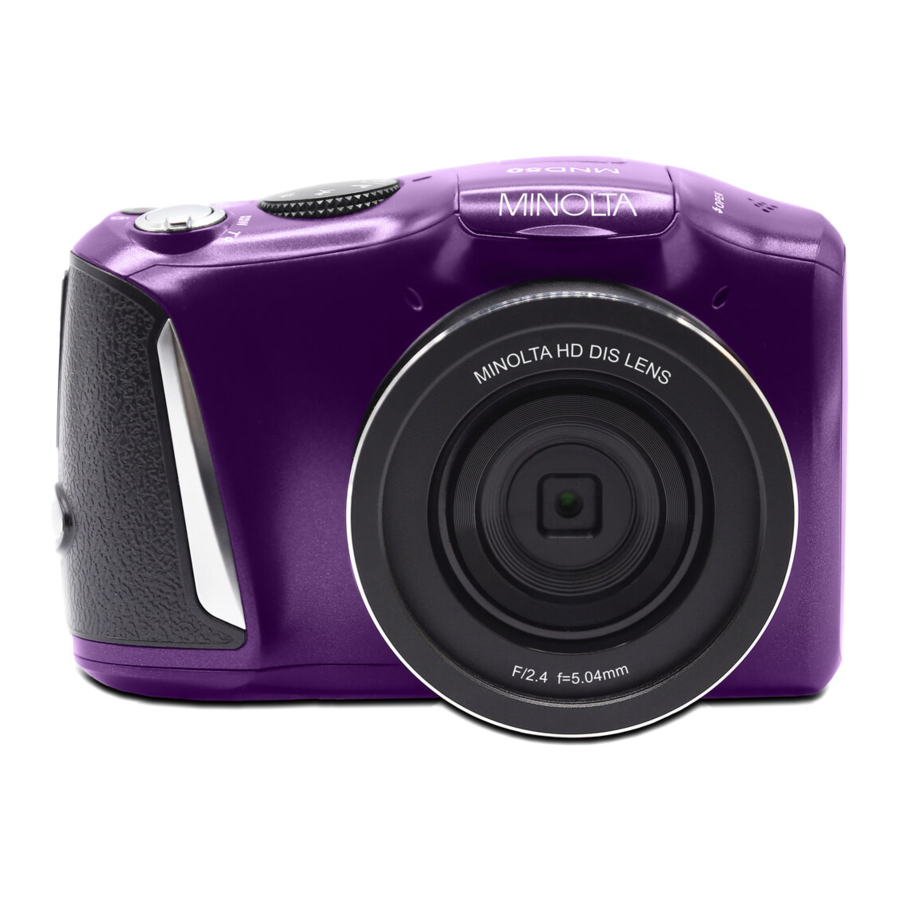
About Your Camera
About this Manual
The contents of this manual are subject to change without notice. Note that the example screens and product illustrations shown in this User's Guide may differ somewhat from the screens and configuration of the actual camera.
Camera Interface

Button Function Description
| Function | Description |
| Power | Press and hold for 3 seconds to power on. Tap to power off. |
| Mode | OK | Tap to cycle between Photo, Video and Playback modes. In Settings: Tap to confirm selected setting. In Playback: Tap to start and stop video playback. |
| Zoom | In Video or Photo: Slide to zoom in and out. In Playback: Slide to zoom in on the image displayed on the screen. |
| Up | Flash | In Photo: Tap to change the flash settings. In Settings: Tap to scroll through menus and submenus. |
| Down | Mute | In Video or Photo: Tap to mute and unmute the button sounds. In Playback: Tap to scroll through images on the screen. In Settings: Tap to scroll through menus and submenus. |
| Left | Self Timer | In Photo: Tap to change the self timer settings. In Settings: Tap to change the submenu. In Playback: Tap to view the previous image. |
| Right | Exposure | In Video or Photo: Tap to change the exposure settings. In Settings: Tap to change the submenu. In Playback: Tap to view the next image. |
| Menu | Tap to show the settings available in each mode. |
| Shutter | In Photo: Tap to capture a photo. |
| Record | In Video: Tap to start and stop recording. |
| Playback | Tap to enter playback mode. |
| Delete | In Video or Photo: Tap to delete the last recorded video or captured image. |
| ISO | In Video or Photo: Tap to change the ISO settings. |
| Display | In Video or Photo: Tap to turn the icons on the LCD screen off, turn off the LCD screen, or turn it back on. |
| Scene Dial | Rotate the dial to switch the different scene modes. |
| Tripod Mount | Mount port for attaching to a tripod nut. |
| Battery Door | Door to cover the battery compartment and memory card slot. |
| Lens | Front capture device for all video and photo. |
First Use
To Open the Battery Door
Unlock the battery door by sliding the battery door notch away from the opening. Use a fingernail or other pointy object when sliding the latch to get a better grip.

Installing the Battery
Insert the lithium-ion battery into the battery compartment with the metal contacts facing the inside of the camera. The battery can only be inserted one way.

Installing the Memory Card
Insert the included Micro SD memory card to record and store your videos and photos. When the battery is low, media stored on the memory card will not be erased. Please insert the SD memory card by following the steps below:
- Open the battery door by following the diagram above.
- Insert the memory card. Ensure that the metal contacts are inserted first. Push the memory card down until you hear an audible click.
The memory card can only be inserted in one way. Do not force the card in if it will not go in smoothly. - Close the battery door by pushing it down and sliding the lock back into place.
- To remove the memory card, simply push in and the card will eject back out.

NOTE:- Please format the memory card before using the camera
![]()
This will erase all data on the card. - Do not remove or insert the memory card when recording. It may damage the card or cause data loss.
- Memory card rating must be or above.
- Please format the memory card before using the camera


NOTE: After closing the battery door, make sure that the door is closed securely and the lock engaged.
Charging the Battery
Connect your camera to the included AC adaptor with the USB cable provided for charging. Insert the small end of the USB plug into the camera![]() s port under the battery door, and the larger end in to the included AC adaptor. While charging the LED indicator light will light up solid red, when finished charging the light will turn off.
s port under the battery door, and the larger end in to the included AC adaptor. While charging the LED indicator light will light up solid red, when finished charging the light will turn off.

Powering the Camera On/Off
Press and hold the POWER button for 3 seconds to power the camera on. To power the camera off, press the POWER button again.
If the camera's battery is low, a "Low Power" message will display on the screen and it will automatically shut down within a few seconds to prevent memory corruption or loss.
Switching Modes
Press the MODE/OK button to cycle between Photo, Interval Photo, Video, Slow Motion, Loop Recording and Timep Lapse Modes. The corresponding mode will be displayed in the top left corner of the screen.
Connecting to a Computer
Your camera can connect to a computer to transfer photo and video files for viewing and editing, you can also use the camera as a webcam or you can use your computer to charge the camera. Once connected and powered on, the camera's screen will show "Charging Mode", "Mass storage mode" and "PC camera". Use the UP or DOWN buttons to select your desired mode. Press the MODE/OK to select your desired mode.
Scene Dial
This function adjusts the camera's settings to predetermined values that will produce the best image for that selected scene. In Photo mode, simply rotate the dial to switch scene modes, the scene modes available are below.

Flash
To raise the flash, simply lift the bottom edge of the flash on the front up. To lower the flash, simply push the flash down.
Using the Zoom Function
This camera has a digital zoom function. To operate the zoom function, slide the ZOOM button to the right to zoom in closer to the subject, and slide the ZOOM button to the left zoom away from the subject.
Screen Icons
The meaning of the icons shown on the LCD screen in each mode can be found below.
| Icon | Description |
 | Photo Mode |
 | Interval Photo Mode |
 | Video Mode |
 | Slow Motion Mode |
 | Loop Recording Mode |
 | Time Lapse Mode |
 | Photo Burst Mode |
 | Photo Size (Resolution) |
 | Movie Size (Resolution) |
 | White Balance |
 | Exposure |
 | Metering |
 | Sharpness |
 | Flash |
 | ISO |
 | Video Quality |
 | Record Audio |
 | Self Timer |
 | Memory Card Inserted |
 | Scene Mode |
Using the Camera
Photo Shooting
Power the camera on and it will be ready to take pictures right away. You may press the MODE/OK button to switch to another mode.
- Line up your shot by looking at the LCD screen to see what is in the shot.
- Hold the camera steady and press the SHUTTER button to capture a photo.
- The number of photos that can be captured at a particular resolution will be displayed in the top right corner of the screen.
- A "Memory Full" message will be displayed on the screen if there is no SD card inserted in the camera's memory card slot. A "Memory Full" message will be shown on the screen when the SD card is full.
- The number of remaining photos is determined by the selected photo resolution. The higher the photo resolution, the lower the number of photos you are able to be save to the memory card. Before capturing any photos, you can select a preferred photo resolution.
Photo Size
This function sets the photo resolution. The higher the resolution, the greater the photo quality and the larger the file size of the photo.
- In Photo Mode press the MENU button.
- Select the Camera icon on the top of the left side of the screen using the UP or DOWN buttons.
- Press the RIGHT button to enter the settings menu.
- Select 'Photo Size' using the UP or DOWN buttons and press the MODE/OK button to enter the 'Photo Size' menu.
- Use the UP or DOWN buttons to navigate the menu, and press the MODE/OK button to confirm your selected resolution (48MP, 40MP, 30MP, 24MP, 18MP, 12MP).
- Press the MENU button to exit the settings menu without making a selection.
White Balance
White Balance changes the color of light in your pictures, making it seem warmer or cooler depending on how the light you're shooting in affects the frame.
- In Photo Mode press the MENU button.
- Select the Camera icon on the top of the left side of the screen using the UP or DOWN buttons.
- Press the RIGHT button to enter the settings menu.
- Select 'White Balance' using the UP or DOWN buttons and press the MODE/OK button to enter the 'White Balance' menu.
- Use the UP or DOWN buttons to navigate the menu, and press the MODE/OK button to confirm your selected option (Auto, Sunny, Cloudy, Incandescent, Florescent).
- Press the MENU button to exit the settings menu without making a selection.
Exposure
This function adjusts the frame brightness in your photograph.
- In Photo Mode press the MENU button.
- Select the Camera icon on the top of the left side of the screen using the UP or DOWN buttons.
- Press the RIGHT button to enter the settings menu.
- Select 'Exposure' using the UP or DOWN buttons and press the MODE/OK button to enter the 'Exposure' menu.
- Use the UP or DOWN buttons to navigate the menu, and press the MODE/OK button to confirm your selected option (-3, -2, -1, 0, +1, +2, +3).
- Press the MENU button to exit the settings menu without making a selection.
Metering
Metering mode refers to the way in which a camera determines the appropriate exposure (quantity of light reaching the camera lens). Spot metering will only base the exposure setting on a very small area of the scene. Center metering will use the light from the center of the LCD and the Multi setting measures the light at several points on the screen.
- In Photo Mode press the MENU button.
- Select the Camera icon on the top of the left side of the screen using the UP or DOWN buttons.
- Press the RIGHT button to enter the settings menu.
- Select 'Metering' using the UP or DOWN buttons and press the MODE/OK button to enter the 'Metering' menu.
- Use the UP or DOWN buttons to navigate the menu, and press the MODE/OK button to confirm your selected option (Multi, Center, Spot, Matrix).
- Press the MENU button to exit the settings menu without making a selection.
Sharpness
This function adjusts the visible detail of a photograph.
- In Photo Mode press the MENU button.
- Select the Camera icon on the top of the left side of the screen using the UP or DOWN buttons.
- Press the RIGHT button to enter the settings menu.
- Select 'Sharpness' using the UP or DOWN buttons and press the MODE/OK button to enter the 'Sharpness' menu.
- Use the UP or DOWN buttons to navigate the menu, and press the MODE/OK button to confirm your selected option (Sharp, Normal, Soft).
- Press the MENU button to exit the settings menu without making a selection.
Flash
This function allows to change the flash settings.
- In Photo Mode press the MENU button.
- Select the Camera icon on the top of the left side of the screen using the UP or DOWN buttons.
- Press the RIGHT button to enter the settings menu.
- Select 'Flash' using the UP or DOWN buttons and press the MODE/OK button to enter the 'Flash' menu.
- Use the UP or DOWN buttons to navigate the menu, and press the MODE/OK button to confirm your selected option (Auto, Off, On).
- Press the MENU button to exit the settings menu without making a selection.
ISO
This function adjusts the light sensitivity in your photograph.
- In Photo Mode press the MENU button.
- Select the Camera icon on the top of the left side of the screen using the UP or DOWN buttons.
- Press the RIGHT button to enter the settings menu.
- Select 'ISO' using the UP or DOWN buttons and press the MODE/OK button to enter the 'ISO' menu.
- Press the UP or DOWN buttons to navigate the menu, and press the MODE/OK button to confirm your selected option (ISO Auto, 100, 200, 400, 800, 1600, 3200, 6400).
- Press the MENU button to exit the settings menu without making a selection.
Time Stamp
This setting allows you to imprint a date & time onto your captured image files. Once an image file is captured with the imprint, the imprint cannot be removed.
- In Photo Mode press the MENU button.
- Select the Camera icon on the top of the left side of the screen using the UP or DOWN buttons.
- Press the RIGHT button to enter the settings menu.
- Select 'Time Stamp' using the UP or DOWN buttons and press the MODE/OK button to turn the time stamp on or off.
File Compression
Video compression is the process of reducing the number of bits needed to record a video without compromising its visual quality. The purpose of compression is to make a video file occupy less space than the original file while maintaining a high quality.
Videos are compressed using codecs. Video codecs are the compression component of video compression software that compile files by encoding the data they contain. For the highest quality, select High Compression. For the best compatibility across all playback devices, select H.264. Either select will process high quality video file in MP4 format.
- In Photo Mode press the MENU button.
- Select the gear icon on the bottom of the left side of the screen using the UP or DOWN buttons.
- Press the RIGHT button to enter the setup menu.
- Select 'File Compression' using the UP or DOWN buttons and press the MODE/OK button to enter the 'File Compression' menu.
- Press the UP or DOWN buttons to navigate the menu, and press the MODE/OK button to confirm your selected option (H.264, High Compression).
- Press the MENU button to exit the settings menu without making a selection.
Image Rotation
This option will flip the image on the LCD screen 180 degrees.
- In Photo Mode press the MENU button.
- Select the gear icon on the bottom of the left side of the screen using the UP or DOWN buttons.
- Press the RIGHT button to enter the setup menu.
- Select 'Image Rotation' using the UP or DOWN buttons and press the MODE/OK button to turn Image Rotation on or off.
Frequency
This function sets the frequency of the camera from 50Hz to 60Hz. Please check the frequency of your location and set accordingly.
- In Photo Mode press the MENU button.
- Select the gear icon on the bottom of the left side of the screen using the UP or DOWN buttons.
- Press the RIGHT button to enter the setup menu.
- Select 'Frequency' using the UP or DOWN buttons and press the MODE/OK button to enter the 'Frequency' menu.
- Press the UP or DOWN buttons to navigate the menu, and press the MODE/OK button to confirm your selected option (Auto, 50 Hz, 60 Hz) the default frequency for the United States is 60Hz.
- Press the MENU button to exit the settings menu without making a selection.
LED Indicator
This function allows you turn the LED status indicator on and off.
- In Photo Mode press the MENU button.
- Select the gear icon on the bottom of the left side of the screen using the UP or DOWN buttons.
- Press the RIGHT button to enter the setup menu.
- Select 'LED Indicator' using the UP or DOWN buttons and press the MODE/OK button to turn the LED Indicator on or off.
Screen Saver
This function sets the duration of time in which the camcorder will wait with no user input before automatically turning off the LCD screen. Note: even while the screen is off, the camera will still be powered on.
- In Photo Mode press the MENU button.
- Select the gear icon on the bottom of the left side of the screen using the UP or DOWN buttons.
- Press the RIGHT button to enter the setup menu.
- Select 'Screen Saver' using the UP or DOWN buttons and press the MODE/OK button to enter the 'Screen Saver' menu.
- Press the UP or DOWN buttons to navigate the menu, and press the MODE/OK button to confirm your selected option (Off, 30 Seconds, 1 Minute, 2 Minutes, 10 Minutes).
- Press the MENU button to exit the settings menu without making a selection.
Auto Power Off
This function sets the duration of time in which the camcorder will wait with no user input before automatically powering off.
- In Photo Mode press the MENU button.
- Select the gear icon on the bottom of the left side of the screen using the UP or DOWN buttons.
- Press the RIGHT button to enter the setup menu.
- Select 'Auto Power Off' using the UP or DOWN buttons and press the MODE/OK button to enter the 'Auto Power Off' menu.
- Press the UP or DOWN buttons to navigate the menu, and press the MODE/OK button to confirm your selected option (Off, 3 Minutes, 5 Minutes, 10 Minutes).
- Press the MENU button to exit the settings menu without making a selection.
Button Sound
This function allows you to turn off the sounds of the camera.
- In Photo Mode press the MENU button.
- Select the gear icon on the bottom of the left side of the screen using the UP or DOWN buttons.
- Press the RIGHT button to enter the setup menu.
- Select 'Button Sound' using the UP or DOWN buttons and press the MODE/OK button to enter the 'Button Sound' menu.
- Press the UP or DOWN buttons to navigate the menu, and press the MODE/OK button to confirm your selected option (Off, On).
- Press the MENU button to exit the settings menu without making a selection.
Language
This function allows you to set the camera's interface language.
- In Photo Mode press the MENU button.
- Select the gear icon on the bottom of the left side of the screen using the UP or DOWN buttons.
- Press the RIGHT button to enter the setup menu.
- Select 'Language' using the UP or DOWN buttons and press the MODE/OK button to enter the 'Language' menu.
- Press the UP or DOWN buttons to navigate the menu, and press the MODE/OK button to confirm your selected language.
- Press the MENU button to exit the settings menu without making a selection.
Date Format
This function allows you to set the current Date and Time on your recorded video clips and captured photos.
- In Photo Mode press the MENU button.
- Select the gear icon on the bottom of the left side of the screen using the UP or DOWN buttons.
- Press the RIGHT button to enter the setup menu.
- Select 'Date Format' using the UP or DOWN buttons and press the MODE/OK button to enter the 'Date Format' menu.
- Press the UP or DOWN buttons to navigate the menu, and press the MODE/OK button to confirm your selected option (YYYY/MM/DD, MM/DD/YYYY, DD-MM-YYYY).
- Press the MENU button to exit the settings menu without making a selection.
Date & Time Set
This function allows you to set the current Date and Time on your recorded video clips and captured photos.
- In Photo Mode press the MENU button.
- Select the gear icon on the bottom of the left side of the screen using the UP or DOWN buttons.
- Press the RIGHT button to enter the setup menu.
- Select 'Date & Time Set' using the UP or DOWN buttons and press the MODE/OK button to enter the 'Date & Time Set' menu.
- Press the UP or DOWN buttons to change the value of the highlighted field.
- Press the LEFT or RIGHT buttons to change to the next field.
- Press the MODE/OK button to save the date and time and to exit the settings menu.
- You can also press the MENU button to exit the settings menu without making a selection.
Format Memory Card
The format setting erases all photos, videos and data stored on your memory card.
- In Photo Mode press the MENU button.
- Select the gear icon on the bottom of the left side of the screen using the UP or DOWN buttons.
- Press the RIGHT button to enter the setup menu.
- Select 'Format Memory Card' using the UP or DOWN buttons and press the MODE/OK button to enter the 'Format Memory Card' menu.
- Press the LEFT or RIGHT buttons to navigate the menu, and press the MODE/OK button to confirm your selected option (Format, Cancel).
- Press the MENU button to exit the settings menu without making a selection.
NOTE: This will delete all of your media and cannot be undone.
Device Info
This setting displays the current firmware version of your camera.
- In Photo Mode press the MENU button.
- Select the gear icon on the bottom of the left side of the screen using the UP or DOWN buttons.
- Press the RIGHT button to enter the setup menu.
- Select 'Device Info' using the UP or DOWN buttons and press the MODE/OK button to enter the 'Device Info' menu.
- Press the OK button to exit the Device Info menu.
Restore Default Settings
Factory default settings can be restored in this menu. This function will not delete the media stored on the memory card, and will only restore all of the menu's setting back to factory default settings.
- In Photo Mode press the MENU button.
- Select the gear icon on the bottom of the left side of the screen using the UP or DOWN buttons.
- Press the RIGHT button to enter the setup menu.
- Select 'Restore Default Settings' using the UP or DOWN buttons and press the MODE/OK button to enter the 'Restore Default Settings' menu.
- Press the LEFT or RIGHT buttons to navigate the menu, and press the MODE/OK button to confirm your selected option (Confirm, Cancel).
- Press the MENU button to exit the settings menu without making a selection.
Interval Photo
In the interval photo mode, the camera will take a single photo at a set interval until stopped.
To enter interval photo mode, power the camera on and press the MODE/OK button. Use the LEFT or RIGHT buttons to select Interval Photo and press the MODE/OK button to enter the Interval Photo Mode.
- Line up your shot by looking at the LCD screen to see what is in the shot.
- Hold the camera steady and press the SHUTTER button to capture a photo and start the countdown.
- At the end of each countdown, a new photo will be captured, each captured photo will be saved as an individual file.
- To end the interval photo, press the SHUTTER button.
- The number of photos that can be captured at a particular resolution will be displayed in the top right corner of the screen.
- A "Memory Full" message will be displayed on the screen if there is no SD card inserted in the camera's memory card slot. A "Memory Full" message will be shown on the screen when the SD card is full.
- The number of remaining photos is determined by the selected photo resolution. The higher the photo resolution, the lower the number of photos you are able to be save to the memory card. Before capturing any photos, you can select a preferred photo resolution.
Photo Size
This function sets the photo resolution. The higher the resolution, the greater the photo quality and the larger the file size of the photo.
- In Interval Photo Mode press the MENU button.
- Select the Camera icon on the top of the left side of the screen using the UP or DOWN buttons.
- Press the RIGHT button to enter the settings menu.
- Select 'Photo Size' using the UP or DOWN buttons and press the MODE/OK button to enter the 'Photo Size' menu.
- Use the UP or DOWN buttons to navigate the menu, and press the MODE/OK button to confirm your selected option (48MP, 40MP, 30MP, 24MP, 18MP, 12MP).
- Press the MENU button to exit the settings menu without making a selection.
Interval Duration
This function will let you set the amount of time between each photo.
- In Interval Photo Mode press the MENU button.
- Select the Camera icon on the top of the left side of the screen using the UP or DOWN buttons.
- Press the RIGHT button to enter the settings menu.
- Select 'Interval Duration' using the UP or DOWN buttons and press the MODE/OK button to enter the 'Interval Duration' menu.
- Use the UP or DOWN buttons to navigate the menu, and press the MODE/OK button to confirm your selected option (3 Seconds, 10 Seconds, 15 Seconds, 20 Seconds, 30 Seconds).
- Press the MENU button to exit the settings menu without making a selection.
White Balance
White Balance changes the color of light in your pictures, making it seem warmer or cooler depending on how the light you're shooting in affects the frame.
- In Interval Photo Mode press the MENU button.
- Select the Camera icon on the top of the left side of the screen using the UP or DOWN buttons.
- Press the RIGHT button to enter the settings menu.
- Select 'White Balance' using the UP or DOWN buttons and press the MODE/OK button to enter the 'White Balance' menu.
- Use the UP or DOWN buttons to navigate the menu, and press the MODE/OK button to confirm your selected option (Auto, Sunny, Cloudy, Incandescent, Florescent).
- Press the MENU button to exit the settings menu without making a selection.
Exposure
This function adjusts the frame brightness in your photograph.
- In Interval Photo Mode press the MENU button.
- Select the Camera icon on the top of the left side of the screen using the UP or DOWN buttons.
- Press the RIGHT button to enter the settings menu.
- Select 'Exposure' using the UP or DOWN buttons and press the MODE/OK button to enter the 'Exposure' menu.
- Use the UP or DOWN buttons to navigate the menu, and press the MODE/OK button to confirm your selected option (-3, -2, -1, 0, +1, +2, +3).
- Press the MENU button to exit the settings menu without making a selection.
Metering
Metering mode refers to the way in which a camera determines the appropriate exposure (quantity of light reaching the camera lens). Spot metering will only base the exposure setting on a very small area of the scene. Center metering will use the light from the center of the LCD and the Multi setting measures the light at several points on the screen.
- In Interval Photo Mode press the MENU button.
- Select the Camera icon on the top of the left side of the screen using the UP or DOWN buttons.
- Press the RIGHT button to enter the settings menu.
- Select 'Metering' using the UP or DOWN buttons and press the MODE/OK button to enter the 'Metering' menu.
- Use the UP or DOWN buttons to navigate the menu, and press the MODE/OK button to confirm your selected option (Multi, Center, Spot, Matrix).
- Press the MENU button to exit the settings menu without making a selection.
Sharpness
This function adjusts the visible detail of a photograph.
- In Interval Photo Mode press the MENU button.
- Select the Camera icon on the top of the left side of the screen using the UP or DOWN buttons.
- Press the RIGHT button to enter the settings menu.
- Select 'Sharpness' using the UP or DOWN buttons and press the MODE/OK button to enter the 'Sharpness' menu.
- Use the UP or DOWN buttons to navigate the menu, and press the MODE/OK button to confirm your selected option (Sharp, Normal, Soft).
- Press the MENU button to exit the settings menu without making a selection.
Flash
This function allows to change the flash settings.
- In Interval Photo Mode press the MENU button.
- Select the Camera icon on the top of the left side of the screen using the UP or DOWN buttons.
- Press the RIGHT button to enter the settings menu.
- Select 'Flash' using the UP or DOWN buttons and press the MODE/OK button to enter the 'Flash' menu.
- Use the UP or DOWN buttons to navigate the menu, and press the MODE/OK button to confirm your selected option (Auto, Off, On).
- Press the MENU button to exit the settings menu without making a selection.
ISO
This function adjusts the light sensitivity in your photograph.
- In Interval Photo Mode press the MENU button.
- Select the Camera icon on the top of the left side of the screen using the UP or DOWN buttons.
- Press the RIGHT button to enter the settings menu.
- Select 'ISO' using the UP or DOWN buttons and press the MODE/OK button to enter the 'ISO' menu.
- Press the UP or DOWN buttons to navigate the menu, and press the MODE/OK button to confirm your selected option (ISO Auto, 100, 200, 400, 800, 1600, 3200, 6400).
- Press the MENU button to exit the settings menu without making a selection.
Time Stamp
This setting allows you to imprint a date & time onto your captured image files. Once an image file is captured with the imprint, the imprint cannot be removed.
- In Interval Photo Mode press the MENU button.
- Select the Camera icon on the top of the left side of the screen using the UP or DOWN buttons.
- Press the RIGHT button to enter the settings menu.
- Select 'Time Stamp' using the UP or DOWN buttons and press the MODE/OK button to turn the time stamp on or off.
File Compression
Video compression is the process of reducing the number of bits needed to record a video without compromising its visual quality. The purpose of compression is to make a video file occupy less space than the original file while maintaining a high quality.
Videos are compressed using codecs. Video codecs are the compression component of video compression software that compile files by encoding the data they contain. For the highest quality, select High Compression. For the best compatibility across all playback devices, select H.264. Either select will process high quality video file in MP4 format.
- In Interval Photo Mode press the MENU button.
- Select the gear icon on the bottom of the left side of the screen using the UP or DOWN buttons.
- Press the RIGHT button to enter the setup menu.
- Select 'File Compression' using the UP or DOWN buttons and press the MODE/OK button to enter the 'File Compression' menu.
- Press the UP or DOWN buttons to navigate the menu, and press the MODE/OK button to confirm your selected option (H.264, High Compression).
- Press the MENU button to exit the settings menu without making a selection.
Image Rotation
This option will flip the image on the LCD screen 180 degrees.
- In Interval Photo Mode press the MENU button.
- Select the gear icon on the bottom of the left side of the screen using the UP or DOWN buttons.
- Press the RIGHT button to enter the setup menu.
- Select 'Image Rotation' using the UP or DOWN buttons and press the MODE/OK button to turn Image Rotation on or off.
Frequency
This function sets the frequency of the camera from 50Hz to 60Hz. Please check the frequency of your location and set accordingly.
- In Interval Photo Mode press the MENU button.
- Select the gear icon on the bottom of the left side of the screen using the UP or DOWN buttons.
- Press the RIGHT button to enter the setup menu.
- Select 'Frequency' using the UP or DOWN buttons and press the MODE/OK button to enter the 'Frequency' menu.
- Press the UP or DOWN buttons to navigate the menu, and press the MODE/OK button to confirm your selected option (Auto, 50 Hz, 60 Hz) the default frequency for the United States is 60Hz.
- Press the MENU button to exit the settings menu without making a selection.
LED Indicator
This function allows you turn the LED status indicator on and off.
- In Interval Photo Mode press the MENU button.
- Select the gear icon on the bottom of the left side of the screen using the UP or DOWN buttons.
- Press the RIGHT button to enter the setup menu.
- Select 'LED Indicator' using the UP or DOWN buttons and press the MODE/OK button to turn the LED Indicator on or off.
Screen Saver
This function sets the duration of time in which the camcorder will wait with no user input before automatically turning off the LCD screen. Note: even while the screen is off, the camera will still be powered on.
- In Interval Photo Mode press the MENU button.
- Select the gear icon on the bottom of the left side of the screen using the UP or DOWN buttons.
- Press the RIGHT button to enter the setup menu.
- Select 'Screen Saver' using the UP or DOWN buttons and press the MODE/OK button to enter the 'Screen Saver' menu.
- Press the UP or DOWN buttons to navigate the menu, and press the MODE/OK button to confirm your selected option (Off, 30 Seconds, 1 Minute, 2 Minutes, 10 Minutes).
- Press the MENU button to exit the settings menu without making a selection.
Auto Power Off
This function sets the duration of time in which the camcorder will wait with no user input before automatically powering off.
- In Interval Photo Mode press the MENU button.
- Select the gear icon on the bottom of the left side of the screen using the UP or DOWN buttons.
- Press the RIGHT button to enter the setup menu.
- Select 'Auto Power Off' using the UP or DOWN buttons and press the MODE/OK button to enter the 'Auto Power Off' menu.
- Press the UP or DOWN buttons to navigate the menu, and press the MODE/OK button to confirm your selected option (Off, 3 Minutes, 5 Minutes, 10 Minutes).
- Press the MENU button to exit the settings menu without making a selection.
Button Sound
This function allows you to turn off the sounds of the camera.
- In Interval Photo Mode press the MENU button.
- Select the gear icon on the bottom of the left side of the screen using the UP or DOWN buttons.
- Press the RIGHT button to enter the setup menu.
- Select 'Button Sound' using the UP or DOWN buttons and press the MODE/OK button to enter the 'Button Sound' menu.
- Press the UP or DOWN buttons to navigate the menu, and press the MODE/OK button to confirm your selected option (Off, On).
- Press the MENU button to exit the settings menu without making a selection.
Language
This function allows you to set the camera's interface language.
- In Interval Photo Mode press the MENU button.
- Select the gear icon on the bottom of the left side of the screen using the UP or DOWN buttons.
- Press the RIGHT button to enter the setup menu.
- Select 'Language' using the UP or DOWN buttons and press the MODE/OK button to enter the 'Language' menu.
- Press the UP or DOWN buttons to navigate the menu, and press the MODE/OK button to confirm your selected language.
- Press the MENU button to exit the settings menu without making a selection.
Date Format
This function allows you to set the current Date and Time on your recorded video clips and captured photos.
- In Interval Photo Mode press the MENU button.
- Select the gear icon on the bottom of the left side of the screen using the UP or DOWN buttons.
- Press the RIGHT button to enter the setup menu.
- Select 'Date Format' using the UP or DOWN buttons and press the MODE/OK button to enter the 'Date Format' menu.
- Press the UP or DOWN buttons to navigate the menu, and press the MODE/OK button to confirm your selected option (YYYY/MM/DD, MM/DD/YYYY, DD-MM-YYYY).
- Press the MENU button to exit the settings menu without making a selection.
Date & Time Set
This function allows you to set the current Date and Time on your recorded video clips and captured photos.
- In Interval Photo Mode press the MENU button.
- Select the gear icon on the bottom of the left side of the screen using the UP or DOWN buttons.
- Press the RIGHT button to enter the setup menu.
- Select 'Date & Time Set' using the UP or DOWN buttons and press the MODE/OK button to enter the 'Date & Time Set' menu.
- Press the UP or DOWN buttons to change the value of the highlighted field.
- Press the LEFT or RIGHT buttons to change to the next field.
- Press the MODE/OK button to save the date and time and to exit the settings menu.
- You can also press the MENU button to exit the settings menu without making a selection.
Format Memory Card
The format setting erases all photos, videos and data stored on your memory card.
- In Interval Photo Mode press the MENU button.
- Select the gear icon on the bottom of the left side of the screen using the UP or DOWN buttons.
- Press the RIGHT button to enter the setup menu.
- Select 'Format Memory Card' using the UP or DOWN buttons and press the MODE/OK button to enter the 'Format Memory Card' menu.
- Press the LEFT or RIGHT buttons to navigate the menu, and press the MODE/OK button to confirm your selected option (Format, Cancel).
- Press the MENU button to exit the settings menu without making a selection.
NOTE: This will delete all of your media and cannot be undone.
Device Info
This setting displays the current firmware version of your camera.
- In Interval Photo Mode press the MENU button.
- Select the gear icon on the bottom of the left side of the screen using the UP or DOWN buttons.
- Press the RIGHT button to enter the setup menu.
- Select 'Device Info' using the UP or DOWN buttons and press the MODE/OK button to enter the 'Device Info' menu.
- Press the OK button to exit the Device Info menu.
Restore Default Settings
Factory default settings can be restored in this menu. This function will not delete the media stored on the memory card, and will only restore all of the menu's setting back to factory default settings.
- In Interval Photo Mode press the MENU button.
- Select the gear icon on the bottom of the left side of the screen using the UP or DOWN buttons.
- Press the RIGHT button to enter the setup menu.
- Select 'Restore Default Settings' using the UP or DOWN buttons and press the MODE/OK button to enter the 'Restore Default Settings' menu.
- Press the LEFT or RIGHT buttons to navigate the menu, and press the MODE/OK button to confirm your selected option (Confirm, Cancel).
- Press the MENU button to exit the settings menu without making a selection.
Photo Burst
In photo burst mode, the camera will take a set number of images with each press of the SHUTTER button.
To enter Photo Burst mode, power the camera on and press the MODE/OK button. Use the LEFT or RIGHT buttons to select Photo and press the MODE/OK button to enter the Photo Mode. Then rotate the scene dial on the top of the camera to photo burst mode.
- Line up your shot by looking at the LCD screen to see what is in the shot.
- Hold the camera steady and press the SHUTTER button to capture the set number of photos.
- The number of photos that can be captured at a particular resolution will be displayed in the top right corner of the screen.
- A "Memory Full" message will be displayed on the screen if there is no SD card inserted in the camera's memory card slot. A "Memory Full" message will be shown on the screen when the SD card is full.
- The number of remaining photos is determined by the selected photo resolution. The higher the photo resolution, the lower the number of photos you are able to be save to the memory card. Before capturing any photos, you can select a preferred photo resolution.
Photo Size
This function sets the photo resolution. The higher the resolution, the greater the photo quality and the larger the file size of the photo.
- In Photo Burst Mode press the MENU button.
- Select the Camera icon on the top of the left side of the screen using the UP or DOWN buttons.
- Press the RIGHT button to enter the settings menu.
- Select 'Photo Size' using the UP or DOWN buttons and press the MODE/OK button to enter the 'Photo Size' menu.
- Use the UP or DOWN buttons to navigate the menu, and press the MODE/OK button to confirm your selected option (24MP, 18MP, 12MP).
- Press the MENU button to exit the settings menu without making a selection.
Photo Burst
This function lets you set the number of photos captured with each photo burst.
- In Photo Burst Mode press the MENU button.
- Select the Camera icon on the top of the left side of the screen using the UP or DOWN buttons.
- Press the RIGHT button to enter the settings menu.
- Select 'Photo Burst' using the UP or DOWN buttons and press the MODE/OK button to enter the 'Photo Burst' menu.
- Use the UP or DOWN buttons to navigate the menu, and press the MODE/OK button to confirm your selected option (3-Photo Burst, 5-Photo Burst, 10-Photo Burst).
- Press the MENU button to exit the settings menu without making a selection.
White Balance
White Balance changes the color of light in your pictures, making it seem warmer or cooler depending on how the light you're shooting in affects the frame.
- In Photo Burst Mode press the MENU button.
- Select the Camera icon on the top of the left side of the screen using the UP or DOWN buttons.
- Press the RIGHT button to enter the settings menu.
- Select 'White Balance' using the UP or DOWN buttons and press the MODE/OK button to enter the 'White Balance' menu.
- Use the UP or DOWN buttons to navigate the menu, and press the MODE/OK button to confirm your selected option (Auto, Sunny, Cloudy, Incandescent, Florescent).
- Press the MENU button to exit the settings menu without making a selection.
Exposure
This function adjusts the frame brightness in your photograph.
- In Photo Burst Mode press the MENU button.
- Select the Camera icon on the top of the left side of the screen using the UP or DOWN buttons.
- Press the RIGHT button to enter the settings menu.
- Select 'Exposure' using the UP or DOWN buttons and press the MODE/OK button to enter the 'Exposure' menu.
- Use the UP or DOWN buttons to navigate the menu, and press the MODE/OK button to confirm your selected option (-3, -2, -1, 0, +1, +2, +3).
- Press the MENU button to exit the settings menu without making a selection.
Metering
Metering mode refers to the way in which a camera determines the appropriate exposure (quantity of light reaching the camera lens). Spot metering will only base the exposure setting on a very small area of the scene. Center metering will use the light from the center of the LCD and the Multi setting measures the light at several points on the screen.
- In Photo Burst Mode press the MENU button.
- Select the Camera icon on the top of the left side of the screen using the UP or DOWN buttons.
- Press the RIGHT button to enter the settings menu.
- Select 'Metering' using the UP or DOWN buttons and press the MODE/OK button to enter the 'Metering' menu.
- Use the UP or DOWN buttons to navigate the menu, and press the MODE/OK button to confirm your selected option (Multi, Center, Spot, Matrix).
- Press the MENU button to exit the settings menu without making a selection.
Sharpness
This function adjusts the visible detail of a photograph.
- In Photo Burst Mode press the MENU button.
- Select the Camera icon on the top of the left side of the screen using the UP or DOWN buttons.
- Press the RIGHT button to enter the settings menu.
- Select 'Sharpness' using the UP or DOWN buttons and press the MODE/OK button to enter the 'Sharpness' menu.
- Use the UP or DOWN buttons to navigate the menu, and press the MODE/OK button to confirm your selected option (Sharp, Normal, Soft).
- Press the MENU button to exit the settings menu without making a selection.
ISO
This function adjusts the light sensitivity in your photograph.
- In Photo Burst Mode press the MENU button.
- Select the Camera icon on the top of the left side of the screen using the UP or DOWN buttons.
- Press the RIGHT button to enter the settings menu.
- Select 'ISO' using the UP or DOWN buttons and press the MODE/OK button to enter the 'ISO' menu.
- Press the UP or DOWN buttons to navigate the menu, and press the MODE/OK button to confirm your selected option (ISO Auto, 100, 200, 400, 800, 1600, 3200, 6400).
- Press the MENU button to exit the settings menu without making a selection.
Time Stamp
This setting allows you to imprint a date & time onto your captured image files. Once an image file is captured with the imprint, the imprint cannot be removed.
- In Photo Burst Mode press the MENU button.
- Select the Camera icon on the top of the left side of the screen using the UP or DOWN buttons.
- Press the RIGHT button to enter the settings menu.
- Select 'Time Stamp' using the UP or DOWN buttons and press the MODE/OK button to turn the time stamp on or off.
File Compression
Video compression is the process of reducing the number of bits needed to record a video without compromising its visual quality. The purpose of compression is to make a video file occupy less space than the original file while maintaining a high quality.
Videos are compressed using codecs. Video codecs are the compression component of video compression software that compile files by encoding the data they contain. For the highest quality, select High Compression. For the best compatibility across all playback devices, select H.264. Either select will process high quality video file in MP4 format.
- In Photo Burst Mode press the MENU button.
- Select the gear icon on the bottom of the left side of the screen using the UP or DOWN buttons.
- Press the RIGHT button to enter the setup menu.
- Select 'File Compression' using the UP or DOWN buttons and press the MODE/OK button to enter the 'File Compression' menu.
- Press the UP or DOWN buttons to navigate the menu, and press the MODE/OK button to confirm your selected option (H.264, High Compression).
- Press the MENU button to exit the settings menu without making a selection.
Image Rotation
This option will flip the image on the LCD screen 180 degrees.
- In Photo Burst Mode press the MENU button.
- Select the gear icon on the bottom of the left side of the screen using the UP or DOWN buttons.
- Press the RIGHT button to enter the setup menu.
- Select 'Image Rotation' using the UP or DOWN buttons and press the MODE/OK button to turn Image Rotation on or off.
Frequency
This function sets the frequency of the camera from 50Hz to 60Hz. Please check the frequency of your location and set accordingly.
- In Photo Burst Mode press the MENU button.
- Select the gear icon on the bottom of the left side of the screen using the UP or DOWN buttons.
- Press the RIGHT button to enter the setup menu.
- Select 'Frequency' using the UP or DOWN buttons and press the MODE/OK button to enter the 'Frequency' menu.
- Press the UP or DOWN buttons to navigate the menu, and press the MODE/OK button to confirm your selected option (Auto, 50 Hz, 60 Hz) the default frequency for the United States is 60Hz.
- Press the MENU button to exit the settings menu without making a selection.
LED Indicator
This function allows you turn the LED status indicator on and off.
- In Photo Burst Mode press the MENU button.
- Select the gear icon on the bottom of the left side of the screen using the UP or DOWN buttons.
- Press the RIGHT button to enter the setup menu.
- Select 'LED Indicator' using the UP or DOWN buttons and press the MODE/OK button to turn the LED Indicator on or off.
Screen Saver
This function sets the duration of time in which the camcorder will wait with no user input before automatically turning off the LCD screen. Note: even while the screen is off, the camera will still be powered on.
- In Photo Burst Mode press the MENU button.
- Select the gear icon on the bottom of the left side of the screen using the UP or DOWN buttons.
- Press the RIGHT button to enter the setup menu.
- Select 'Screen Saver' using the UP or DOWN buttons and press the MODE/OK button to enter the 'Screen Saver' menu.
- Press the UP or DOWN buttons to navigate the menu, and press the MODE/OK button to confirm your selected option (Off, 30 Seconds, 1 Minute, 2 Minutes, 10 Minutes).
- Press the MENU button to exit the settings menu without making a selection.
Auto Power Off
This function sets the duration of time in which the camcorder will wait with no user input before automatically powering off.
- In Photo Burst Mode press the MENU button.
- Select the gear icon on the bottom of the left side of the screen using the UP or DOWN buttons.
- Press the RIGHT button to enter the setup menu.
- Select 'Auto Power Off' using the UP or DOWN buttons and press the MODE/OK button to enter the 'Auto Power Off' menu.
- Press the UP or DOWN buttons to navigate the menu, and press the MODE/OK button to confirm your selected option (Off, 3 Minutes, 5 Minutes, 10 Minutes).
- Press the MENU button to exit the settings menu without making a selection.
Button Sound
This function allows you to turn off the sounds of the camera.
- In Photo Burst Mode press the MENU button.
- Select the gear icon on the bottom of the left side of the screen using the UP or DOWN buttons.
- Press the RIGHT button to enter the setup menu.
- Select 'Button Sound' using the UP or DOWN buttons and press the MODE/OK button to enter the 'Button Sound' menu.
- Press the UP or DOWN buttons to navigate the menu, and press the MODE/OK button to confirm your selected option (Off, On).
- Press the MENU button to exit the settings menu without making a selection.
Language
This function allows you to set the camera's interface language.
- In Photo Burst Mode press the MENU button.
- Select the gear icon on the bottom of the left side of the screen using the UP or DOWN buttons.
- Press the RIGHT button to enter the setup menu.
- Select 'Language' using the UP or DOWN buttons and press the MODE/OK button to enter the 'Language' menu.
- Press the UP or DOWN buttons to navigate the menu, and press the MODE/OK button to confirm your selected language.
- Press the MENU button to exit the settings menu without making a selection.
Date Format
This function allows you to set the current Date and Time on your recorded video clips and captured photos.
- In Photo Burst Mode press the MENU button.
- Select the gear icon on the bottom of the left side of the screen using the UP or DOWN buttons.
- Press the RIGHT button to enter the setup menu.
- Select 'Date Format' using the UP or DOWN buttons and press the MODE/OK button to enter the 'Date Format' menu.
- Press the UP or DOWN buttons to navigate the menu, and press the MODE/OK button to confirm your selected option (YYYY/MM/DD, MM/DD/YYYY, DD-MM-YYYY).
- Press the MENU button to exit the settings menu without making a selection.
Date & Time Set
This function allows you to set the current Date and Time on your recorded video clips and captured photos.
- In Photo Burst Mode press the MENU button.
- Select the gear icon on the bottom of the left side of the screen using the UP or DOWN buttons.
- Press the RIGHT button to enter the setup menu.
- Select 'Date & Time Set' using the UP or DOWN buttons and press the MODE/OK button to enter the 'Date & Time Set' menu.
- Press the UP or DOWN buttons to change the value of the highlighted field.
- Press the LEFT or RIGHT buttons to change to the next field.
- Press the MODE/OK button to save the date and time and to exit the settings menu.
- You can also press the MENU button to exit the settings menu without making a selection.
Format Memory Card
The format setting erases all photos, videos and data stored on your memory card.
- In Photo Burst Mode press the MENU button.
- Select the gear icon on the bottom of the left side of the screen using the UP or DOWN buttons.
- Press the RIGHT button to enter the setup menu.
- Select 'Format Memory Card' using the UP or DOWN buttons and press the MODE/OK button to enter the 'Format Memory Card' menu.
- Press the LEFT or RIGHT buttons to navigate the menu, and press the MODE/OK button to confirm your selected option (Format, Cancel).
- Press the MENU button to exit the settings menu without making a selection.
NOTE: This will delete all of your media and cannot be undone.
Device Info
This setting displays the current firmware version of your camera.
- In Photo Burst Mode press the MENU button.
- Select the gear icon on the bottom of the left side of the screen using the UP or DOWN buttons.
- Press the RIGHT button to enter the setup menu.
- Select 'Device Info' using the UP or DOWN buttons and press the MODE/OK button to enter the 'Device Info' menu.
- Press the OK button to exit the Device Info menu.
Restore Default Settings
Factory default settings can be restored in this menu. This function will not delete the media stored on the memory card, and will only restore all of the menu's setting back to factory default settings.
- In Photo Burst Mode press the MENU button.
- Select the gear icon on the bottom of the left side of the screen using the UP or DOWN buttons.
- Press the RIGHT button to enter the setup menu.
- Select 'Restore Default Settings' using the UP or DOWN buttons and press the MODE/OK button to enter the 'Restore Default Settings' menu.
- Press the LEFT or RIGHT buttons to navigate the menu, and press the MODE/OK button to confirm your selected option (Confirm, Cancel).
- Press the MENU button to exit the settings menu without making a selection.
Video Recording
To switch to Video mode power the camera on and press the MODE/OK button, then using the LEFT or RIGHT buttons, select Video and press the MODE/OK button to enter Video mode. A camcorder icon will appear in the top left corner of the screen when you are in Video mode.
- Line up your shot by looking at the LCD screen to see what is in view.
- Hold the camera steady and press the RECORD button to begin recording.
- When recording begins, a rolling timer will display at the top right corner of the screen and the LED status light will blink blue. This indicates the recorded video time elapsed.
- Press the RECORD button to stop recording.
- The recorded video files will automatically save onto the inserted memory card.
Movie Size (Video Resolution)
This function sets the video resolution. The higher the resolution, the greater the video quality and the larger the file size of the video.
- In Video Mode press the MENU button.
- Select the Video icon on the top of the left side of the screen using the UP or DOWN buttons.
- Press the RIGHT button to enter the settings menu.
- Select 'Movie Size' using the UP or DOWN buttons and press the MODE/OK button to enter the 'Movie Size' menu.
- Use the UP or DOWN buttons to navigate the menu, and press the MODE/OK button to confirm your selected option (4K (60fps), 4K (30fps), 2.7K (30fps), 1080p (120fps), 1080p (60fps), 1080p (30fps), 720p (60fps), 720p (30fps)).
- Press the MENU button to exit the settings menu without making a selection.
White Balance
White Balance changes the color of light in your pictures, making it seem warmer or cooler depending on how the light you're shooting in affects the frame.
- In Video Mode press the MENU button.
- Select the Camera icon on the top of the left side of the screen using the UP or DOWN buttons.
- Press the RIGHT button to enter the settings menu.
- Select 'White Balance' using the UP or DOWN buttons and press the MODE/OK button to enter the 'White Balance' menu.
- Use the UP or DOWN buttons to navigate the menu, and press the MODE/OK button to confirm your selected option (Auto, Sunny, Cloudy, Incandescent, Florescent).
- Press the MENU button to exit the settings menu without making a selection.
Exposure
This function adjusts the frame brightness in your photograph.
- In Video Mode press the MENU button.
- Select the Camera icon on the top of the left side of the screen using the UP or DOWN buttons.
- Press the RIGHT button to enter the settings menu.
- Select 'Exposure' using the UP or DOWN buttons and press the MODE/OK button to enter the 'Exposure' menu.
- Use the UP or DOWN buttons to navigate the menu, and press the MODE/OK button to confirm your selected option (-3, -2, -1, 0, +1, +2, +3).
- Press the MENU button to exit the settings menu without making a selection.
Metering
Metering mode refers to the way in which a camera determines the appropriate exposure (quantity of light reaching the camera lens). Spot metering will only base the exposure setting on a very small area of the scene. Center metering will use the light from the center of the LCD and the Multi setting measures the light at several points on the screen.
- In Video Mode press the MENU button.
- Select the Camera icon on the top of the left side of the screen using the UP or DOWN buttons.
- Press the RIGHT button to enter the settings menu.
- Select 'Metering' using the UP or DOWN buttons and press the MODE/OK button to enter the 'Metering' menu.
- Use the UP or DOWN buttons to navigate the menu, and press the MODE/OK button to confirm your selected option (Multi, Center, Spot, Matrix).
- Press the MENU button to exit the settings menu without making a selection.
Sharpness
This function adjusts the visible detail of a photograph.
- In Video Mode press the MENU button.
- Select the Camera icon on the top of the left side of the screen using the UP or DOWN buttons.
- Press the RIGHT button to enter the settings menu.
- Select 'Sharpness' using the UP or DOWN buttons and press the MODE/OK button to enter the 'Sharpness' menu.
- Use the UP or DOWN buttons to navigate the menu, and press the MODE/OK button to confirm your selected option (Sharp, Normal, Soft).
- Press the MENU button to exit the settings menu without making a selection.
Video Quality
The Video Quality function determines the level of compression the camera uses when saving photos to a memory card.
- In Video Mode press the MENU button.
- Select the Camera icon on the top of the left side of the screen using the UP or DOWN buttons.
- Press the RIGHT button to enter the settings menu.
- Select 'Video Quality' using the UP or DOWN buttons and press the MODE/OK button to enter the 'Video Quality' menu.
- Use the UP or DOWN buttons to navigate the menu, and press the MODE/OK button to confirm your selected option (Super Fine, Fine, Normal).
- Press the MENU button to exit the settings menu without making a selection.
ISO
This function adjusts the light sensitivity in your photograph.
- In Video Mode press the MENU button.
- Select the Camera icon on the top of the left side of the screen using the UP or DOWN buttons.
- Press the RIGHT button to enter the settings menu.
- Select 'ISO' using the UP or DOWN buttons and press the MODE/OK button to enter the 'ISO' menu.
- Press the UP or DOWN buttons to navigate the menu, and press the MODE/OK button to confirm your selected option (ISO Auto, 100, 200, 400, 800, 1600, 3200, 6400).
- Press the MENU button to exit the settings menu without making a selection.
Time Stamp
This setting allows you to imprint a date & time onto your recorded video files. Once a video file is recorded with the imprint, the imprint cannot be removed.
- In Video Mode press the MENU button.
- Select the Camera icon on the top of the left side of the screen using the UP or DOWN buttons.
- Press the RIGHT button to enter the settings menu.
- Select 'Time Stamp' using the UP or DOWN buttons and press the MODE/OK button to turn the time stamp on or off.
Record Audio
This function allows you to turn audio recording in video and loop recording modes on and off. If this setting is set to off, any videos recorded in video and loop recording modes will not have any audio.
- In Video Mode press the MENU button.
- Select the Camera icon on the top of the left side of the screen using the UP or DOWN buttons.
- Press the RIGHT button to enter the settings menu.
- Select 'Record Audio' using the UP or DOWN buttons and press the MODE/OK button to turn audio recording on or off.
File Compression
Video compression is the process of reducing the number of bits needed to record a video without compromising its visual quality. The purpose of compression is to make a video file occupy less space than the original file while maintaining a high quality.
Videos are compressed using codecs. Video codecs are the compression component of video compression software that compile files by encoding the data they contain. For the highest quality, select High Compression. For the best compatibility across all playback devices, select H.264. Either select will process high quality video file in MP4 format.
- In Video Mode press the MENU button.
- Select the gear icon on the bottom of the left side of the screen using the UP or DOWN buttons.
- Press the RIGHT button to enter the setup menu.
- Select 'File Compression' using the UP or DOWN buttons and press the MODE/OK button to enter the 'File Compression' menu.
- Press the UP or DOWN buttons to navigate the menu, and press the MODE/OK button to confirm your selected option (H.264, High Compression).
- Press the MENU button to exit the settings menu without making a selection.
Image Rotation
This option will flip the image on the LCD screen 180 degrees.
- In Video Mode press the MENU button.
- Select the gear icon on the bottom of the left side of the screen using the UP or DOWN buttons.
- Press the RIGHT button to enter the setup menu.
- Select 'Image Rotation' using the UP or DOWN buttons and press the MODE/OK button to turn image rotation on or off.
Frequency
This function sets the frequency of the camera from 50Hz to 60Hz. Please check the frequency of your location and set accordingly.
- In Video Mode press the MENU button.
- Select the gear icon on the bottom of the left side of the screen using the UP or DOWN buttons.
- Press the RIGHT button to enter the setup menu.
- Select 'Frequency' using the UP or DOWN buttons and press the MODE/OK button to enter the 'Frequency' menu.
- Press the UP or DOWN buttons to navigate the menu, and press the MODE/OK button to confirm your selected option (Auto, 50 Hz, 60 Hz) the default frequency for the United States is 60Hz.
- Press the MENU button to exit the settings menu without making a selection.
LED Indicator
This function allows you turn the LED status indicator on and off.
- In Video Mode press the MENU button.
- Select the gear icon on the bottom of the left side of the screen using the UP or DOWN buttons.
- Press the RIGHT button to enter the setup menu.
- Select 'LED Indicator' using the UP or DOWN buttons and press the MODE/OK button to turn the LED Indicator on or off.
Screen Saver
This function sets the duration of time in which the camcorder will wait with no user input before automatically turning off the LCD screen. Note: even while the screen is off, the camera will still be powered on.
- In Video Mode press the MENU button.
- Select the gear icon on the bottom of the left side of the screen using the UP or DOWN buttons.
- Press the RIGHT button to enter the setup menu.
- Select 'Screen Saver' using the UP or DOWN buttons and press the MODE/OK button to enter the 'Screen Saver' menu.
- Press the UP or DOWN buttons to navigate the menu, and press the MODE/OK button to confirm your selected option (Off, 30 Seconds, 1 Minute, 2 Minutes, 10 Minutes).
- Press the MENU button to exit the settings menu without making a selection.
Auto Power Off
This function sets the duration of time in which the camcorder will wait with no user input before automatically powering off.
- In Video Mode press the MENU button.
- Select the gear icon on the bottom of the left side of the screen using the UP or DOWN buttons.
- Press the RIGHT button to enter the setup menu.
- Select 'Auto Power Off' using the UP or DOWN buttons and press the MODE/OK button to enter the 'Auto Power Off' menu.
- Press the UP or DOWN buttons to navigate the menu, and press the MODE/OK button to confirm your selected option (Off, 3 Minutes, 5 Minutes, 10 Minutes).
- Press the MENU button to exit the settings menu without making a selection.
Button Sound
This function allows you to turn off the sounds of the camera.
- In Video Mode press the MENU button.
- Select the gear icon on the bottom of the left side of the screen using the UP or DOWN buttons.
- Press the RIGHT button to enter the setup menu.
- Select 'Button Sound' using the UP or DOWN buttons and press the MODE/OK button to enter the 'Button Sound' menu.
- Press the UP or DOWN buttons to navigate the menu, and press the MODE/OK button to confirm your selected option (Off, On).
- Press the MENU button to exit the settings menu without making a selection.
Language
This function allows you to set the camera's interface language.
- In Video Mode press the MENU button.
- Select the gear icon on the bottom of the left side of the screen using the UP or DOWN buttons.
- Press the RIGHT button to enter the setup menu.
- Select 'Language' using the UP or DOWN buttons and press the MODE/OK button to enter the 'Language' menu.
- Press the UP or DOWN buttons to navigate the menu, and press the MODE/OK button to confirm your selected language.
- Press the MENU button to exit the settings menu without making a selection.
Date Format
This function allows you to set the current Date and Time on your recorded video clips and captured photos.
- In Video Mode press the MENU button.
- Select the gear icon on the bottom of the left side of the screen using the UP or DOWN buttons.
- Press the RIGHT button to enter the setup menu.
- Select 'Date Format' using the UP or DOWN buttons and press the MODE/OK button to enter the 'Date Format' menu.
- Press the UP or DOWN buttons to navigate the menu, and press the MODE/OK button to confirm your selected option (YYYY/MM/DD, MM/DD/YYYY, DD-MM-YYYY).
- Press the MENU button to exit the settings menu without making a selection.
Date & Time Set
This function allows you to set the current Date and Time on your recorded video clips and captured photos.
- In Video Mode press the MENU button.
- Select the gear icon on the bottom of the left side of the screen using the UP or DOWN buttons.
- Press the RIGHT button to enter the setup menu.
- Select 'Date & Time Set' using the UP or DOWN buttons and press the MODE/OK button to enter the 'Date & Time Set' menu.
- Press the UP or DOWN buttons to change the value of the highlighted field.
- Press the LEFT or RIGHT buttons to change to the next field.
- Press the MODE/OK button to save the date and time and to exit the settings menu.
- You can also press the MENU button to exit the settings menu without making a selection.
Format Memory Card
The format setting erases all photos, videos and data stored on your memory card.
- In Video Mode press the MENU button.
- Select the gear icon on the bottom of the left side of the screen using the UP or DOWN buttons.
- Press the RIGHT button to enter the setup menu.
- Select 'Format Memory Card' using the UP or DOWN buttons and press the MODE/OK button to enter the 'Format Memory Card' menu.
- Press the LEFT or RIGHT buttons to navigate the menu, and press the MODE/OK button to confirm your selected option (Format, Cancel).
- Press the MENU button to exit the settings menu without making a selection.
NOTE: This will delete all of your media and cannot be undone.
Device Info
This setting displays the current firmware version of your camera.
- In Video Mode press the MENU button.
- Select the gear icon on the bottom of the left side of the screen using the UP or DOWN buttons.
- Press the RIGHT button to enter the setup menu.
- Select 'Device Info' using the UP or DOWN buttons and press the MODE/OK button to enter the 'Device Info' menu.
- Press the OK button to exit the Device Info menu.
Restore Default Settings
Factory default settings can be restored in this menu. This function will not delete the media stored on the memory card, and will only restore all of the menu's setting back to factory default settings.
- In Video Mode press the MENU button.
- Select the gear icon on the bottom of the left side of the screen using the UP or DOWN buttons.
- Press the RIGHT button to enter the setup menu.
- Select 'Restore Default Settings' using the UP or DOWN buttons and press the MODE/OK button to enter the 'Restore Default Settings' menu.
- Press the LEFT or RIGHT buttons to navigate the menu, and press the MODE/OK button to confirm your selected option (Confirm, Cancel).
- Press the MENU button to exit the settings menu without making a selection.
Slow Motion
Videos recorded in slow motion are recorded at a much higher frames per second and when played back, the videos show movement at a much slower rate.
To switch to Slow Motion mode power the camera on and press the MODE/OK button, then using the LEFT or RIGHT buttons, select Slow Motion and press the MODE/OK button to enter Slow Motion mode. A camcorder icon will appear in the top left corner of the screen when you are in Slow Motion mode.
- Line up your shot by looking at the LCD screen to see what is in view.
- Hold the camera steady and press the RECORD button to begin recording.
- When recording begins, a rolling timer will display at the top right corner of the screen and the LED status light will blink blue. This indicates the recorded video time elapsed.
- Press the RECORD button to stop recording.
- The recorded video files will automatically save onto the inserted memory card.
Slow Motion Rate
This function allows you to set the rate that the video is recorded in. If you choose 1080p 4X, your video will playback at ¼ speed and if you choose 1080p 2X, then your video will playback at ½ speed.
- In Slow Motion Mode press the MENU button.
- Select the Video icon on the top of the left side of the screen using the UP or DOWN buttons.
- Press the RIGHT button to enter the settings menu.
- Select 'Slow Motion Rate' using the UP or DOWN buttons and press the MODE/OK button to enter the 'Slow Motion Rate' menu.
- Use the UP or DOWN buttons to navigate the menu, and press the MODE/OK button to confirm your selected option (1080p 4X, 1080p 2X).
- Press the MENU button to exit the settings menu without making a selection.
White Balance
White Balance changes the color of light in your pictures, making it seem warmer or cooler depending on how the light you're shooting in affects the frame.
- In Slow Motion Mode press the MENU button.
- Select the Camera icon on the top of the left side of the screen using the UP or DOWN buttons.
- Press the RIGHT button to enter the settings menu.
- Select 'White Balance' using the UP or DOWN buttons and press the MODE/OK button to enter the 'White Balance' menu.
- Use the UP or DOWN buttons to navigate the menu, and press the MODE/OK button to confirm your selected option (Auto, Sunny, Cloudy, Incandescent, Florescent).
- Press the MENU button to exit the settings menu without making a selection.
Exposure
This function adjusts the frame brightness in your photograph.
- In Slow Motion Mode press the MENU button.
- Select the Camera icon on the top of the left side of the screen using the UP or DOWN buttons.
- Press the RIGHT button to enter the settings menu.
- Select 'Exposure' using the UP or DOWN buttons and press the MODE/OK button to enter the 'Exposure' menu.
- Use the UP or DOWN buttons to navigate the menu, and press the MODE/OK button to confirm your selected option (-3, -2, -1, 0, +1, +2, +3).
- Press the MENU button to exit the settings menu without making a selection.
Metering
Metering mode refers to the way in which a camera determines the appropriate exposure (quantity of light reaching the camera lens). Spot metering will only base the exposure setting on a very small area of the scene. Center metering will use the light from the center of the LCD and the Multi setting measures the light at several points on the screen.
- In Slow Motion Mode press the MENU button.
- Select the Camera icon on the top of the left side of the screen using the UP or DOWN buttons.
- Press the RIGHT button to enter the settings menu.
- Select 'Metering' using the UP or DOWN buttons and press the MODE/OK button to enter the 'Metering' menu.
- Use the UP or DOWN buttons to navigate the menu, and press the MODE/OK button to confirm your selected option (Multi, Center, Spot, Matrix).
- Press the MENU button to exit the settings menu without making a selection.
Sharpness
This function adjusts the visible detail of a photograph.
- In Slow Motion Mode press the MENU button.
- Select the Camera icon on the top of the left side of the screen using the UP or DOWN buttons.
- Press the RIGHT button to enter the settings menu.
- Select 'Sharpness' using the UP or DOWN buttons and press the MODE/OK button to enter the 'Sharpness' menu.
- Use the UP or DOWN buttons to navigate the menu, and press the MODE/OK button to confirm your selected option (Sharp, Normal, Soft).
- Press the MENU button to exit the settings menu without making a selection.
Video Quality
The Image Quality function determines the level of compression the camera uses when saving photos to a memory card.
- In Slow Motion Mode press the MENU button.
- Select the Camera icon on the top of the left side of the screen using the UP or DOWN buttons.
- Press the RIGHT button to enter the settings menu.
- Select 'Video Quality' using the UP or DOWN buttons and press the MODE/OK button to enter the 'Video Quality' menu.
- Use the UP or DOWN buttons to navigate the menu, and press the MODE/OK button to confirm your selected option (Super Fine, Fine, Normal).
- Press the MENU button to exit the settings menu without making a selection.
File Compression
Video compression is the process of reducing the number of bits needed to record a video without compromising its visual quality. The purpose of compression is to make a video file occupy less space than the original file while maintaining a high quality.
Videos are compressed using codecs. Video codecs are the compression component of video compression software that compile files by encoding the data they contain. For the highest quality, select High Compression. For the best compatibility across all playback devices, select H.264. Either select will process high quality video file in MP4 format.
- In Slow Motion Mode press the MENU button.
- Select the gear icon on the bottom of the left side of the screen using the UP or DOWN buttons.
- Press the RIGHT button to enter the setup menu.
- Select 'File Compression' using the UP or DOWN buttons and press the MODE/OK button to enter the 'File Compression' menu.
- Press the UP or DOWN buttons to navigate the menu, and press the MODE/OK button to confirm your selected option (H.264, High Compression).
- Press the MENU button to exit the settings menu without making a selection.
Image Rotation
This option will flip the image on the LCD screen 180 degrees.
- In Slow Motion Mode press the MENU button.
- Select the gear icon on the bottom of the left side of the screen using the UP or DOWN buttons.
- Press the RIGHT button to enter the setup menu.
- Select 'Image Rotation' using the UP or DOWN buttons and press the MODE/OK button to turn image rotation on or off.
Frequency
This function sets the frequency of the camera from 50Hz to 60Hz. Please check the frequency of your location and set accordingly.
- In Slow Motion Mode press the MENU button.
- Select the gear icon on the bottom of the left side of the screen using the UP or DOWN buttons.
- Press the RIGHT button to enter the setup menu.
- Select 'Frequency' using the UP or DOWN buttons and press the MODE/OK button to enter the 'Frequency' menu.
- Press the UP or DOWN buttons to navigate the menu, and press the MODE/OK button to confirm your selected option (Auto, 50 Hz, 60 Hz) the default frequency for the United States is 60Hz.
- Press the MENU button to exit the settings menu without making a selection.
LED Indicator
This function allows you turn the LED status indicator on and off.
- In Slow Motion Mode press the MENU button.
- Select the gear icon on the bottom of the left side of the screen using the UP or DOWN buttons.
- Press the RIGHT button to enter the setup menu.
- Select 'LED Indicator' using the UP or DOWN buttons and press the MODE/OK button to turn the LED Indicator on or off.
Screen Saver
This function sets the duration of time in which the camcorder will wait with no user input before automatically turning off the LCD screen. Note: even while the screen is off, the camera will still be powered on.
- In Slow Motion Mode press the MENU button.
- Select the gear icon on the bottom of the left side of the screen using the UP or DOWN buttons.
- Press the RIGHT button to enter the setup menu.
- Select 'Screen Saver' using the UP or DOWN buttons and press the MODE/OK button to enter the 'Screen Saver' menu.
- Press the UP or DOWN buttons to navigate the menu, and press the MODE/OK button to confirm your selected option (Off, 30 Seconds, 1 Minute, 2 Minutes, 10 Minutes).
- Press the MENU button to exit the settings menu without making a selection.
Auto Power Off
This function sets the duration of time in which the camcorder will wait with no user input before automatically powering off.
- In Slow Motion Mode press the MENU button.
- Select the gear icon on the bottom of the left side of the screen using the UP or DOWN buttons.
- Press the RIGHT button to enter the setup menu.
- Select 'Auto Power Off' using the UP or DOWN buttons and press the MODE/OK button to enter the 'Auto Power Off' menu.
- Press the UP or DOWN buttons to navigate the menu, and press theMODE/OK button to confirm your selected option (Off, 3 Minutes, 5 Minutes, 10 Minutes).
- Press the MENU button to exit the settings menu without making a selection.
Button Sound
This function allows you to turn off the sounds of the camera.
- In Slow Motion Mode press the MENU button.
- Select the gear icon on the bottom of the left side of the screen using the UP or DOWN buttons.
- Press the RIGHT button to enter the setup menu.
- Select 'Button Sound' using the UP or DOWN buttons and press the MODE/OK button to enter the 'Button Sound' menu.
- Press the UP or DOWN buttons to navigate the menu, and press the MODE/OK button to confirm your selected option (Off, On).
- Press the MENU button to exit the settings menu without making a selection.
Language
This function allows you to set the camera's interface language.
- In Slow Motion Mode press the MENU button.
- Select the gear icon on the bottom of the left side of the screen using the UP or DOWN buttons.
- Press the RIGHT button to enter the setup menu.
- Select 'Language' using the UP or DOWN buttons and press the MODE/OK button to enter the 'Language' menu.
- Press the UP or DOWN buttons to navigate the menu, and press the MODE/OK button to confirm your selected language.
- Press the MENU button to exit the settings menu without making a selection.
Date Format
This function allows you to set the current Date and Time on your recorded video clips and captured photos.
- In Slow Motion Mode press the MENU button.
- Select the gear icon on the bottom of the left side of the screen using the UP or DOWN buttons.
- Press the RIGHT button to enter the setup menu.
- Select 'Date Format' using the UP or DOWN buttons and press the MODE/OK button to enter the 'Date Format' menu.
- Press the UP or DOWN buttons to navigate the menu, and press the MODE/OK button to confirm your selected option (YYYY/MM/DD, MM/DD/YYYY, DD-MM-YYYY).
- Press the MENU button to exit the settings menu without making a selection.
Date & Time Set
This function allows you to set the current Date and Time on your recorded video clips and captured photos.
- In Slow Motion Mode press the MENU button.
- Select the gear icon on the bottom of the left side of the screen using the UP or DOWN buttons.
- Press the RIGHT button to enter the setup menu.
- Select 'Date & Time Set' using the UP or DOWN buttons and press the MODE/OK button to enter the 'Date & Time Set' menu.
- Press the UP or DOWN buttons to change the value of the highlighted field.
- Press the LEFT or RIGHT buttons to change to the next field.
- Press the MODE/OK button to save the date and time and to exit the settings menu.
- You can also press the MENU button to exit the settings menu without making a selection.
Format Memory Card
The format setting erases all photos, videos and data stored on your memory card.
- In Slow Motion Mode press the MENU button.
- Select the gear icon on the bottom of the left side of the screen using the UP or DOWN buttons.
- Press the RIGHT button to enter the setup menu.
- Select 'Format Memory Card' using the UP or DOWN buttons and press the MODE/OK button to enter the 'Format Memory Card' menu.
- Press the LEFT or RIGHT buttons to navigate the menu, and press the MODE/OK button to confirm your selected option (Format, Cancel).
- Press the MENU button to exit the settings menu without making a selection.
NOTE: This will delete all of your media and cannot be undone.
Device Info
This setting displays the current firmware version of your camera.
- In Slow Motion Mode press the MENU button.
- Select the gear icon on the bottom of the left side of the screen using the UP or DOWN buttons.
- Press the RIGHT button to enter the setup menu.
- Select 'Device Info' using the UP or DOWN buttons and press the MODE/OK button to enter the 'Device Info' menu.
- Press the OK button to exit the Device Info menu.
Restore Default Settings
Factory default settings can be restored in this menu. This function will not delete the media stored on the memory card, and will only restore all of the menu's setting back to factory default settings.
- In Slow Motion Mode press the MENU button.
- Select the gear icon on the bottom of the left side of the screen using the UP or DOWN buttons.
- Press the RIGHT button to enter the setup menu.
- Select 'Restore Default Settings' using the UP or DOWN buttons and press the MODE/OK button to enter the 'Restore Default Settings' menu.
- Press the LEFT or RIGHT buttons to navigate the menu, and press the MODE/OK button to confirm your selected option (Confirm, Cancel).
- Press the MENU button to exit the settings menu without making a selection.
Loop Recording
This function allows you to set a maximum duration for each video clip recorded.
To switch to Loop Recording mode power the camera on and press the MODE/OK button, then using the LEFT or RIGHT buttons, select Loop Recording and press the MODE/OK button to enter Loop Recording mode. A camcorder icon will appear in the top left corner of the screen when you are in Loop Recording mode.
- Line up your shot by looking at the LCD screen to see what is in view.
- Hold the camera steady and press the RECORD button to begin recording.
- When recording begins, a rolling timer will display at the top right corner of the screen and the LED status light will blink blue. This indicates the recorded video time elapsed.
- Press the RECORD button to stop recording.
- The recorded video files will automatically save onto the inserted memory card.
Movie Size (Video Resolution)
This function sets the video resolution. The higher the resolution, the greater the video quality and the larger the file size of the video.
- In Loop Recording Mode press the MENU button.
- Select the Video icon on the top of the left side of the screen using the UP or DOWN buttons.
- Press the RIGHT button to enter the settings menu.
- Select 'Movie Size' using the UP or DOWN buttons and press the MODE/OK button to enter the 'Movie Size' menu.
- Use the UP or DOWN buttons to navigate the menu, and press the MODE/OK button to confirm your selected option (4K (60fps), 4K (30fps), 2.7K (30fps), 1080p (120fps), 1080p (60fps), 1080p (30fps), 720p (60fps), 720p (30fps)).
- Press the MENU button to exit the settings menu without making a selection.
Loop Duration
This function allows you to set a maximum duration for each video clip recorded.
- In Loop Recording Mode press the MENU button.
- Select the Video icon on the top of the left side of the screen using the UP or DOWN buttons.
- Press the RIGHT button to enter the settings menu.
- Select 'Loop Duration' using the UP or DOWN buttons and press the MODE/OK button to enter the 'Loop Duration' menu.
- Use the UP or DOWN buttons to navigate the menu, and press the MODE/OK button to confirm your selected option (2 Minutes, 3 Minutes, 5 Minutes).
- Press the MENU button to exit the settings menu without making aselection.
Once you select an option, your camcorder will record video clips in this interval only. Once this duration is reached, the camcorder will seamlessly end recording and begin recording a new video file.
White Balance
White Balance changes the color of light in your pictures, making it seem warmer or cooler depending on how the light you're shooting in affects the frame.
- In Loop Recording Mode press the MENU button.
- Select the Camera icon on the top of the left side of the screen using the UP or DOWN buttons.
- Press the RIGHT button to enter the settings menu.
- Select 'White Balance' using the UP or DOWN buttons and press the MODE/OK button to enter the 'White Balance' menu.
- Use the UP or DOWN buttons to navigate the menu, and press the MODE/OK button to confirm your selected option (Auto, Sunny, Cloudy, Incandescent, Florescent).
- Press the MENU button to exit the settings menu without making a selection.
Exposure
This function adjusts the frame brightness in your photograph.
- In Loop Recording Mode press the MENU button.
- Select the Camera icon on the top of the left side of the screen using the UP or DOWN buttons.
- Press the RIGHT button to enter the settings menu.
- Select 'Exposure' using the UP or DOWN buttons and press the MODE/OK button to enter the 'Exposure' menu.
- Use the UP or DOWN buttons to navigate the menu, and press the MODE/OK button to confirm your selected option (-3, -2, -1, 0, +1, +2, +3).
- Press the MENU button to exit the settings menu without making a selection.
Metering
Metering mode refers to the way in which a camera determines the appropriate exposure (quantity of light reaching the camera lens). Spot metering will only base the exposure setting on a very small area of the scene. Center metering will use the light from the center of the LCD and the Multi setting measures the light at several points on the screen.
- In Loop Recording Mode press the MENU button.
- Select the Camera icon on the top of the left side of the screen using the UP or DOWN buttons.
- Press the RIGHT button to enter the settings menu.
- Select 'Metering' using the UP or DOWN buttons and press the MODE/OK button to enter the 'Metering' menu.
- Use the UP or DOWN buttons to navigate the menu, and press the MODE/OK button to confirm your selected option (Multi, Center, Spot, Matrix).
- Press the MENU button to exit the settings menu without making a selection.
Sharpness
This function adjusts the visible detail of a photograph.
- In Loop Recording Mode press the MENU button.
- Select the Camera icon on the top of the left side of the screen using the UP or DOWN buttons.
- Press the RIGHT button to enter the settings menu.
- Select 'Sharpness' using the UP or DOWN buttons and press the MODE/OK button to enter the 'Sharpness' menu.
- Use the UP or DOWN buttons to navigate the menu, and press the MODE/OK button to confirm your selected option (Sharp, Normal, Soft).
- Press the MENU button to exit the settings menu without making a selection.
Video Quality
The Image Quality function determines the level of compression the camera uses when saving photos to a memory card.
- In Loop Recording Mode press the MENU button.
- Select the Camera icon on the top of the left side of the screen using the UP or DOWN buttons.
- Press the RIGHT button to enter the settings menu.
- Select 'Video Quality' using the UP or DOWN buttons and press the MODE/OK button to enter the 'Video Quality' menu.
- Use the UP or DOWN buttons to navigate the menu, and press the MODE/OK button to confirm your selected option (Super Fine, Fine, Normal).
- Press the MENU button to exit the settings menu without making a selection.
ISO
This function adjusts the light sensitivity in your photograph.
- In Loop Recording Mode press the MENU button.
- Select the Camera icon on the top of the left side of the screen using the UP or DOWN buttons.
- Press the RIGHT button to enter the settings menu.
- Select 'ISO' using the UP or DOWN buttons and press the MODE/OK button to enter the 'ISO' menu.
- Press the UP or DOWN buttons to navigate the menu, and press the MODE/OK button to confirm your selected option (ISO Auto, 100, 200, 400, 800, 1600, 3200, 6400).
- Press the MENU button to exit the settings menu without making a selection.
Time Stamp
This setting allows you to imprint a date & time onto your recorded video files. Once a video file is recorded with the imprint, the imprint cannot be removed.
- In Loop Recording Mode press the MENU button.
- Select the Camera icon on the top of the left side of the screen using the UP or DOWN buttons.
- Press the RIGHT button to enter the settings menu.
- Select 'Time Stamp' using the UP or DOWN buttons and press the MODE/OK button to turn the time stamp on or off.
Record Audio
This function allows you to turn audio recording in video and loop recording modes on and off. If this setting is set to off, any videos recorded in video and loop recording modes will not have any audio.
- In Loop Recording Mode press the MENU button.
- Select the Camera icon on the top of the left side of the screen using the UP or DOWN buttons.
- Press the RIGHT button to enter the settings menu.
- Select 'Record Audio' using the UP or DOWN buttons and press the MODE/OK button to turn audio recording on or off.
File Compression
Video compression is the process of reducing the number of bits needed to record a video without compromising its visual quality. The purpose of compression is to make a video file occupy less space than the original file while maintaining a high quality.
Videos are compressed using codecs. Video codecs are the compression component of video compression software that compile files by encoding the data they contain. For the highest quality, select High Compression. For the best compatibility across all playback devices, select H.264. Either select will process high quality video file in MP4 format.
- In Loop Recording Mode press the MENU button.
- Select the gear icon on the bottom of the left side of the screen using the UP or DOWN buttons.
- Press the RIGHT button to enter the setup menu.
- Select 'File Compression' using the UP or DOWN buttons and press the MODE/OK button to enter the 'File Compression' menu.
- Press the UP or DOWN buttons to navigate the menu, and press the MODE/OK button to confirm your selected option (H.264, High Compression).
- Press the MENU button to exit the settings menu without making a selection.
Image Rotation
This option will flip the image on the LCD screen 180 degrees.
- In Loop Recording Mode press the MENU button.
- Select the gear icon on the bottom of the left side of the screen using the UP or DOWN buttons.
- Press the RIGHT button to enter the setup menu.
- Select 'Image Rotation' using the UP or DOWN buttons and press the MODE/OK button to turn image rotation on or off.
Frequency
This function sets the frequency of the camera from 50Hz to 60Hz. Please check the frequency of your location and set accordingly.
- In Loop Recording Mode press the MENU button.
- Select the gear icon on the bottom of the left side of the screen using the UP or DOWN buttons.
- Press the RIGHT button to enter the setup menu.
- Select 'Frequency' using the UP or DOWN buttons and press the MODE/OK button to enter the 'Frequency' menu.
- Press the UP or DOWN buttons to navigate the menu, and press the MODE/OK button to confirm your selected option (Auto, 50 Hz, 60 Hz) the default frequency for the United States is 60Hz.
- Press the MENU button to exit the settings menu without making a selection.
LED Indicator
This function allows you turn the LED status indicator on and off.
- In Loop Recording Mode press the MENU button.
- Select the gear icon on the bottom of the left side of the screen using the UP or DOWN buttons.
- Press the RIGHT button to enter the setup menu.
- Select 'LED Indicator' using the UP or DOWN buttons and press the MODE/OK button to turn the LED Indicator on or off.
Screen Saver
This function sets the duration of time in which the camcorder will wait with no user input before automatically turning off the LCD screen. Note: even while the screen is off, the camera will still be powered on.
- In Loop Recording Mode press the MENU button.
- Select the gear icon on the bottom of the left side of the screen using the UP or DOWN buttons.
- Press the RIGHT button to enter the setup menu.
- Select 'Screen Saver' using the UP or DOWN buttons and press the MODE/OK button to enter the 'Screen Saver' menu.
- Press the UP or DOWN buttons to navigate the menu, and press the MODE/OK button to confirm your selected option (Off, 30 Seconds, 1 Minute, 2 Minutes, 10 Minutes).
- Press the MENU button to exit the settings menu without making a selection.
Auto Power Off
This function sets the duration of time in which the camcorder will wait with no user input before automatically powering off.
- In Loop Recording Mode press the MENU button.
- Select the gear icon on the bottom of the left side of the screen using the UP or DOWN buttons.
- Press the RIGHT button to enter the setup menu.
- Select 'Auto Power Off' using the UP or DOWN buttons and press the MODE/OK button to enter the 'Auto Power Off' menu.
- Press the UP or DOWN buttons to navigate the menu, and press theMODE/OK button to confirm your selected option (Off, 3 Minutes, 5 Minutes, 10 Minutes).
- Press the MENU button to exit the settings menu without making a selection.
Button Sound
This function allows you to turn off the sounds of the camera.
- In Loop Recording Mode press the MENU button.
- Select the gear icon on the bottom of the left side of the screen using the UP or DOWN buttons.
- Press the RIGHT button to enter the setup menu.
- Select 'Button Sound' using the UP or DOWN buttons and press the MODE/OK button to enter the 'Button Sound' menu.
- Press the UP or DOWN buttons to navigate the menu, and press the MODE/OK button to confirm your selected option (Off, On).
- Press the MENU button to exit the settings menu without making a selection.
Language
This function allows you to set the camera's interface language.
- In Loop Recording Mode press the MENU button.
- Select the gear icon on the bottom of the left side of the screen using the UP or DOWN buttons.
- Press the RIGHT button to enter the setup menu.
- Select 'Language' using the UP or DOWN buttons and press the MODE/OK button to enter the 'Language' menu.
- Press the UP or DOWN buttons to navigate the menu, and press the MODE/OK button to confirm your selected language.
- Press the MENU button to exit the settings menu without making a selection.
Date Format
This function allows you to set the current Date and Time on your recorded video clips and captured photos.
- In Loop Recording Mode press the MENU button.
- Select the gear icon on the bottom of the left side of the screen using the UP or DOWN buttons.
- Press the RIGHT button to enter the setup menu.
- Select 'Date Format' using the UP or DOWN buttons and press the MODE/OK button to enter the 'Date Format' menu.
- Press the UP or DOWN buttons to navigate the menu, and press the MODE/OK button to confirm your selected option (YYYY/MM/DD, MM/DD/YYYY, DD-MM-YYYY).
- Press the MENU button to exit the settings menu without making a selection.
Date & Time Set
This function allows you to set the current Date and Time on your recorded video clips and captured photos.
- In Loop Recording Mode press the MENU button.
- Select the gear icon on the bottom of the left side of the screen using the UP or DOWN buttons.
- Press the RIGHT button to enter the setup menu.
- Select 'Date & Time Set' using the UP or DOWN buttons and press the MODE/OK button to enter the 'Date & Time Set' menu.
- Press the UP or DOWN buttons to change the value of the highlighted field.
- Press the LEFT or RIGHT buttons to change to the next field.
- Press the MODE/OK button to save the date and time and to exit the settings menu.
- You can also press the MENU button to exit the settings menu without making a selection.
Format Memory Card
The format setting erases all photos, videos and data stored on your memory card.
- In Loop Recording Mode press the MENU button.
- Select the gear icon on the bottom of the left side of the screen using the UP or DOWN buttons.
- Press the RIGHT button to enter the setup menu.
- Select 'Format Memory Card' using the UP or DOWN buttons and press the MODE/OK button to enter the 'Format Memory Card' menu.
- Press the LEFT or RIGHT buttons to navigate the menu, and press the MODE/OK button to confirm your selected option (Format, Cancel).
- Press the MENU button to exit the settings menu without making a selection.
NOTE: This will delete all of your media and cannot be undone.
Device Info
This setting displays the current firmware version of your camera.
- In Loop Recording Mode press the MENU button.
- Select the gear icon on the bottom of the left side of the screen using the UP or DOWN buttons.
- Press the RIGHT button to enter the setup menu.
- Select 'Device Info' using the UP or DOWN buttons and press the MODE/OK button to enter the 'Device Info' menu.
- Press the OK button to exit the Device Info menu.
Restore Default Settings
Factory default settings can be restored in this menu. This function will not delete the media stored on the memory card, and will only restore all of the menu's setting back to factory default settings.
- In Loop Recording Mode press the MENU button.
- Select the gear icon on the bottom of the left side of the screen using the UP or DOWN buttons.
- Press the RIGHT button to enter the setup menu.
- Select 'Restore Default Settings' using the UP or DOWN buttons and press the MODE/OK button to enter the 'Restore Default Settings' menu.
- Press the LEFT or RIGHT buttons to navigate the menu, and press the MODE/OK button to confirm your selected option (Confirm, Cancel).
- Press the MENU button to exit the settings menu without making a selection.
Time Lapse
This feature allows you to capture long sequences of events in a much shorter time period.
To switch to Time Lapse mode power the camera on and press the MODE/OK button, then using the LEFT or RIGHT buttons, select Time Lapse and press the MODE/OK button to enter Time Lapse mode. A camcorder icon will appear in the top left corner of the screen when you are in Time Lapse mode.
- Line up your shot by looking at the LCD screen to see what is in view.
- Hold the camera steady and press the RECORD button to begin recording.
- When recording begins, a rolling timer will display at the top right corner of the screen and the LED status light will blink blue. This indicates the recorded video time elapsed.
- Press the RECORD button to stop recording.
- The recorded video files will automatically save onto the inserted memory card.
Movie Size (Video Resolution)
This function sets the video resolution. The higher the resolution, the greater the video quality and the larger the file size of the video.
- In Time Lapse Mode press the MENU button.
- Select the Video icon on the top of the left side of the screen using the UP or DOWN buttons.
- Press the RIGHT button to enter the settings menu.
- Select 'Movie Size' using the UP or DOWN buttons and press the MODE/OK button to enter the 'Movie Size' menu.
- Use the UP or DOWN buttons to navigate the menu, and press the MODE/OK button to confirm your selected option (4K, 2.7K, 1080p, 720p).
- Press the MENU button to exit the settings menu without making a selection.
Interval Duration
This function allows you to set the amount of time in between images.
- In Time Lapse Mode press the MENU button.
- Select the Video icon on the top of the left side of the screen using the UP or DOWN buttons.
- Press the RIGHT button to enter the settings menu.
- Select 'Interval Duration' using the UP or DOWN buttons and press the MODE/OK button to enter the 'Interval Duration' menu.
- Use the UP or DOWN buttons to navigate the menu, and press the MODE/OK button to confirm your selected option (0.5 Seconds, 1 Second, 2 Seconds, 5 Seconds, 10 Seconds, 30 Seconds, 60 Seconds).
- Press the MENU button to exit the settings menu without making a selection.
NOTE: By selecting '10 Seconds' the camera will capture a single frame every 10 seconds and create a video combining all of the captured images. See the table below for how long it will take to record 1 second of video for each option;
| Interval Duration Option | Length of time to record 1 second of video |
| 0.5 Seconds | 15 Seconds |
| 1 Second | 30 Seconds |
| 2 Seconds | 60 Seconds |
| 5 Seconds | 150 Seconds |
| 10 Seconds | 300 Seconds |
| 30 Seconds | 900 Seconds |
| 60 Seconds | 1,800 Seconds |
White Balance
White Balance changes the color of light in your pictures, making it seem warmer or cooler depending on how the light you're shooting in affects the frame.
- In Time Lapse Mode press the MENU button.
- Select the Camera icon on the top of the left side of the screen using the UP or DOWN buttons.
- Press the RIGHT button to enter the settings menu.
- Select 'White Balance' using the UP or DOWN buttons and press the MODE/OK button to enter the 'White Balance' menu.
- Use the UP or DOWN buttons to navigate the menu, and press the MODE/OK button to confirm your selected option (Auto, Sunny, Cloudy, Incandescent, Florescent).
- Press the MENU button to exit the settings menu without making a selection.
Exposure
This function adjusts the frame brightness in your photograph.
- In Time Lapse Mode press the MENU button.
- Select the Camera icon on the top of the left side of the screen using the UP or DOWN buttons.
- Press the RIGHT button to enter the settings menu.
- Select 'Exposure' using the UP or DOWN buttons and press the MODE/OK button to enter the 'Exposure' menu.
- Use the UP or DOWN buttons to navigate the menu, and press the MODE/OK button to confirm your selected option (-3, -2, -1, 0, +1, +2, +3).
- Press the MENU button to exit the settings menu without making a selection.
Video Duration
This function allows you to set the length of the final time lapse video.
- In Time Lapse Mode press the MENU button.
- Select the Camera icon on the top of the left side of the screen using the UP or DOWN buttons.
- Press the RIGHT button to enter the settings menu.
- Select 'Video Duration' using the UP or DOWN buttons and press the MODE/OK button to enter the 'Video Duration' menu.
- Use the UP or DOWN buttons to navigate the menu, and press the MODE/OK button to confirm your selected option (Unlimited, 6 Seconds, 8 Seconds, 10 Seconds, 20 Seconds, 30 Seconds, 60 Seconds, 120 Seconds).
- Press the MENU button to exit the settings menu without making a selection.
NOTE: By selecting time lapse will automatically stop recording when the final video is 10 seconds long. The actual length of time that it will take to record the 10 second video will depend on the interval duration, see section Interval Duration.
Metering
Metering mode refers to the way in which a camera determines the appropriate exposure (quantity of light reaching the camera lens). Spot metering will only base the exposure setting on a very small area of the scene. Center metering will use the light from the center of the LCD and the Multi setting measures the light at several points on the screen.
- In Time Lapse Mode press the MENU button.
- Select the Camera icon on the top of the left side of the screen using the UP or DOWN buttons.
- Press the RIGHT button to enter the settings menu.
- Select 'Metering' using the UP or DOWN buttons and press the MODE/OK button to enter the 'Metering' menu.
- Use the UP or DOWN buttons to navigate the menu, and press the MODE/OK button to confirm your selected option (Multi, Center, Spot, Matrix).
- Press the MENU button to exit the settings menu without making a selection.
Sharpness
This function adjusts the visible detail of a photograph.
- In Time Lapse Mode press the MENU button.
- Select the Camera icon on the top of the left side of the screen using the UP or DOWN buttons.
- Press the RIGHT button to enter the settings menu.
- Select 'Sharpness' using the UP or DOWN buttons and press the MODE/OK button to enter the 'Sharpness' menu.
- Use the UP or DOWN buttons to navigate the menu, and press the MODE/OK button to confirm your selected option (Sharp, Normal, Soft).
- Press the MENU button to exit the settings menu without making a selection.
Video Quality
The Image Quality function determines the level of compression the camera uses when saving photos to a memory card.
- In Time Lapse Mode press the MENU button.
- Select the Camera icon on the top of the left side of the screen using the UP or DOWN buttons.
- Press the RIGHT button to enter the settings menu.
- Select 'Video Quality' using the UP or DOWN buttons and press the MODE/OK button to enter the 'Video Quality' menu.
- Use the UP or DOWN buttons to navigate the menu, and press the MODE/OK button to confirm your selected option (Super Fine, Fine, Normal).
- Press the MENU button to exit the settings menu without making a selection.
ISO
This function adjusts the light sensitivity in your photograph.
- In Time Lapse Mode press the MENU button.
- Select the Camera icon on the top of the left side of the screen using the UP or DOWN buttons.
- Press the RIGHT button to enter the settings menu.
- Select 'ISO' using the UP or DOWN buttons and press the MODE/OK button to enter the 'ISO' menu.
- Press the UP or DOWN buttons to navigate the menu, and press the MODE/OK button to confirm your selected option (ISO Auto, 100, 200, 400, 800, 1600, 3200, 6400).
- Press the MENU button to exit the settings menu without making a selection.
File Compression
Video compression is the process of reducing the number of bits needed to record a video without compromising its visual quality. The purpose of compression is to make a video file occupy less space than the original file while maintaining a high quality.
Videos are compressed using codecs. Video codecs are the compression component of video compression software that compile files by encoding the data they contain. For the highest quality, select High Compression. For the best compatibility across all playback devices, select H.264. Either select will process high quality video file in MP4 format.
- In Time Lapse Mode press the MENU button.
- Select the gear icon on the bottom of the left side of the screen using the UP or DOWN buttons.
- Press the RIGHT button to enter the setup menu.
- Select 'File Compression' using the UP or DOWN buttons and press the MODE/OK button to enter the 'File Compression' menu.
- Press the UP or DOWN buttons to navigate the menu, and press the MODE/OK button to confirm your selected option (H.264, High Compression).
- Press the MENU button to exit the settings menu without making a selection.
Image Rotation
This option will flip the image on the LCD screen 180 degrees.
- In Time Lapse Mode press the MENU button.
- Select the gear icon on the bottom of the left side of the screen using the UP or DOWN buttons.
- Press the RIGHT button to enter the setup menu.
- Select 'Image Rotation' using the UP or DOWN buttons and press the MODE/OK button to turn image rotation on or off.
Frequency
This function sets the frequency of the camera from 50Hz to 60Hz. Please check the frequency of your location and set accordingly.
- In Time Lapse Mode press the MENU button.
- Select the gear icon on the bottom of the left side of the screen using the UP or DOWN buttons.
- Press the RIGHT button to enter the setup menu.
- Select 'Frequency' using the UP or DOWN buttons and press the MODE/OK button to enter the 'Frequency' menu.
- Press the UP or DOWN buttons to navigate the menu, and press the MODE/OK button to confirm your selected option (Auto, 50 Hz, 60 Hz) the default frequency for the United States is 60Hz.
- Press the MENU button to exit the settings menu without making a selection.
LED Indicator
This function allows you turn the LED status indicator on and off.
- In Time Lapse Mode press the MENU button.
- Select the gear icon on the bottom of the left side of the screen using the UP or DOWN buttons.
- Press the RIGHT button to enter the setup menu.
- Select 'LED Indicator' using the UP or DOWN buttons and press the MODE/OK button to turn the LED Indicator on or off.
Screen Saver
This function sets the duration of time in which the camcorder will wait with no user input before automatically turning off the LCD screen. Note: even while the screen is off, the camera will still be powered on.
- In Time Lapse Mode press the MENU button.
- Select the gear icon on the bottom of the left side of the screen using the UP or DOWN buttons.
- Press the RIGHT button to enter the setup menu.
- Select 'Screen Saver' using the UP or DOWN buttons and press the MODE/OK button to enter the 'Screen Saver' menu.
- Press the UP or DOWN buttons to navigate the menu, and press the MODE/OK button to confirm your selected option (Off, 30 Seconds, 1 Minute, 2 Minutes, 10 Minutes).
- Press the MENU button to exit the settings menu without making a selection.
Auto Power Off
This function sets the duration of time in which the camcorder will wait with no user input before automatically powering off.
- In Time Lapse Mode press the MENU button.
- Select the gear icon on the bottom of the left side of the screen using the UP or DOWN buttons.
- Press the RIGHT button to enter the setup menu.
- Select 'Auto Power Off' using the UP or DOWN buttons and press the MODE/OK button to enter the 'Auto Power Off' menu.
- Press the UP or DOWN buttons to navigate the menu, and press theMODE/OK button to confirm your selected option (Off, 3 Minutes, 5 Minutes, 10 Minutes).
- Press the MENU button to exit the settings menu without making a selection.
Button Sound
This function allows you to turn off the sounds of the camera.
- In Time Lapse Mode press the MENU button.
- Select the gear icon on the bottom of the left side of the screen using the UP or DOWN buttons.
- Press the RIGHT button to enter the setup menu.
- Select 'Button Sound' using the UP or DOWN buttons and press the MODE/OK button to enter the 'Button Sound' menu.
- Press the UP or DOWN buttons to navigate the menu, and press the MODE/OK button to confirm your selected option (Off, On).
- Press the MENU button to exit the settings menu without making a selection.
Language
This function allows you to set the camera's interface language.
- In Time Lapse Mode press the MENU button.
- Select the gear icon on the bottom of the left side of the screen using the UP or DOWN buttons.
- Press the RIGHT button to enter the setup menu.
- Select 'Language' using the UP or DOWN buttons and press the MODE/OK button to enter the 'Language' menu.
- Press the UP or DOWN buttons to navigate the menu, and press the MODE/OK button to confirm your selected language.
- Press the MENU button to exit the settings menu without making a selection.
Date Format
This function allows you to set the current Date and Time on your recorded video clips and captured photos.
- In Time Lapse Mode press the MENU button.
- Select the gear icon on the bottom of the left side of the screen using the UP or DOWN buttons.
- Press the RIGHT button to enter the setup menu.
- Select 'Date Format' using the UP or DOWN buttons and press the MODE/OK button to enter the 'Date Format' menu.
- Press the UP or DOWN buttons to navigate the menu, and press the MODE/OK button to confirm your selected option (YYYY/MM/DD, MM/DD/YYYY, DD-MM-YYYY).
- Press the MENU button to exit the settings menu without making a selection.
Date & Time Set
This function allows you to set the current Date and Time on your recorded video clips and captured photos.
- In Time Lapse Mode press the MENU button.
- Select the gear icon on the bottom of the left side of the screen using the UP or DOWN buttons.
- Press the RIGHT button to enter the setup menu.
- Select 'Date & Time Set' using the UP or DOWN buttons and press the MODE/OK button to enter the 'Date & Time Set' menu.
- Press the UP or DOWN buttons to change the value of the highlighted field.
- Press the LEFT or RIGHT buttons to change to the next field.
- Press the MODE/OK button to save the date and time and to exit the settings menu.
- You can also press the MENU button to exit the settings menu without making a selection.
Format Memory Card
The format setting erases all photos, videos and data stored on your memory card.
- In Time Lapse Mode press the MENU button.
- Select the gear icon on the bottom of the left side of the screen using the UP or DOWN buttons.
- Press the RIGHT button to enter the setup menu.
- Select 'Format Memory Card' using the UP or DOWN buttons and press the MODE/OK button to enter the 'Format Memory Card' menu.
- Press the LEFT or RIGHT buttons to navigate the menu, and press the MODE/OK button to confirm your selected option (Format, Cancel).
- Press the MENU button to exit the settings menu without making a selection.
NOTE: This will delete all of your media and cannot be undone.
Device Info
This setting displays the current firmware version of your camera.
- In Time Lapse Mode press the MENU button.
- Select the gear icon on the bottom of the left side of the screen using the UP or DOWN buttons.
- Press the RIGHT button to enter the setup menu.
- Select 'Device Info' using the UP or DOWN buttons and press the MODE/OK button to enter the 'Device Info' menu.
- Press the OK button to exit the Device Info menu.
Restore Default Settings
Factory default settings can be restored in this menu. This function will not delete the media stored on the memory card, and will only restore all of the menu's setting back to factory default settings.
- In Time Lapse Mode press the MENU button.
- Select the gear icon on the bottom of the left side of the screen using the UP or DOWN buttons.
- Press the RIGHT button to enter the setup menu.
- Select 'Restore Default Settings' using the UP or DOWN buttons and press the MODE/OK button to enter the 'Restore Default Settings' menu.
- Press the LEFT or RIGHT buttons to navigate the menu, and press the MODE/OK button to confirm your selected option (Confirm, Cancel).
- Press the MENU button to exit the settings menu without making a selection.
Playback Mode
Videos and photos captured on your camera can be easily played back.
- Press the PLAYBACK button to enter Playback mode, previously recorded videos and captured images will show on the screen.
- Press the LEFT or RIGHT buttons to cycle through the captured videos and photos stored on the memory card. Press the MODE/OK button to view the selected file.
- When viewing a photo press and hold the ZOOM IN button to zoom in on the picture on the screen, press and hold the ZOOM OUT button to view the entire image. While zoomed in, use the UP, DOWN, LEFT or RIGHT buttons to move the image on the screen.
- While viewing a recorded video, press the MODE/OK button to start the video, press the MODE/OK button again to pause the video.
- Press the DELETE button to delete the current image.
Technical Specifications
| Model Number | Minolta MND50 | ||
| Lens | Fixed Focus • f=5.04mm • F/2.4 • 52mm Front Threading | ||
| Zoom | 16X Digital Zoom | ||
| Image Sensor | Sony IMX 386 12.0MP 1/2.9" CMOS Sensor | ||
| Shutter | Electronic | ||
| Pixels (photo) | JPEG: 48 MP • 40 MP • 30 MP • 24 MP • 18 MP • 12 MP | ||
| Pixels (video) | MP4: 4K 60fps • 4K 30fps • 2.7K 30fps • 1080p 120fps • 1080p 60fps • 1080p 30fps • 720p 60fps • 720p 30fps | ||
| ISO Sensitivity | Auto • 100 • 200 • 400 • 800 • 1600 • 3200 • 6400 | ||
| LCD Screen | 3.0" IPS 640x360 LCD Screen | ||
| Assistive Light | White LED Flash Strobe | ||
| Power Saving Mode | OFF • 3 Minutes • 5 Minutes • 10 Minutes | ||
| White Balance Control | Auto • Sunny • Cloudy • Incandescent • Florescent | ||
| Scene Modes | Auto • Macro • Night • Portrait • Landscape • Sports • Beach | ||
| Recording Media | SD • SDXC; Maximum: 128GB | ||
| I/O Ports | USB-C • External Microphone Port (3.5mm) • Microphone (built-in MIC) • Speaker | ||
| Power | NP40 Lithium-Ion 3.7V, 1500mAh, 5.55Wh | ||
| Dimensions | 4.54 x 2.2 x 2.96 in • 8.4 oz. | ||
Safety and Handling Precautions
Camera Information
- Do not disassemble or attempt to service the camera yourself.
- Do not expose the camera to moisture, or extreme temperatures.
- Allow the camera to warm up when moving from cold to warm temperatures.
- Do not touch and put pressure on the camera lens.
- Do not expose the lens to direct sunlight for extended periods.
- Do not use abrasive chemicals, cleaning solvents or strong detergents to clean the product. Wipe the product with a slightly damp soft cloth.
- Do not use the flash or LED Light near a person's eyes to prevent possible eye injury.
- To prevent you from falling over or resulting in traffic accident, please do not use the camera while you are walking, driving or riding a vehicle.
- Please handle the camera strap with care, and never place the strap around the neck of an infant or child. Wrapping the strap around a neck may cause suffocation.
- Do not subject the LCD screen to impact.
- To prevent the risk of fire or electric shock, do not expose the inside of this product to rain or moisture.
Battery Information
- Turn off the camera before installing or removing the battery.
- Use only the provided batteries or type of battery and charger that came with your camera. Using other types of battery or charger may damage the device and invalidate the warranty.
- Inserting the battery upside down can cause damage to the product and possibly cause an explosion.
- When the camera is used for an extended period of time, it is normal for the camera body to feel warm.
- Download all pictures and remove the battery from the camera if you are going to store the camera for a long period of time.
- Risk of explosion if battery is replaced by an incorrect type. Dispose of used batteries according to the instructions.
- Please keep the batteries out of the reach of children to prevent from swallowing the batteries, which might cause poisoning.
- If the battery's color or shape changes in any way, stop using the battery immediately.
USB Adaptor Information
- Do not expose the adapter to high temperatures or moisture places. Otherwise, it may cause fire or electric shock.
- Do not attempt to repair, disassemble, change or transform the adapter.
- Avoid sudden changes in temperature, which may cause condensation on the adapter's internal surfaces. Please do not use it immediately in this situation.
- Do not touch the plug with wet hands. Otherwise, it may cause electric shock.
- Do not use the travel voltage converter or AC/DC power inverter. Otherwise, it may cause damage, overheating, malfunction or fire to the camera.
Notes about Opening and Closing the Battery Door
- Make sure the camera and your hands are not wet.
- Make sure that there are no debris inside the battery-chamber or memory card slot.
- Make sure that the battery cover is firmly closed and the security lock is in the lock position.
Precautions When Cleaning
- Do not puncture the microphone or speaker openings with a sharp implement.
- If the inside of the camera is damaged, the waterproof performance will deteriorate.
- Do not use soap, natural detergents, or chemicals such as benzene for cleaning.
Do Not Apply Strong Impact to the Camera
The product may malfunction if subjected to strong shock or vibration. In addition, do not touch or apply force to the lens.
Avoid Sudden Changes in Temperature
Sudden changes in temperature, such as when entering or leaving a heated building on a cold day, can cause condensation to form inside the device. To prevent condensation, place the device in a carrying case or a plastic bag before exposing it to sudden changes in temperature.
Keep Away from Strong Magnetic Fields
Do not use or store this device in the vicinity of equipment that generates strong electromagnetic radiation or magnetic fields. Doing so could result in loss of data or camera malfunction.
Do Not Point the Lens at Strong Light Sources for Extended Periods
Avoid pointing the lens at the sun or other strong light source light sources for extended periods when using or storing the camera. Intense light may cause the image sensor to deteriorate or produce a white blur effect in photographs.
Turn the Product Off before Removing or Disconnecting the Power Source or Memory Card
Do not remove the battery while the product is on, or while images are being saved or deleted. Forcibly cutting power in these circumstances could result in loss of data or cause damage to the memory card or internal circuitry.
Notes about the LCD Screen
- The LCD Screen is constructed with extremely high precision; At least 99.99% Hence, while these displays may contain pixels that are always lit (white, red, blue or green) or always off (black), this is not a malfunction and has no effect on images recorded with the device.
- Images viewed on the LCD screen may be difficult to see under certain lighting.
- Do not apply pressure to the LCD screen, as this could cause damage or malfunction.
The Battery
Precautions for Use
- Note that the battery may become hot after use.
- Do not use the battery at ambient temperatures below 0°C (32°F) or above 40°C (104°F) as this could cause damage or malfunction.
- If you notice any abnormalities such as excessive heat, smoke, or an unusual smell coming from the battery, immediately discontinue use and consult your retailer.
- After removing the battery from the camera or optional battery charger, put the battery in a plastic bag, etc. in order to insulate it.
Charging the Battery
Check the battery level before using the camera and replace or charge the battery if necessary.
- Charge the battery indoors with an ambient temperature of 5°C (41°F) to 35°C (95°F) before use.
- A high battery temperature may prevent the battery from charging properly or completely, and may reduce battery performance. Note that the battery may become hot after use; wait for the battery to cool before charging. When charging the battery inserted into this camera using the Charging AC Adapter or a computer, the battery is not charged at battery temperature below 5°C (41°F) or above 55°C (131°F).
- When the battery is between 45°C (113°F) - 55°C (131°F), the chargeable capacity may decrease.
- Do not continue charging once the battery is fully charged as this will result in reduce battery performance.
- The battery temperature may increase during charging. However, this is not a malfunction.
Using the Battery When Cold
On cold days, the capacity of batteries tends to decrease. If an exhausted battery is used at a low temperature, the camera may not turn on. Keep spare batteries in a warm place and exchange as necessary. Once warmed, a cold battery may recover some of its charge.
Cleaning After Using the Camera
Use a blower to remove any dust or lint that adheres to the lens, monitor or camera body. To remove fingerprints or other stains that cannot be removed with a blower, gently wipe the parts with a soft dry cloth. If you wipe with too much pressure or with a rough cloth, it may damage the camera or cause a malfunction.
Storage
If you do not intend to use the camera for an extended period, remove the battery and avoid storing the camera in any of the following types of locations:
- Places that are poorly ventilated or subject to humidity of over 60%
- Place exposed to temperatures above 50°C (122°F) or below -10°C (14°F).
- Place next to equipment that produces strong electromagnetic field, such as television or radios.
To prevent mold or mildew, take the camera out of storage at least once a month, and turn it on and release the shutter a few times before putting it away again.
40 Wall Street, 61st Floor, New York, NY 10005 USA • Tel: 800-441-1100
www.minoltadigital.com • www.elitebrands.com
If you're having difficulties with your camera, or would like further assistance, please call our toll-free technical support hotline at 800-441-1100. Please be sure to have your camera handy when calling.

Documents / Resources
References
Download manual
Here you can download full pdf version of manual, it may contain additional safety instructions, warranty information, FCC rules, etc.
Advertisement


Need help?
Do you have a question about the MND50 and is the answer not in the manual?
Questions and answers