
Related Manuals for urmet domus VOG7 1760/31A


Summary of Contents for urmet domus VOG7 1760/31A
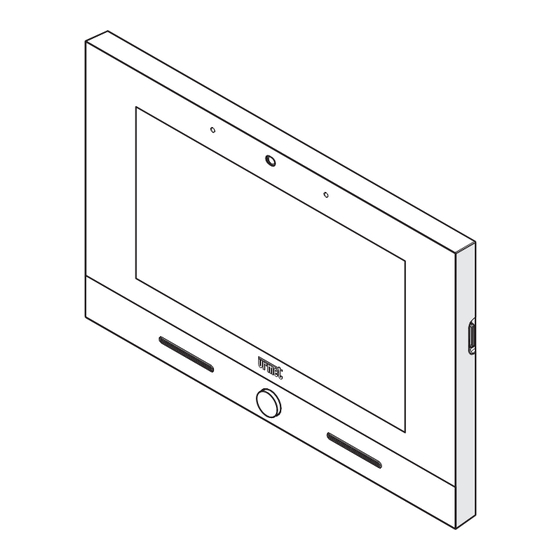
- Page 1 Mod. 1760 DS 1760-031 LBT 21180 OOOOOOOOO Interactive Links 7’’ VIDEO DOOR PHONE Ref. 1760/31 - 1760/31A (White) Ref. 1760/33 - 1760/33A (Black) USER BOOKLET...
- Page 2 The information contained in this booklet has been carefully collected and checked; however, the manufacturer may not be held responsible for any errors or omissions. The manufacturer reserves the right to introduce at any time and without notice improvements or changes in the products and services described in the booklet.
-
Page 3: Table Of Contents
Interactive Links The document contains INTERACTIVE LINKS for faster and more efficient consultation. INDEX 1. DEVICE GENERAL DESCRIPTION .......................5 In a nutshell ..........................5 How to turn on the screen and access the various functions .............5 How to navigate between applications ..................6 How to interpret the reports ......................8... - Page 4 3. USE OF THE DEVICE AS TERMINAL FOR: HOME AUTOMATION, ACCESS CONTROL, INTRUSION ALARM CONTROL UNIT AND MULTIMEDIA ..............25 App Firefox ..........................25 Yokis Home Automation ......................26 3.3 MIFARE (Access control Application) ..................27 3.3.1 How to change the access code for the administrator ............29 3.3.2 How to create, delete, or replace a key for the administrator ..........30 3.3.3 How to manage users...
-
Page 5: Device General Description
DEVICE GENERAL DESCRIPTION The following booklet describes how to use the video door phone. IN A NUTSHELL The Video door phone 1760/31 or /33 is a touchscreen device of the 2Voice system that can operate as: • Advanced Video Door Phone; •... -
Page 6: How To Navigate Between Applications
The video door phone functions are the following: Recording short audio messages (Post.it) Calling the switchboard (if there is a switchboard in the 2Voice system) Lift control(if a Ref. 1083/80 and the function is appropriately configured). Activation of an auxiliary function, e.g. switching on staircase lights (if there is a Ref. 1083/80 and the function is appropriately configured). Opening a driveway or garage gate. Opening the door WARNING! The functions’ availability depends on how the video door phone system has been designed and built. Some of the functions described below may not be available in your system. You may want to check with your installer if a specific function is available or can be implemented. - Page 7 To return to the Home Page from any screen page, tap the icon in the middle of the bottom bar. The default Homepage is the Video Door Phone application, but it can be replaced with one of the other applications using the Top Page Configuration menu The other navigation icons in the top bar can be used to: Return to the previous page.
-
Page 8: How To Interpret The Reports
HOW TO INTERPRET THE REPORTS The bar at the top right of the screen shows status information: Automatic door opening (if this feature is enabled). At home / Recording / Remote (only one active at a time). Active WiFi connection Time. A new notification is signalled by the blue LED flashing on the Home button of the Video Door Phone from the relative icon in the upper left corner and the corresponding item in the scrolling menu. The possible notifications are: Micro SD Card in. -
Page 9: Technology Alarm And Intrusion Alarm
ATTENTION! In any case, even in the absence of confirmation, the alarm message will be sent at the end of the timeout (5 seconds), unless you cancel the sending by pressing the CANCEL button. The panic alarm can also be activated via an external device, such as a button, connected to the terminal block behind the Video door phone. -
Page 10: Using The Device As Video Door Phone Terminal
USING THE DEVICE AS VIDEO DOOR PHONE TERMINAL The Video Door Phone application is the main application of the 1760/31 or /33 Video door phone and it is also the default Home Page. The application turns the device into an advanced video door phone terminal. -
Page 11: Adjustment On Osd Menu (On Screen Display)
Turn the Video door phone microphone off and then back on, to prevent the caller hearing what you are saying. When the microphone is turned off, the corresponding icon is crossed out. The icon is only displayed after the call has been answered. Activate an auxiliary function, e.g. turning on the stair lights. Tapping the icon opens a pop-up window that lists the possible controls. The icon only appears if there is a device in the 2Voice system Ref. 1083/80 and the function is appropriately configured. Close the call. The icon will only be active after the call has been answered. Change the audio volume in the outdoor station-to-Video door phone direction (Video door phone speaker). -
Page 12: How To Answer A Call From The Switchboard
HOW TO ANSWER A CALL FROM THE SWITCHBOARD When the Video door phone receives a call from the switchboard, it rings and the screen lights up from its default switched-off state. To answer the call and begin a hands-free conversation tap the icon After answering, by tapping the various icons you can then: Turn the Video door phone microphone off and then back on, to stop the switchboard opera- tor hearing what you are saying. When the microphone is turned off, the corresponding icon is crossed out. -
Page 13: Speech Activation By Pressing The Button (Push To Talk Mode)
Close the call. Change the RX audio volume. SPEECH ACTIVATION BY PRESSING THE BUTTON (PUSH TO TALK MODE) If communication between the handset and the video door phone is disturbed or absent, make sure you remove the transparent film covering the display of the video door phone. If the film has been removed and there is still noise on the audio, it is possible to activate the two speech channels (in and out) individually. After receiving a call, briefly press the button to activate door phone speech, then if the button... -
Page 14: How To Use Audio Messages (Voice "Post-Its")
HOW TO USE AUDIO MESSAGES (VOICE “POST-ITS”) The Video door phone allows you to record short audio messages that can be subsequently listened to by their recipients after they have returned home or to the office. To record or listen to messages: • Access the main page of the Video Door Phone application and press the Audio Messages icon A pop-up window will open that can be used to record and listen to messages. -
Page 15: How To Call The Switchboard
To listen to a message, press the icon. Messages are listed by date and time. Select the desired message and press the PLAY icon to start playback. Message playing cannot be stopped before it ends. Tap the icon delete the message. When there are no more new messages to listen to, the Home key LED turns off and the icon of Audio Messages function returns to the default state HOW TO CALL THE SWITCHBOARD... -
Page 16: How To Open The Entrance Door Without Having Been Called
• Tapping the icon opens a pop-up window that lists the possible functions. Tap your required function to activate it. • To close the pop-up window tap the X icon at the top right. The same special functions can also be activated by tapping the corresponding icon present in the “How to answer screen page that is displayed when you answer an incoming external call (see section an external call”). 2.10 HOW TO OPEN THE ENTRANCE DOOR WITHOUT HAVING BEEN CALLED If properly configured, your entrance door can be opened even when you have not been called from an outdoor station. -
Page 17: How To Turn Off The Video Door Phone Voicemail
The Video Door Phone Voicemail can be set up according to the 3 different operation modes: • in the calling phase recording is immediately activated on the Video door phone; • in the calling phase a customised audio message is played at the outdoor calling station; • in the calling phase a customised audio message is played at the outdoor calling station and a beep is heard after which to leave a message. -
Page 18: How To Delete One Or More Voicemail Recordings
A list of voicemail calls opens; each call is identified by the name of the outdoor calling station and by the call date and time. Select the call that you wish to view details. A pop-up window opens. Tap the button to listen to the recorded message, the button to close the window. 2.16.1 How to delete one or more voicemail recordings How to delete one or more recorded messages: • Open the list of voicemail calls (see previous section) • Tap the button •... -
Page 19: Door Open Indication
• A pop-up window opens showing the remaining time of MUTE function • To stop the MUTE function and reactivate the ringer, press the YES button. 2.18 DOOR OPEN INDICATION The video door phone has the icon in the upper bar of the display, which indicates whether the door has remained open on one or more entries. -
Page 20: How To Check The Call Log
• The following window will display and the contact is called. “How to answer an intercom call”. For a description of the icons shown in the window see the section • If the called contact answers the call, basic voice communication is activated. •... -
Page 21: How To Search For A Name In The Address Book
For each call the following information is shown: — An icon that shows whether the call was incoming , outgoing or if it was missed — The identifier or name of the caller or the called contact. — Date and time of the call. If the contact is another video door phone or a switchboard, the icon , is displayed to call it back “How to make an intercom... -
Page 22: How To Add New Contacts To Your Address Book
• The address book will open. Tap the Search Contacts field at the top right. • A virtual keypad is displayed on the screen, with which you can type in the name you are searching for. As more characters are typed in, only the names that meet that character sequence are listed. As soon as the searched name comes up, you can select it by tapping it. -
Page 23: Auto-On Function
2. Video door phone ID code Select the text box to insert the video door phone ID code. • For external contacts, permissible codes range from 0 to 126 • For internal contacts, permissible codes range from 0 to 3 Use the virtual keypad and insert the video door phone ID code. -
Page 24: How To View Snapshots
• Press the icon to interrupt the auto-on. Viewing also stops automatically after 10 minutes. 2.24 HOW TO VIEW SNAPSHOTS To view the snapshots captured by the video door phone, follow the procedure below: • Access the main page of the Video Door Phone application • Press the icon. • Press the SNAPSHOTS icon. •... -
Page 25: Use Of The Device As Terminal For: Home Automation, Access Control, Intrusion Alarm Control Unit And Multimedia
USE OF THE DEVICE AS TERMINAL FOR: HOME AUTOMATION, ACCESS CONTROL, INTRUSION ALARM CONTROL UNIT AND MULTIMEDIA 3.1 APP FIREFOX Switch on the screen, if switched off, by touching it anywhere or pressing the Home button. The Homepage is displayed, which corresponds to the main Video Door Phone page , if the default configuration has been maintained. Press the icon to go directly to the Top Page. Press the icon . -
Page 26: Yokis Home Automation
The application allows you to use the Firefox web browser to navigate the Internet. WARNING! In order to be able to navigate the Internet via the Firefox app, WiFi must have been activated on the video door phone and a network must have been selected to connect to (see section Activating WiFi on the video door phone in the Parameter configuration booklet). -
Page 27: Mifare (Access Control Application)
From the Top Page press the button to reach Yokis Home Automation: From here, select your required control or controls, or access the scheduling page. To schedule a control for one or more weekly occurrences press In the new screen the button NEW can be used to create a new scheduling. - Page 28 Video Door Phone Home Page (default option) Press the icon to directly access the Top Page. Top Page Press the icon . The MIFARE home page will open. MIFARE home page DS1760-031...
-
Page 29: How To Change The Access Code For The Administrator
3.3.1 How to change the access code for the administrator To change the administrator access code, follow the procedure below: • Press the icon • The virtual keypad is displayed on the screen. • Enter the default access code “123456” for your first-time authentication. The page containing the main menu is displayed: •... -
Page 30: How To Create, Delete, Or Replace A Key For The Administrator
• Enter the code “123456” in the PREVIOUS PASSWORD field. • Enter a new code in the NEW PASSWORD field and repeat it in the field below. The code can have a minimum of 4 up to 8 characters. • Press the SAVE button to save the new code, the CLOSE button allows closing the page without saving. -
Page 31: How To Manage Users
• Pass the key on the left side of the video door phone and then press CONFIRM to finish the acquisition operation. After a key has been added, there will be two new items in the menu: DELETE ADMINISTRATOR KEY and REPLACE ADMINISTRATOR KEY. 3.3.2.1 How to delete the administrator key To delete an administrator key, press DELETE ADMINISTRATOR KEY menu item. In the pop-up window that opens, confirm the deleting command. - Page 32 • Enter the administrator access code or pass the administrator key. The main menu page is displayed. • Press USERS MANAGEMENTS. The window listing the stored users is displayed (initially blank). • Press the ADD USER button. A new window opens: Fill in the required fields NAME and DESCRIPTION. The other fields are optional. It is also possible to associate an image to the user that is being entered, press the icon to display a window pop-up DS1760-031...
- Page 33 through which you can use an image captured by the camera or use one contained in the internal memory. • Press the SAVE button to save the entered data, or CLOSE to abort the procedure without entering any data. • Pressing the SAVE key opens a pop-up window which invites you to pass the key to be acquired to the video door phone.
- Page 34 3.3.3.2 How to delete a user or a key or change a user data To delete a user or a key or change a user data:, proceed as follows: • Press the icon • The virtual keypad is displayed on the screen. •...
-
Page 35: How To Record Accesses And Exits
• In the line containing the name of the user: – Press the icon to replace the user key. The procedure is similar to the one used to replace the administrator key. – Press the icon to change the stored data. The window used for creating the user is displayed. Edit the data and press the SAVE button to save. -
Page 36: How To View All Logs
You can see the log of the current month, previous month or any time interval by tapping the tabs CURRENT MONTH, LAST MONTH or SELECT RANGE - respectively (range means a group of several months). If you chose SELECT RANGE the following window appears: where it is possible to select the start month and the end month. After your selection, tap the button SELECT to view the log. -
Page 37: Gallery
The Salva log button can be used to save the log in the SD Card in the video door phone, if any. The CLEAR LOG button can be used to delete all the logs. GALLERY Switch on the screen if it is off, by tapping it any point or by pressing the Home button. Page is displayed, which corresponds to the main page of the video door phone system , if the default configuration has been maintained. -
Page 38: Yokis Yno App
The gallery can be used to play videos or view images. For example, you can view snapshots of external images captured during a call with the door unit or play back the images on the SD card. Press the button to return to the Home Page. - Page 39 Top Page Press the icon . The Yokis home automation main page opens. If automatic account connection is not enabled, you must enter your credentials to log in. After authentication, you can choose the system and have access to home automation controls. For more details, see the YnO app section at www.yokis.com.
-
Page 40: Urmet Secure App
URMET SECURE APP Switch on the screen if it is off, by tapping it any point or by pressing the Home button. Page is displayed, which corresponds to the main page of the video door phone system , if the default configuration has been maintained. Video Door Phone Home Page (default option) Press the icon to directly access the Top Page Top Page Press the icon . The main page of the Urmet Secure app opens. If the installer has not entered any data on the existing system, it is necessary to register the account first and then carry out the guided configuration through the Urmet Secure app. -
Page 41: Media Player
The app allows you to control your burglar alarm system through the video intercom. You can view the status of the system and arm or disarm it either completely or partially. For more details, visit www.urmet.com. MEDIA PLAYER Switch on the screen if it is off, by tapping it any point or by pressing the Home button. Page is displayed, which corresponds to the main page of the video door phone system , if the default configuration has been maintained. -
Page 42: Iuvs App
Top Page Press the icon . The video door phone media player opens. The media player allows you to play audio tracks on the video door phone or play recorded songs on the SD card. You can split the audio tracks into different categories or create your own playlist. Press the button to return to the Home Page. iUVS APP The iUVS app can be used to manage the video surveillance of your home directly from the video door phone. The app can be used to view the images from the cameras in the system in real-time, even with... - Page 43 Video Door Phone Home Page (default option) Press the icon to directly access the Top Page. Top Page Press the icon . The iUVS app opens. The page for using the video surveillance management controls appears after pressing the icon. DS1760-031...
-
Page 44: Callme App
For more details, click on the icon to consult the guide for using the app. 3.9 CALLME APP Allows the CallMe application to be used directly on the video door phone. The CallMe application allows the video door phone to be associated with the following call forwarding devices: - 1720/1 (Pico display) - 1083/58 and 1083/58A (2Voice) - 1722/58 and 1722/58A (Kit 1722/81_/83_/85_/86) - Page 45 • Press on WiFi to display a pop-up window in which you can activate the device’s WiFi. • Press ON to activate WiFi, then select the network to connect to. • Press All Networks to display the networks detected by the video door phone. DS1760-031...
-
Page 46: Configuration And Use Of Callme App
• Select the network you wish to connect to. • Enter the password and then press CONFIRM. • If the connection to the network has been made correctly, the following icon will appear in the top right-hand bar 3.9.2 Configuration and Use of CallMe App •... -
Page 47: Configuration Of Video Door Phone Parameters And Video Door Phone Application
To learn how to use and configure the CallMe App, please consult the CallMe section on Urmet website https://www.urmet.com/it-it/CallMe. 3.10 CONFIGURATION OF VIDEO DOOR PHONE PARAMETERS AND VIDEO DOOR PHONE APPLICATION For all information on how to configure the video door phone and Video Door Phone application parameters, “Parameter configuration booklet” by pressing the relevant link. download the DS1760-031... - Page 48 DS 1760-031 LBT 21180 URMET S.p.A. Area tecnica 10154 TORINO (ITALY) servizio clienti +39 011.23.39.810 VIA BOLOGNA 188/C http://www.urmet.com Telef. +39 011.24.00.000 (RIC. AUT.) e-mail: info@urmet.com +39 011.24.00.300 - 323...
Need help?
Do you have a question about the VOG7 1760/31A and is the answer not in the manual?
Questions and answers