Table of Contents
Advertisement
Available languages
Available languages
Quick Links
FH 103 0 IX/HA
Italiano
Istruzioni per l'uso
FORNO
Sommario
Istruzioni per l'uso,1
Descrizione dell'apparecchio,8
Descrizione dell'apparecchio,10
Installazione,12
Avvio e utilizzo,14
English
Operating Instructions
OVEN
Contents
Operating Instructions,1
Warnings,3
Assistance,6
Description of the appliance,8
Description of the appliance,10
Precautions and tips,28
Français
Mode d'emploi
FOUR
Sommaire
Mode d'emploi,1
Avertissements,3
Assistance,6
Description de l'appareil,8
Description de l'appareil,10
Mise en marche et utilisation,32
Español
Manual de instrucciones
HORNO
Sumario
Manual de instrucciones,1
Advertencias,4
Asistencia,6
Descripción del aparato,8
Descripción del aparato,10
Anomalías y soluciones,48
Portuges
Instruções para a utilização
FORNO
Índice
Instruções para a utilização,1
Advertências,4
Assistência,7
Descrição do aparelho,8
Descrição do aparelho,11
Precauções e conselhos,56
Advertisement
Table of Contents

Related Manuals for Hotpoint Ariston FH 103 0 IX/HA


Summary of Contents for Hotpoint Ariston FH 103 0 IX/HA
-
Page 1: Table Of Contents
FH 103 0 IX/HA Français Mode d’emploi FOUR Sommaire Mode d’emploi,1 Avertissements,3 Assistance,6 Description de l’appareil,8 Description de l’appareil,10 Installation,30 Mise en marche et utilisation,32 Programmes,33 Précautions et conseils,37 Nettoyage et entretien,37 Anomalies et remèdes,38 Italiano Español Istruzioni per l’uso... - Page 2 Deutsch Bedienungsanleitung BACKOFEN Inhaltsverzeichnis Bedienungsanleitung,2 Hinweise,5 Kundendienst,7 Beschreibung Ihres Gerätes,9 Beschreibung Ihres Gerätes,11 Installation,58 Inbetriebsetzung und Gebrauch,60 Programme,61 Vorsichtsmaßregeln und Hinweise,65 Reinigung und Pflege,65 Störungen und Abhilfe,67 Nederlands Gebruiksaanwijzing OVEN Inhoud Gebruiksaanwijzing,2 Belangrijk,5 Service,7 Beschrijving van het apparaat,9 Beschrijving van het apparaat,11 Het installeren,68 Starten en gebruik,70 Programma’s,71...
-
Page 3: Avvertenze,3
reduced physical, sensory or mental capabilities or lack of experience and knowledge if they have been given supervision or instruction concerning use of the Avvertenze appliance in a safe way and understand the hazards involved. Children shall not play with the appliance. ATTENZIONE: Questo apparecchio e le sue parti Cleaning and user maintenance shall not be made accessibili diventano molto caldi durante l’uso. - Page 4 ! Cuando introduzca la parrilla, controle que el tope en verre, sous peine d’érafler la surface et de briser le verre. esté dirigido hacia arriba y en la parte posterior de la cavidad. Ne jamais nettoyer l’appareil avec des nettoyeurs vapeur ou haute pression.
- Page 5 niet dichtbij het apparaat kunnen komen, tenzij onder constant toezicht. Het huidige apparaat mag alleen door kinderen van 8 jaar en ouder en door personen Hinweise met een beperkt lichamelijk, sensorieel of geestelijk vermogen, of zonder ervaring en kennis worden ZUR BEACHTUNG: Bei Gebrauch wird dieses gebruikt, mits ze onder adequaat toezicht zijn, of Gerät und alle zugänglichen Teile sehr heiß.
-
Page 6: Assistenza,6
Assistenza Assistance Attenzione: Warning: L’apparecchio è dotato di un sistema di diagnostica automatica che consente The appliance is fitted with an automatic diagnostic system which detects any di rilevare eventuali malfunzionamenti. Questi vengono comunicati dal display malfunctions. Malfunctions are signalled through messages of the following tramite messaggi del tipo: “F--”... - Page 7 Antes de llamar al Servicio de Asistencia Técnica: • verifique que la anomalía no pueda ser resuelta por Ud. mismo; • vuelva a poner en marcha el programa para controlar si el inconveniente ha sido resuelto; Kundendienst • si no es así, llame al Servicio de Asistencia Técnica Autorizado. Achtung: ! Nunca solicite la asistencia de técnicos no autorizados.
- Page 8 Descrizione dell’apparecchio Descripción del aparato Vista d’insieme Vista en conjunto 1 POSIzIONE 1 1 POSICIóN 1 2 POSIzIONE 2 2 POSICIóN 2 3 POSIzIONE 3 3 POSICIóN 3 4 POSIzIONE 4 4 POSICIóN 4 5 POSIzIONE 5 5 POSICIóN 5 6 GUIDE di scorrimento dei ripiani 6 GUÍAS de deslizamiento de las bandejas 7 Ripiano LECCARDA...
- Page 9 Beschreibung Ihres Gerätes Geräteansicht 1 EINSCHUBHöHE 1 2 EINSCHUBHöHE 2 3 EINSCHUBHöHE 3 4 EINSCHUBHöHE 4 5 EINSCHUBHöHE 5 6 GLEITFÜHRUNGEN für die Einschübe 7 Einschub FETTPFANNE 8 Einschub BACKOFENROST 9 Bedienfeld Beschrijving van het apparaat Algemeen aanzicht 1 POSITIE 1 2 POSITIE 2 3 POSITIE 3 4 POSITIE 4...
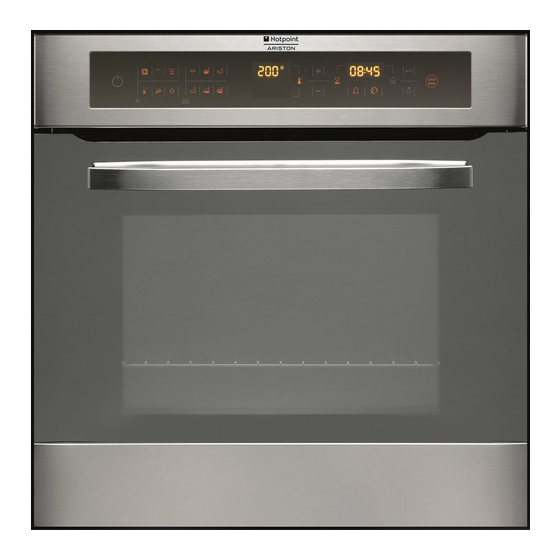
- Page 10 Descrizione dell’apparecchio Description de l’appareil Pannello di controllo Tableau de bord 1. Icone PROGRAMMI MANUALI 1. Icônes PROGRAMMES MANUELS 2. Display TEMPERATURA 2. Afficheur TEMPERATURE 3. Icona TEMPERATURA 3. Icône TEMPÉRATURE 4. Icona DURATA 4. Icône DURÉE 5. Display TEMPI 5.
- Page 11 Descrição do aparelho Beschrijving van het apparaat Painel de comandos Bedieningspaneel 1. Symbolen HANDMATIGE PROGRAMMA’S 1. Ícone PROGRAMAS MANUAIS 2. Display TEMPERATUUR 2. Display da TEMPERATURA 3. Symbool TEMPERATUUR 3. Ícone TEMPERATURA 4. Symbool DUUR 4. Ícone DURAçãO 5. Display TIJDEN 5.
- Page 12 Installazione ! È importante conservare questo libretto per poterlo consultare in ogni momento. In caso di vendita, di cessione o di trasloco, assicurarsi che resti insieme all’apparecchio per informare il nuovo proprietario sul funzionamento e sui relativi avvertimenti. ! Leggere attentamente le istruzioni: ci sono importanti informazioni sull’installazione, sull’uso e sulla sicurezza.
- Page 13 ! Ad apparecchio installato, il cavo elettrico e la presa della corrente devono essere facilmente raggiungibili. ! Il cavo non deve subire piegature o compressioni. ! Il cavo deve essere controllato periodicamente e sostituito solo da tecnici autorizzati (vedi Assistenza). ! L’azienda declina ogni responsabilità...
- Page 14 Avvio e utilizzo Per regolare il contaminuti: 1. Premere l’icona ATTENzIONE! Il forno è dotato di 2. Regolare il tempo desiderato con le icone “ ” e “ ”. un sistema di arresto griglie che 3. Raggiunta l’impostazione desiderata, premere nuovamente l’icona consente di estrarle senza che queste fuoriescano dal forno.
-
Page 15: Programmi,15
Luce del forno Programma BARBECUE La luce si accende aprendo la porta del forno o al momento dell’avvio di un programma di cottura. Si attiva l’elemento riscaldante superiore e il girarrosto (ove presente). La temperatura elevata e diretta del grill è consigliata per gli alimenti che L’icona permette di accendere e spegnere la luce in qualsiasi momento. - Page 16 Programmi di cottura automatici • Avviare la cottura PANE ! La temperatura e la durata di cottura sono prestabilite tramite il sistema • Alla fine della cottura, lasciare riposare i pani su una griglia fino a completo C.O.P.® (Cottura Ottimale Programmata) che garantisce automaticamente raffreddamento.
- Page 17 Consigli pratici di cottura ! Nelle cotture ventilate non utilizzare le posizioni 1 e 5: sono investite direttamente dall’aria calda che potrebbe provocare bruciature sui cibi delicati. ! Nelle cotture BARBECUE e GRATIN, in particolare se praticate col girarrosto, disporre la leccarda in posizione 1 per raccogliere i residui di cottura (sughi e/o grassi).
- Page 18 Tabella cottura Programmi Alimenti Peso Posizione Preriscaldamento Temperatura Durata (Kg) dei ripiani consigliata cottura (°C) (minuti) guide guide Manuali standard scorrevoli Multilivello* 210-220 Pizza su 2 ripiani 2 e 4 1 e 3 20-25 Crostate su 2 ripiani/torte su 2 ripiani 2 e 4 1 e 3 30-35...
-
Page 19: Precauzioni E Consigli,19
Precauzioni e consigli Risparmiare e rispettare l’ambiente • Ove possibile, evitare di pre-riscaldare il forno e cercare sempre di riempirlo. Aprire la porta del forno quanto necessario, perché vi sono ! L’apparecchio è stato progettato e costruito in conformità alle norme dispersioni di calore ogni volta che viene aperta. -
Page 20: Anomalie E Rimedi,20
3 Afferrare la porta ai due lati esterni, richiudendola lentamente ma non del tutto. Tirare la porta verso di sé estraendola dalle cerniere (vedi figura). Rimontare la porta seguendo il procedimento in senso contrario. Controllare le guarnizioni Controllare periodicamente lo stato della guarnizione attorno alla porta del forno. -
Page 21: Installation,21
Installation ! Please keep this instruction booklet in a safe place for future reference. If the appliance is sold, given away or moved, please make sure the booklet is also passed on to the new owners so that they may benefit from the advice contained within it. - Page 22 ! Once the appliance has been installed, the power supply cable and the electrical socket must be easily accessible. ! The cable must not be bent or compressed. ! The cable must be checked regularly and replaced by authorised technicians only (see Assistance).
-
Page 23: Start-Up And Use,23
Start-up and use When the set time has elapsed, the timer emits a buzzer that will automatically stop after 30 seconds or when any active button on the control panel is pressed. WARNING! The oven is provided To adjust the timer proceed as follows: with a stop system to extract the racks and prevent them from coming 1. -
Page 24: Modes,24
! Once cooking has been completed, the cooling fan continues to operate throughout the oven, the air cooks and browns food in a uniform manner. A until the oven has cooled down sufficiently. maximum of two racks may be used at the same time. Oven light BARBECUE mode The light comes on when the oven door is opened or when a cooking mode... - Page 25 Automatic cooking modes • Dust the loaves with flour. • Make incisions on the loaves. ! The temperature and cooking duration are pre-set values, guaranteeing • Place the food inside the oven while it is still cold. a perfect result every time - automatically. These values are set using the C.O.P.®...
- Page 26 Practical cooking advice ! Do not place racks in position 1 and 5 during fan-assisted cooking. This is because excessive direct heat can burn temperature sensitive foods. ! In the GRILL and FAN GRILLING cooking modes, particularly when using the rotisserie spit, place the dripping pan in position 1 to collect cooking residues (fat and/or grease).
- Page 27 Cooking advice table Rack position Recommended Cooking Modes Foods Weight Preheating Temperature duration (in kg) (°C) (minutes) Standard Sliding guide guide Manual rails rails Multilevel* 2 and 4 1 and 3 210-220 20-25 2 and 4 1 and 3 30-35 2 and 4 1 and 3 160-170...
-
Page 28: Maintenance And Care,28
Precautions and tips The crossed out “wheeled bin” symbol on the product reminds you of your obligation, that when you dispose of the appliance it must be separately collected. ! This appliance has been designed and manufactured in compliance with Consumers should contact their local authority or retailer for information international safety standards. -
Page 29: Troubleshooting,29
and cause the glass to crack. For more thorough cleaning purposes, the oven door may be removed: 1. Open the oven door fully (see diagram); 2. Lift up and turn the small levers located on the two hinges (see diagram); Grip the door on the two external sides and close it approximately half way.Pull the door towards you lifting it out of its seat (see... -
Page 30: Installation,30
Installation Centrage et fixation Pour fixer l’appareil au meuble : ouvrir la porte du four et visser 4 vis à bois dans les 4 trous du cadre. ! Conservez ce mode d’emploi pour pouvoir le consulter à tout moment. En cas de vente, de cession ou de déménagement, veillez à ce qu’il suive l’appareil pour informer le nouveau propriétaire sur son fonctionnement et lui fournir les conseils correspondants. - Page 31 ! Après installation de l’appareil, le câble électrique et la prise de courant doivent être facilement accessibles ! Le câble ne doit être ni plié ni excessivement écrasé. ! Il doit être contrôlé périodiquement et ne peut être remplacé que par un technicien agréé...
- Page 32 Mise en marche et utilisation Pour régler la minuterie : 1. Appuyer sur ll’icône ATTENTION! Le four est équipé 2. Sélectionner le temps désiré à l’aide des icônes “ ” et “ ”. d’un système d’arrêts de grilles qui 3. Une fois la sélection voulue atteinte, appuyer à nouveau sur l’icône permet de les retirer sans que ces dernières sortent entièrement du L’icône...
-
Page 33: Programmes,33
Eclairage du four niveaux en même temps. L’éclairage s’allume à l’ouverture de la porte du four ou au démarrage d’un programme de cuisson. Programme BARBECUE L’icône permet d’allumer ou éteindre l’éclairage à tout moment. Mise en marche de la résistance de voûte et du tournebroche (si l’appareil en est équipé). - Page 34 • Former une boule, la placer dans un saladier et couvrir d’un film plastique ! Quand le programme est lancé, le tournebroche s’arrête dès ouverture pour éviter que la surface de la pâte ne sèche. Glisser le saladier dans le de la porte du four.
- Page 35 Les icônes se mettent à clignoter alternativement pour signaler qu’une programmation ; pendant la période d’attente du départ de cuisson, l’afficheur TEMPS affiche tour à tour la durée et l’heure de fin de cuisson. 5. Un signal sonore indique que la cuisson est terminée et l’afficheur TEMPÉRATURE affiche END.
- Page 36 Tableau de cuisson Programmes Aliments Poids Niveau enfournement Préchauffage Température Durée (Kg) préconisée cuisson (°C) (minutes) glissières glissières Manuels standard coulissantes Multiniveaux* Pizza sur 2 niveaux 2 et 4 1 et 3 20-25 210-220 30-35 Tartes sur 2 niveaux/gâteaux sur 2 niveaux 2 et 4 1 et 3 2 et 4...
-
Page 37: Précautions Et Conseils,37
Précautions et conseils et réduire l’impact sur la santé humaine et l’environnement. Le symbole de la ‘‘poubelle barrée’’ est apposée sur tous les produits pour rappeler les obligations de collecte séparée. ! Cet appareil a été conçu et fabriqué conformément aux normes Les consommateurs pourront confier leur appareil usagé... -
Page 38: Anomalies Et Remèdes,38
Nettoyage de la porte Remplacement de l’ampoule d’éclairage Nettoyer la vitre de la porte avec des produits non abrasifs et des éponges non grattantes, essuyer ensuite avec un chiffon doux. Ne pas utiliser de Pour changer l’ampoule d’éclairage matériaux abrasifs ou de racloirs métalliques aiguisés qui risquent de rayer du four: la surface et de briser le verre. -
Page 39: Instalación,39
Instalación ! Es importante conservar este manual para poder consultarlo en todo momento. En caso de venta, de cesión o de mudanza, verifique que permanezca junto al aparato para informar al nuevo propietario sobre su funcionamiento y sobre las advertencias correspondientes. ! Lea atentamente las instrucciones: contienen importante información sobre la instalación, el uso y la seguridad. - Page 40 ! Una vez instalado el aparato, el cable eléctrico y la toma de corriente deben ser fácilmente accesibles. ! El cable no debe sufrir pliegues ni compresiones. ! El cable debe ser revisado periódicamente y sustituido sólo por técnicos autorizados (ver Asistencia). ! La empresa declina toda responsabilidad cuando estas normas no sean respetadas.
-
Page 41: Puesta En Funcionamiento Y Uso,41
Puesta en funcionamiento y uso Programar el cuentaminutos ! Puede programar el cuentaminutos con el horno apagado o encendido. No controla ni el encendido ni el apagado del horno. ATENCIóN! El horno está dotado de un sistema de bloqueo de las Cuando se ha cumplido el tiempo, el contador de minutos emite una señal parrillas que permite quitarlas sin sonora que se detiene después de 30 segundos o pulsando cualquier botón... -
Page 42: Programas,42
Programas ! Coloque siempre los recipientes de cocción sobre la parrilla suministrada con el aparato. ! Cada vez que se enciende el horno se propone el primer programa de Ventilación de enfriamiento cocción manual. Para lograr una disminución de la temperatura externa, un ventilador de enfriamiento genera un chorro de aire que sale entre el panel de control y la Programas de cocción manuales puerta del horno y también de la parte inferior de la puerta. - Page 43 Programa ECO El elemento calefactor de atrás está encendido y el ventilador comienza a Programa PAN funcionar, lo que garantiza un nivel de calor suave y uniforme dentro del Utilice esta función para cocinar pan. Para obtener los mejores resultados, horno.
- Page 44 Programar la duración PIZZA • Utilice una bandeja para pizza de aluminio liviano apoyándola sobre la 1. Presionar el icono ; el icono y las cifras en el display TIEMPOS parrilla suministrada con el horno. Utilizando la grasera aumenta el tiempo centellean.
- Page 45 Tabla de cocción Programas Alimentos Peso Posiciones Precalentamiento Temperatura Duración (Kg) aconsejada de la (°C) cocción (minutos) guías guías Manuales estándar deslizantes Multinivel* Pizza en 2 niveles 2 y 4 1 y 3 210-220 20-25 2 y 4 1 y 3 30-35 Tortas glaseadas en 2 niveles/tortas en 2 niveles 2 y 4...
-
Page 46: Precauciones Y Consejos,46
Precauciones y consejos recogidos selectivamente para optimizar la recuperación y reciclado de los componentes y materiales que los constituyen, y reducir el impacto en la salud humana y el medioambiente. El símbolo del cubo de basura ! El aparato ha sido proyectado y fabricado en conformidad con las normas tachado se marca sobre todos los productos para recordar al consumidor internacionales de seguridad. - Page 47 Limpiar la puerta Limpie el vidrio de la puerta con esponjas y productos no abrasivos y séquelo con un paño suave; no utilice materiales ásperos abrasivos o raederas metálicas afiladas que puedan rayar la superficie y quebrar el vidrio. Para lograr una limpieza más profunda es posible desmontar la puerta del horno: 1.
- Page 48 Anomalías y soluciones Problema Causa posible Solución El “Botón Reloj” y las cifras en la El aparato ha sido recién conectado a la red Programar el reloj. pantalla centellean. eléctrica o se ha producido una interrupción corriente. La programación de una cocción no se Se ha producido una interrupción de corriente.
-
Page 49: Instalação,49
Instalação Colocar no centro e prender Para prender o aparelho no móvel: abra a porta do forno e atarraxe 4 parafusos na madeira, nos 4 furos situados na moldura ao redor. ! É importante guardar este folheto para poder consultá-lo a qualquer momento. - Page 50 • a tomada tenha a capacidade de suportar a carga máxima de potência PLACA DAS CARACTERÍSTICAS da máquina, indicada na placa de identificação; largura 43,5 cm • a tensão de alimentação seja entre os valores da placa de identificação; altura 32,4 cm Medidas* •...
-
Page 51: Início E Utilização,51
Início e utilização Programe o contador de minutos ! É possível programar o contador de minutos tanto com o forno apagado quanto aceso. O contador de minutos não comanda o forno para acender- ATENçãO! O forno está equipado se ou apagar-se. com um sistema de bloqueio das grelhas que permite retirá-las Quando terminar o prazo, o contador de minutos tocará... -
Page 52: Programas,52
Programas ! Nunca encoste objectos no fundo do forno, para evitar riscos de danos ao esmalte. ! A cada acendimento o forno irá propor o primeiro programa de cozedura ! Coloque sempre os recipientes de cozedura sobre a grelha fornecida. manual. - Page 53 de 200ºC; o programa é igualmente adequado para aquecer os alimentos • a levedação da massa deve ser feira com a temperatura ambiente por e para completar o processo de cozedura. O programa é particularmente 1 hora ou 1 hora e meia, em função da temperatura da cozinha, e em adequado para cozedura lenta de carne e peixe, uma vez que permite prática, até...
- Page 54 Programar uma cozedura posterior ! A programação do fim da cozedura é possível somente depois de ter definido uma duração para a cozedura. ! Para utilizar da melhor forma a programação posterior, é necessário que o relógio esteja regulado correctamente. 1.
- Page 55 Tabela de cozedura Programas Alimentos Peso Posição das Pré-aquecimento Temperatura Duração (Kg) prateleiras aconselhada (°C) cozedura (minutos) guias guias Manuais padrão corrediças Multinível* Pizza em 2 prateleiras 2 e 4 1 e 3 210-220 20-25 Tortas doces em duas prateleiras/bolos em duas prat. 2 e 4 1 e 3 30-35...
-
Page 56: Manutenção E Cuidados,56
Precauções e conselhos compõem e impedir potenciais danos à saúde e ao meio ambiente. O símbolo da lixeira cancelada está indicado em todos os produtos para lembrar o dever de colecta selectiva. ! Este aparelho foi projectado e fabricado em conformidade com as normas Para maiores informações sobre a correcta eliminação dos internacionais de segurança. -
Page 57: Anomalias E Soluções,57
Para uma limpeza mais cuidadosa é possível desmontar a porta do forno: 1. Abra a porta inteiramente (veja a figura); 2. Levante e rode as alavancas situadas nas duas dobradiças (veja a figura); 3. Segure a porta dos dois lados exteriores e feche-a novamente devagar mas não inteiramente;... -
Page 58: Installation,58
Installation zentrieren und Befestigen Befestigung des Gerätes am Möbel: Öffnen Sie die Backofentür und schrauben Sie die 4 Holzschrauben in die 4 im Backofenrahmen vorgesehenen Löcher ! Bewahren Sie diese Bedienungsanleitung bitte sorgfältig auf, damit Sie sie ein. jederzeit zu Rate ziehen können. Sorgen Sie dafür, dass sie im Falle eines Verkaufs, eines Umzugs oder einer Übergabe an einen anderen Benutzer das Gerät stets begleitet, damit auch der Nachbesitzer die Möglichkeit hat, darin nachschlagen zu können. - Page 59 • die Netzspannung im Bereich der auf dem Typenschild angegebenen Werte liegt; • die Netzsteckdose mit dem Netzstecker kompatibel ist. Sollte dies nicht der Fall sein, wechseln Sie bitte die Netzsteckdose oder den Netzstecker aus; verwenden Sie keine Verlängerungen und Mehrfachsteckdosen. ! Netzkabel und Steckdose müssen bei installiertem Gerät leicht zugänglich sein.
- Page 60 Inbetriebsetzung und Gebrauch Nach Ablauf der für den Kurzzeitwecker eingestellten Zeit ertönt ein akustisches Signal, das nach einer Minute oder durch Drücken auf ein beliebiges aktiviertes Symbol verstummt. ACHTUNG! Der Ofen ist mit einem Einstellen des Kurzzeitweckers: Arretierungssystem der Roste ausgestattet.
-
Page 61: Programme,61
Programme ! Das Kochgeschirr stets auf dem mit dem Gerät gelieferten Backofenrost abstellen. ! Bei jedem Einschalten des Ofens erscheint das erste manuelle Garprogramm. Kühlluftgebläse Um die Temperaturen an den äußeren Teilen des Backofens abzusenken, Manuelle Garprogramme wird mit Hilfe eines Kühlluftgebläses ein Luftstrahl erzeugt, der zwischen dem ! Alle Programme verfügen über eine voreingestellte Gartemperatur. - Page 62 Programm ECO Programm BROT Um im Backofen reibungslos eine gleichemässige Hitze herzustellen ist das Benutzen Sie diese Funktion zum Brotbacken. Für optimale Ergebnisse hintere Heizelement eingeschalten und der Lüfter geht in Betrieb. Dieses befolgen Sie bitte aufmerksam die nachfolgend aufgeführten Anweisungen: Programm ist für das langsame Kochen von jede Art von Nahrung mit •...
- Page 63 Programmierung der Garzeit-Dauer GRILL • Den Grillrost in die Position 3 oder 4 einführen und die zu garenden Speisen 1. Drücken Sie die Ikone ; die Taste und auch die Ziffern auf dem Display in der Mitte des Grillrostes ausrichten. ZEITEN blinken.
- Page 64 Tabelle der Garzeiten Programme Lebensmittel Gewicht Einschubhöhe Vorheizen Empfohlene Garzeit Temperatur (Minuten) (°C) Standard- Gleit- Manuell Führungen Führungen Echte Pizza auf 2 Ebenen 2 und 4 1 und 3 210-220 20-25 Kuchen auf 2 Ebenen 2 und 4 1 und 3 30-35 Heißluft* 2 und 4...
-
Page 65: Vorsichtsmaßregeln Und Hinweise,65
Vorsichtsmaßregeln und Hinweise über den herkömmlichen Haushaltsmüllkreislauf entsorgt werden. Altgeräte müssen separat gesammelt werden, um die Wiederverwertung und das Recycling der beinhalteten Materialien zu optimieren und die ! Das Gerät wurde entsprechend den strengsten internationalen Einflüsse auf die Umwelt und die Gesundheit zu reduzieren. Das Symbol Sicherheitsvorschriften entworfen und gebaut. - Page 66 Backofentür reinigen Reinigen Sie die Backofentür aus Glas bitte nur mit einem weichen Schwamm und mildem Spülmittel und trocknen Sie sie abschließend mit einem weichen Tuch. Verwenden Sie keine rauen, scheuernden Materialien oder scharfkantige, metallische Schaber, da diese Kratzer auf ihrer Oberfläche hinterlassen und das Zerbrechen des Glases zur Folge haben können.
-
Page 67: Störungen Und Abhilfe,67
Störungen und Abhilfe Problem Mögliche Ursache Lösung Die “Taste Uhr” und die Ziffern auf dem Das Gerät wurde gerade an das Stromnetz einstellen. Display blinken. angeschlossen oder ein Stromausfall hat stattgefunden. Ein programmiertes Garprogramm ist Ein Stromausfall hat stattgefunden. Die Programmierung wiederholen. - Page 68 Het installeren Centreren en bevestigen Om het apparaat aan het keukenkastje te bevestigen: open de ovendeur en schroef de 4 houtschroeven in de 4 gaten in de zijrand. ! Bewaar dit boekje zorgvuldig voor eventuele verdere raadpleging. Wanneer u het product weggeeft, verkoopt, of wanneer u verhuist, dient u dit boekje bij het apparaat te bewaren zodat alle nodige informatie voorhanden blijft.
-
Page 69: Inhoud
• de spanning zich bevindt tussen de waarden die staan aangegeven op het typeplaatje; • het stopcontact en de stekker overeenkomen. Als dat niet zo is, dient u ofwel de stekker ofwel het stopcontact te vervangen; gebruik geen verlengsnoeren of dubbelstekkers. ! Wanneer het apparaat geïnstalleerd is moeten het snoer en het stopcontact gemakkelijk te bereiken zijn. - Page 70 Starten en gebruik Als de tijd verstreken is laat de timer een geluidssignaal horen dat ofwel vanzelf na 30 seconden uitgaat, of kan worden afgezet door op een willekeurige actieve toets te drukken. BELANGRIJK! De oven is uitgerust De timer instellen: met een blokkeringssysteem voor de grill dat het mogelijk maakt om 1.
- Page 71 en de ovendeur naar buiten komt, alsmede aan de onderzijde van de programma voorgesteld. Als de gekozen temperatuur lager is dan de interne ovendeur. temperatuur van de oven, toont het TEMPERATUUR display de tekst “Hot”. U kunt de bereiding in ieder geval laten starten. ! Aan het einde van de kooktijd blijft de ventilator draaien totdat de oven voldoende is afgekoeld.
- Page 72 Braadspit Procedure: Voor het activeren van het draaispit (zie • Meng het meel en het zout in een grote kom. afbeelding) gaat u als volgt te werk: • Doe de gist in lauw water (circa 35 graden). 1. Plaats de lekplaat in stand 1; •...
- Page 73 1. Druk op het symbool en volg de procedure van de duur van punt 1 t/m 3. 2. Druk op het symbool en regel de eindtijd met behulp van het symboolen “ ” en “ ”. 3. Als u de juiste tijd van einde bereiding heeft bereikt drukt u nogmaals op het symbool 4.
- Page 74 Kooktabel Programma's Gerechten Gewicht Roosterstanden Voorverwarmen Aanbevolen Duur (kg) temperatuur bereiding (°C) (minuten) standaard verschuifbare Handmatig geleiders geleiders Multilevel* Pizza op 2 roosters 2 en 4 1 en 3 210-220 20-25 2 en 4 1 en 3 30-35 (Vruchten)taarten op 2 roosters 2 en 4 1 en 3 160-170...
-
Page 75: Service,7
Voorzorgsmaatregelen en advies symbool op het product van de “afvalcontainer met een kruis erdoor” herinnert u aan uw verplichting, dat wanneer u het apparaat vernietigt, het apparaat apart moet worden ingezameld. Dit apparaat is ontworpen en vervaardigd volgens de geldende internationale Consumenten moeten contact opnemen met de locale autoriteiten voor veiligheidsvoorschriften. -
Page 76: Storingen En Oplossingen,76
195122965.00 06/2014 - XEROX FABRIANO Vervangen van het lampje 1. Open de deur volledig (zie afbeelding). 2. Til de hendeltjes F die zich aan de twee scharnieren bevinden, op met behulp van een schroevendraaier en draai ze (zie afbeelding); Voor het vervangen van het ovenlampje: 1.
Need help?
Do you have a question about the FH 103 0 IX/HA and is the answer not in the manual?
Questions and answers