Table of Contents
Advertisement
Available languages
Available languages
FH 51 /HA
FH 51 IX/HA
FHS 51 IX/HA
Italiano
Istruzioni per l'uso
FORNO
Sommario
Istruzioni per l'uso,1
English
Operating Instructions
OVEN
Contents
Operating Instructions,1
Warnings,3
Assistance,6
Description of the appliance,8
Description of the appliance,10
Installation,17
Français
Mode d'emploi
FOUR
Sommaire
Mode d'emploi,1
Avertissements,3
Description de l'appareil,8
Description de l'appareil,10
Installation,23
Español
Manual de instrucciones
HORNO
Sumario
Manual de instrucciones,1
Advertencias,4
Asistencia,6
Descripción del aparato,8
Descripción del aparato,10
Instalación,29
Portuges
Instruções para a utilização
FORNO
Índice
Instruções para a utilização,1
Advertências,4
Assistência,7
Descrição do aparelho,9
Descrição do aparelho,10
Instalação,35
Advertisement
Table of Contents

Subscribe to Our Youtube Channel
Related Manuals for Hotpoint Ariston FH 51 IX/HA


Summary of Contents for Hotpoint Ariston FH 51 IX/HA
-
Page 1: Table Of Contents
FH 51 /HA FH 51 IX/HA FHS 51 IX/HA Français Mode d’emploi FOUR Sommaire Mode d’emploi,1 Avertissements,3 Assistance,6 Description de l’appareil,8 Description de l’appareil,10 Installation,23 Mise en marche et utilisation,25 Programmes,25 Précautions et conseils,27 Nettoyage et entretien,27 Italiano Español Istruzioni per l’uso... - Page 2 Deutsch Bedienungsanleitung BACKOFEN Inhaltsverzeichnis Bedienungsanleitung,2 Hinweise,5 Kundendienst,7 Beschreibung Ihres Gerätes,9 Beschreibung Ihres Gerätes,10 Installation,41 Inbetriebsetzung und Gebrauch,43 Programme,43 Vorsichtsmaßregeln und Hinweise,45 Reinigung und Pflege,45 Русскии Руководство по эксплуатации ДУХОВОЙ ШКАФ Содержание Руководство по эксплуатации,2 Предупреждения,5 Сервисное обслуживание,7 Описание изделия,9 Описание изделия,10 Установка,47 Включение...
-
Page 3: Avvertenze
reduced physical, sensory or mental capabilities or lack of experience and knowledge if they have been given supervision or instruction concerning use of the Avvertenze appliance in a safe way and understand the hazards involved. Children shall not play with the appliance. ATTENZIONE: Questo apparecchio e le sue parti Cleaning and user maintenance shall not be made accessibili diventano molto caldi durante l’uso. - Page 4 en verre, sous peine d’érafler la surface et de briser esté dirigido hacia arriba y en la parte posterior de le verre. la cavidad. Ne jamais nettoyer l’appareil avec des nettoyeurs vapeur ou haute pression. Advertências ATTENTION : s’assurer que l’appareil est éteint avant de procéder au remplacement de l’ampoule, ATENÇÃO: Este aparelho e as suas partes afin d’éviter tout risque d’électrocution.
- Page 5 Es ist darauf zu achten, dass die Heizelemente условии надлежащего контроля или обучения nicht berührt werden. Kinder unter 8 Jahren, die безопасному использованию изделия с учетом nicht ständig beaufsichtigt sind, von dem Gerät соответствующих рисков. Не разрешайте fernhalten. Das Gerät darf von Kindern ab 8 Jahren детям...
-
Page 6: Assistenza
Assistance ! Never use the services of an unauthorised technician. Assistenza Please have the following information to hand: • The type of problem encountered. ! Non ricorrere mai a tecnici non autorizzati. • The appliance model (Mod.). • The serial number (S/N). Comunicare: The latter two pieces of information can be found on the data plate located •... -
Page 7: Assistência
Assistência ! Nunca recorra a técnicos não autorizados. Comunique: • o tipo de avaria; • o modelo da máquina (Mod.); • o número de série (S/N); Estas últimas informações encontram-se na placa de identificação situada no aparelho. Kundendienst ! Wenden Sie sich auf keinen Fall an nicht autorisierte Techniker. Geben Sie bitte Folgendes an: •... -
Page 8: Descrizione Dell'apparecchio
Descrizione dell’apparecchio Descripción del aparato Vista d’insieme Vista en conjunto 1 POSIZIONE 1 1 POSICIÓN 1 2 POSIZIONE 2 2 POSICIÓN 2 3 POSIZIONE 3 3 POSICIÓN 3 4 POSIZIONE 4 4 POSICIÓN 4 5 POSIZIONE 5 5 POSICIÓN 5 6 GUIDE di scorrimento dei ripiani 6 GUÍAS de deslizamiento de las bandejas 7 Ripiano LECCARDA... -
Page 9: Descrição Do Aparelho
Descrição do aparelho Vista de conjunto 1 POSIÇÃO 1 2 POSIÇÃO 2 3 POSIÇÃO 3 4 POSIÇÃO 4 5 POSIÇÃO 5 6 GUIAS de escorrimento das prateleiras 7 Prateleira BANDEJA PINGADEIRA 8 Prateleira GRADE 9 Painel de comandos Beschreibung Ihres Gerätes Geräteansicht 1 EINSCHUBHÖHE 1 2 EINSCHUBHÖHE 2... -
Page 10: Descrizione Dell'apparecchio
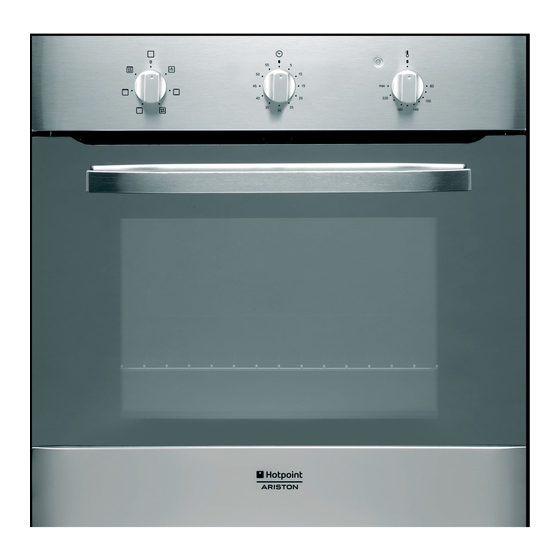
Descrizione dell’apparecchio Descrição do aparelho Pannello di controllo Painel de comandos 1 Spia TERMOSTATO 1 Indicador luminoso TERMOSTATO 2 Manopola TERMOSTATO 2 Selector do TERMÓSTATO 3 Manopola CONTAMINUTI 3 Selector do CONTADOR DE MINUTOS 4 Manopola PROGRAMMI 4 Selector PROGRAMAS Description of the appliance Beschreibung Ihres Gerätes Control panel... -
Page 11: Installazione
Installazione Centraggio e fissaggio Per fissare l’apparecchio al mobile: aprire la porta del forno e avvitare 4 viti a legno nei 4 fori posti sulla cornice perimetrale. ! È importante conservare questo libretto per poterlo consultare in ogni momento. In caso di vendita, di cessione o di trasloco, assicurarsi che resti insieme all’apparecchio per informare il nuovo proprietario sul funzionamento e sui relativi avvertimenti. - Page 12 ! Ad apparecchio installato, il cavo elettrico e la presa della corrente devono TARGHETTA CARATTERISTICHE essere facilmente raggiungibili. larghezza cm 43,5 Dimensioni* altezza cm 32,4 ! Il cavo non deve subire piegature o compressioni. profondità cm 41,5 ! Il cavo deve essere controllato periodicamente e sostituito solo da tecnici Volume* lt.
-
Page 13: Avvio E Utilizzo
Avvio e utilizzo • GRATIN (si consiglia di non superare la temperatura di 200°C). Programma FORNO TRADIZIONALE ATTENZIONE ! Il forno è dotato Si attivano i due elementi riscaldanti inferiore e superiore. Con questa cottura di un sistema di arresto griglie che tradizionale è... - Page 14 Tabella cottura Durata Peso Posizione Preriscaldamento Temperatura Programmi Alimenti cottura (Kg) dei ripiani (minuti) consigliata (minuti) Anatra 65-75 Arrosto di vitello o manzo 70-75 Forno Arrosto di maiale 70-80 Tradizionale Biscotti (di frolla) 15-20 Crostate 30-35 Pizza (su 2 ripiani) 2 e 4 15-20 Lasagne...
-
Page 15: Precauzioni E Consigli
Precauzioni e consigli Risparmiare e rispettare l’ambiente • Azionando il forno negli orari che vanno dal tardo pomeriggio fino alle prime ore del mattino si collabora a ridurre il carico di assorbimento delle aziende ! L’apparecchio è stato progettato e costruito in conformità alle norme elettriche. - Page 16 Pulire la porta Pulire il vetro della porta con spugne e prodotti non abrasivi e asciugare con un panno morbido; non usare materiali ruvidi abrasivi o raschietti metallici affilati che possono graffiare la superficie e causare la frantumazione del vetro. Per una pulizia più...
-
Page 17: Installation
Installation Centring and fixing Secure the appliance to the cabinet by opening the oven door and inserting 4 screws into the 4 holes on the outer frame. ! Please keep this instruction booklet in a safe place for future reference. If the appliance is sold, given away or moved, please make sure the booklet is also passed on to the new owners so that they may benefit from the advice contained within it. - Page 18 ! Once the appliance has been installed, the power supply cable and the APPLIANCE SPECIFICATIONS electrical socket must be easily accessible. width 43.5 cm Dimensions* ! The cable must not be bent or compressed. height 32,4 cm depth 41.5 cm ! The cable must be checked regularly and replaced by authorised technicians Volume* 59 l...
-
Page 19: Start-Up And Use
Start-up and use • GRATIN (recommended: do not exceed 200°C). TRADITIONAL OVEN mode WARNING! The oven is provided Both the top and bottom heating elements will come on. With this traditional with a stop system to extract the cooking mode, it is best to use one cooking rack only; if more than one rack racks and prevent them from is used, the heat will be distributed unevenly. -
Page 20: Cooking Advice Table
Cooking advice table Cooking Cooking Weight Rack Pre-heating Recommended Foods time modes (in kg) position time (min) temperature (minutes) Duck 65-75 Roast veal or beef 70-75 Convection Pork roast 70-80 Oven Biscuits (short pastry) 15-20 Tarts 30-35 Pizza (on 2 racks) 2 and 4 15-20 Lasagne... -
Page 21: Precautions And Tips
Precautions and tips Consumers should contact their local authority or retailer for information concerning the correct disposal of their old appliance. ! This appliance has been designed and manufactured in compliance with Respecting and conserving the environment international safety standards. The following warnings are provided for safety •... -
Page 22: Cleaning The Oven Door
Cleaning the oven door Clean the glass part of the oven door using a sponge and a non-abrasive cleaning product, then dry thoroughly with a soft cloth. Do not use rough abrasive material or sharp metal scrapers as these could scratch the surface and cause the glass to crack. -
Page 23: Installation
Installation Centrage et fixation Pour fixer l’appareil au meuble : ouvrir la porte du four et visser 4 vis à bois ! Conservez ce mode d’emploi pour pouvoir le consulter à tout moment. dans les 4 trous du cadre. En cas de vente, de cession ou de déménagement, veillez à ce qu’il suive l’appareil pour informer le nouveau propriétaire sur son fonctionnement et lui fournir les conseils correspondants. - Page 24 • la prise est bien compatible avec la fiche de l’appareil. Si ce n’est pas le PLAQUE SIGNALETIQUE cas, remplacez la prise ou la fiche, n’utilisez ni rallonges ni prises multiples. largeur 43,5 cm Dimensions* hauteur 32,4 cm ! Après installation de l’appareil, le câble électrique et la prise de courant profondeur 41,5 cm doivent être facilement accessibles Volume*...
-
Page 25: Mise En Marche Et Utilisation
Mise en marche et utilisation • GRILL (il est conseillé dans ce cas de sélectionner MAX.); • GRATIN (il est conseillé de ne pas dépasser 200°C). ATTENTION ! Le four est équipé Programme FOUR TRADITION d’un système d’arrêts de grilles Mise en marche des résistances de voûte et de sole. -
Page 26: Tableau De Cuisson
Tableau de cuisson Durée Poids Niveau Préchauffage Température Programmes Aliments cuisson (Kg) enfournement (minutes) préconisée (minutes) Canard 65-75 Rôti de veau ou de bœuf 70-75 Four Rôti de porc 70-80 Traditionnel Biscuits (pâte brisée) 15-20 Tartes 30-35 Pizza (sur 2 niveaux) 2 et 4 15-20 Lasagnes... -
Page 27: Précautions Et Conseils
Précautions et conseils de la ‘‘poubelle barrée’’ est apposée sur tous les produits pour rappeler les obligations de collecte séparée. Les consommateurs pourront confier leur appareil usagé au service ! Cet appareil a été conçu et fabriqué conformément aux normes de collecte des collectivités locales ou de leurs groupements, ou si la internationales de sécurité. - Page 28 Nettoyage de la porte Nettoyer la vitre de la porte avec des produits non abrasifs et des éponges non grattantes, essuyer ensuite avec un chiffon doux. Ne pas utiliser de matériaux abrasifs ou de racloirs métalliques aiguisés qui risquent de rayer la surface et de briser le verre.
-
Page 29: Instalación
Instalación ! Es importante conservar este manual para poder consultarlo en todo momento. En caso de venta, de cesión o de mudanza, verifique que permanezca junto al aparato para informar al nuevo propietario sobre su funcionamiento y sobre las advertencias correspondientes. ! Lea atentamente las instrucciones: contienen importante información sobre la instalación, el uso y la seguridad. - Page 30 alcance en ningún punto una temperatura que supere en 50°C la temperatura PLACA DE CARACTERÍSTICAS ambiente (por ejemplo, la parte posterior del horno). ancho 43,5 cm. Dimensiones* altura 32,4 cm. ! El instalador es responsable de la correcta conexión eléctrica y del profundidad 41,5 cm.
-
Page 31: Puesta En Funcionamiento Y Uso
Puesta en funcionamiento y uso Programas ATENCIÓN! El horno está dotado ! En todos los programas se puede fijar una temperatura de un sistema de bloqueo de las entre 60ºC y MAX, excepto en: parrillas que permite quitarlas sin que sobresalgan del horno (1).Para •... - Page 32 PIZZA • Per una buona cottura della pizza ultilizzate il programma MULTICOTTURA. • Utilice una bandeja para pizza de aluminio liviano apoyándola sobre la parrilla suministrada con el horno. Utilizando la grasera se aumenta el tiempo de cocción y difícilmente se obtiene una pizza crocante.
-
Page 33: Precauciones Y Consejos
Precauciones y consejos El consumidor debe contactar con la autoridad local o con el vendedor para informarse en relación a la correcta eleminación de su electrodoméstico viejo. ! El aparato ha sido proyectado y fabricado en conformidad con las normas internacionales de seguridad. - Page 34 Limpiar la puerta Limpie el vidrio de la puerta con esponjas y productos no abrasivos y séquelo con un paño suave; no utilice materiales ásperos abrasivos o raederas metálicas afiladas que puedan rayar la superficie y quebrar el vidrio. Para lograr una limpieza más profunda es posible desmontar la puerta del horno: 1.
-
Page 35: Instalação
Instalação Colocar no centro e prender Para prender o aparelho no móvel: abra a porta do forno e atarraxe 4 parafusos na madeira, nos 4 furos situados na moldura ao redor. ! É importante guardar este folheto para poder consultá-lo a qualquer momento. - Page 36 • a tomada seja compatível com a ficha do aparelho. Em caso contrário, PLACA DAS CARACTERÍSTICAS substitua a tomada ou a ficha; não empregue extensões nem tomadas múltiplas. largura 43,5 cm Medidas* altura 32,4 cm profundidade 41,5 cm ! Depois de ter instalado o aparelho, o acesso ao cabo eléctrico e à tomada da corrente deve ser fácil.
-
Page 37: Início E Utilização
Início e utilização Programas ATENÇÃO! O forno está equipado ! Para todos os programas pode ser definida uma temperatura entre 60°C com um sistema de bloqueio das e MÁX., excepto:. grelhas que permite retirá-las sem que estas ressaiam do forno •... - Page 38 PIZZA • Para cozer bem uma pizza utilize o programa de COZEDURA MÚLTIPLA. • Utilize uma forma de alumínio leve, apoie-a na grelha do forno. Se utilizar a bandeja pingadeira aumentará os tempos de cozedura e dificilmente será obtida uma pizza crocante. •...
-
Page 39: Precauções E Conselhos
Precauções e conselhos lembrar o dever de colecta selectiva. Para maiores informações sobre a correcta eliminação dos electrodomésticos, os proprietários poderão contactar o serviço de ! Este aparelho foi projectado e fabricado em conformidade com as normas colecta público ou os revendedores. internacionais de segurança. - Page 40 Limpeza da porta Limpe o vidro da porta com esponjas e produtos não abrasivos e enxugue com um pano macio; não use materiais ásperos, abrasivos ou espátulas metálicas afiadas que podem arranhar a superfície e quebrar o vidro. Para uma limpeza mais cuidadosa é possível desmontar a porta do forno: 1.
-
Page 41: Installation
Installation Zentrieren und Befestigen Befestigung des Gerätes am Möbel: Öffnen Sie die Backofentür und schrauben Sie die 4 Holzschrauben in die 4 im Backofenrahmen vorgesehenen Löcher ! Bewahren Sie diese Bedienungsanleitung bitte sorgfältig auf, damit Sie sie ein. jederzeit zu Rate ziehen können. Sorgen Sie dafür, dass sie im Falle eines Verkaufs, eines Umzugs oder einer Übergabe an einen anderen Benutzer das Gerät stets begleitet, damit auch der Nachbesitzer die Möglichkeit hat, darin nachschlagen zu können. - Page 42 Leistungsaufnahme des Gerätes ausgelegt ist; TYPENSCHILD • die Netzspannung im Bereich der auf dem Typenschild angegebenen Werte liegt; Breite 43,5 cm Abmessungen* Höhe 32,4 cm • die Netzsteckdose mit dem Netzstecker kompatibel ist. Sollte dies nicht Tiefe 41,5 cm der Fall sein, wechseln Sie bitte die Netzsteckdose oder den Netzstecker aus;...
-
Page 43: Inbetriebsetzung Und Gebrauch
Inbetriebsetzung und Gebrauch Programme ACHTUNG! Der Ofen ist mit einem ! Für alle Programme kann eine Gartemperatur von 60° bis MAX. eingestellt Arretierungssystem der Roste werden, mit Ausnahme der Programme: ausgestattet. Damit lassen diese sich ausziehen, ohne aus dem Ofen •... - Page 44 GRILL • Schieben Sie den Grillrost in die Führung 3 oder 4 ein, und legen Sie die zu garenden Speisen auf die Mitte des Grillrostes. • Es empfiehlt sich, die höchste Energiestufe zu verwenden. Im Übrigen ist es bei dieser Funktion völlig normal, dass das obere Heizelement nicht ständig rot glüht: Es wird durch einen Thermostaten gesteuert.
-
Page 45: Vorsichtsmaßregeln Und Hinweise
Vorsichtsmaßregeln und Hinweise und das Recycling der beinhalteten Materialien zu optimieren und die Einflüsse auf die Umwelt und die Gesundheit zu reduzieren. Das Symbol „durchgestrichene Mülltonne“ auf jedem Produkt erinnert Sie an Ihre ! Das Gerät wurde entsprechend den strengsten internationalen Verpflichtung, dass Elektrohaushaltsgeräte gesondert entsorgt werden Sicherheitsvorschriften entworfen und gebaut. - Page 46 Backofentür reinigen Reinigen Sie die Backofentür aus Glas bitte nur mit einem weichen Schwamm und mildem Spülmittel und trocknen Sie sie abschließend mit einem weichen Tuch. Verwenden Sie keine rauen, scheuernden Materialien oder scharfkantige, metallische Schaber, da diese Kratzer auf ihrer Oberfläche hinterlassen und das Zerbrechen des Glases zur Folge haben können.
- Page 47 Установка ! Важно сохранить данное руководство для его последующих консультации. В случае продажи, передачи изделия или при переезде на новое место жительства необходимо проверить, чтобы руководство оставалось вместе с изделием, для того чтобы его новыи владелец мог ознакомиться с правилами эксплуатации и с соответствующими предупреждениями. ! Внимательно...
- Page 48 минимальным расстоянием между контактами 3 мм, расчитанный ПАСПОРТНАЯ ТАБЛИЧКА на данную нагрузку и соответствующий действующим нормативам а 43,5 (выключатель не должен размыкать провод заземления). Сетевой кабель Га а а 32,4 должен быть расположен таким образом, чтобы ни в одной точке его а...
- Page 49 Включение и эксплуатация Программы ВНИМАНИЕ! Духовой шкаф ! Для всех программ можно задать температуру от 60°C до МАКС кроме: у к о м п л е к то ва н с и с те м о й • ГРИЛЬ (рекомендуется устанавливать только МАКС. температуру); б...
- Page 50 ГРИЛЬ • Установите решетку на уровень 3 или 4, поместите продукты в центр решетки. • Рекомендуется выбрать максимальную мощность духовки. Не беспокойтесь, если верхний элемент не остается постоянно включенным: его работа управляется термостатом. ПИЦЦА • Используйте противень из легкого алюминия, устанавливая его на прилагающуюся...
- Page 51 Предосторожности и управления рекомендации Утилизация • Уничтожение упаковочных материалов: соблюдаите местные нормативы с целью повторного использования упаковочных ! Изделие спроектировано и изготовлено в соответствии с материалов. международными нормативами по безопасности. Необходимо • Согласно Европеискои Директиве 2012/19/СЕ касательно утилизации внимательно прочитать настоящие предупреждения, составленные в электронных...
- Page 52 195114208.01 11/2013 - XEROX FABRIANO • Съемные детали можно легко вымыть как любую другую посуду, также в посудомоечной машине за исключением выдвижных направляющих. ! Не используйте паровые чистящие агрегаты или агрегаты под высоким давлением для чистки изделия. Чистка дверцы Для чистки стекла дверцы используйте неабразивные губки и чистящие средства, затем...
Need help?
Do you have a question about the FH 51 IX/HA and is the answer not in the manual?
Questions and answers