Table of Contents
Advertisement
Quick Links
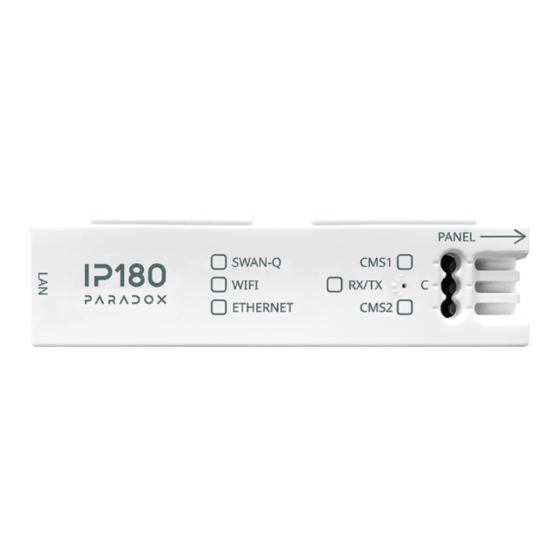
Thank you for choosing Paradox Security Systems products. The following manual describes the connections and programming for the IP180
Internet Module. For any comments or suggestions, send an email to manualsfeedback@paradox.com.
Introduction
The IP180 Internet Module provides access to Paradox systems and replaces the previous IP150 reporting devices. The IP180 has built-in
Wi-Fi, a Wi-Fi Antenna kit may be purchased separately. The IP180 reports only to the IPC10 Paradox receiver/converter, BabyWare, and
communicates with the BlueEye application. IP180 uses an encrypted supervised connection with the IPC10 PC and BlueEye, based on MQTT
technology making it stable, fast, and reliable. The IP180 is remotely upgradable from InField and the BlueEye application. The IP180 supports
all Paradox + panels and should operate with most Paradox panels produced after 2012.
THING YOU SHOULD KNOW, PLEASE READ:
While the IP180 programming is similar to the IP150, there are some differences you should know:
•
IP180 does not support "Combo" mode, there is no serial output. A system with a combo connection cannot be upgraded to IP180
without upgrading the panel to + with two serial outputs.
•
The IP180, due to its nature, cannot support local closed networks. Paradox will offer future local solutions for closed networks.
•
For Beta testing, static IP is not supported.
•
IP180 reports in Contact ID format only to the IPC10 (make sure the panel is set to Contact ID reporting), and from IPC10 to CMS
MLR2-DG or Ademco 685.
•
IP180 Beta supports and supervises up to three IPC10 reporting receivers and upon release will support up to four receivers (IP150+
Future MQTT version supports only two receivers).
•
When IP180 is connected, only the BlueEye application will connect; Insite Gold will not connect to the IP180.
•
When connected to a + panel, it is recommended to connect the IP180 to Serial-1 (main channel) and PCS265 V8 (MQTT version) to
Serial-2. It is not possible to mix MQTT reporting devices and previous reporting devices on the same panel.
FOR BETA:
If you upgraded/installed the IP180 and wish to revert to IP150, please see the "Reverting to Classic" section in this manual.
Programming of the IP180 can be only from a keypad and BabyWare. BlueEye can now configure emails, and upon beta completion all
programming can be made from the BlueEye app as well.
NOTE: The IPC10 can only receive CONTACT ID format. Please make sure the reporting format is set to CID.
PARADOX.COM
BETA VERSION
For latest manual updates, please refer to
paradox.com/Manuals/IP180.pdf.
1
Advertisement
Table of Contents

Summary of Contents for Paradox IP180
- Page 1 • For Beta testing, static IP is not supported. • IP180 reports in Contact ID format only to the IPC10 (make sure the panel is set to Contact ID reporting), and from IPC10 to CMS MLR2-DG or Ademco 685. •...
-
Page 2: Before You Begin
Before You Begin Make sure you have the following to configure your IP180 Internet Module: • 4-pin serial cable (included) • Ethernet network connection or for Wi-Fi connection, Wi-Fi network credentials, and have Wi-Fi antenna kit • BlueEye app installed on your smartphone... -
Page 3: Installation
Serial to the Panel Connect the serial output of the IP180 to the Serial port of the Paradox panels. If it is Paradox + Series, connect it to Serial1 as it is the main reporting channel, as shown in Figure 2. If the panel is powered up, the on-board LEDs will illuminate to indicate the IP180’s status. -
Page 4: Led Indicators
Attaching the IP180 to the Panel In order to connect the IP180, plug in the Serial cable to panel, refer to Figure 2. After a few seconds, the RX/TX LED starts flashing; this indicates that the IP180 is powered and is communicating with the panel. -
Page 5: Creating A Site
(open network) leave it blank and press connect. 6) Exit and proceed to BlueEye to connect to the site. Note: If Ethernet and Wi-Fi are connected, the IP180 will keep one connection active but not both. The module will use the last active connection type. - Page 6 IP Port, and the security profile (2-digit number) that indicates the supervision time. Up to three receivers can be used to report with the IP180. If you are currently reporting to four receivers, once you upgrade to an IP180 or if you are using IP150+ MQTT firmware, you will no longer be able to configure or report to a fourth receiver.
-
Page 7: Email Configuration
Email Configuration Configure the IP180’s email server settings. Email Addresses You can configure your IP180 to send email notifications to up to four email addresses to receive notification of system events. To configure an email address: Enable the Address toggle button. -
Page 8: Firmware Upgrade
Reset IP180 to Default Settings To reset the IP180 module to its default settings, ensure that the module is turned on and then insert a pin/straightened paper clip (or similar) into the pinhole located between the two CMS LEDs. Press down gently until you feel some resistance; hold it down for approximately five seconds.


Need help?
Do you have a question about the IP180 and is the answer not in the manual?
Questions and answers