Advertisement
Quick Links
Advertisement

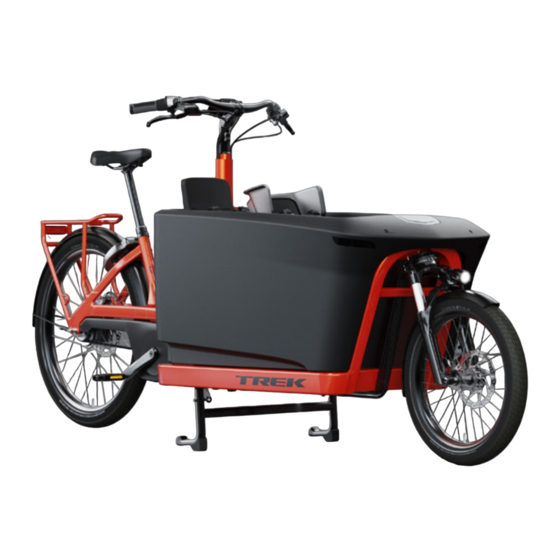
Related Manuals for Trek FETCH+ 4


Summary of Contents for Trek FETCH+ 4
- Page 1 2023 FETCH+ 4 SERVICE MANUAL...
- Page 2 Frame pages 21-25 Floor plate and Cargo box Front cover Frame assembly Frame-tightening sequence Accessories pages 26-32 Front mudguard Rear mudguard Ring lock Kickstand Child seats and light and light and light Copyright 2022 Trek Bicycle Corporation All Rights Reserved...
- Page 3 2023 Fetch+ 4 About this manual Scope Legend This manual contains parts diagrams, specifications (such as grease and torque values), instructions and helpful tips Zip tie (such as the easiest direction to route cables). This manual does not contain instructions on all components (such as brake callipers).
- Page 4 2023 Fetch+ 4 Steering: cable system Click here 18 Nm. 4 Nm. 18 Nm. 14 Nm. 18 Nm. 2 18 Nm. 4 Nm. Steerer tube (rear) Cable mount (front) – W5257125 5284549 Steering disc (rear) Bolts (M8x20 mm) Steering disc (front) –...
- Page 5 2023 Fetch+ 4 Steering: adjust cable tension Move the cable mount (6) to increase tension in the Loosen the four rear cable mount bolts (2) – do not cables. remove them. Hold the tensioning bolt (4) in place and use a 13 mm wrench to loosen the tensioning nut (5).
- Page 6 2023 Fetch+ 4 Steering: replace steering cables Replace all four cables every two years or 10,000 Remove the two bolts (11) securing the steering km/6,000 mi. cables in the rear cable mount. NOTE: If a cable is damaged and needs repair, replace all four cables –...
- Page 7 2023 Fetch+ 4 Steering: replace the steering cables (continued) Insert the cables into the front disc Insert the cables into the rear disc NOTE: The cables may be slightly different lengths – there Route the rear cables as shown below.
- Page 8 2023 Fetch+ 4 Drivetrain: belt guard Click here 5 Nm. 5 Nm. 2 Nm. 2 Nm. Belt guard Washers (M5) Belt guard bracket Bolts, T25 drive (M5x10 5280793 5284857 Belt guard bracket addition *North America only Bolt M6x10 mm Beltring (50T) –...
- Page 9 2023 Fetch+ 4 Drivetrain: drive unit cover Click here 2 Nm. 4 Nm. 20Nm. 2 Nm. 20Nm. Washers (M5) Bolts, T25 drive (M5x10 mm) 5284548 Bolts, T25 drive (M4.8x13 mm) Sheet nuts (M4.8) Drive unit cover (non-drive side) 5280792 Drive unit cover (drive side) Mounting bolts, T40 drive (M8x16 mm) –...
- Page 10 2023 Fetch+ 4 Drivetrain: belt tensioner Click here 7Nm. 12 5 Nm. 5 Nm. Tensioner arm Belt roller Tensioning bolt (M8x100 mm) Washers (M8) 5291300 Bolt (M6x60 mm) Bearings Tensioning nut (upper) 5280807 Bolt (M8x40 mm) Tensioning nut (lower) Bolt socket set screw –...
- Page 11 Source: Gates Corporation belt tension. TIP: You can also measure the tension using the methods listed below. Trek suggests using the Gates Krikit Tension Gauge for the most precise measurement. • Your finger – push down in the middle of the belt.
- Page 12 2023 Fetch+ 4 Drivetrain: align belt Centre the belt on the belt roller Adjust the belt angle The notch in the middle is slightly off-centre. The belt roller should be parallel to the belt. If the belt roller gets out of alignment, tighten or loosen the set screw (5).
- Page 13 2023 Fetch+ 4 Routing: rear Click here 15 4 Nm. Bosch smart Standard system set-up set-up Front light wire W316706 Cable manager – Rear light wire Bolt (M4x6 mm) 5284750 Drive unit cable Speed sensor and wire Bosch Connect Module –...
- Page 14 2023 Fetch+ 4 Routing: front 4 Nm. Front brake hose. Front light wire Bolt (M5x10 mm), T25 drive 5304417 Washer (M5) Cable clamp – W2016621...
- Page 15 2023 Fetch+ 4 Routing: instructions Rear headset Speed sensor Route the wire from the back – through the chainstay – to Route all handlebar cables/wires/hoses down the drive unit. through the frame – except the front brake. Use the current housing as a guide when pulling a new one through.
- Page 16 2023 Fetch+ 4 Routing: instructions (continued) Rear light Drive unit cable You must remove the rear wheel to route the wire. Make With the drive unit removed, connect the drive unit cable sure there is no slack in the wire between the mudguard (11) at both ends before reinstalling the drive unit.
- Page 17 2023 Fetch+ 4 Routing: instructions (continued) Front brake and front light Route the front brake hose and front light wire – starting from the front – under the frame as shown below. Note: The front brake hose must have enough slack to turn the front wheel back and forth fully – without interference. The brake hose must have a 10 mm (3/8”...
- Page 18 2023 Fetch+ 4 Battery: guide 4 Nm. Click here 3 Nm. 4.5 Nm. 4 Nm. 4 Nm. Damper foil plug – *EB12.100.01Z Bolts, T25 (M5x10 mm) Bolts, T25 (M4x16 mm) – *EB12.100.01X Washers (M5) 5284856 Cradle – *EB12.100.01B Bolts (M5x14 mm) Battery adapter –...
- Page 19 2023 Fetch+ 4 Battery: install battery guide Make sure all cables are routed in front of the battery guide before installing it. Insert the battery guide assembly into the frame. Install the two lower (3) battery guide bolts. Torque to 4 Nm.
- Page 20 2023 Fetch+ 4 Battery: lock, cover and charge port Battery cover – W5257032 Click here Bolts, T15 (M3.5x12 mm) – *EB12.100.01G Cover – *EB12.100.01A Bolts, T15 (M3x7 mm) – *EB12.100.01G Battery lock – W5277876 Locking assembly – *EB12.100.01D PowerTube 750 W battery – *EB12.100.00X Bolts (M5x10 mm) –...
- Page 21 2023 Fetch+ 4 Headsets: rear assembly Stem cover – 5307966 Click Compression bolt W5297608 here Stem Stem spacer – W5295111 Bearing cover – W5283853 6Nm. Compression ring – W532842 Headset bearings – W531676 Compression nut (1”) – 63374 Steerer tube...
- Page 22 2023 Fetch+ 4 Headsets: front assembly Click here 8 Nm. 2.5 Nm. Install bolt (12) last Compression bolt (M6x35 Front steering disc – 5284720 Washer (M5) W545877 Top cap 5305201 Bolt (M5x14 mm) Compression nut (1 1/8”) W5266799 Suspension fork –...
- Page 23 2023 Fetch+ 4 Headsets: instructions Install the front headset/fork Verify rear headset tightness Assemble the headset/fork and tighten the Hold the stem (3) and move it up/down and compression bolt (1). forwards/backwards to ensure that the headset is properly assembled and tightened. The steering Install the bolt (12) and washer (11).
- Page 24 2023 Fetch+ 4 Frame: floor plate and mat Click here 4 Nm. Front frame 4 Nm. 4 Nm. 4 Nm. Bolts (M5x12 mm) Floor plate – W5267707 Washers (M5) Floor mat – W5271011 Bolt M5x16 mm 5286562 Washers, wide (M5)
- Page 25 2023 Fetch+ 4 Frame: cargo box 2 Nm. 2 Nm. Front frame 8 Nm. 8 Nm. Bolts (M8x90 mm) 5284748 Washers (M8) Bolts (M5x10 mm) – 5284749 Cargo box – 5280798 Decals – 5291298 Floor plate – W5267707...
- Page 26 2023 Fetch+ 4 Frame: front cover 8 Nm. 5 Nm. Front frame 5 Nm. Hole covers (M8) Nuts (M6) 5284748 Bolt (M6x50 mm) Washers (M6) Bolts (M6x90 mm) 5284749 Front cover 5280797 Washers (M8) Headset lid Bolts, T40 drive (M8x20...
- Page 27 2023 Fetch+ 4 Frame: frame assembly Rear frame 18 Nm. 18 Nm. T-nuts Washers (M8) 5286563 Bolts (M8x45 mm) IMPORTANT: If connecting the front and rear frame together, follow the frame-tightening sequence on page 25.
- Page 28 2023 Fetch+ 4 Frame: frame-tightening sequence Tighten the eight horizontal bolts to 5 Nm. Fully tighten the eight horizontal bolts – in an X pattern – to 18 Nm in the order shown below. 5 Nm. Bottom 5 Nm. Fully tighten the four vertical bolts – outside first – to 18 Nm in the order shown below.
- Page 29 2023 Fetch+ 4 Accessories: front mudguard and light Click here 3 Nm. 3 Nm. 3 Nm. WARNING Reapply threadlocker – see warning on page ii Bolts, T25 drive (M5x10 Mount bolts – W331954 5284747 W5269940 Mudguard stay (20”x65 mm) –...
- Page 30 2023 Fetch+ 4 Accessories: rear mudguard and light 4 Nm. Click here 4 Nm. WARNING 4 Nm. Reapply threadlocker – see warning on page ii 4 Nm. 4 Nm. Bolts, T25 drive (M5x16 Stay mounts – 5258260 Stay holder Washers (M5)
- Page 31 2023 Fetch+ 4 Accessories: ring lock Click here 4 Nm. 4 Nm. 4 Nm. 4 Nm. 4 Nm. Bolts (M5x10 mm) 5284753 Vibration dampers (M5x10 mm) Non-retainable – 5253038 Ring lock *Retainable – 592162 *The key cannot be removed if the ring lock is unlocked.
- Page 32 2023 Fetch+ 4 Accessories: kickstand NOTE: Replace the springs (8) every two years. Click here 5 Nm. 12 1 Nm. 12 Nm. CAUTION The kickstand is spring-loaded and can snap shut on you, causing injury. Either tie 4 Nm. off the kickstand or be careful not to get caught in it.
- Page 33 2023 Fetch+ 4 Accessories: child seats Click here 25 Nm. 6 Nm. 25 Nm. With headrest Without headrest 1 Nm. 1 Nm. Left bumper Child seat – 5283900 5310015 Right bumper Crossbar mount – W5270763 Bolt (16 mm), without headrest –...
- Page 34 2023 Fetch+ 4 Accessories: install the child seats Pull the inner latch and put the seat in the fully Install the upper bolts and torque to 25 Nm. reclined position. 25 Nm. 25 Nm. Outer latch Inner latch Slide the seat down onto the mushroom fasteners.
- Page 35 2023 Fetch+ 4 Accessories: remove the child seats Pull the inner latch and put one seat into the fully Remove the upper bolts. reclined position. Outer latch Pull the seat up and remove it. Inner latch Remove the other seat following Steps 1-3.
- Page 36 2023 Fetch+ 4 Parts list Specifications Fetch+ 4 Wheels Rear hub OLD 142 mm Part number 25 mm Front wheel W5292177 Front Tyre width max 700c 28 mm Rear wheel W5292180 Rear Front rim W5283286 Dropper post stiffness Rear rim...
Need help?
Do you have a question about the FETCH+ 4 and is the answer not in the manual?
Questions and answers