
Subscribe to Our Youtube Channel
Related Manuals for BENE PORTS TABLE


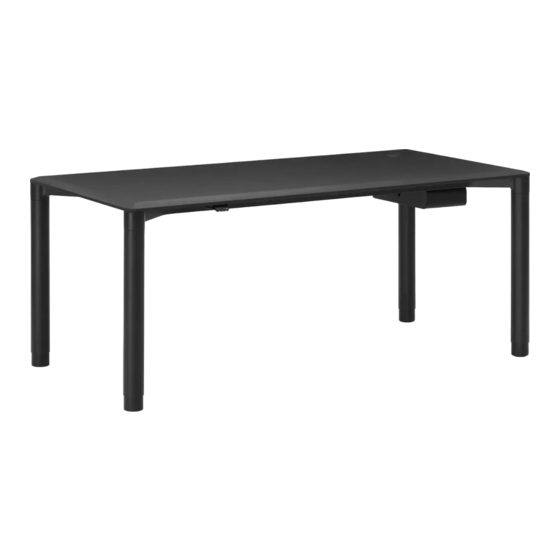
Summary of Contents for BENE PORTS TABLE
- Page 1 PORTS TABLE MONTAGE- UND BEDIENUNGSANLEITUNG ASSEMBLY AND OPERATING INSTRUCTIONS INSTRUCTIONS DE MONTAGE ET D’UTILISATION...
-
Page 2: Table Of Contents
INHALT CONTENT SOMMAIRE Zusätzliche Information ......3 Additional information ..... 3 Informations complémentaires ..3 Produktübersicht .......4 Product overview ......4 Aperçu du produit ......4 Sicherheitshinweise ......5 Safety instructions ......10 Instructions de sécurité ....14 Richtig sitzen ........19 Sitting correctly ......19 S'asseoir correctement .... -
Page 3: Zusätzliche Information
Information on using the Li-Ion battery can be found next to the battery in the instructions from Linak. These instructions must be enclosed with the Bene operating instructions in the course of the battery installation. Vous trouverez des informations sur l’utilisation de la batterie Li-Ion à côté de la batterie dans les instructions de Linak. -
Page 4: Produktübersicht
PRODUKTÜBERSICHT PRODUCT OVERVIEW APERÇU DU PRODUIT ARBEITSTISCH BESPRECHUNGSTISCH WORKING TABLE MEETING TABLE PLAN DE TRAVAIL TABLE DE RÉUNION rechteckig rechteckig quadratisch rectangular rectangular square rectangulaire rectangulaire carré 1.200 - 1.560 mm 1.600 - 2.400 mm 2.000 - 2.400 mm... -
Page 5: Sicherheitshinweise
SICHERHEITSHINWEISE Die Sicherheitshinweise sind un- 2. Bei Funktionsstörungen, wie zum Beispiel bedingt zu beachten! Wird das System Rauch- oder Geruchsentwicklung oder unsachgemäß betrieben, können ungewöhnliche Geräusche: Lösen Sie das Gefahren für Personen und Sachgegen- Netzkabel. stände entstehen! 3. Beim Fahren des Antriebes ist darauf zu 1. - Page 6 SICHERHEITSHINWEISE 6. Die Höhenverstellung ist nur im 9. Der Auffahrschutz ist kein Einklemm- Tippbetrieb möglich. Beim Auffahren auf schutz und kein Personenschutz ein Hindernis oder bei Funktionsstörungen (Körperteile)! Aus physikalischen Gründen ist die Verstellung sofort zu stoppen. können „weiche“ Hindernisse nur schlecht oder gar nicht erkannt und ausgewertet 7.
- Page 7 SICHERHEITSHINWEISE 12. Öffnen sie keinesfalls das Gehäuse der 17. Die Steckerleisten müssen sachgemäß Steuerung oder des Netzteils. Unbefugtes befestigt sein und so platziert werden, Öffnen des Gehäuses und unsachgemäße dass die Stecker problemlos verbunden Reparaturen können Gefahren verursachen und gezogen werden können. Stecker und der Garantieanspruch erlischt.
- Page 8 SICHERHEITSHINWEISE 19. Bei Möbel mit beweglichen oder höhen- 22. Für den Betrieb der Steuerung und verstellbaren Bauteilen gilt besondere des Netzteils beträgt die minimal Sorgfalt: Die Kabellängen müssen so zulässige Umgebungstemperatur 5°C, bemessen werden, dass beim Verstellen die maximale 40°C. keinerlei Schäden an Kabel und Leitung 23.
- Page 9 SICHERHEITSHINWEISE Gefahr: Im Fehlerfall kann es 24. Nach 2 min. Dauerbetrieb schaltet sich vorkommen, dass sich die Tischplatte das System automatisch ab und ist erst bei jedem Losfahrversuch ein Stück nach 18 min. wieder verwendbar. bewegt, bevor die Sicherheitsab- Damit wird ein Überhitzen des Motors schaltung einsetzt.
-
Page 10: Safety Instructions
SAFETY INSTRUCTIONS Please observe safety instructions! 3. Make sure no objects or parts of the body Improper operation of the system may are caught in when operating the drive. result in personal injury and cause 4. Do not adjust the height of the furniture hazard to objects. - Page 11 SAFETY INSTRUCTIONS 8. Make sure that there are safety gaps of at 12. Never attempt to open the enclosure of least 25 mm for movable parts (this also the control unit or the power supply unit. applies to organisational elements that are Unauthorised opening of the enclosure attached above or below the furniture or and improper repairs can cause danger...
- Page 12 SAFETY INSTRUCTIONS 17. Connection plug boards must be fixed to allow height adjustments without properly for easy plugging and unplugging. damaging the cables and wiring Plugs and connection plug boards must (i.e., stretching, crushing, ...). be located in such a way that no fluids 20.
- Page 13 SAFETY INSTRUCTIONS 23. For the above reasons do not use the Please note: If the product is visibly control unit: above or below heat sources damaged, it must not be installed ( e.g. heaters), at places exposed to direct or used! sunlight, in small, unventilated or humid rooms, near easily flammable materials or 24.
-
Page 14: Instructions De Sécurité
INSTRUCTIONS DE SÉCURITÉ Les instructions de sécurité doivent 2. En cas de dysfonctionnements tels que absolument être respectées ! l’apparition de fumée ou d’odeurs ou bien L’exploitation inappropriée du système de bruits inhabituels : débranchez le peut entraîner des risques pour les câble secteur. - Page 15 INSTRUCTIONS DE SÉCURITÉ 7. Une distance minimale de 25 mm par 10. En cas de collision avec un obstacle, il rapport aux objets avoisinants doit être n’est pas à exclure que l’obstacle puisse respectée afin d’éviter des points de être endommagé (éraflures, enfoncements, cisaillement et d’écrasement.
- Page 16 INSTRUCTIONS DE SÉCURITÉ 13. La maintenance et les réparations doivent l’équipement électrique ne puisse jamais uniquement être effectuées par le entrer en contact avec des liquides au personnel qualifié du fabricant. cours d’une utilisation adéquate des meubles de bureau. 14. Aucun appareil ne doit être exploité dans une atmosphère comportant des risques 18.
- Page 17 INSTRUCTIONS DE SÉCURITÉ 20. Si le câble secteur de cet appareil est 23. Pour cette raison, ne pas utilisation la endommagé, il doit être remplacé par le commande au-dessus ou devant des fabricant, le service aprèsvente du sources de chaleur (radiateurs, etc.) fabricant ou une autre personne qualifiée - dans des lieux directement exposés aux pour éviter des risques d’accidents.
- Page 18 INSTRUCTIONS DE SÉCURITÉ Danger : En cas d’erreur, il peut arriver 24. Après une utilisation continue pendant 2 que le plateau de la table se déplace minutes, le système s’éteint automati- un peu à chaque tentative de quement et ne peut être remis en marche démarrage avant que la coupure de qu’au bout de 18 minutes.
-
Page 19: Richtig Sitzen
RICHTIG SITZEN SITTING CORRECTLY S'ASSEOIR CORRECTEMENT Beim Sitzen mit gekrümmten Rücken ist die Belastung der 200% Bandscheiben doppelt so hoch (200%) wie beim Stehen (100%). Sitting with a hunched back doubles the burden (200%) on the vertebral disks compared to standing up (100%). 140% Lors d‘une position assise avec le dos voûté, la sollicitation des 100%... -
Page 20: Lieferzustand
LIEFERZUSTAND INCLUDED IN DELIVERY CONDITIONNEMENT Tischplatte mit Zargen, Eckknoten, Abdeckplatten Hubsäulen (höhenverstellbarer Tisch) Table top with frame, corner junctions, cover panels Lift column (height adjustable table) Plateau avec châssis, jonctions d’angle, panneaux de finition Colonnes de levage (table avec réglage en hauteur) Power Box (optional) Power Box (optional) Power Box (en option) -
Page 21: Montage
MONTAGE ASSEMBLY MONTAGE D990009 SPAX-SKPZ-VZ-4,0*13 Scharniere Hinges Charnières Abdeckung unten abheben und an der Schmallseite die Scharniere aushängen. Lift the cover at the bottom and remove the hinges on the narrow side. Die Schrauben lösen und Rahmen herausnehmen. Ôter le cache en dessous et fixer les charnières au côté étroit. Loosen the screws and remove the frame. - Page 22 MONTAGE ASSEMBLY MONTAGE fixer Tischfuss Ausnehmung in Tischmitte Fixed table Recess in the centre of the table Pieds de table fixes Évidement central es kann immer nur ein Fuss verkabelt werden (Ausnehmung) D990504 only one leg can be wired at a time (recess) GWSR-SKIS-SZ-M6x20 un seul pied peut être câblé...
- Page 23 MONTAGE ASSEMBLY MONTAGE höhenverstellbare Tischsäule Height-adjustable table column Piètement colonne réglable en hauteur Überschubrohr über Liftsäule fäden Kabelausrichtung zur Tischmitte in den Tischknoten einfädeln Fit the sleeve tube over the lift column Thread the cables towards the centre of the table through the junction Faire glisser le tube externe par-dessus Faire passer les câbles dans les jonctions d’angle en direction du centre de la table.
- Page 24 MONTAGE ASSEMBLY MONTAGE Tischplatte auf den aufgestellten Rahmen legen und mit den beiliegenden Schrauben befestigen. Abdeckungen wieder in die Klips eindrücken bzw. in die Scharniere einrasten. Place table top on the assembled frame and fasten it with the screws provided. Push the covers back into the clips and snap them into the hinges.
- Page 25 MONTAGE ASSEMBLY MONTAGE OPTIONAL OPTIONAL EN OPTION Steckerleiste montieren: auf Tischplatte / in die Plugbox / in die Power Box und Steuerung montieren Install the connection plug board: on the tabletop/ in the plug box / in the Power Box, and install control unit Monter la multiprise : montage directement sur le plateau / avec boîtier connectique / avec Power Box et commande D990022 SPAX-SKPZ-VZ-5,0*40...
- Page 26 MONTAGE ASSEMBLY MONTAGE OPTIONAL OPTIONAL EN OPTION Montage Steckerleise Untertisch Assembling under-table plug board Montage de la bloc multiprise sous la table D990798 SPAX-PHPZ-VZ-4,0/40 Steckerleiste mit den beiliegenden Schrauben an die vor- gekörnte Position schrauben. Screw the connector strip to the pre-punched position using the screws provided.
- Page 27 MONTAGE ASSEMBLY MONTAGE D990235 GWSR-SKIS-VZ-M8x40 Dann die Blende in die Klippverbindungen einrasten. Sicherungsschraube Then snap the cover into the clip connections. Corrugated-head screw Puis enclenchez le couvercle dans les connexions des clips. Vis de bridage...
- Page 28 MONTAGE ASSEMBLY MONTAGE OPTIONAL OPTIONAL EN OPTION Montage Plugbox mit Powerbox Assembling under-table plug board Montage de la bloc multiprise sous la table D990403 GWSR-SKIS-VZ-M5x25 GWSR-SKPR-SZ-M3*10...
- Page 29 MONTAGE ASSEMBLY MONTAGE Schrauben fixieren. Fix the screws. Fixez les vis.
- Page 30 MONTAGE ASSEMBLY MONTAGE OPTIONAL OPTIONAL EN OPTION Halterung montieren, Akkubox aufschieben und Kabel anstecken Attach bracket, slide on battery box, and plug in the cable Monter le support, ouvrir le boîtier de la batterie et brancher le câble. D990341 SPAX-SKPZ-SZ-4,0*16...
- Page 31 MONTAGE ASSEMBLY MONTAGE OPTIONAL OPTIONAL EN OPTION Spiralkabel montieren Mount spiral cable. Monter câble spiralé.
-
Page 32: Verkabelungsmöglichkeiten
VERKABELUNGSMÖGLICHKEITEN CABLING OPTIONS OPTIONS DE CÂBLAGE 10 cm vom geraden Kabel - Zugentlastung 10 cm from the straight cable - strain relief 10 cm du câble droit - système de décharge de traction fixe Tische fixed tables tables fixes elektrisch höhenverstellbare Tisch electrically height-adjustable tables tables à... - Page 33 VERKABELUNG CABLING CÂBLAGE Kabel muss fest in der Zugentlastung montiert werden. The cables must be mounted tightly into the strain relief. Le câble doit être solidement installé dans le système de décharge de traction. STEUERUNG AKKUBOX CONTROL SYSTEM BATTERY BOX COMMANDE BATTERIE Zugentlastung...
-
Page 34: Nivellierung
NIVELLIERUNG LEVELLING MISE À NIVEAU Der Tisch muss nach dem Nivellieren resetiert werden. Achtung: Der Auffahrschutz ist beim Resetieren deaktiviert. Es dürfen sich keine Gegenstände oder Hindernisse unterm Tisch (speziell im Bereich der Säule) befinden! Bei der Auslieferung unserer Tische sind die Hubsäulen ganz eingefahren. -
Page 35: Optionen
OPTION. UNTERTISCHBLENDE OPTION. MODESTY PANEL OPTION. VOILE DE FOND D990350 EURO-PZ-VZ-6,3*19... - Page 36 OPTION. POWER TRAY OPTION. POWER TRAY OPTION. POWER TRAY Die Power Tray wird einfach auf den Tisch gestellt. Place the power tray simply on the table. Le Power Tray se pose tout simplement sur la table. Typ 1: 2 x Steckdose, 2 x USB-Ladebuchse Type 1: 2 x power socket, 2 x USB charging port Type 1 : prise x 2, port USB x 2 Typ 2: 1 x Steckdose, 2 x USB-Ladebuchse, 1 x Wireless-Charger...
-
Page 37: Bedienung Handschalter
BEDIENUNG. HANDSCHALTER ALLGEMEIN OPERATION. GENERAL MANUAL SWITCH UTILISATION. PRÉSENTATION DES INTERRUPTEURS MANUELS Handschalter EASY Handschalter Premium BT mit Sensor Manual switch EASY Manual switch Premium BT with sensor Interrupteur manuel EASY Interrupteur manuel Premium BT avec capteur Dimensionen Dimensionen B: 60 mm, H: 15,8 mm B: 82 mm, H: 28,8 mm Dimensions Dimensions... - Page 38 BEDIENUNG. HANDSCHALTER ALLGEMEIN OPERATION. GENERAL MANUAL SWITCH UTILISATION. PRÉSENTATION DES INTERRUPTEURS MANUELS EASY Premium BT mit Sensor EASY Premium BT with sensor EASY Premium BT avec capteur Tasten-Bedienung Control via button Commande par bouton Paddel-Bedienung Control via paddle Commande par palette Speicherpositionen Memoryposition...
- Page 39 BEDIENUNG. HANDSCHALTER EASY OPERATION. MANUAL SWITCH EASY UTILISATION. INTERRUPTEUR MANUEL EASY EASY EASY EASY Drücken Sie die Taste des Handschalters nach oben, um den Tisch hochzufahren; drücken Sie die Taste des Handschalters nach unten, um den Tisch runter zu fahren. Lassen Sie los, wenn Sie Ihre gewünschte Position erreicht haben.
- Page 40 BEDIENUNG. HANDSCHALTER PREMIUM BT MIT SENSOR OPERATION. MANUAL SWITCH PREMIUM BT WITH SENSOR UTILISATION. INTERRUPTEUR MANUEL PREMIUM BT AVEC CAPTEUR PREMIUM BT MIT SENSOR PREMIUM BT WITH SENSOR PREMIUM BT AVEC CAPTEUR Bedienen Sie den Handschalter, indem Sie den Schalter drücken. Halten Sie die Taste nach oben gedrückt, um den Tisch nach oben zu fahren.
- Page 41 BEDIENUNG. HANDSCHALTER PREMIUM BT MIT SENSOR OPERATION. MANUAL SWITCH PREMIUM BT WITH SENSOR UTILISATION. INTERRUPTEUR MANUEL PREMIUM BT AVEC CAPTEUR EINSTELLUNGSMODUS (ZUGRIFF ÜBER DAS BEDIENELEMENT) SETTINGS MODE (ACCESSIBLE VIA THE CONTROL ELEMENT) MODE RÉGLAGES (ACCESSIBLE VIA LE ÉLÉMENT DE COMMANDE) Über den Einstellungsmodus des Via the settings mode of the Premium Le mode de réglage du Premium BT...
- Page 42 BEDIENUNG. HANDSCHALTER PREMIUM BT MIT SENSOR OPERATION. MANUAL SWITCH PREMIUM BT WITH SENSOR DAS EINSTELLUNGSMENÜ THE SETUP MENU Um in den Einstellungsmodus zu gelangen, drücken Sie die Verbindungstaste und halten Sie gleichzeitig den Kippschalter 3 Sekunden lang nach unten. Kippen Sie den Kippschalter nach oben oder unten, um durch die Menüs zu blättern. Der Einstellungsmodus ist durch das Symbol in der oberen linken Ecke des Displays gekennzeichnet.
- Page 43 UTILISATION. INTERRUPTEUR MANUEL PREMIUM BT AVEC CAPTEUR LE MENU DE CONFIGURATION Pour accéder au mode réglages, appuyez sur le bouton de connexion et, en même temps, inclinez la raquette vers le bas pendant 3 secondes. Inclinez la palette vers le haut ou vers le bas pour faire défiler les menus. Le mode réglages est identifié par l’icône dans le coin supérieur gauche de l’écran.
- Page 44 BEDIENUNG. HANDSCHALTER PREMIUM BT MIT SENSOR OPERATION. MANUAL SWITCH PREMIUM BT WITH SENSOR UTILISATION. INTERRUPTEUR MANUEL PREMIUM BT AVEC CAPTEUR HÖHE HEIGHT HAUTEUR Das erste Menü ist „HÖHE“. Wenn The first menu is ‘HEIGHT’. If the Le premier menu est «HAUTEUR». die im Display angezeigte Höhe nicht height shown in the display is not cor- Si la hauteur affichée à...
- Page 45 BEDIENUNG. HANDSCHALTER PREMIUM BT MIT SENSOR OPERATION. MANUAL SWITCH PREMIUM BT WITH SENSOR UTILISATION. INTERRUPTEUR MANUEL PREMIUM BT AVEC CAPTEUR EINHEITEN UNITS UNITÉS Das zweite Menü ist „ EINHEITEN“. The second menu is ‘UNITS’. In this Le deuxième menu est «UNITÉS». Dans In diesem Menü...
- Page 46 BEDIENUNG. HANDSCHALTER PREMIUM BT MIT SENSOR FAVORITENPOSITIONEN Das dritte Menü ist ‚FAVORITENPOSITIONEN‘. In diesem Menü können Sie Ihre Lieblingspositionen einstellen. Drücken Sie die Verbindungstaste, um das Menü aufzurufen. Drücken Sie den Kippschalter nach oben oder unten, um die gewünschte Favoritenposition zu erreichen, um alle eingestellten Favoritenpositionen zu löschen oder um mit „ABBRECHEN“...
- Page 47 OPERATION. MANUAL SWITCH PREMIUM BT WITH SENSOR FAVOURITE POSITIONS The third menu is ‘FAV. POS’. In this menu you can set your favourite positions. Press the connect button to enter the menu. Tilt the paddle up or down to reach the desired favourite position, the option to clear all set favourite positions, or ‘CANCEL’ to leave the menu and return to the settings menu.
- Page 48 UTILISATION. INTERRUPTEUR MANUEL PREMIUM BT AVEC CAPTEUR POSITIONS FAVORITES Le troisième menu est ‘FAV. POS’. Dans ce menu, vous pouvez définir vos positions favorites. Appuyez sur la touche de connexion pour accéder au menu. Inclinez la palette vers le haut ou vers le bas pour atteindre la position favorite souhaitée, l’option d’effacer toutes les posi- tions favorites réglées, ou ‘CANCEL’...
- Page 49 BEDIENUNG. HANDSCHALTER PREMIUM BT MIT SENSOR OPERATION. MANUAL SWITCH PREMIUM BT WITH SENSOR UTILISATION. INTERRUPTEUR MANUEL PREMIUM BT AVEC CAPTEUR LÖSCHEN VON FAVORITENPOSITIONEN DELETING FAVOURITE POSITIONS SUPPRESSION DES POSITIONS FAVORITES Drücken Sie im Menü der In the favourite positions menu, tilt the Dans le menu des positions favorites, Favoritenpositionen den Kippschalter paddle up or down to get to the menu...
- Page 50 BEDIENUNG. HANDSCHALTER PREMIUM BT MIT SENSOR OPERATION. MANUAL SWITCH PREMIUM BT WITH SENSOR BEGRENZUNGEN LIMITS Das vierte Menü ist „BEGRENZUNGEN“. In diesem Menü können Sie die Ober- und Untergrenzen der Tischhöhe ändern, um eine Kollision mit einem Regal oben oder einem Möbel unter dem Tisch zu vermeiden. Drücken Sie die Verbindungstaste, um das Menü...
- Page 51 UTILISATION. INTERRUPTEUR MANUEL PREMIUM BT AVEC CAPTEUR LIMITES Le quatrième menu est «LIMITES». Dans ce menu, vous pouvez modifier les limites supérieure et inférieure de la hauteur du bureau afin d’éviter d’éviter les collisions avec, par exemple, une étagère au-dessus du bureau ou une armoire placée sous le bureau.
- Page 52 BEDIENUNG. HANDSCHALTER PREMIUM BT MIT SENSOR OPERATION. MANUAL SWITCH PREMIUM BT WITH SENSOR UTILISATION. INTERRUPTEUR MANUEL PREMIUM BT AVEC CAPTEUR WIEDERHERSTELLEN RESTORE RESTAURATION Das fünfte Menü ist „ The fifth menu is ‘RESTORE’. In this Le cinquième menu est «RESTAURER». WIEDERHERSTELLEN“.
- Page 53 BEDIENUNG. HANDSCHALTER PREMIUM BT MIT SENSOR OPERATION. MANUAL SWITCH PREMIUM BT WITH SENSOR UTILISATION. INTERRUPTEUR MANUEL PREMIUM BT AVEC CAPTEUR BEENDEN EXIT QUITTER Das letzte Menü ist „BEENDEN“. The last menu is ‘EXIT’. From here you Le dernier menu est «EXIT». A partir Von hier aus können Sie das can exit the settings menu when all set- de là, vous pouvez quitter le menu des...
-
Page 54: Fehlercheckliste
BEDIENUNG. FEHLERCHECKLISTE Display funktioniert nicht (Tasten funktionieren) mögliche Ursache Behebung Kabel ist defekt Wechseln Sie den Handschalter aus. Display ist defekt Wechseln Sie den Handschalter aus. Mikrocontroller ist defekt Wechseln Sie den Handschalter aus. Handschalter ist defekt Wechseln Sie den Handschalter aus. Tasten funktionieren nicht (Display funktioniert) mögliche Ursache Behebung... -
Page 55: Possible Problems
OPERATION. POSSIBLE PROBLEMS Display does not function (but buttons do) possible reasons Remedy Cable is defective Exchange the manual switch. Display is defective Exchange the manual switch. Microcontroller is defective Exchange the manual switch. Manual switch is defective Exchange the manual switch. Buttons do not function (but display does) possible reasons Remedy... -
Page 56: Liste Des Erreurs Possibles
UTILISATION. LISTE DES ERREURS POSSIBLES L'écran ne fonctionne pas (les touches fonctionnent) Causes possibles Correction Le câble est défectueux Remplacez l'interrupteur manuel. L'écran est défectueux Remplacez l'interrupteur manuel. Le micro contrôleur est défectueux Remplacez l'interrupteur manuel. L'interrupteur manuel est défectueux Remplacez l'interrupteur manuel. - Page 57 BEDIENUNG. FEHLERMELDUNGEN AM DISPLAY OPERATION. ERROR MESSAGES ON THE DISPLAY UTILISATION. MESSAGES D’ERREUR À L’ÉCRAN ANZEIGE NAME BESCHREIBUNG DISPLAY DESCRIPTION SOLUTION MESSAGE DESCRIPTION RÉSOLUTION DU PROBLÈME • Initialisieren Sie das System. Positionsverlust Loss of position • Initialize the system. Perte de position •...
- Page 58 BEDIENUNG. FEHLERMELDUNGEN AM DISPLAY OPERATION. ERROR MESSAGES ON THE DISPLAY UTILISATION. MESSAGES D’ERREUR À L’ÉCRAN • Kurzschluss wurde im Betrieb erkannt. Kurzschluss Short circuit • Short circuit was detected during operation. Court - circuit • Un court-circuit a été détecté pendant le fonctionnement. •...
- Page 59 BEDIENUNG. FEHLERMELDUNGEN AM DISPLAY OPERATION. ERROR MESSAGES ON THE DISPLAY UTILISATION. MESSAGES D’ERREUR À L’ÉCRAN Kanal 1-6 fehlt • Antrieb fehlt. E23-E28 Channel 1-6 is missing • Drive is missing. • Le lecteur est manquant. Channel 1-6 est manquant Kanal 1-6 Typ •...
- Page 60 BEDIENUNG. FEHLERMELDUNGEN AM DISPLAY OPERATION. ERROR MESSAGES ON THE DISPLAY UTILISATION. MESSAGES D’ERREUR À L’ÉCRAN Kanal 1-6 SLS aktiviert • Überlast aufwärts. Eventuell kein Signal durch abgeklemmtes Kabel. E59-E64 Channel 1-6 SLS activated • Overload upwards. Eventually no signal due to disconnected cable. •...
- Page 61 BEDIENUNG. FEHLERMELDUNGEN AM DISPLAY OPERATION. ERROR MESSAGES ON THE DISPLAY UTILISATION. MESSAGES D’ERREUR À L’ÉCRAN Master • Verbindung zum Master verloren oder Signal nicht eindeutig. Master • Connection to master lost or signal not clear. • La connexion avec le maître est perdue ou le signal n‘est pas effacé. Master Slave 1-3 •...
-
Page 62: Technische Daten
TECHNISCHE DATEN TECHNICAL DETAILS DONNÉES TECHNIQUES Steuerung CBD6S Akkubox BA001 Maximale Belastung 100 kg Akkukapazität 2,15Ah/52Wh (alle auf- und angebrachten Teile/Lasten sind einzurechnen) Nennspannung 24V DC Entladestrom 9 A (max.) Netzanschluss Eingang 230V ~ 50Hz; max. 450 W Maximale Ladespannung 40V DC Maximale Einschaltdauer 2 min Ein, 18 min Aus Ladestrom 0,5 A Schutzklasse II... -
Page 63: Konformitätserklärung
KONFORMITÄTSERKLÄRUNG DECLARATION OF CONFORMITY DÉCLARATION DE CONFORMITÉ... -
Page 64: Pflegehinweise. Zertifikate
Ihrer Möbel und Wände ist besonders wichtig, um deren opti- ligen Herstellers zu reinigen. Informationen bzw. Unterlagen malen Zustand möglichst lange zu erhalten. dazu erhalten Sie von Ihrem Bene Betreuer. Für Schäden an Oberflächen, die durch unsachgemäße Reinigung verursacht Grundsätzlich empfiehlt sich die Reinigung mit einem feuch- wurden, übernimmt Bene keine Haftung. -
Page 65: Cleaning Instructions. Certificates
Never use polishes containing silicon, caustic cleaning agents with ammonia additives, alcohol or DISPOSAL softeners. The same applies for scratching cleaning agents Instructions for the disposal of Bene products can be found in with abrasive additives. the sustainability report at: http://www.bene.com... -
Page 66: Instructions D'entretien. Certificats
Bene. Humidifié avec de l’eau, sans addition de produit de netto- Bene se dégage de toute responsabilité concernant les sur- yage et de polissage ou analogue. Si toutefois le nettoyage faces endommagées suite à une utilisation inappropriée. -
Page 67: Notizen
NOTIZEN NOTES NOTES .............................................................................................................................................................................................................................................................................................................................................................................................................................................................................................................................................................................................................................................................................................................................................................................................................. - Page 68 à une protection plus importante et plus durable de l’environnement. Le principe que suit Bene pour sa politique environnementale est : Éviter – Réduire – Recycler – Éliminer. PORTS TABLE/WP_MB366/072021/PM...
Need help?
Do you have a question about the PORTS TABLE and is the answer not in the manual?
Questions and answers