Table of Contents
Advertisement
Advertisement
Table of Contents

Related Manuals for BENE TWIN TABLE


Summary of Contents for BENE TWIN TABLE
- Page 1 TWIN TABLE SAFETY AND OPERATING INSTRUCTIONS NOTE Please read all instructions carefully before operating the system. Keep instruction manual for further reference. This document is alternative available on the official Bene - homepage. (www.bene.com)
- Page 2 CONTENTS Contents ................2 (manual control „PRO“) ..23 Saving a table top position Product overview ............... 3 Adjusting the height display of the table top position Safety instructions ............. 5 (Manual control “Pro”) ............. 24 Sitting correctly..............9 Protection against uncontrolled movement &...
-
Page 3: Product Overview
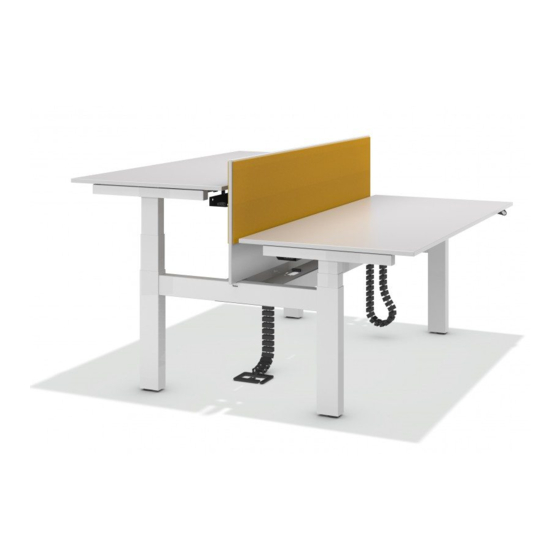
PRODUCT OVERVIEW Table top sizes, versions and cable openings: 120/140/160/180/200 cm 120/140/160/180/200 cm 120/140/160/180/200 cm 120/140/160/180/200 cm... - Page 4 PRODUCT OVERVIEW Twin Table electrical height adjustment Twin Table with crank lever height Twin Table with crank lever height (65 - 125 cm) adjustment sitting-standing adjustment sitting-sitting (68 – 118 cm) (65 - 85 cm)
-
Page 5: Safety Instructions
SAFETY INSTRUCTIONS Please observe safety instructions! 5. It is only possible to adjust the height in the incremental mode. In case an Improper operation of the system may obstacle is encountered, or there are result in personal injury and cause functional errors, stop the adjustment damage to objects! immediately. - Page 6 SAFETY INSTRUCTIONS 9. If the hardware hits an obstacle, slight 14. This furniture is only certified for commer- damage to the obstacle (scratching, cial office and administrative areas within marks, etc.) is possible because the desk rooms. is lifted at nominal speed! 15.
- Page 7 SAFETY INSTRUCTIONS 17. Connection plug boards must be fixed 20. If the electrical cable of this device properly for easy plugging and unplugging. is damaged, it must be replaced by the Plugs and connection plug boards must manufacturer or by its customer service or by a similarly qualified person to avoid be located in such a way that no fluids come into contact with electrical equip-...
- Page 8 SAFETY INSTRUCTIONS 23. For the above reasons do not install the Warning:The collision protection is control unit: inactive during all reset processes - above or below heat sources (section 5). Please take care to avoid possible danger of crushing! (e.g. heaters) - at places exposed to direct sunlight - in small, unventilated or humid rooms Caution:If the product is visibly dama-...
-
Page 9: Sitting Correctly
SITTING CORRECTLY. 200% > 600 mm 140% 20° 100% > 100 mm 90-100° Sitting with a hunched back doubles the burden (200%) on the vertebral disks compared 90-100° to standing up (100%). Occupational health experts have issued standards and recommendations for preventing harmful habits and their negative health impact at the office workplace. -
Page 10: Board Installation
GENERAL. COLLAPSIBLE CABLE TRAY AND CONNECTION PLUG BOARD INSTALLATION If the table top is already assembled, table top clips must be unfastened and table top lifted to allow pro- per clipping of the cable tray clips to the cross beam. Furthermorealways fix the cable in the strain relief! Table top clips 8 pieces... -
Page 11: Cable Tray Assembly Central
GENERAL. CABLE TRAY ASSEMBLY CENTRAL Always fix the cable in the strain relief! D990206 D524780 GWSR-ZKIS-VZ-M6x20 Spacer ø8x10... -
Page 12: Cable Chain Assembly
GENERAL. CABLE CHAIN ASSEMBLY Option 1: Fix the cable chain with the Option 2: Fix the cable chain centrally cable chain/cable tray connection with the cable chain/cable tray con- nection Cables are to be pressed left and/or right into the entire length of the cable chain! -
Page 13: Cpu Holder Assembly
GENERAL. CPU HOLDER ASSEMBLY The PC bracket can be installed to the left or right on each side! D990583 GWSR-LKIS-VZ-M8x60... -
Page 14: Levelling & Load Information
Large load: stiff towards the top Optimal load: 18 kg for table size of 1600 x 800 (19 mm chipboard) For the Twin Table, the table must be reset with elec- tronic height adjustment after levelling. CAUTION: The protection against uncontrolled move- ment is deactivated during resetting. -
Page 15: Electr. Height Adjustment Manual Control In General
ELECTR. HEIGHT ADJUSTMENT – MANUAL CONTROL IN GENERAL Manual control LIGHT Raise table top Lower table top Manual control PRO Ergoflex - LED Pedestal stop - LED Info - LED Reset - LED Log - LED Raise table top - Container Ergo ex Reset... - Page 16 ELECTR. HEIGHT ADJUSTMENT - GENERAL MANUAL CONTROL Function Description Note Raise table top The table top will move upward Press this button to move the table top position upward. until you release the button or until Keep the button pressed until the desired table top position is the highest table top position is reached.
-
Page 17: Manual Reset (Manual Control „Light")
ELECTR. HEIGHT ADJUSTMENT - MANUAL RESET (MANUAL CONTROL „LIGHT“) When the desk is used for the first time a reset must be done before you can operate the product. The reset causes all of the columns to be brought to the same level. This ensures that the table top is positioned parallel with the ground.The controller also saves the connected components in the standard configuration, such as columns or a sensor, if there is one attached. - Page 18 ELECTR. HEIGHT ADJUSTMENT - PEDESTAL-STOP – SHELF-STOP (MANUAL CONTROL „LIGHT“) These two features can be used to limit the table’s range of movement (e.g. if a pedestal is located under the table). A pedestal- stop position can be set in the lower half of the range of movement, and a shelf-stop position can be set in the upper half. If a pedestal-stop position is set, this is used as a new lower end position;...
- Page 19 ELECTR. HEIGHT ADJUSTMENT - MANUAL RESET (MANUAL CONTROL „PRO“) When the desk is used for the first time a reset must be done before you can operate the product. The reset causes all of the columns to be brought to the same level. This ensures that the table top is positioned parallel with the ground.The controller also saves the connected components in the standard configuration, such as columns or a sensor, if there is one attached.
-
Page 20: Reset To Factory Defaults
ELECTR. HEIGHT ADJUSTMENT - RESET TO FACTORY DEFAULTS (MANUAL CONTROL „PRO“) Container Ergo ex Reset Info Container Container Ergo ex Ergo ex 1. Simultaneously press the memory position buttons 1 and 2, as well as the “raise table top” button Reset Reset Info... - Page 21 ELECTR. HEIGHT ADJUSTMENT - PEDESTAL-STOP – SHELF-STOP (MANUAL CONTROL „PRO“) Container Ergo ex Reset Info These two features can be used to limit the table’s range of movement (e.g. if a pedestal is located under the table). A pedestal- stop position can be set in the lower half of the range of movement, and a shelf-stop position can be set in the upper half. (to be taken into consideration also at deactivation) If a pedestal-stop position is set, this is used as a new lower end position;...
-
Page 22: Pedestal-Stop – Shelf-Stop / Change Display From Cm To Inches (Manual Control "Pro")
ELECTR. HEIGHT ADJUSTMENT – PEDESTAL-STOP – SHELF-STOP / CHANGE DISPLAY FROM CM TO INCHES (MANUAL CONTROL “PRO”) Container Ergo ex Reset Info This function makes it possible to change the display unit of the memory manual control from centimetres to inches and vice versa. -
Page 23: Saving A Table Top Position (Manual Control „Pro")
ELECTR. HEIGHT ADJUSTMENT - SAVING A TABLE TOP POSITION (MANUAL CONTROL „PRO“) Container Ergo ex Reset Info Container Ergo ex Reset Info This function saves a defined table top height. Note: When the motor control is used for the first time , all of the saved positions are equal to the lowest table top height. - Page 24 ELECTR. HEIGHT ADJUSTMENT – ADJUSTING THE HEIGHT DISPLAY OF THE TABLE TOP POSITION (MANUAL CONTROL “PRO”) Container Ergo ex Reset Info The display will begin to blink. With this function you can change the height on the display but not the table top position. Note: When the motor control is used for the first time, all of the saved positions are equal to the lowest table top height (lowest position)
-
Page 25: Protection Against Uncontrolled Movement Technical Data
ELECTR. HEIGHT ADJUSTMENT – PROTECTION AGAINST UNCONTROLLED MOVEMENT & TECHNICAL DATA PROTECTION AGAINST UNCONTROLLED MOVEMENT Standard protection against uncontrolled movementEvery table TECHNICAL DETAILS is fitted with standard protection against uncontrolled move- PRO WORKPLACE ment, which significantly reduces any potential risk of getting Maximum load......75 kg caught or crushed. -
Page 26: Error Message On Display
ELECTR. HEIGHT ADJUSTMENT - ERROR MESSAGE ON DISPLAY Container Ergo ex Reset Info 1. MOTORS NOT WORKING Display DESCRIPTION TROUBLE SHOOTING • Wait until the motor controller has cooled off and the HOT message on the Motor controller overheated display has disappeared. The motor controller is then ready for use again. Internal error channel 1 •... - Page 27 ELECTR. HEIGHT ADJUSTMENT - ERROR MESSAGE ON DISPLAY Plug detection on motor M1 connector • Plug the correct motor to the affected connector. Plug detection on motor M2 connector Motor exchanged • Remove weight from the table. Synchronisation • Perform a reset; if the error continues to be displayed after of motor group 1 not possible the reset, then contact customer service.
-
Page 28: Click Codes
ELECTR. HEIGHT ADJUSTMENT - CLICK CODES As soon as the controller is supplied with power, the controller uses its built-in relays to audibly inform the user about the system status. The following table shows the correlation between the number of clicks and what they mean. NUMBER OF CLICKS STATUS INFORMATION Normal operating mode:... -
Page 29: Declaration Of Conformity
ELECTR. HEIGHT ADJUSTMENT – DECLARATION OF CONFORMITY... - Page 30 An enhanced glossy appearance of DISPOSAL the surface is difficult to prevent. Never use polishes Instructions for the disposal of Bene products can be found in containing silicon, caustic cleaning agents with ammonia the sustainability report at: http://www.bene.com...
-
Page 31: Notes
NOTES .............................................................................................................................................................................................................................................................................................................................................................................................................................................................................................................................................................................................................................................................................................................................................................................................................. - Page 32 - from product development, procurement, production and logistics to product recycling. Bene considers ecology to be a central element of its responsible and sustainable corporate strategy. Bene sees the legal regulations as minimum requirements and strives for better and more sustainable environmental protection throughout the group.
Need help?
Do you have a question about the TWIN TABLE and is the answer not in the manual?
Questions and answers