Table of Contents
Advertisement
Quick Links
Advertisement
Table of Contents

Related Manuals for BENE lift desk pure


Summary of Contents for BENE lift desk pure
- Page 1 LIFT DESK PURE SAFETY AND OPERATING INSTRUCTIONS NOTE Please read all instructions carefully before operating the system. Keep instruction manualfor further reference. This document is alternative available on the official Bene - homepage. (www.bene.com)
-
Page 2: Table Of Contents
CONTENTS Product overview ...............3 SOLUTION Safety instructions .............4 Click codes ..............18 Sitting correctly ..............8 Possible problems ............19 Error messages on the display FIRST START-UP (only at Manual control switch ”Pro“) ........20 Levelling ................9 Manual control general .............10 Technical data ..............22 Manual reset ..............12 CE Certificate of Comformance .........23 Cleaning instructions. -
Page 3: Product Overview
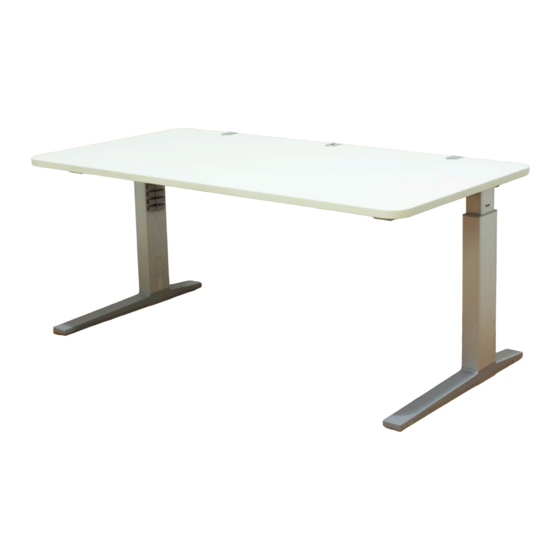
PRODUCT OVERVIEW Lift Desk Pure with cable tray Lift Desk Pure with CPU - holder Lift Desk Pure with cable duct Lift Desk Pure with third working level 3L / 3T... -
Page 4: Safety Instructions
SAFETY INSTRUCTIONS Please observe the safety instructions! 6. Make sure adjacent objects are placed at Improper operation of the system may a minimum distance of 25 mm to prevent result in personal injury and cause them from being squeezed or sheared! damage to objects! 7. - Page 5 SAFETY INSTRUCTIONS 10. Do not change or modify the control they are supervised by a person mechanism or the operating device. responsible for their safety or received instructions about how to use the appli- 11. Never open the enclosure of the control ance.
- Page 6 SAFETY INSTRUCTIONS 19. Furniture with flexible or height-adjustable 22. The operation of the control mechanism components require special care. Cables and the power supply unit requires a must be sufficiently long to allow height minimum of 5°C and a maximum adjustments without damaging the cables temperature of 40°C.
- Page 7 SAFETY INSTRUCTIONS Warning: In the event of a fault it is 24. After 2 minutes of continuous operation possible that the table top moves a bit the system automatically shuts itself off during every attempt whilst operating and cannot be used for an additional before the safety switch off kicks in.
-
Page 8: Sitting Correctly
SITTING CORRECTLY 200% > 600 mm 140% 20° 100% > 100 mm 90-100° Sitting with a hunched back doubles the burden (200%) on the vertebral disks compared 90-100° to standing up (100%). Occupational health experts have issued standards and recommendations for preventing harmful habits and their negative health impact at the office workplace. -
Page 9: Levelling
LEVELLING The desk must be reset after levelling! Please note: The protection against uncontrolled movement is deactivated during resetting. Make sure there are no objects or impediments under the table! (specifically in the area of the column) -
Page 10: Manual Control General
MANUAL CONTROL GENERAL ”Light” Manual control Raise table top Lower table top ”Pro” Manual control Display Memory position button 1 Raise table top Memory position button 2 Memory position button 3 Memory button Memory position button 4 Lower table top... - Page 11 MANUAL CONTROL GENERAL Function Description Note The desk will continue driving For an upward adjustment of the desk push this button. Desk upwards upwards until you release the Push this button until the desired height of the desk has been button, or the maximum height is reached.
-
Page 12: Manual Reset
MANUAL RESET When the desk is used for the first time a reset must be done before you can operate the product. The reset causes all of the columns to be brought to the same level. This ensures that the table top is positioned parallel with the ground. The controller also saves the connected components in the standard configuration, such as columns or a sensor, if there is one attached. -
Page 13: Storing A Position (Manual Control "Light")
STORING A POSITION (MANUAL CONTROL ”LIGHT“) These 2 features can be used to limit the movement area of the desktop (e.g. if a container is placed underneath the desktop). A container stop position can be defined in the lower half of the movement area, a shelf stop position in the upper half. If a container stop position is set, this position will be the lower limit position. -
Page 14: Storing A Position (Manual Control "Pro")
STORING A POSITION (MANUAL CONTROL ”PRO“) You can use this function to adjust the desktop to a saved height. To change to a saved position, proceed as follows: Note: If you are switching on the control unit for the first time, all the saved positions are set to the lowest desktop height (minimum desktop position). -
Page 15: Recalling A Saved Position
RECALLING A SAVED POSITION You can use this function to adjust the desktop to a saved height. To change to a saved position, proceed as follows: Press the required memory position key (e.g. 2) and hold it down. The desktop will move until it reaches the saved position. If you release the key before the saved position is reached, the desktop will stop and the saved desktop position will not be reached. -
Page 16: Information Regarding The Push-Push Function
INFORMATION REGARDING THE PUSH-PUSH FUNCTION The ”Pro“ manual control is equipped with a push-push function which is used to move out the user interface panel automatically. Note: To extend the control panel you have to press it while it is retracted. Afterwards you have to release it. The control panel will extend automatically (push-push function). -
Page 17: Enable And Disable Keylock
ENABLE AND DISABLE KEYLOCK The keylock can be enabled and disabled by swiping the screen. After enabling the keylock a key will be shown on the display. Figure 3: The key indicates that the Figure 4: Activating and deactivating the keylock can be done by keylock is enabled swiping left or right underneath the display Note:... -
Page 18: Click Codes
CLICK CODES When the control unit is switched on the SMART uses its relays to inform the user acoustically about the system state and the reason why the control unit was switched off before. The table below shows which number of clicks corresponds to certain information. -
Page 19: Possible Problems
POSSIBLE PROBLEMS Display does not work (buttons work) Possible cause Remedy Cable is defective Replace the handswitch. Display is defective Replace the handswitch. Microcontroller is defective Replace the handswitch. Handswitch is defective Replace the handswitch. Buttons do not work (display works) Possible cause Remedy Cable is defective... -
Page 20: Error Messages On The Display (Only At Manual Control Switch "Pro")
ERROR MESSAGES ON THE DISPLAY (ONLY AT MANUAL CONTROL SWITCH ”PRO“) Display DESCRIPTION SOLUTION • Wait until the motor controller has cooled off and the “hot” message on the display has disappeared. This can take up to 18 minutes (on-time monito- Motor controller overheated ring: 2 min. - Page 21 ERROR MESSAGES ON THE DISPLAY (ONLY AT MANUAL CONTROL SWITCH ”PRO“) • Remove load from desktop. Synchronization lost • Reset all motors. motor group 1 If error occurs after reset again, contact customer service. High voltage • Unplug the power cord and contact the customer service. Motor configuration changed •...
-
Page 22: Technical Data
TECHNICAL DATA Handschalter LIGHT Handschalter PRO Supply voltage ..........5VDC ± 10% Supply voltage ..........5VDC ± 10% Power consumption (Average) ........0mA Power consumption (Average) ........60mA Dimensioning of switching current ....... 50mA Power consumption in standby (Average) ..... 1,3mA Lifetime (Cycles of operation) ........10.000 Lifetime (Cycles of operation) ........ -
Page 23: Ce Certificate Of Comformance
CE CERTIFICATE OF COMFORMANCE... -
Page 24: Cleaning Instructions. Certificates
An enhanced glossy appearance of DISPOSAL the surface is difficult to prevent. Never use polishes Instructions for the disposal of Bene products can be found in containing silicon, caustic cleaning agents with ammonia the sustainability report at: http://www.bene.com... -
Page 25: Notes
NOTES .............................................................................................................................................................................................................................................................................................................................................................................................................................................................................................................................................................................................................................................................................................................................................................................................................. - Page 26 NOTES ..............................................................................................................................................................................................................................................................................................................................................................................................................................................................................................................................................................................................................................................................................................................................................................................................................
- Page 27 NOTES ..............................................................................................................................................................................................................................................................................................................................................................................................................................................................................................................................................................................................................................................................................................................................................................................................................
- Page 28 - from product development, procurement, production and logistics to product recycling. Bene considers ecology to be a central element of its responsible and sustainable corporate strategy. Bene sees the legal regulations as minimum requirements and strives for better and more sustainable environmental protection throughout the group.
Need help?
Do you have a question about the lift desk pure and is the answer not in the manual?
Questions and answers