
Subscribe to Our Youtube Channel
Related Manuals for Soozier A90-211V80


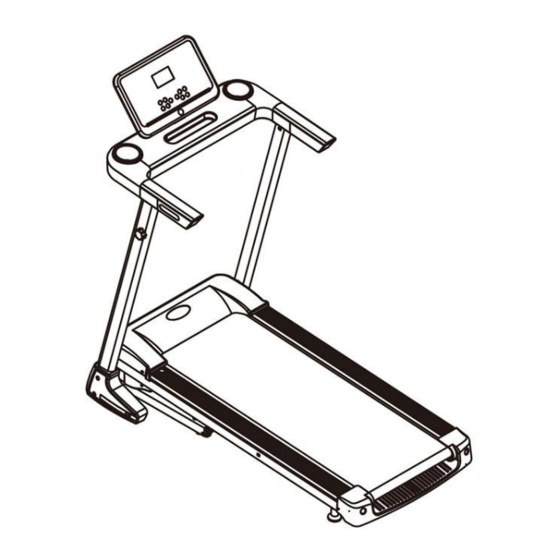
Summary of Contents for Soozier A90-211V80
- Page 1 INadd034V02_US A90-211V80 IMPORTANT, RETAIN FOR FUTURE REFERENCE: READ CAREFULLY ASSEMBLY INSTRUCTION...
-
Page 2: Table Of Contents
1、Catalogue Number Content Catalogue Safety instructions Packing specifications Assembly instructions Electric control instructions Maintenance instructions Failures and trouble shooting Exercise guidelines Warm exercise Thanks choose home use electric treadmill. Our products will improve your health, the more familiar with your treadmill, the more easy and comfortable for using. - Page 3 2、Safety Instructions A. We considered many safety problems when design and manufacture this treadmill, to ensure your safety, please read all contents of this manual carefully before use.We do not bear the consequences of any abnormal operation. RISK Do not use the heart rate device together with other wireless heart rate devices, or it can cause electrical interference.
-
Page 4: Packing Specifications
3、Packing Specification Number Component FRAME MANUAL 说明书 SCREEN COLUMN SIDE COVE SCREW PACK Fourth page icon Screw Pack... -
Page 5: Assembly Instructions
4、Assembly Instructions 1: Lift the main frame out of the carton and open the cable tie that bundles the frame. 2: Expand the frame:please pull out the pull pin on the column of N, and hold the frame on the ground with the other hand,secure it to the sheet metal part of the base with D#M8*45 screws.. - Page 6 A.First connect the signal lines of the electronic meter, and then put the panel on the electronic meter as indicated by the direction of the arrow, and then fix it with E#M5*40 screws (2 pieces). B.The red part indicated by the arrow is the anti-warping device.In use, please adjust the device according to your own weight to prevent the base from being upturned.
-
Page 7: Electric Control Instructions
5、Electric Control Instructions Boot start: Normal start after 3 seconds countdown. The number of programs is P1~P12 automatic programs. Safety lock function Unplugging the safety lock immediately shows that the "SAFE" treadmill is quickly stopped, when the safety lock is placed, the electronic watch is fully displayed for 2 seconds, and the data is all cleared. Key Function Start button, stop button: “START”... - Page 8 Calorie display: Shows the calorie accumulation during exercise in manual and program mode or the calorie count in mode run. The range of data displayed by each window: TIME: 0:00 – 99:59 (MIN) DISTANCE: 0.00 – 99 (KM) CALORIES: 0.0 – 990 (KC) SPEED: 1-12KM/H Automatic program The default running time is 10 minutes.
-
Page 9: Maintenance Instructions
Parameter setting in 3 modes The countdown time setting is initially 30:00 minutes, the setting range is 5:00---90:00 minutes, and the step is 1:00. The calorie setting of the calorie count is: 100 kcal, the setting range is 20---990 kcal, step 10. The initial distance of the countdown distance is 5.0 km, the setting range is 0.5---99.0 km, and the step is 0.1 The cycle switching sequence is: manual, time, distance, calories. - Page 10 A. Running belt tightening adjustment If the running belt is too loose, please insert the supplied hex wrench into the adjusting hole of the left footstep of the treadmill, turn it 1/4 turn clockwise, and then adjust the right foot to rotate clockwise. 1/4 laps, note that the left and right must be adjusted synchronously, so that the running belt can be tightened and the running belt will not deviate from the center point.
-
Page 11: Failures And Trouble Shooting
7、Failures And Trouble Shooting 1.Electronic watch displays error message code and excludes Default code Default code Default Resolution The display board is not 1.1.Check if the communication line is loose, connected detached or damaged; Received signal 1.2.Check or replace the electronic board; 1.3.Check or replace the controller. - Page 12 overload 4.1.Check whether overload; 4.2.Check whether the mechanical running parts are stuck; 4.3.Check whether the lack of a release agent, and if the release agent is missing, the friction between the running belt and the running board will increase.; 4.4.Check whether the running board serious wear and tear;...
- Page 13 2.Common problems and troubleshooting methods 1. Some or all of the buttons are not working well 1.1 Uncover the upper case of the electronic watch and test whether the buttons are working; 1.2 Check or replace the electronic board; 1.3 Check the button can be worked after the power is turned back on . 1.
-
Page 14: Exercise Guidelines
8、Exercise Guidelines ● Consult your doctor before starting a exercise or training program. Please follow the doctor's advice and instructions for training. ● Set your goals with your doctor before you can ensure that the plan is realistic and start the training program with ease. - Page 15 1.Touch the toes: Slowly bend forward, relax your back and shoulders when you bend down, try to stretch to the maximum, then stop counting to 15.Repeat 3 times. 2.Bigfoot muscle stretching: Sit on the floor and straighten your right leg. Bend your left leg so that the left sole is close to the inside of your right leg.
Need help?
Do you have a question about the A90-211V80 and is the answer not in the manual?
Questions and answers