
Related Manuals for Soozier A90-249V80


Summary of Contents for Soozier A90-249V80
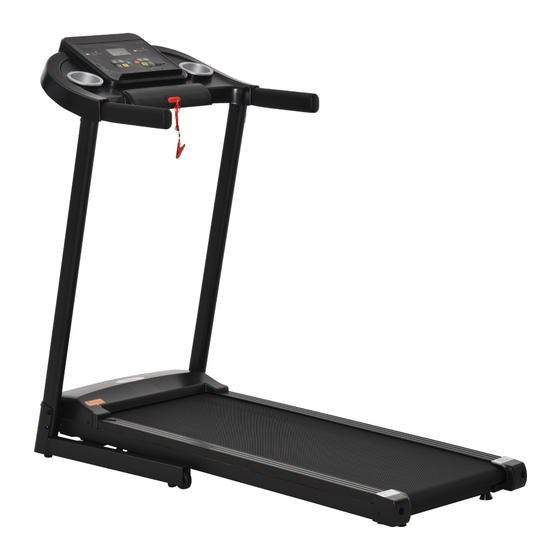
- Page 1 INan007_US A90-249V80 Treadmill User Manual IMPORTANT, RETAIN FOR FUTURE REFERENCE: READ CAREFULLY ASSEMBLY INSTRUCTION...
-
Page 2: Table Of Contents
CONTENTS SAFETY INFORMATION ............................1 PACKAGE SPECIFICATIONS ..........................2 ASSEMBLY SPECIFICATIONS ..........................3 ELECTRONIC CONTROL INSTRUCTIONS ......................5 MANUAL MODE: ............................... 6 ENERGY SAVING MODE: ............................8 PROGRAM DESCRIPTION ............................. 8 DISPLAY RANGE OF EACH VALUE ........................9 SAFETY LOCK FUNCTION: ............................ 9 10 SHUT DOWN: ................................ -
Page 3: Safety Information
SAFETY INFORMATION Please read all contents of this manual carefully before use for the safety of all users. We are not liable for any injuries because of improper operation. RISK Please do not use the heart rate device together with other wireless heart monitors as it can cause an electrical interference. -
Page 4: Package Specifications
PACKAGE SPECIFICATIONS Number Spare parts Main Frame Electronic watch holder Instruction Manual Screw pack Illustrated below Screw bag Serial number Spare parts Number Safety Key 6mm hexagon wrench Lubricating oil M8 * 15 half round head hexagon screw M8 flat washer M8 * 45 half round head hexagon screw... -
Page 5: Assembly Specifications
ASSEMBLY SPECIFICATIONS Step 1: : Lift the main frame and the electronic watch stand out of the carton, and open the binding belt of the frame. Step 2: Unfold the frame: please hold the column with your hand and gently pull it up in the direction shown by the arrow on the icon and fix it on the base with F# m8 * 45 and D# M8 * 15 screws. - Page 6 Step 4: Product use: turn on the power switch, the electronic watch screen is on, press the start key before the machine can run! (Note: the safety lock must be placed on the yellow label position in the middle under the instrument to start the treadmill normally; if "E7" is displayed in the electronic watch window, it means that the safety lock is not placed or in place).
-
Page 7: Electronic Control Instructions
ELECTRONIC CONTROL INSTRUCTIONS 5.1 Window display: 4.1.1 "SPEED": The current speed value is displayed in the running state, and the speed display range is 1.0-12KM / During the countdown, "3", "2", and "1" are displayed. 4.1.2 "TIME" Displays exercise time. The display will count from 0:00 to a maximum of 99:59. Once the counter reaches the selected time, the display will countdown to 0:00 from the set time, when the countdown reaches 0:00, the treadmill will decrease speed slowly and come to a stop. -
Page 8: Manual Mode
4.2.3 "START" is the start key: When the power is on and the safety lock is engaged, press this key at any time to start the running of the treadmill. 4.2.4 "STOP" is the stop button: during the exercise, you can use this button to stop the running of the treadmill and reset it to zero. - Page 9 preset time is 30:00, press"+","-"Keys to set the required exercise time, and then press the "START "key to start the built-in program, the built-in program is divided into 10 segments, each segment of exercise time = set time / 10. When entering, there are 3 “Bi-Bi-Bi-” prompts in the system during one period.
-
Page 10: Energy Saving Mode
6 ENERGY SAVING MODE: In the standby mode, no operation machine enters the energy-saving mode for 10 minutes. At this time, the display will be blank, press any button to exit standby mode. Time slot Set time / 10 = run time of each time slot Program PROGRAM DESCRIPTION Time set by time segment program / 10 = Run time of each segment, each program divides exercise time into 10... -
Page 11: Display Range Of Each Value
DISPLAY RANGE OF EACH VALUE Setting parameter Initial Set the initial value Set range Show range Initial Time (minutes:seconds) 0:00 15:00 5:00-99:00 0:00-99:59 Slope (Segment) Speed (KM/H) 1.0-12 1.0-12 Distance (km) 0.00 1.00 0.5-99.9 0.0-99.9 Heart rate (times/minute) Calories (kcal) 50.0 10.0-990 0.0-990... - Page 12 To maintain and extend the life of the treadmill, it is recommended that you rest the treadmill for 10 minutes after 30 minutes of continuous use. The running belt has been adjusted before leaving the factory, but after use, the running belt will be stretched and will deviate from the centre position, causing the running belt to rub the side bars and the rear cover and damage it.
-
Page 13: Lubricants
LUBRICANTS Treadmills are oiled when they are shipped, but the lubricity of the treadmills is often checked to help keep the treadmills at peak use. The treadmill must be lubricated after one year of use or 100 hours of operation. After 30 hours or 30 days of use, in the treadmill stationary state, pull the starting belt from the side to reach as far as possible to touch the table surface, if you feel touch the lubricant, do not need to add lubricant;(Use non-petroleum lubricants). -
Page 14: Exercise Guidelines
13.2 Common problems and troubleshooting methods. 13.2.1 Some or all the buttons are not working well. ➢ Uncover the upper case of the electronic watch and test whether the buttons are working. ➢ Check or replace the electronic board. ➢ Check the button can be worked after the power is turned back on . 13.2.2 The electronic watch has no display. -
Page 15: Warm Up Exercises
WARM UP EXERCISES Warm-up and soothing exercise: A successful exercise program must include warm-up, aerobic and soothing exercises. The number of exercises should start with at least two or three times a week, increasing to four or five times a day after a few months. Warm-up is an important part of your fitness routine and should not be skipped.
Need help?
Do you have a question about the A90-249V80 and is the answer not in the manual?
Questions and answers