Table of Contents
Advertisement
Quick Links
Advertisement
Table of Contents

Related Manuals for AVer CL01


Summary of Contents for AVer CL01
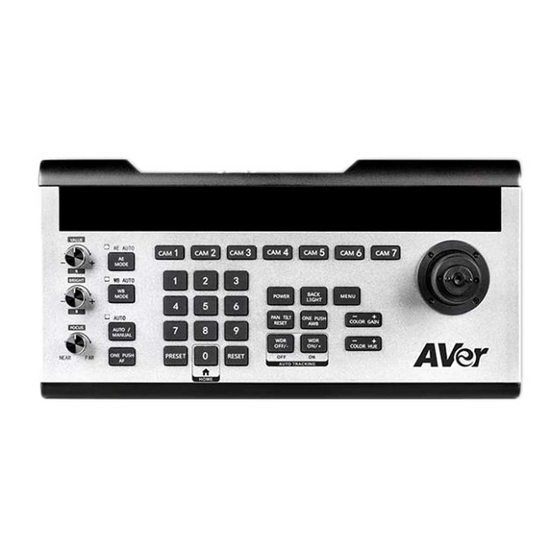
- Page 1 CL01 PTZ Camera Controller — — User Manual...
-
Page 2: Warning
Warning To reduce risk of fire or electric shock, do not expose this appliance to rain or moisture. Warranty will be void if any unauthorized modifications are done to the product. Do not drop the device it to physical shock. ... - Page 3 © 2023 AVer Information Inc. All rights reserved. | November 21, 2023 All rights of this object belong to AVer Information Inc. Reproduced or transmitted in any form or by any means without the prior written permission of AVer Information Inc. is prohibited. All...
- Page 4 Tel: +81 (0) 3 5989 0290 テクニカル・サポート: https://jp.aver.com/technical-support Vietnam Branch Office Công ty TNHH AVer Information (Việt Nam) Tầng 5, 596 Nguyễn Đình Chiểu, P.3, Quận 3, Thành phố Hồ Chí Minh 700000, Việt Nam Tel: +84 (0)28 22 539 211...
-
Page 5: Table Of Contents
Overview........................1 Parts Info ........................1 Dimensions ....................... 1 Connections ....................... 2 Keyboard ........................3 Set up Your CL01 PTZ Camera Controller ............... 6 Joystick Operation ....................6 Control More Than 7 Cameras ................. 6 Menu ........................7 Specifications ......................9 Appendix ........................ -
Page 6: Overview
Overview Parts Info Back panel 1. Micro USB Port (for firmware upgrade) 2. RS-422 / RS-485 Port 3. RS-232 Port 4. LAN Port 5. DC Power Jack Dimensions... -
Page 7: Connections
Connections Connect your controller to a power outlet using the included power plug for your country or region. Make sure your controller and PTZ cameras are connected to the same network. RS-422 / RS-485 port connection table: RS-422 RS-485 Camera Controller... -
Page 8: Keyboard
Keyboard Name Function Make sure this area isn’t covered when you use your controller in low 1. Light Sensor light conditions. Turn backlit keyboard on or off in: Menu > System for Backlit Keyboard Setting > Backlight. 2. LED Display Shows the relevant menu and camera information. - Page 9 With each press, cycle through 5 exposure modes (Auto > Manual > Shutter Priority > Iris Priority > Brightness Priority). The AUTO indicator will light up to confirm that your camera is in Auto mode. Adjust Value/R knob and Bright/B knob accordingly: 6.
- Page 10 Power: Press Power and the indicator lights of CAM1 - CAM7 will flash to confirm their status. Color Status Green Normal White Standby No light No camera connected or status unavailable Press Power and CAM1 - CAM7 to turn the camera on or off. ...
-
Page 11: Set Up Your Cl01 Ptz Camera Controller
Set up Your CL01 PTZ Camera Controller Joystick Operation Action Function Right Enter, move to, or confirm the selection. Left Exit the selection or go back to the previous selection. Move through the menu or decrease a value. Down Move through the menu or increase a value. -
Page 12: Menu
Menu Press and hold the menu button for 3 seconds to open the menu. Short press again to close the menu. Move the joystick right to enter, move to or confirm the selection. System Setting Item Description Language: English Change the menu language to English, Traditional Chinese or Simplified Chinese. - Page 13 3. Baud rate: 9600 Specify the rate at which bits are transmitted. 4. Protocol: Visca Set the protocol to Visca, SonyVisca, Pelco-P or Pelco-D. VISCA Serial port (RS-232/422/485) : VISCA UDP VISCA Sony VISCA IP: VISCA over IP Ethernet Setting Item Description 1.
-
Page 14: Specifications
Specifications I/O Port RS-422/RS-485 Port 4-pin terminal RS-232 Port DB 9-pin male interface LAN Port RJ-45 female port (All communication ports can work at the same time.) Power Plug JEITA type-4 female Upgrade Port Micro USB female port Camera Control Max Support 255 PTZ cameras Control Protocol... -
Page 15: Appendix
Appendix VISPA over IP Settings Interface RJ-45 10BASE-T / 100BASE-TX / 1000BASE-T Internet protocol IPv4 Transport protocol Your controller’s IP address IP address Port address 53669 Control Command Command Function Command Package Note Panel System Language 81 01 01 01 2p FF English (0), TC (1), Setting SC(2) -
Page 16: Query Command
Query Command Command Command Package Return Package Note PANEL_LanguageInq 81 09 01 01 FF 90 50 0p FF English (0), TC (1), SC PANEL_LED 81 09 01 02 FF 90 50 0p FF L (0) / Normal (1) / Brightness_Inq Hight (2) PANEL_Backlight_Inq 81 09 01 03 FF...
Need help?
Do you have a question about the CL01 and is the answer not in the manual?
Questions and answers