Table of Contents
Advertisement
Quick Links
Advertisement
Table of Contents

Subscribe to Our Youtube Channel
Related Manuals for Sinoboom AB16EJ Plus


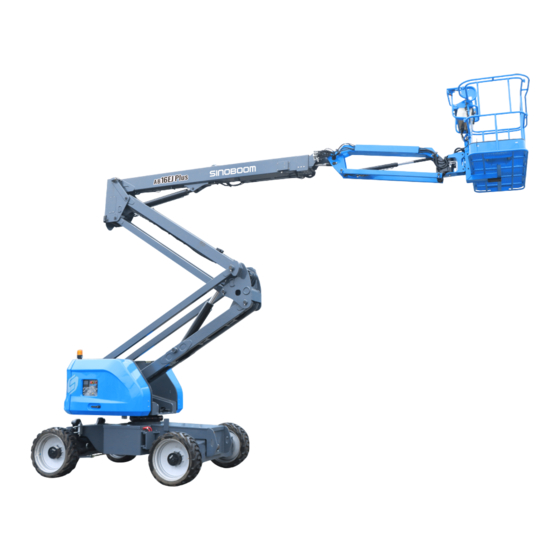
Summary of Contents for Sinoboom AB16EJ Plus
- Page 1 AB16EJ Plus Maintenance Manual Maintenance Manual No: 503011110002 REV: A Mar. 2023 Manual 产品说明书 Translated version Preface to AB16EJ Plus Maintenance PRODU C T MAN U AL AB16EJ Plus/AB520EJ Plus Manual 0608E (2132E) G T JZ 0808E (2732E) G T JZ...
- Page 3 Operating, servicing and maintaining this vehicle or equipment can expose you to chemicals including engine exhaust, carbon monoxide, phthalates and lead, which are known to the State of California to cause cancer and birth defects or other reproductive harm. To minimize exposure and avoid breathing exhaust, do not idle the engine except as necessary, service your vehicle or equipment in a well-ventilated area and wear gloves or wash your hands...
- Page 4 Service Tel: 400-608-1289/0086-0731-87116333 E-mail: info@sinoboom.com/sales@sinoboom.com Address: No.128, East Jinzhou Avenue, Ningxiang High-tech Industrial Park, Changsha, Hunan, China Postal code: 410600 Copyright©Hunan Sinoboom Intelligent Equipment Co., Ltd. Hunan Sinoboom Intelligent Equipment Co., Ltd. retains the right of final interpretation of the manual.
- Page 5 To Users Thank you for choosing and using the machine of Hunan Sinoboom In- telligent Equipment Co., Ltd. Use this machine only to transport tools to work locations and for performing tasks on the work platform. Only authorized personnel who have received appropriate training on MEWP can operate this machine.
- Page 6 Manual Revision History: DATE DESCRIPTION Original issue Mar. 2023...
- Page 7 Metric Trade Imperial Trade Model Serial No. 0301100100 to present AB16EJ Plus AB16EJ Plus AB520EJ Plus Note: • Check the machine model and serial number on the machine nameplate, and whose position can be found in the Diagram of Decals Positions section of the Operation Manual.
-
Page 9: Table Of Contents
Hydraulic Fitting Torque ... . . 20 Check Oil Level in Travel Reducer. . . 36 Replace Gear Oil in Travel Reducer . 36 4 Maintenance Instructions23 Disassembly and Installation ..37 © Mar. 2023 AB16EJ Plus Maintenance Manual... - Page 10 9.1 Drive Function....105 Air Filter......67 © Mar. 2023 AB16EJ Plus Maintenance Manual...
- Page 11 12 Appendix....139 12.1 Major Modification and Repair Record ......139 © Mar. 2023 AB16EJ Plus Maintenance Manual...
- Page 12 © Mar. 2023 AB16EJ Plus Maintenance Manual...
-
Page 13: Safety Warning Symbols And Signs
Indicates an imminently hazardous situation that, if not avoided, could result in death or serious injury. Indicates an imminently hazardous situation that, if not avoided, could result in minor or moderate injury. NOTICE Indicates information directly or indirectly related to personal safety, machine damage, or property loss. © Mar. 2023 AB16EJ Plus Maintenance Manual... - Page 14 Tipping hazard-Never Tipping hazard-Never Tip-over hazard-Never use machine in strong, use machine in strong, push or pull objects suspend objects from place ladders and gusty wind gusty wind outside platform platform scaffolding on platform © Mar. 2023 AB16EJ Plus Maintenance Manual...
- Page 15 No fire personnel can perform hazard maintenance No smoking Lifting point Lashing point Tire-to-ground load Hydraulic oil filler Platform carrying Do not use damaged Tool or weight Fast/high speed Slow/low speed capacity cords Horn © Mar. 2023 AB16EJ Plus Maintenance Manual...
- Page 16 SAFETY WARNING SYMBOLS AND SIGNS This Page Intentionally Left Blank AB16EJ Plus Maintenance Manual © Mar. 2023...
-
Page 17: Maintenance Safety Precautions
Without the written permission of Hunan Precautions before Maintenance Sinoboom Intelligent Equipment Co., Ltd., it is forbidden to alter or modify the machine. Before machine inspections and maintenance and dur- ing maintenance, maintenance personnel must be care- ful and take measures to avoid dangerous situations. -
Page 18: Maintenance Safety
Please strictly follow the above requirements during the maintenance process. In addition, take other measures to ensure safety during the maintenance process as ap- propriate for the actual environment. AB16EJ Plus Maintenance Manual © Mar. 2023... - Page 19 • After maintenance, clean the spilled hydraulic oil thoroughly and do not spill the hydraulic oil on the ground. © Mar. 2023 AB16EJ Plus Maintenance Manual...
- Page 20 If treatment is or cable clamps with tools that not carried out immediately, seri- can generate sparks. ous complications can result. • Only approved non-flammable cleaning solutions should be used on the machine. AB16EJ Plus Maintenance Manual © Mar. 2023...
- Page 21 • Do not short-circuit the positive • Batteries contain sulfuric acid and negative poles of the battery and can produce explosive system. © Mar. 2023 AB16EJ Plus Maintenance Manual...
-
Page 22: Considerations After
3. The safety protective device needs to be restored or reinstalled, and if necessary, be recalibrated. 4. After maintenance, clear up the tools and equip- ment for maintenance, remove the replaced parts and loose objects, and clean up the site. AB16EJ Plus Maintenance Manual © Mar. 2023... -
Page 23: Technical Characteristics
(restricted)/1000lb (restricted) Max. number of allowed people on 3 persons/2 persons the platform (restricted/unrestricted) Drive speed (stowed) 0~3.4mph 0~5.5km/h Drive speed (raised) 0~0.68mph 0~1.1km/h Gradeability (4WD) Turntable rotation (angle/continuity) 355°/non-continuous Platform rotation angle 180° © Mar. 2023 AB16EJ Plus Maintenance Manual... - Page 24 Max. allowable side force 400N 90lbf (restricted/unrestricted) Max. allowable wind speed 12.5m/s 28mph Max. allowable altitude 1000m 3280ft Allowable ambient temperature -10℃~40℃ 14℉~104℉ (lead-acid battery) Allowable ambient temperature -20℃~40℃ -4℉~104℉ (lithium battery) Max. allowable relative humidity © Mar. 2023 AB16EJ Plus Maintenance Manual...
-
Page 25: Specifications Of Major
Rated output 3500Nm (2581ft-lb) Rated power torque Rated voltage Maximum input 112Nm (82.6ft-lb) torque Rated current 165A Maximum input 4000rpm Rated RPM 3333rpm Rated 114Hz Speed ratio 62.33 frequency Rated torque 20Nm (14.75ft-lb) © Mar. 2023 AB16EJ Plus Maintenance Manual... -
Page 26: Battery
Table 3-10 Gear pump (PN.202010003053) ~140℉). If the hydraulic oil temperature is too low, the test results will be affected. Displacement 5.6mL/r Test requirements: Rated pressure 28Mpa (4061psi) Maximum pressure 31Mpa (4496psi) 600–4000rpm AB16EJ Plus Maintenance Manual © Mar. 2023... -
Page 27: Weight Of Major Components
3968 Main boom Telescopic boom Upper articulated boom Lower articulated boom Jib boom assembly Cable track system Platform (middle-sized) Platform (small-sized) Counterweight 1400 3086 Slewing mechanism Main boom telescopic cylinder Upward leveling cylinder © Mar. 2023 AB16EJ Plus Maintenance Manual... -
Page 28: Pressure Requirements
• It is strictly forbidden to use inferior oils. The use of inferior oils will bring damage to the ma- chine, and the resulting failure will not be guar- anteed by Sinoboom. AB16EJ Plus Maintenance Manual © Mar. 2023... -
Page 29: Torque Specifications
Slewing bearing fastening bolt 300Nm (221ft-lb) Counterweight fastening bolt 730Nm (538ft-lb) Cable fastening nut M8 9~11Nm (6.6~8.1ft-lb) Cable fastening nut M10 18~23Nm (13.2~17ft-lb) Swing cylinder fastening bolt 100Nm (74ft-lb) Swing cylinder fastening nut 630Nm (465ft-lb) © Mar. 2023 AB16EJ Plus Maintenance Manual... -
Page 30: Fastener Torque Specifications
( ( i i n n ) ) 10Nm (7ft-lb) 14Nm (10ft-lb) 1/4-20 7/16" 21Nm (15ft-lb) 29Nm (21ft-lb) 5/16-18 1/2" 37Nm (27ft-lb) 51Nm (38ft-lb) 3/8-16 9/16" AB16EJ Plus Maintenance Manual © Mar. 2023... -
Page 31: Hydraulic Hose Torque
Table 3-20 Hydraulic Hose Torque L (light-duty) S (heavy-duty) Metric thread 19±1Nm (14±1ft-lb) M12×1.5 26±2Nm (19±2ft-lb) M14×1.5 40±3Nm (30±2ft-lb) M16×1.5 50±4Nm (37±3ft-lb) M18×1.5 60±4Nm (44±3ft-lb) M20×1.5 70±5Nm (52±4ft-lb) M22×1.5 85±6Nm (63±4ft-lb) M24×1.5 90±6Nm (66±4ft-lb) M26×1.5 © Mar. 2023 AB16EJ Plus Maintenance Manual... -
Page 32: Hydraulic Fitting Torque
185±12Nm (136±9ft-lb) 160±10Nm (118±7ft-lb) M27×2 140±8Nm (103±6ft-lb) 245±15Nm (181±11ft-lb) 210±13Nm (155±10ft-lb) M30×2 180±10Nm (133±7ft-lb) 320±20Nm (236±15ft-lb) 260±15Nm (192±11ft-lb) M33×2 240±15Nm (177±11ft-lb) 450±25Nm (332±18ft-lb) 330±20Nm (243±15ft-lb) M42×2 280±20Nm (207±15ft-lb) 540±30Nm (398±22ft-lb) 420±25Nm (310±18ft-lb) M48×2 © Mar. 2023 AB16EJ Plus Maintenance Manual... - Page 33 35±2Nm (26±2ft-lb) 11/16-12 40±3Nm (30±2ft-lb) 50±4Nm (37±3ft-lb) 3/4-16 50±3Nm (37±2ft-lb) 65±4Nm (48±3ft-lb) 7/8-14 75±5Nm (55±4ft-lb) 110±8Nm (81±6ft-lb) 1-1/16-12 110±8Nm (81±6ft-lb) 140±10Nm (103±7ft-lb) 1-5/16-12 160±10Nm (118±7ft-lb) 210±15Nm (155±11ft-lb) S (heavy-duty) 7/16-20 21±2Nm (15±2ft-lb) 23±2Nm (17±2ft-lb) © Mar. 2023 AB16EJ Plus Maintenance Manual...
- Page 34 Thread size O-ring O-ring 9/16-18 34±2Nm (25±2ft-lb) 40±3Nm (30±2ft-lb) 11/16-12 40±3Nm (30±2ft-lb) 65±4Nm (48±3ft-lb) 3/4-16 50±3Nm (37±2ft-lb) 80±6Nm (59±4ft-lb) 7/8-14 75±5Nm (55±4ft-lb) 125±10Nm (92±7ft-lb) 1-1/16-12 110±8Nm (81±6ft-lb) 185±15Nm (136±11ft-lb) 1-5/16-12 160±10Nm (118±7ft-lb) 280±20Nm (207±15ft-lb) © Mar. 2023 AB16EJ Plus Maintenance Manual...
-
Page 35: Maintenance Instructions23
The fre- recognized by Sinoboom as one who, by possession of quency of the inspection and maintenance must be in- a recognized degree, certificate and training, has suc-... -
Page 36: Responsible Persons And Qualifi- Cations For Performing Inspection
Steering component 1, 2 1, 2 1, 2 Outrigger, telescopic shaft 1, 2, 3 1, 2, 3 1, 2, 3 Bearing 1, 2, 5, 12 1, 2, 5, 12 1, 2, 5, 12 © Mar. 2023 AB16EJ Plus Maintenance Manual... - Page 37 Counterbalance valve locking check NO.1 NO.1 NO.1 Hydraulic connecting pin and 1, 2 1, 2 1, 2 retaining ring Hydraulic hose, pipeline and fitting 1, 2, 6 1, 2, 6 1, 2, 6 © Mar. 2023 AB16EJ Plus Maintenance Manual...
- Page 38 All decals/labels complete, clear and secure Annual inspection date No unapproved changes or additions All safety publications included General structural components and welds All fasteners, pins, protective guards 1, 2 1, 2 1, 2 and covers © Mar. 2023 AB16EJ Plus Maintenance Manual...
- Page 39 6. Check for correct sealing, leaking and level 7. Labels are complete, clear and secure 8. Check for appropriate tolerances 9. Fully charged 10. Validation/Execution 11. Replace the oil or filter element 12. Correctly lubricated © Mar. 2023 AB16EJ Plus Maintenance Manual...
-
Page 40: General Maintenance
11. If a component with the assembly angle relative to the support less than 90° needs to be removed, take special care since the eye bolt or similar bracket cannot provide adequate supporting force in such case. © Mar. 2023 AB16EJ Plus Maintenance Manual... - Page 41 Bearing 1. After a bearing is removed, cover it to avoid dust and abrasives. Use non-flammable cleaning solvent © Mar. 2023 AB16EJ Plus Maintenance Manual...
- Page 42 © Mar. 2023 AB16EJ Plus Maintenance Manual...
-
Page 43: Major Modification And Repair
• Excessively tilted joint • Noise originating from the joint during operation 2. The composite bearing should be replaced in any of the following conditions: © Mar. 2023 AB16EJ Plus Maintenance Manual... - Page 44 MAINTENANCE INSTRUCTIONS This Page Intentionally Left Blank © Mar. 2023 AB16EJ Plus Maintenance Manual...
-
Page 45: Chassis And Turntable Assembly
So, the machine’s four wheels can always contact with the ground even when driving on rough and uneven ground, which greatly im- proves the trafficability and operating comfort. © Mar. 2023 AB16EJ Plus Maintenance Manual... -
Page 46: Tire Assembly
The wear extent of the tire’s off-ground support sur- face exceeds 25%. Hunan Sinoboom Intelligent Equipment Co., Ltd. recom- mends the replacement tire be of the same size, ply rat- ing and brand as the original tire. For the tire part number of a specific machine model, please reference its Parts Manual. -
Page 47: Replace Tires
The travel drive device is mainly composed of the travel 8. Tighten all nuts by hand first to prevent loosening of reducer and travel motor. Fig 3 Diagram of travel drive device © Mar. 2023 AB16EJ Plus Maintenance Manual... -
Page 48: Check Disengaged Drive Hub Cap
3. Remove the oil plug from the oil port at the bottom to drain the gear oil in the travel reducer to the vessel. 4. Reinstall the oil plug. Fill with clean oil: © Mar. 2023 AB16EJ Plus Maintenance Manual... -
Page 49: Disassembly And Installation
(worm gear) of the slewing bearing, so as to rotate the equipment. turntable. Installation © Mar. 2023 AB16EJ Plus Maintenance Manual... -
Page 50: Lubricate Slewing Bearing
1. As shown in the figure below, connect the grease nipple on the slewing bearing and the nipple at posi- tion #1 with a hose. © Mar. 2023 AB16EJ Plus Maintenance Manual... -
Page 51: Inspect Slewing Bearing Bolts
(turntable counterweight). 7. Make sure that the feeler gauge will not penetrate under the bolt head to the bolt shank. Fig 8 Instruction for inserting feeler gauge © Mar. 2023 AB16EJ Plus Maintenance Manual... - Page 52 CHASSIS AND TURNTABLE ASSEMBLY Fig 9 Checking slewing bearing connecting bolts (a) AB16EJ Plus Maintenance Manual © Mar. 2023...
-
Page 53: Disassembly And Installation
6. Slowly remove the entire turntable assembly from bearing to the mounting surface of the chassis, the slewing bearing with the assistance of lifting aligning the outer ring of the slewing bearing with © Mar. 2023 AB16EJ Plus Maintenance Manual... -
Page 54: Counterweight
4. Remove the bolts securing the counterweight to the turntable. 13. Remove the lifting equipment and reconnect the hy- draulic hoses according to the marks before 5. Slowly remove the counterweight with the aid of the disassembly. lifting equipment. © Mar. 2023 AB16EJ Plus Maintenance Manual... -
Page 55: Battery
4. Place the forklift fork below the battery box to be re- moved to provide support for the battery box. © Mar. 2023 AB16EJ Plus Maintenance Manual... - Page 56 CHASSIS AND TURNTABLE ASSEMBLY This Page Intentionally Left Blank AB16EJ Plus Maintenance Manual © Mar. 2023...
-
Page 57: Boom And Platform Assembly
After the excess load is removed, the overload indicator will go out and all machine movements will be resumed. © Mar. 2023 AB16EJ Plus Maintenance Manual... -
Page 58: Platform And Jib Boom
2. Turn off the machine and press the emergency stop tightened with the correct torque. Refer to the Torque button on the platform controller and ground Specifications section for the tightening torque. controller. 3. Mark and disconnect the harness connections on AB16EJ Plus Maintenance Manual © Mar. 2023... -
Page 59: Jib Boom Assembly
Inspection 5. Knock out pivot pins #3 and #4 with a brass rod and • Inspect the jib boom pivot pin for wear, scratches, mallet. deformation or other damage. Replace the pivot pin © Mar. 2023 AB16EJ Plus Maintenance Manual... -
Page 60: Upward Leveling Cylinder
8. To disassemble the cable track separately, simply Then seal the pipelines and ports. remove the fastening bolts at both ends of the cable 4. Remove the hydraulic pipelines and wiring har- track. nesses from the cable track guide. AB16EJ Plus Maintenance Manual © Mar. 2023... -
Page 61: Downward Leveling Cylinder
2. Mark and disconnect the hydraulic pipelines on the downward leveling cylinder and collect the hydraulic oil in the pipelines with a suitable vessel. Then seal the pipelines and ports. © Mar. 2023 AB16EJ Plus Maintenance Manual... -
Page 62: Main Boom Assembly
1. Raise the boom tube slightly until the main boom lift cylinder is accessible and can be easily removed. Main Boom Assembly 2. Support the main boom with suitable lifting Fig 5 Main boom assembly AB16EJ Plus Maintenance Manual © Mar. 2023... -
Page 63: Articulated Boom Lift Cylinder
2. Raise the articulated boom slightly until the articu- Installation lated boom lift cylinder is accessible and can be easily removed. Follow the reverse order of the disassembly procedures. © Mar. 2023 AB16EJ Plus Maintenance Manual... -
Page 64: Articulated Boom Assembly
Follow the reverse order of the disassembly procedures. Fig 7 Articulated boom assembly Table 6-2 Articulated boom assembly Description Upper connector Upper articulated boom Upper linkage Lower connector Pull rod Lower linkage Lower articulated boom Articulated boom lift cylinder Turntable © Mar. 2023 AB16EJ Plus Maintenance Manual... -
Page 65: Boom Slider
13. Remove the articulated boom lift cylinder. 14. Reliably support the upper linkage with suitable lift- ing equipment. 15. Remove the bolt at the pivot pin #2 connecting the Fig 8 Diagram of sliders at boom head © Mar. 2023 AB16EJ Plus Maintenance Manual... - Page 66 3mm Slider thickness (0.118in). 11mm (0.43in)/ NOTICE 14mm (0.55in) 11mm (0.43in) The disassembled slider cannot be reused and must be replaced with a new slider assembly. 16mm (0.63in) AB16EJ Plus Maintenance Manual © Mar. 2023...
-
Page 67: Telescopic Cylinder
7. With the assistance of the lifting equipment, slowly remove the cylinder from the main boom and care- fully place it on a suitable support. Installation © Mar. 2023 AB16EJ Plus Maintenance Manual... - Page 68 BOOM AND PLATFORM ASSEMBLY This Page Intentionally Left Blank AB16EJ Plus Maintenance Manual © Mar. 2023...
-
Page 69: Hydraulic System
HYDRAULIC SYSTEM © Mar. 2023 AB16EJ Plus Maintenance Manual... -
Page 70: Layout Of Hydraulic Components
HYDRAULIC SYSTEM 7.1 LAYOUT OF HYDRAULIC COMPONENTS Fig 1 Table 7-1 1. Oscillation multi-way valve 7. Return filter 13. Luffing control valve 2. Oscillation counterbalance valve 8. Oscillation control valve 14. Leveling counterbalance valve AB16EJ Plus Maintenance Manual © Mar. 2023... -
Page 71: Function Valves
Articulated boom luffing Control articulated boom lifting/lowering work section Main boom luffing work Control the direction and speed of main boom lifting/lowering section Boom telescoping work Control the direction and speed of boom extending/retracting section © Mar. 2023 AB16EJ Plus Maintenance Manual... - Page 72 If the main spool of the boom telescoping work section is Unloading valve stuck, the pressure of the oil port can be released to prevent the spool from being stuck and causing malfunction AB16EJ Plus Maintenance Manual © Mar. 2023...
- Page 73 Control oscillation pressure reducing valve 33.9Nm (25ft-lb) Flow valve Control flow for oil lines 25.8~28.5Nm Solenoid valve Control oscillation (19~21ft-lb) Pilot-operated 45~50Nm (33~37ft-lb) Limit the maximum pressure for oscillation system valve Damper 5Nm (9ft-lb) © Mar. 2023 AB16EJ Plus Maintenance Manual...
- Page 74 Table 7-4 Two-section platform valve (PN.202040000329) Torque Indication Function 40~45Nm (30~33ft-lb) Control the direction of jib luffing movement 1–1 Solenoid valve 40~45Nm (30~33ft-lb) Control the direction of platform swing 1–2 Solenoid valve Damper 5Nm (9ft-lb) Damper 5Nm (9ft-lb) © Mar. 2023 AB16EJ Plus Maintenance Manual...
- Page 75 40~45Nm (30~33ft-lb) Keep the load balanced valve Leveling Counterbalance Valve (PN.202040000011) Fig 6 Leveling counterbalance valve (PN.202040000011) Table 7-6 Leveling counterbalance valve (PN.202040000011) Torque Name Function Counterbalance 70~75Nm (52~55ft-lb) Keep the load balanced valve © Mar. 2023 AB16EJ Plus Maintenance Manual...
- Page 76 HYDRAULIC SYSTEM Telescopic Counterbalance Valve (PN.202040000026) Fig 7 Telescopic counterbalance valve (PN.202040000026) Table 7-7 Telescopic counterbalance valve (PN.202040000026) Torque Name Function Counterbalance 45-50Nm (33-37ft-lb) Keep the load balanced valve AB16EJ Plus Maintenance Manual © Mar. 2023...
- Page 77 Table 7-8 Luffing control valve (PN.202040003366) Torque Name Function 25.8~28.5Nm Control the speed of lowering caused by dead Solenoid valve (19~21ft-lb) weight Damper 5Nm (4ft-lb) Counterbalance 70~75Nm (52~55ft-lb) Keep the load balanced valve Damper 5Nm (4ft-lb) © Mar. 2023 AB16EJ Plus Maintenance Manual...
-
Page 78: Hydraulic Oil
2. Open the left turntable cover and locate the hydraul- ic tank. Air filter 3. Close the hydraulic shut-off valve located on the Level indicator side of the tank. Suction Filter 4. Place an appropriate oil-collecting container under AB16EJ Plus Maintenance Manual © Mar. 2023... -
Page 79: Air Filter
5. Repeat steps 3 and 4 until the left/right oscillating tighten it securely. cylinders are exhausted successfully. 8. Clean the hydraulic oil spilled during the process. 6. Perform a counterbalance valve locking check. © Mar. 2023 AB16EJ Plus Maintenance Manual... -
Page 80: Oscillation Function Check
1. Place the cylinder in an environment with stable am- bient temperature. 2. Make the cylinder apply normal cylinder load to the platform. 3. Measure drift at cylinder piston rod with a calibrated dial indicator. AB16EJ Plus Maintenance Manual © Mar. 2023... -
Page 81: Hydraulic Symbols
46.7096 28.5682 16.0000 棕 兰 黑 7.10 HYDRAULIC SYMBOLS 棕 兰 Table 7-11 黑 Symbol Description 17.4787 46.7096 Filter 17.4787 34.4087 46.7096 32.0000 34.4087 Brake 28.5682 16.0000 32.0000 Emergency power unit 28.5682 16.0000 © Mar. 2023 AB16EJ Plus Maintenance Manual... -
Page 82: Hydraulic Schematic Diagram
HYDRAULIC SYSTEM 7.11 HYDRAULIC SCHEMATIC DIAGRAM Fig 10 Hydraulic Schematic Diagram AB16EJ Plus Maintenance Manual © Mar. 2023... -
Page 83: Electrical System
If satisfying the Result battery is damaged. If any damage is found, repair 1, proceed with the next step. the paint immediately to protect the outer box insula- tion and avoid corrosion. © Mar. 2023 AB16EJ Plus Maintenance Manual... -
Page 84: Adding Water
(the white dot of the battery observation hole the following table. is not at the top), wear gloves to add conforming dis- tilled water or deionized water to the standard level © Mar. 2023 AB16EJ Plus Maintenance Manual... -
Page 85: Charging Faults And Solutions
When the battery temperature exceeds the preset value, Overtemp cutout of the charger will cut out to prevent overheat. After the 3 lights flash four E04 bAt battery battery temperature drops, the charger will restart times automatically. © Mar. 2023 AB16EJ Plus Maintenance Manual... -
Page 86: Charging Faults And Solutions
Excessively high Return the battery for repair. output current Excessively high Check and make sure the correct output battery voltage is connected. battery voltage Reading memory Return the battery for repair. address error AB16EJ Plus Maintenance Manual © Mar. 2023... -
Page 87: Fault Codes Description
Check whether the foot switch or enable switch Footswitch or Footswitch or enable switch function properly enable switch 7- 7-second limit alarm © Mar. 2023 AB16EJ Plus Maintenance Manual... - Page 88 Steer right solenoid valve Check the wiring of steer right solenoid valve valve fault fault Platform swing left Platform swing left solenoid Check the wiring of platform swing left solenoid solenoid valve fault valve fault valve AB16EJ Plus Maintenance Manual © Mar. 2023...
- Page 89 Main boom relative Main boom relative angle Check whether the main boom relative angle angle sensor sensor comparison error sensor is correctly installed comparison error © Mar. 2023 AB16EJ Plus Maintenance Manual...
-
Page 90: Motor Controller Fault Codes
2. Controller damaged. Pre-charging fault of RL 0314 3. If no problem is found in the above inspec- motor controller tions, replace the controller. Pre-charging fault of RR 0414 motor controller AB16EJ Plus Maintenance Manual © Mar. 2023... - Page 91 0021 pump motor controller The power generation current limit value Activated battery current sent by the host computer is less than the attenuation Declined battery current of 0121 actual value. FL motor controller © Mar. 2023 AB16EJ Plus Maintenance Manual...
- Page 92 0224 performance of FR motor setting. age rise. controller 4. Check the regenerative brake current limit Reduced overvoltage setting (programme/current limits menu re- 0324 performance of RL motor gen current limit). controller AB16EJ Plus Maintenance Manual © Mar. 2023...
- Page 93 2. Improper motor tem- perature setup. Reduced overheat 3. Monitor the machine operating current to 0228 performance of FR motor determine whether the overheat results controller from an excessively high current, re-match © Mar. 2023 AB16EJ Plus Maintenance Manual...
- Page 94 2. Monitor output signal (monitor menu/out- Open/short-circuited 2. Stained/damaged/bro- puts menu/Driver 3 PWM) to check 0133 solenoid brake/coil 3 output ken wiring. whether there is output control signal; of FL motor controller © Mar. 2023 AB16EJ Plus Maintenance Manual...
- Page 95 0037 1. Missing phase in 1. Ensure the UVW 3-phase wiring not open- controller motor; circuited; Open-circuited FL motor 0137 2. Improper wiring; 2. Use a multimeter to check the UVW power controller © Mar. 2023 AB16EJ Plus Maintenance Manual...
- Page 96 Note: The pin #16 of the 35-pin controller accelerator. Low voltage at slider end of 0142 connector is for accelerator slider end input. AB16EJ Plus Maintenance Manual © Mar. 2023...
- Page 97 0345 motor controller Pot-low overcurrent of RR 0445 motor controller 1. Download the correct software version; Invalid EEPROM of pump 1. Software error; 0046 motor controller 2. Replace the controller. 2. Controller fault. © Mar. 2023 AB16EJ Plus Maintenance Manual...
- Page 98 Power supply of FL motor loads; 2. Check the setup (external supply max and controller exceeding the 0169 external supply min); range 2. Check the setup. 3. Replace the failed devices. Power supply of FR motor 0269 AB16EJ Plus Maintenance Manual © Mar. 2023...
- Page 99 2. Check input signals of all switches, and the controller fails; check the switches for wetting or damage. System distress of FR motor 0277 3. The processor discov- controller ers the switching value © Mar. 2023 AB16EJ Plus Maintenance Manual...
- Page 100 Motor matching failure of RL 2=Motor temp sensor 0387 motor controller failure; 3=Motor high-temp Motor matching failure of RR response failure; 0487 motor controller 4=Motor overheat AB16EJ Plus Maintenance Manual © Mar. 2023...
- Page 101 2. Check the brake disc of solenoid brake to 2. The holding force of determine whether it needs adjusting. solenoid brake is too Invalid solenoid brake setup 0292 weak. of FR motor controller © Mar. 2023 AB16EJ Plus Maintenance Manual...
- Page 102 2WD machine motor setup When the dual-motor is shall be set as 0 or 1. Check the parameter on, the control mode is not 0099 mismatch of pump motor setting. controller set as 0 or 1. AB16EJ Plus Maintenance Manual © Mar. 2023...
- Page 103 Communication RL motor controller timeout Check CAN3 signal lines between RL and FL 0356 timeout between RL 1s to receive signal from FL motor controllers. motor and main motor controller © Mar. 2023 AB16EJ Plus Maintenance Manual...
-
Page 104: Lithium Battery Bms Fault Codes
Second Level Battery Cell Voltage Difference-Second Discharge Overcurrent Threshold-Third 0x205 0x30C Level Level Battery Cell Voltage Difference-Third 0x305 0x10D Low SOC-First Level Level Discharge of Low Temperature-First 0x106 0x20D Low SOC-Second Level Level © Mar. 2023 AB16EJ Plus Maintenance Manual... -
Page 105: Basic Trouble Shooting
Check the function solenoid, adjust the pressure or Function solenoid problem Platform failed to be replace the function solenoid leveled Check the pipeline and connectors for leakage. Cylinder or pipeline leakage Check the cylinder or its seal for leakage. © Mar. 2023 AB16EJ Plus Maintenance Manual... - Page 106 Low hydraulic system oil level Check the hydraulic oil level Supply pipelines in valve housing or hydraulic pump Clean or replace the pipeline restricted or damaged Directional valve Repair or replace the valve malfunctioning AB16EJ Plus Maintenance Manual © Mar. 2023...
- Page 107 Backward function inserted correctly and securely. Backward traveling function is failed while with no Check whether the connection of the forward valve is malfunctioning. warning normal. Inspect whether the ground controller is malfunctioning. © Mar. 2023 AB16EJ Plus Maintenance Manual...
-
Page 108: Electrical Symbols
28.5682 Symbol Description 16.0000 Table 8-9 46.7096 46.8000 Symbol Description 34.4087 Storage battery 32.0000 28.5682 Buzzer 16.0000 Lithium battery Valve θ Toggle switch Two lines connected θ Motor Level switch 28.5682 46.7096 θ AB16EJ Plus Maintenance Manual © Mar. 2023... - Page 109 Fuel level sensor Delay relay Horn Main power switch θ Relay Key switch Warning light Preheating wire Valve Two lines not connected 棕 兰 Proximity switch/ Pressure sensor 黑 28.5682 46.7096 28.5682 © Mar. 2023 AB16EJ Plus Maintenance Manual 棕 兰...
-
Page 110: Electrical Schematic Diagram
ELECTRICAL SYSTEM 8.6 ELECTRICAL SCHEMATIC Electrical Schematic Diagram of Turntable DIAGRAM AB16EJ Plus Maintenance Manual © Mar. 2023... - Page 111 XJ1-23/24 CGNDS XJ2-6 XJ1-22 GGND XJ2-5 XJ1-23 XJ1-13/14 XJ1-3/4 C206A SBE201 C205 C201 XJ1-17/18 XJ1-1/2 C202 XJ1-15/16 CGNDS XJ1-19/20 XJ1-11/12 XJ1-9/10 CANL4 XJ1-7/8 CANH4 XJ1-5/6 Fig 1 Electrical schematic diagram of turntable (Rexroth) © Mar. 2023 AB16EJ Plus Maintenance Manual...
- Page 112 XJ1-23 2438 S229 CGNDS SAK201 2407 HAB201 XJ1-13/14 XJ1-3/4 DO10 C205 C201 C207 XJ1-17/18 XJ1-1/2 C202 CGND XJ1-15/16 XJ1-19/20 XJ1-11/12 XJ1-9/10 XJ1-7/8 XJ1-5/6 CANL4 CANH4 Fig 2 Electrical schematic diagram of turntable (Rising) AB16EJ Plus Maintenance Manual © Mar. 2023...
-
Page 113: Electrical Schematic Diagram Of
ELECTRICAL SYSTEM Electrical Schematic Diagram of Platform © Mar. 2023 AB16EJ Plus Maintenance Manual... - Page 114 1416 1043 V(C)_IN_60 PWM_OUT_39 1044 V(C)_IN_56 PWM_OUT_40 1053 IN_47 OUT_24 HR102 1404 IN_48 WS101 WS102 OUT_23 IN_49 OUT_26 IN_50 OUT_25 HG101 1056 WL101 SH117 SBE101 Fig 3 Electrical schematic diagram of platform (Rexroth) © Mar. 2023 AB16EJ Plus Maintenance Manual...
- Page 115 PWM_28 PWM_26 PWM_25 DO20 DO19 HAL101 PWM_14 PWM_13 PWM_11 DT102 1415 PWM_12 DT101 1416 1413 DT104 DO10 DT103 1414 CGND HG101 1056 WL101 SH117 SBE101 Fig 4 Electrical schematic diagram of platform (Rising) © Mar. 2023 AB16EJ Plus Maintenance Manual...
- Page 116 ELECTRICAL SYSTEM This Page Intentionally Left Blank AB16EJ Plus Maintenance Manual © Mar. 2023...
-
Page 117: Functions And Controls
© Mar. 2023 AB16EJ Plus Maintenance Manual... -
Page 118: Tilt Protection Function
The machine system can detect the position of the boom by means of the angle sensor and travel switch mounted on the boom tube. When the system detects the boom in the maximum position, the boom movement will be restricted. AB16EJ Plus Maintenance Manual © Mar. 2023... -
Page 119: Overload Limit Function
Then measure the horizon- technician for inspection and repair. tal reach, which should be 8.1m (26ft 7in) (distance from the center of the slewing bearing to the © Mar. 2023 AB16EJ Plus Maintenance Manual... - Page 120 But the main boom can be retracted, the articulated boom can be lowered, the turntable can Non-KG mode rotate slowly, and the main boom can be lowered after fully retracted. After the excess load is removed, all functions will be resumed. AB16EJ Plus Maintenance Manual © Mar. 2023...
-
Page 121: Control System
10.1 DISPLAY INTERFACE Sinoboom, otherwise the consequences will be at your own risk. The system interface is as shown in the figure below: Note: some interfaces can only be accessed with a... -
Page 122: Home Interface After Booting
10.2 HOME INTERFACE AFTER BOOTING Turn the ground/platform selector switch on the ground controller to the ground control position, pull out the emergency stop button to the ON position, the system will be powered on. AB16EJ Plus Maintenance Manual © Mar. 2023... -
Page 123: State Monitor
8. Setting 3. Left shift key 6. Up shift key 9. Faults 10.3 STATE MONITOR 1. On the Home interface, press the State Monitor but- ton to enter the Machine State (1/3) interface. © Mar. 2023 AB16EJ Plus Maintenance Manual... -
Page 124: Fault Inquiry
2. Press the Home button to return to the Home inter- • The configuration of switches is subject to the face, and power off the machine as needed. actual machine configurations. © Mar. 2023 AB16EJ Plus Maintenance Manual... -
Page 125: Setting
Password 设备状态(1/3) 臂检测开关 主臂升到位开关 Personnel who have not been professionally 处于工作状态 主臂缩到位开关 trained and authorized by Sinoboom are not allowed to modify the options in parameter 开关 后方检测开关 setting (including joystick calibration, sensor 降到位开关 水平开关 calibration, standardization setting, overload limit 升到位开关... - Page 126 Machine Parameter Setting (2/7) interface, and repeat the pre- vious steps. 6) Press the Home button to return to the Home interface, and power off the machine as needed. AB16EJ Plus Maintenance Manual © Mar. 2023...
- Page 127 ) will be displayed in interface again and repeat the previous steps to the upper right corner of the Home interface. select the required option. • After changing the value to “2” and © Mar. 2023 AB16EJ Plus Maintenance Manual...
-
Page 128: Time Setting
2. On the interface, change the selected item by press- ing the left shift key and right shift key, adjust the value by pressing the up shift key and down shift key, and press the OK button to confirm and save AB16EJ Plus Maintenance Manual © Mar. 2023... -
Page 129: Machine Information
1. On the Home interface, press the Setting button to key, down shift key, left shift key and right shift key, enter the System Setting interface. and press the OK button to complete unit setting. © Mar. 2023 AB16EJ Plus Maintenance Manual... - Page 130 CONTROL SYSTEM This Page Intentionally Left Blank AB16EJ Plus Maintenance Manual © Mar. 2023...
-
Page 131: Options
Secondary Guarding as a part of it. Fig 1 Table 11-1 Part Number Part Name Quantity Comment 203080000101 Waterproof cap 203080000109 Slotted nut 203060000021 Toggle switch 203060000150 Toggle switch guard If equipped © Mar. 2023 AB16EJ Plus Maintenance Manual... -
Page 132: Device Components
215040000035 Washer 10-200HV-ZnD GB/T 97.1 203060003031 Travel switch (Schneider) 215020000113 Screw M5×25-A2-70 GB/T 818 105070043031 Bolt 215020000007 Screw M5×16-A2-70 GB/T 70.1 215030000091 Nut M5-8-A2-70 GB/T 6184 105070043032 Support 215030000003 Nut M5-A2-70 GB/T 6170 © Mar. 2023 AB16EJ Plus Maintenance Manual... -
Page 133: Installation And Removal
Instructions for Use other Sinoboom products or any models in other markets. 1. Under normal circumstances, the foldable plates on both sides of support #2 will be attracted by the Installation instructions magnets below. -
Page 134: Harness And Schematic Diagram
OPTIONS Harness and Schematic Secondary Guarding Harness Diagram Fig 3 © Mar. 2023 AB16EJ Plus Maintenance Manual... - Page 135 203080000424 Thin-walled automotive wires 203080000563 (black) Thin-walled automotive wires (red) 203080000562 203080000408 Sheath 203080000021 Lock Tail attachment (2-pin, male) 203080000462 203080000044 Sheath 203080000020 Lock Tail attachment (4-pin, female) 203080000445 Rubber connector (4-pin) 203080000446 © Mar. 2023 AB16EJ Plus Maintenance Manual...
- Page 136 OPTIONS Electrical Schematic Diagram of Secondary Guarding Fig 4 © Mar. 2023 AB16EJ Plus Maintenance Manual...
- Page 137 Secondary Guarding, and the complete harness layout can be found in the complete platform harness diagram. Crush Protect Inspect Crush Protect Warni n g Li g ht 174-1 174-2 174-2 Sensor Fig 6 © Mar. 2023 AB16EJ Plus Maintenance Manual...
- Page 138 The diagram below only shows the electrical schematic related to the Secondary Guarding, and the complete electrical schematic can be found in the complete elec- trical schematic diagram of platform. Man Protect Detection Fig 7 © Mar. 2023 AB16EJ Plus Maintenance Manual...
-
Page 139: Platform Pipe Support Device
Unsafe Operation Hazard • Except for designated models and corresponding markets, it is forbidden to install the pipe sup- port device on other Sinoboom products or any models in other markets. • Before using the pipe support de- vice, the safety rules and all oper- ating instructions should be read, understood and observed. -
Page 140: Device Components
Table 11-5 Part Number Part Name Quantity Comment 215030000107 Nut M6-8-ZnD GB/T 6183 105064043177 Pipe seal 215010000055 Bolt M6×50-A2-70 GB/T 5783 215030000004 Nut M6-A2-70 GB/T 6170 105064043123 Pipe support weldment 105064043020 U-bolt Strap 400mm*25mm © Mar. 2023 AB16EJ Plus Maintenance Manual... -
Page 141: Installation And Removal
Unsafe Operation Hazard Except for designated models and corresponding markets, it is forbidden to install the pipe support device on other Sinoboom products or any models in other markets. Unsafe Operation Hazard • Read and understand the follow- ing safety rules before proceeding to the next step. -
Page 142: Instructions For Use
3. Ensure that the load center is on the same level as the center of the pipe support device. 4. Use the straps equipped with the device to secure the load to the two pipe supports. © Mar. 2023 AB16EJ Plus Maintenance Manual... -
Page 143: Device Components
Part Name Quantity Comment 216030003000 Anti-collision hose 215020000011 Screw M6×16-A2-70 GB/T 70.1 105064043024 Cushion block 215030000004 Nut M6-A2-70 GB/T 6170 105064043178 Cushion plate 105064043136 Vertical cushion block 105064043017 Mounting plate 105064043020 U-bolt Strap 3000mm*25mm © Mar. 2023 AB16EJ Plus Maintenance Manual... -
Page 144: Installation And Removal
Except for designated models and corresponding markets, it is Installation instructions forbidden to install the glass panel bracket device on other Sinoboom Fig 11 1. Install the cushion block with bolts and nuts sequen- tially on the mounting plate of the glass panel brack- et device. -
Page 145: Instructions For Use
• Except for designated models and corresponding markets, it is Table 11-8 forbidden to install the platform fence device on other Sinoboom Maximum load capacity of 115kg (253.5lbs) products or any models in other glass panel bracket device markets. -
Page 146: Device Components
Lower side fence plate 105064043027 Fence plate 1 105064043176 Fence plate 5 105064043175 Fence plate 6 105064043028 Fence plate 2 105064043030 Fence plate 3 105064043031 Fence plate 4 105064043103 Lower gate frame weldment © Mar. 2023 AB16EJ Plus Maintenance Manual... - Page 147 Nut M6-A2-70 GB/T 6170 215010000054 Bolt M6×40-A2-70 GB/T 5783 215010000062 Bolt M8×45-8.8-ZnD GB/T 5783 215040000034 Washer 8-200HV-ZnD GB/T 97.1 215030000005 Nut M8-8-ZnD GB/T 6170 Nylon cable tie Full-height platform fence device components Fig 13 © Mar. 2023 AB16EJ Plus Maintenance Manual...
-
Page 148: Installation And Removal
Unsafe Operation Hazard • Except for designated models and corresponding markets, it is forbidden to install the platform fence device on other Sinoboom products or any models in other markets. • The platform fence device can on- ly be installed on machines equipped with platform revolving gate. - Page 149 ② and the side ③ fixed component on the platform in turn according to the by nylon cable ties or bolts. figure below, with the lower part ① of the fence fixed © Mar. 2023 AB16EJ Plus Maintenance Manual...
-
Page 150: Instructions For Use
• Once the fence device is installed, it is forbidden to install other auxiliary devices, such as pipe support device and glass panel bracket device. © Mar. 2023 AB16EJ Plus Maintenance Manual... -
Page 151: Appendix
APPENDIX 12.1 MAJOR MODIFICATION AND REPAIR RECORD Major Modification and Repair Record Model Serial No. Machine Status Modified/Repaired Item Repairman Date after Change © Mar. 2023 AB16EJ Plus Maintenance Manual... -
Page 152: Tenance Schedule
Turntable Slewing bearing or slewing reducer , 2, 6, 12 , 2, 6, 8, 12 ,2,6,12 Slewing reducer (if equipped) 1, 2, 6 1, 2, 6 1, 2, 6, 11 Central rotary joint AB16EJ Plus Maintenance Manual © Mar. 2023... - Page 153 Hydraulic oil filter 1, 5, 6 1, 5, 6, 11 1, 5, 6, 11 Hydraulic oil 5, 6 5, 6 5, 6, 11 Electrical system Electrical wiring, connector 1, 2 1, 2 1, 2 © Mar. 2023 AB16EJ Plus Maintenance Manual...
- Page 154 All fasteners, pins, protective guards 1, 2 1, 2 1, 2 and covers Grease and lubricating to specifications Functional test of all systems Paint and appearance Inspection date stamped on the frame © Mar. 2023 AB16EJ Plus Maintenance Manual...
- Page 155 6. Check for correct sealing, leaking and level 7. Labels are complete, clear and secure 8. Check for appropriate tolerances 9. Fully charged 10. Validation/Execution 11. Replace the oil or filter element 12. Correctly lubricated © Mar. 2023 AB16EJ Plus Maintenance Manual...
- Page 156 APPENDIX This Page Intentionally Left Blank AB16EJ Plus Maintenance Manual © Mar. 2023...
- Page 157 For B et t er A ccess Solution s Alw ays For B et t er A ccess Solution s ess Solution s Always for Better Access Solutions Hunan Sinoboom Intelligent Equipment Co., Ltd. AS/N ZS 长沙市宁乡高新技术产业园区金洲大道东 128 号...
Need help?
Do you have a question about the AB16EJ Plus and is the answer not in the manual?
Questions and answers